Member
 jimmac
Rio
I was really pleased to see Endless, the little company with big plans, initiate a GNOME Design hackfest in Rio.
The ground team in Rio arranged a visit to two locations where we met with the users that Endless is targeting. While not strictly a user testing session, it helped to better understand the context of their product and get a glimpse of the lives in Rocinha, one of the Rio famous favelas or a more remote rural Magé. Probably wouldn't have a chance to visit Brazil that way.

During the workshop at the Endless offices we went through many areas we identified as being problematic in both the stock GNOME and Endless OS and tried to identify if we could converge on and cooperate on a common solution. Currently Endless isn't using the stock GNOME 3 for their devices. We aren't focusing as much on the shell now, as there is a ton of work to be done in the app space, but there are a few areas in the shell we could revisit.
GNOME could do a little better in terms of discoverability. We investigated the role of the app picker versus the window switcher in the overview and being able to enter the overview on boot. Some design choices have been explained and our solution was reconsidered to be a good way forward for Endless. Unified system menu, window controls, notifications, lock screen/screen shield have been analyzed.
Endless demoed how the GNOME app-provided system search has been used to great effect on their mostly offline devices. Think "offline google".
Another noteworthy detail was the use of CRT screens. The new mini devices sport a cinch connection to old PAL/NTSC CRT TVs. Such small resolutions and poor quality brings more constraints on the design to keep things legible. This also has had a nice effect in that Endless has investigated some responsive layout solutions for gtk+ they demoed.
I also presented GNOME design team's workflow, and the free software toolchain we use. Did a little demo of Inkscape for icon design and wireframing and Blender motion design.
Last but not least, I'd like to thank the GNOME Foundation for making it possible for me to fly to Rio.

LibreOffice mini-Conference 2016 in Osaka

Keynote
First off, let me just say that it was such an honor and pleasure to have had the opportunity to present a keynote at the LibreOffice mini-Conference in Osaka. It was a bit surreal to be given such an opportunity almost one year after my involvement with LibreOffice as a paid full-time engineer ended, but I’m grateful that I can still give some tales that some people find interesting. I must admit that I haven’t been that active since I left Collabora in terms of the number of git commits to the LibreOffice core repository, but that doesn’t mean that my passion for that project has faded. In reality it is far from it.
There were a lot of topics I could potentially have covered for my keynote, but I chose to talk about the 5-year history of the project, simply because I felt that we all deserved to give ourselves a lot of praises for numerous great things we’ve achieved in this five years time, which not many of us do simply because we are all very humble beings and always too eager to keep moving forward. I felt that, sometimes, we do need to stop for a moment, look back and reflect on what we’ve done, and enjoy the fruits of our labors.
Osaka
Though I had visited Kyoto once before, this was actually my first time in Osaka. Access from the Kansai International Airport (KIX) into the city was pretty straightforward. The venue was located on the 23th floor of Grand Front Osaka North Building Tower B (right outside the north entrance of JR Osaka Station), on the premises of GMO DigiRock who kindly sponsored the space for the event.

Conference
The conference took place on Saturday January 9th of 2016. The conference program consisted of my keynote, followed by four regular-length talks (30 minutes each), five lightning talks (5 minutes each), and round-table discussions at the end. Topics of the talks included: potential use of LibreOffice in high school IT textbooks, real-world experiences of large-scale migration from MS Office to LibreOffice, LibreOffice API how-tos, and to LibreOffice with NVDA the open source screen reader.
After the round-table discussions, we had some social event with beer and pizza before we concluded the event. Overall, 48 participants showed up for the conference.
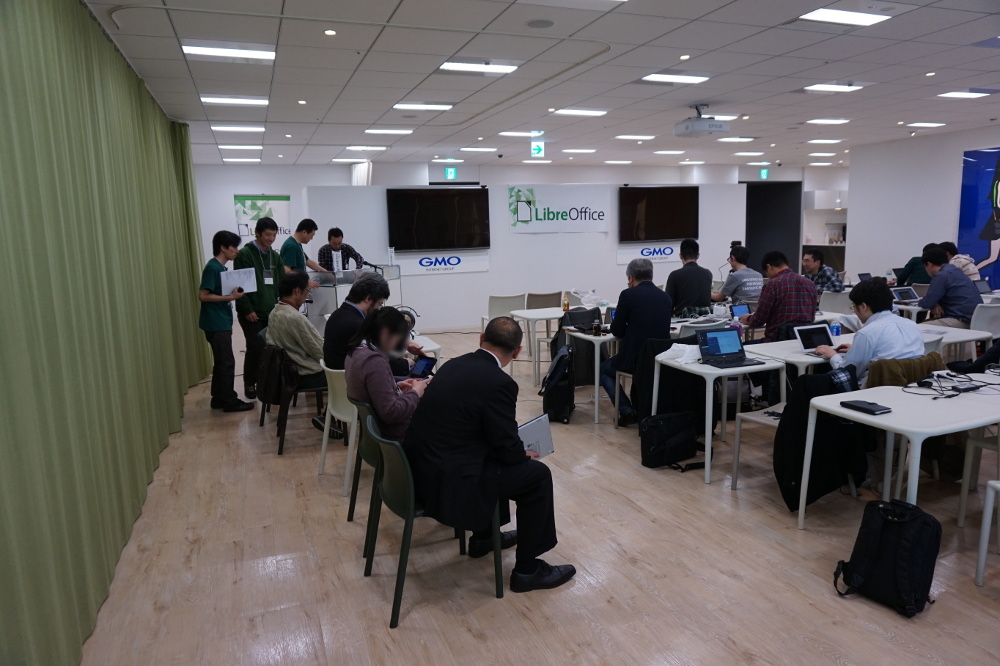
Videos of the conference talks are made available on YouTube thanks to the effort of the LibreOffice Japanese Language Team.
Slides for my keynote are available here.
Hackfest
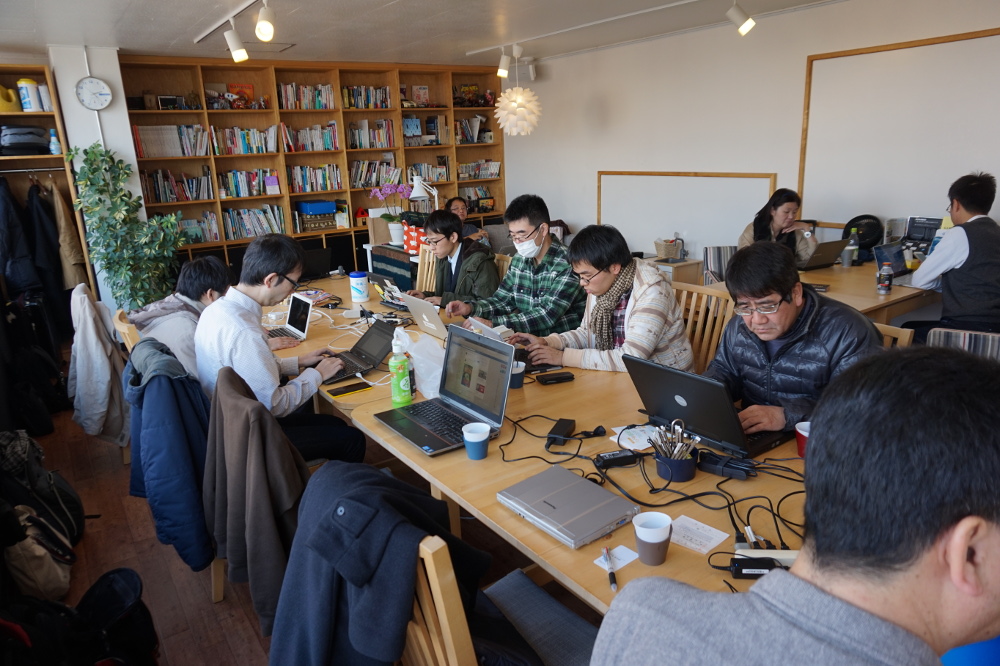
We also organized a hackfest on the following day at JUSO Coworking. A total of 20 plus people showed up for the hackfest, to work on things like translating the UI strings to Japanese, authoring event-related articles, and of course hacking on LibreOffice. I myself worked on implementing simple event callbacks in the mdds library, which, by the way, was just completed and merged to the master branch today.
Conclusion
It was great to see so many faces, new and old, many of whom traveled long distance to attend the conference. I was fortunate enough to be able to travel all the way from North Carolina across the Pacific, and it was well worth the hassle of a jet lag.
Last but not least, be sure to check out the article (in Japanese) Naruhiko Ogasawara has written up on the conference. The article goes in-depth with my keynote, and is very well written.
Other Pictures
I’ve taken quite a bit of pictures of the conference as well as of the city of Osaka in general. Jump over to this Facebook album I made of this event if you are interested.
Why I Strive to be a 0.1x Engineer
There has been more discussion recently on the concept of a “10x engineer”. 10x engineers are, (from Quora) “the top tier of engineers that are 10x more productive than the average”
Productivity
I have observed that some people are able to get 10 times more done than me. However, I’d argue that individual productivity is as irrelevant as team efficiency.
Productivity is often defined and thought about in terms of the amount of stuff produced.
Diseconomies of Scale
The trouble is, software has diseconomies of scale. The more we build, the more expensive it becomes to build and maintain. As software grows, we’ll spend more time and money on:
- Operational support – keeping it running
- User support – helping people use the features
- Developer support – training new people to understand our software
- Developing new features – As the system grows so will the complexity and the time to build new features on top of it (Even with well-factored code)
- Understanding dependencies – The complex software and systems upon which we build
- Building Tools – to scale testing/deployment/software changes
- Communication – as we try to enable more people to work on it
The more each individual produces, the slower the team around them will operate.
Are we Effective?
Only a small percentage of things I build end up generating enough value to justify their existence – and that’s with a development process that is intended to constantly focus us on the highest value work.
If we build a feature that users are happy with it’s easy to count that as a win. It’s even easier to count it as a win if it makes more money than it cost to build.
Does it look as good when you its compare its cost/benefit to some of the other things that the team could have been working on over the same time period? Everything we choose to work on has an opportunity cost, since by choosing to work on it we are therefore not able to work on something potentially more valuable.
Applying the 0.1x
The times I feel I’ve made most difference to our team’s effectiveness is when I find ways to not build things.
-
Let’s not build that feature.
Is there existing software that could be used instead? -
Let’s not add this functionality.
Does the complexity it will introduce really justify its existence? -
Let’s not build that product yet.
Can we first do some small things to test the assumption that it will be valuable? -
Let’s not build/deploy that development tool.
Can we adjust our process or practices instead to make it unnecessary? -
Let’s not adopt this new technology.
Can we achieve the same thing with a technology that the team is already using and familiar with? “The best tool for the job” is a very dangerous phrase. -
Let’s not keep maintaining this feature.
What is blocking us from deleting this code? -
Let’s not automate this.
Can we find a way to not need to do it all?
Identifying the Value is Hard
Given the cost of maintaining everything we build, it would literally be better for us to do 10% the work and sit around doing nothing for the rest of our time, if we could figure out the right 10% to work on.
We could even spend 10x as long on minimising the ongoing cost of maintaining that 10%. Figuring out what the most valuable things to work on and what is a waste of time is the hard part.
HOWTO: Configure 389-ds LDAP server on openSUSE Tumbleweed
Recently I’ve been setting up LDAP authentication on CentOS servers to give a shared authentication method to all the compute nodes I use for my day job. I use 389-DS as it’s in my opinion much better to administer and configure than openLDAP (plus, it has very good documentation). As I have a self built NAS at home (with openSUSE Tumbleweed), I thought it’d be nice to use LDAP for all the web applications I run there. This post shows how to set up 389 Directory Server on openSUSE Tumbleweed, including the administration console.
(Obligatory) disclaimer
While this setup worked for me, there’s no guarantee it will work for you. If something breaks, you get to keep all the pieces. With some adjustments (repo names etc) this might also work on openSUSE Leap 42.1, but I haven’t tested it. Use these instructions at your own risk.
Prerequisites
Your machine should have a FQDN, either a proper domain name, or an internal LAN name. It doesn’t really matter as long as it’s a FQDN.
Secondly, you need to tune a couple of kernel parameters to ensure that the setup won’t scream at you for lack of available resources. In particular, you’ll need to raise the ranges of local ports available and the number of maximum file descriptors. You can easily do that by creating a file called /etc/sysctl.d/00-389-ds.confwith the following contents:
# Local ports available
net.ipv4.ip_local_port_range = 1024 65000
# Maximum number of file handles
fs.file-max = 64000
After adding it, issue sysctl -p as root to apply the changes.
Installing 389 Directory Server
Afterwards, we’ll need to add the network:ldap OBS project, as in particular the admin bits of 389 aren’t yet available in Tumbleweed. Bear in mind that adding third-party repository to a Tumbleweed install is unsupported.
zypper ar -f obs://network:ldap Network_Ldap
# Trust the key when prompted
zypper ref
The obs:// scheme automatically adds the “guessed” distribution to your repository (with Leap it might fail though, so beware). Then we install the required packages:
zypper in 389-admin 389-admin-console 389-adminutil 389-console 389-ds 389-ds-console 389-adminutil 389-adminutil-langAdjusting the configuration to ensure that it works
So far so good. But if you follow the guides now and use setup-ds-admin.pl, you’ll get strange errors and the administration server will fail to get configured properly. This is because of a missing dependency on the apache2-worker package and because the configuration for the HTTP service used by 389 Directory Server is not properly adjusted for openSUSE: it references Apache 2 modules that the openSUSE package ships builtin or with different names and thus cannot be loaded.
Fixing the dependency problem is easy:
zypper in apache2-workerThen, we’ll tackle the configuration issue. Open (as root) /etc/dirsrv/admin-serv/httpd.conf, locate and comment out (or delete) the following line:
LoadModule unixd_module /usr/lib64/apache2/mod_unixd.soThen change the mod_nss one so that it reads like this:
LoadModule nss_module /usr/lib64/apache2/mod_nss.soSave the file and now you’ll be able to run setup-ds-admin.pl without issues. I won’t cover the process here, there are plenty of instructions in the 389 DS documentation.
After installation: fixing 389-console
If you want to use 389-console on a 64 bit system with openJDK you’ll notice that upon running it’ll throw a Java exception saying that some classes (Mozilla NSS Java classes) can’t be found. This is because the script looks in the wrong library directory (/usr/lib as opposed to /usr/lib64). Edit /usr/bin/389-console and find:
java \
    -cp /usr/lib/java/jss4.jar: # rest of line truncated for readability
and change it to:
java \
    -cp /usr/lib64/java/jss4.jar: # rest of line truncated for readability
Voilà!

Bit shifting, done by the << and >> operators, allows in C languages to express memory and storage access, which is quite important to read and write exchangeable data.
Bit shifting, done by the << and >> operators, allows in C languages to express memory and storage access, which is quite important to read and write exchangeable data. But:
Question: where is the bit when moved shifted left?
Answere: it depends
Long Answere:
// On LSB/intel a left shift makes the bit moving
// to the opposite, the right. Omg
// The shift(<<,>>) operators follow the MSB scheme
// with the highest value left.
// shift math expresses our written order.
// 10 is more than 01
// x left shift by n == x << n == x * pow(2,n)
#include <stdio.h> // printf
#include <stdint.h> // uint16_t

int main(int argc, char **argv)
{
  uint16_t u16, i, n;
  uint8_t * u8p = (uint8_t*) &u16; // uint16_t as 2 bytes
  // iterate over all bit positions
  for(n = 0; n < 16; ++n)
  {
    // left shift operation
    u16 = 0x01 << n;
    // show the mathematical result
    printf("0x01 << %u:\t%d\n", n, u16);
    // show the bit position
    for(i = 0; i < 16; ++i) printf( "%u", u16 >> i & 0x01);
    // show the bit location in the actual byte
    for(i = 0; i < 2; ++i)
      if(u8p[i])
        printf(" byte[%d]", i);
    printf("\n");
  }
  return 0;
}
Result on a LSB/intel machine:
0x01 << 0:      1
1000000000000000 byte[0]
0x01 << 1:      2
0100000000000000 byte[0]
0x01 << 2:      4
0010000000000000 byte[0]
0x01 << 3:      8
0001000000000000 byte[0]
...
<< MSB Moves bits to the left, while << LSB is a Lie and moves to the right. For directional shifts I would like to use a separate operator, e.g. <<| and |>>.

Dockerinit and Dead Code
After running into insane amounts of very weird issues with gccgo with Docker, some of which were actual compiler bugs, someone on my team at SUSE asked the very pertinent question "just exactly what is dockerinit, and why are we packaging it?". I've since written a patch to remove it, but I thought I'd take the time to talk about dockerinit and more generally dead code (or more importantly, code that won't die).

A brief 360° overview of my first board turn
You’ve certainly noticed that I didn’t run for a second turn, after my first 2 years. This doesn’t mean the election time and the actual campaign are boring 
If you are an openSUSE Member, we really want to have your vote, so go to Board Election Wiki and make your own opinion.
The ballot should open tomorrow.
Why not a second turn?
Being a board member (present at almost every conference call, reading the mailing lists and other task) consume free time. It has increased during the last semester too. And we’ve got some new business opportunities here at Ioda-Net Sàrl in 2015, and those need also my attention for the next year(s). I prefer to be a retired Board member, than not being able to handle my responsabilities.
But I’m not against the idea of a "I’ll be back" in a near future. Moreover with a bit more bandwidth in my free time, I will be able to continue my packaging stuff, and other contributions.
What a journey!
With the new campaign running, I found funny to bring back to light my 2013 platform written 2 years ago. And spent 5 minutes on checking the differences with today. I’m inviting you to discover the small interview between me and myself
1. Which sentences would you say again today?
I’m a "Fucking Green Dreamer" of a world of collaboration, which will one day offer Freedom for everyone.
Clearly still a day by day mantra and leitmotiv. But even if I’m dreaming, I never forget that
Freedom has a price : Freedom will only be what you do for it.
2. Which thing you would not say again, or differently ?
Well, as there’s no joker card, let’s start by this one:
"A Visible Active Board > A Visible Active Project." With the experience and time, and interaction, (the one who said fight, get out please :-)), I would said this is not as easy as it sound first.
I’m pretty sure, I was more quieter since I was on the board, than before. Because it’s too hard to make a clear distinction, when you just want to express something as "a simple contributor": you are on the board, and then whatever you can try to trick the fact: you’re still a board member.
So making the Board visible like a kind of communicant Alien, will certainly not improve that much our project.
It’s written everywhere, almost everybody agree, the board is not the lighthouse in the dark showing you the future.
Anyone, I repeat, anyone in this community is a potential vector of a future for openSUSE.
So in my past platform "Guardians of the past, Managers of the present, Creators of the future." I would replace Creators of the future by kinda "enabler"
3. In the last 2 years, where did openSUSE mostly evolve?
I think we moved from a traditional way of building distribution to some creative alternative, the rolling but tested Tumbleweed, and the hybrid Leap are really good things that happened.
I believe that if we have also some hard time on mailing list, which are exhausting, they also have a positive aspect (yeap:-)). If we fight, then it’s certainly because of our faith in something. Is this one defined? Not sure! But I’m pretty convinced that all members around have a good image of it.
4. What would be an advice to your successor (even if he doesn’t care about it)?
We are a tooling community, we love tools. Beware of one thing, if you get hurt by a tool, you can become the worst asshole you’ve never met. With tools, you can also hurt other people.
My advise, watch your step and keystroke!

5. Something more you would like to share?
I’ve invested time and energy during 2014 and beginning of 2015, to run booth, talks, represent openSUSE’s project all around. It was awesome to go to those events and meet people, involved or interested about openSUSE.
Perhaps some of you don’t know, but we have friends all around us, in many communities, and when the magic about working together appears, it just blast my heart.
Thanks for reading and for your support during this period
Truly green yours
Keras for Binary Classification
So I didn’t get around to seriously (besides running a few examples) play with Keras (a powerful library for building fully-differentiable machine learning models aka neural networks) – until now. And I have been a bit surprised about how tricky it actually was for me to get a simple task running, despite (or maybe because of) all the docs available already.
The thing is, many of the “basic examples” gloss over exactly how the inputs and mainly outputs look like, and that’s important. Especially since for me, the archetypal simplest machine learning problem consists of binary classification, but in Keras the canonical task is categorical classification. Only after fumbling around for a few hours, I have realized this fundamental rift.
The examples (besides LSTM sequence classification) silently assume that you want to classify to categories (e.g. to predict words etc.), not do a binary 1/0 classification. The consequences are that if you naively copy the example MLP at first, before learning to think about it, your model will never learn anything and to add insult to injury, always show the accuracy as 1.0.
So, there are a few important things you need to do to perform binary classification:
- Pass
output_dim=1to your finalDenselayer (this is the obvious one). - Use
sigmoidactivation instead ofsoftmax– obviously, softmax on single output will always normalize whatever comes in to 1.0. - Pass
class_mode='binary'tomodel.compile()(this fixes the accuracy display, possibly more; you want to passshow_accuracy=Truetomodel.fit()).
Other lessons learned:
- For some projects, my approach of first cobbling up an example from existing code and then thinking harder about it works great; for others, not so much…
- In IPython, do not forget to reinitialize
model = Sequential()in some of your cells – a lot of confusion ensues otherwise. - Keras is pretty awesome and powerful. Conceptually, I think I like NNBlocks‘ usage philosophy more (regarding how you build the model), but sadly that library is still very early in its inception (I have created a bunch of gh issues).
(Edit: After a few hours, I toned down this post a bit. It wasn’t meant at all to be an attack at Keras, though it might be perceived by someone as such. Just as a word of caution to fellow Keras newbies. And it shouldn’t take much to improve the Keras docs.)
High DPI with FLTK
After switchig to a notebook with higher resolution monitor, I noticed, that the FLTK based ICC Examin application looked way too small. Having worked in the last months much with pixel independent resolutions in QML, it was a pain to see the non adapted FLTK GUI. I had the impression, that despite of several years of a very appreciated advancement of monitor technology, some parts of graphics stacks did not move and take advantage. So I became curious on how to solve high DPI support the hard way.
First of all a bit of introduction to my environment, which is openSUSE Linux and KDE-5 with KF5 5.5.3. Xorg use many times a hardcoded default of 96 dpi, which is very unfortune or just a bug? Anyway, KDE follows X11. So the desktop on the high resolution monitor looks initially as bad as any application. All windows, icons and text are way too small to be useable. In KDE’s system settings, I had to set Force Font with DPI and doubled its size from 96 to 192. In the kscreen module I had to set scale 2.0 and then increased the KDE task bars width. Out of the box useability is bad with so many inconsistent manual user intervention. In comparision with the as well tested Unity DE, I had to set a single display scaling factor to 2.0 and everything worked fine and instantly, icons, fonts and window sizes. It would be cool if DE’s and Xorg understand screen resolution. In the tested OS X 10.10 even different screen resolutions of multiple monitors are scaled correctly, so moving a window from a high DPI monitor screen to a traditional low resolution external monitor gives reasonable physical GUI rendering. Apples OS X provides that good behaviour initially, without manual user intervention. It would be interessting how GNOME behaves with regards to display scaling.
Back to FLTK. As FLTK appears to define itself as pixel based, DPI detecion or settings have no effect in FLTK. As a app developer I want to improve user experience and modified first ICC Examin to initially render physically reasonably. First I looked at the FL::screen_dpi() function. It is only a helper for detecting DPI values. FL::screen_dpi() has has in FLTK-1.3.3 hardcoded values of 96DPI under Linux. I noticed XRandR provides correct milimeter based screen dimensions. Together with the XRandR provided screen resolution, it is easy to calculate the DPI values. ICC Examin renderd much better with that XRandR based DPI’s instead of FLTK’s 96DPI. But ICC Examin looked slightly too big. The 192DPI set in KDE are lower than the XRandR detected 227 DPI of my notebooks monitor. KDE provides its forced DPI setting to applications by setting Xft.dpi in XResources. That way all Xft based applications should have the same basic font scaling. KDE and Mozilla apps do use Xft. So add parsing of a Xlib XResources solved that for ICC Examin. The remainder of programing was to programatically scale FLTK’s default font size from 14 pixels with: FL_NORMAL_SIZE = scale(14) . Some more widget sizes, the FtGl font sizes for OpenGL, drawing line widths and graphics scaling where needed. After all those changes, ICC Examin takes now advantage of high resolution rendering inside KDE. Testing under Windows and OS X must follow.
The way to program high DPI support into a FLTK application was basically the same as in QML. However Qt’s QML takes off more tasks by providing a relative font unit, much like CSS em sizes. For FLTK, I would like to see some relative based API’s, in addition to the pixel based API’s. That would be helpful to write more elegant code and integrate with FLTK’s GUI layout program fluid. Computer times point more and more toward W3C technology. FLTK would be helpful to follow.

Li-f-e at BITA Show 2016
BITA IT Show, the biggest IT exhibition in western India is coming to town on 24-26 January, We will be there promoting Li-f-e. If you are in this part of the world, drop in to check it out.