
 Member
 Diamond_gr
Το GUADEC 2019 ήταν ένα επιτυχημένο συνέδριο. Το μαρτυρούν τα βίντεο και οι φωτογραφίες!!!

Όπως πιθανό να έχετε διαβάσει στο blog μου, τις ημερομηνίες 23-28 Αυγούστου 2019 έλαβε χώρα το συνέδριο GUADEC στο Πανεπιστήμιο Μακεδονίας στην πόλη μας.
Το συνέδριο για εμάς είχε ξεκινήσει ένα χρόνο πριν, όταν υποβάλαμε την αίτησή μας. Από τότε έως τον Αύγουστο, κάναμε πολλές συναντήσεις, τόσο μεταξύ μας, όσο και με τους ανθρώπους του Πανεπιστημίου. Υπήρξαν δυσκολίες, απογοητεύσεις αλλά όλοι ανυπομονούσαμε να ξεκινήσει το συνέδριο.
Οι αφίξεις ξεκίνησαν από την αρχή της εβδομάδας, 19-20 Αυγούστου. Τις πρώτες ημέρες που ακόμα προετοιμαζόμασταν, το GNOME Board και το Foundation Stuff πέρασαν δυο μέρες στις οποίες επίλυσαν πολλά θέματα.
Επίσημα, όλα άρχισαν την Πέμπτη 22 Αυγούστου, στο pre-registration party, όπου πήραμε τα lanyards με το όνομά μας. Εκεί έγινε η πρώτη γνωριμία για πολλούς που δεν γνωριζόμασταν.
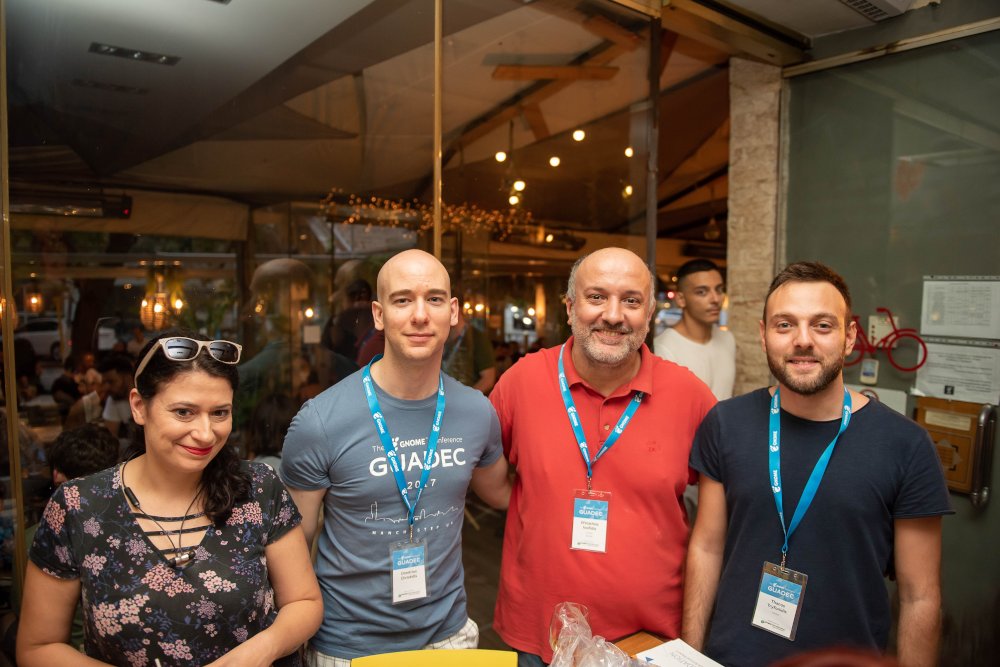
Pre-registration party: Εύα, Δημήτρης, Στάθης, Θάνος
Την επομένη το πρωί, μαζευτήκαμε οι εθελοντές νωρίτερα για να τελειώσουμε τα του στησίματος και αναμέναμε τους περισσοτέρους για να παραλάβουν τα lanyards με το όνομά τους. Επίσημη έναρξη και ξεκίνησαν ομιλίες σε δυο αίθουσες. Αν και ήμουν στο τρέξιμο, την πρώτη ημέρα με τράβηξε η ομιλία του Sriram Ramkrishna σχετικά με το Gitlab (Gitlab - A year in review and what should come next). Την οργάνωση του συνεδρίου την κάναμε μέσα στο Gitlab. Προσωπικά δεν είμαι και πολύ fan αυτού του τρόπου αλλά δούλεψε μια χαρά.
Η πρώτη ημέρα για εμένα έκλεισε με την ομιλία του keynote speaker, Luis Falcon, MD, με τίτλο GNU Health: The fight for our rights in the Public Health System. Αναλύθηκε γιατί η υγεία πρέπει να παραμείνει ΜΗ διαπραγματεύσιμο ανθρώπινο δικαίωμα. Η χρήση του Ελεύθερου Λογισμικού στην υγεία μπορεί να παρέχει ελευθερία και ισότητα στην υγειονομική περίθαλψη. Μας ανέλυσε το παράδειγμα του GNU Health που εφαρμόστηκε σε αρκετές χώρες.
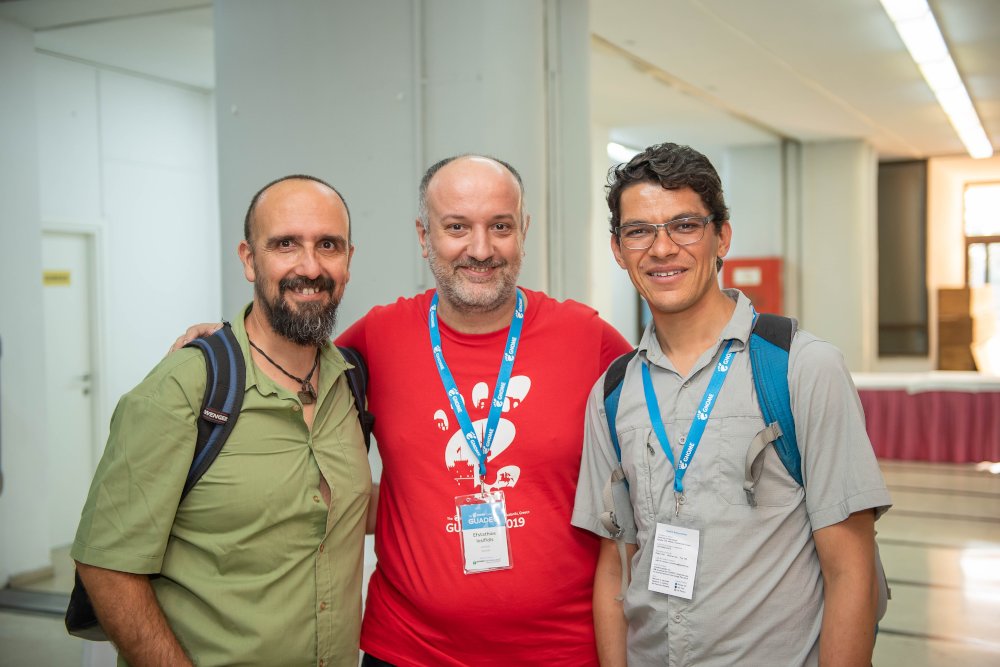
Luis Falcon MD, Στάθης, Federico Mena-Quintero
Η πρώτη μέρα έκλεισε με το καθιερωμένο party. Φροντίσαμε να στολίσουμε τον χώρο με μπαλόνια με το σήμα GNOME. Κρασί, μπύρα, φαγητό και μουσική. Νομίζω όλοι διασκέδασαν. Μερικοί συνέχισαν και αλλού. Βλέπετε Παρασκευή, ο κόσμος γενικά βγαίνει.
Την δεύτερη μέρα, το ενδιαφέρον μου τράβηξε η ομιλία του Philip Withnall με τίτλο Environmentally Friendly GNOME, όπου μίλησε τόσο για το λογισμικό όσο και για το project και την κοινότητα. Μιλώντας για κοινότητες ανοικτού λογισμικού, πέρασα να δω τι κάνανε οι φίλοι από Αφρική. Η StellaMaris Njage και ο Sigu Magwa μας ανέλυσαν για το πως οργάνωσαν μια κοινότητα GNOME στην Αφρική (συγκεκριμένα στην Κένυα). Ακόμα μια ενδιαφέρουσα ομιλία ήταν και αυτή του Georges Basile Stvracas Neto με τίτλος About Maintainers and Contributors. Η ομιλία είχε 3 μέρη. Το πρώτο περιέγραψε σύντομα το πως πέρασε από χρήστης σε άτομο που συνεισφέρει και στη συνέχεια σε άτομο που συντηρεί κάποιο project. Στη συνέχεια ανέλυσε τις διάφορες καταστάσεις που συμβαίνουν όταν γίνεται κάποιος συντηρητής πακέτων και τέλος στρατηγικές που εφαρμόζονται για να υπερπηδήσουν εμπόδια. Η ημέρα έκλεισε με την Annual General Meeting και τις παρουσιάσεις του GNOME Foundation Board of Directors για τα πεπραγμένα της προηγούμενης χρονιάς.
Καταλήξαμε με την ομαδική φωτογραφία
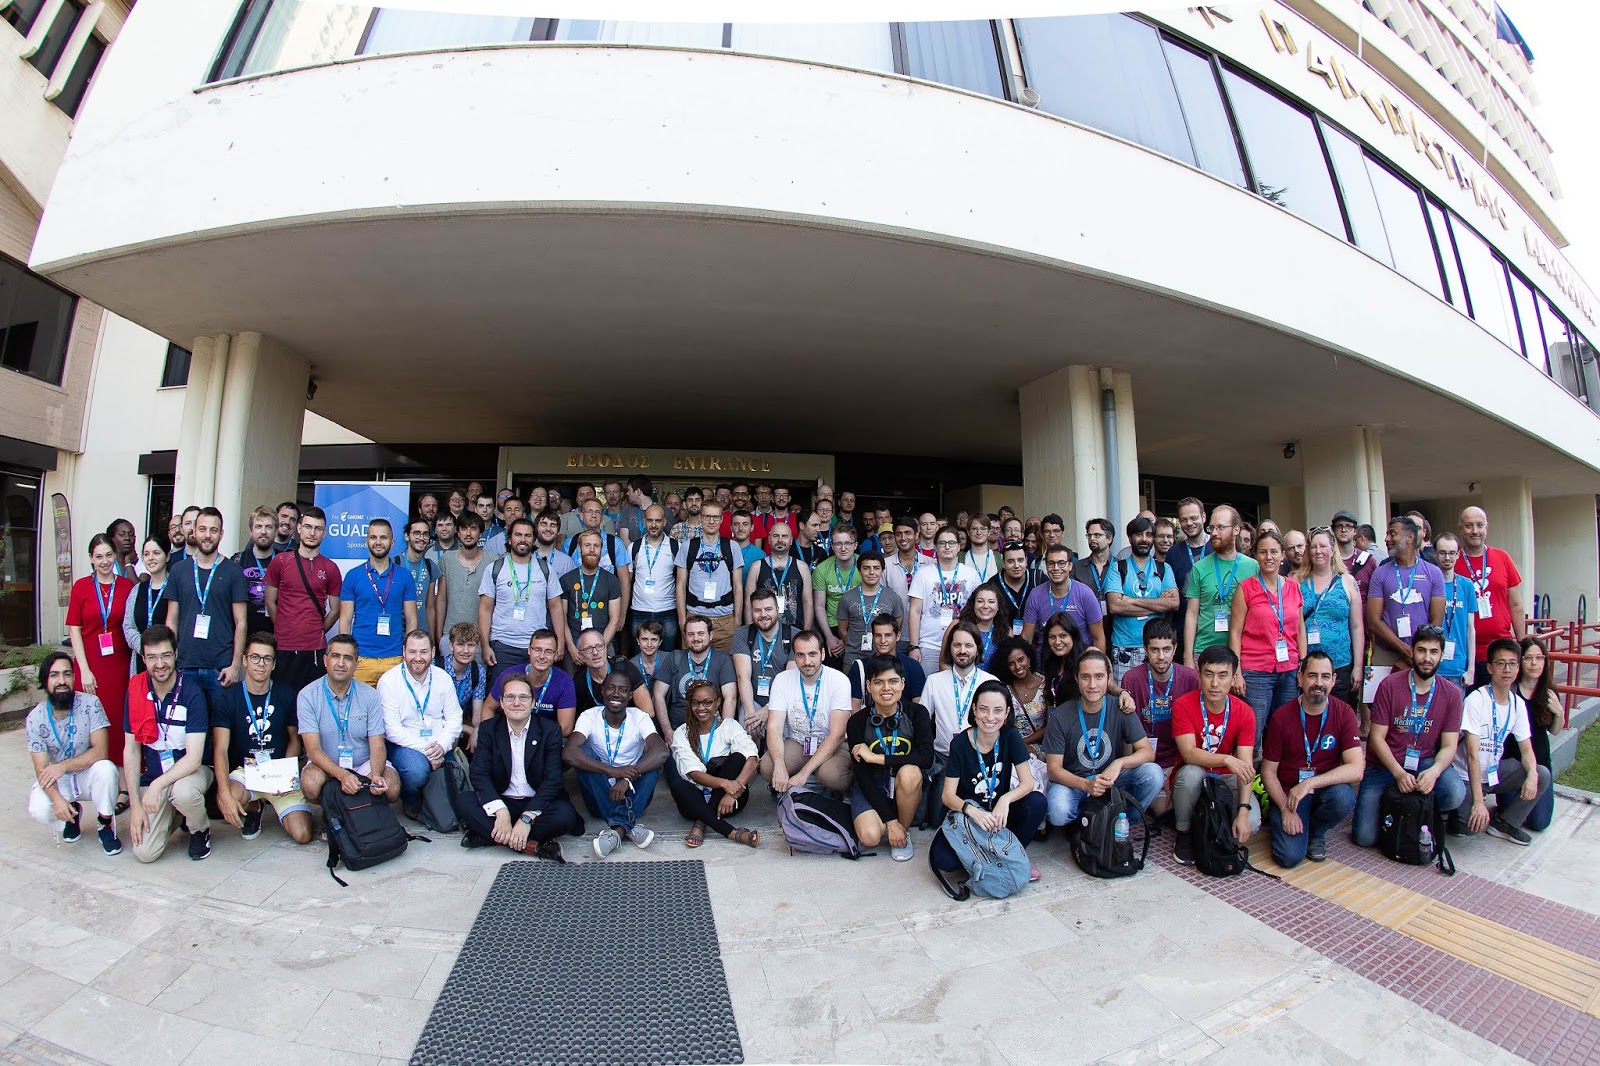
και ακολούθησε το καθιερωμένο πικνικ σε χώρο κοντά στην πόλη. Μετακινηθήκαμε με λεωφορεία. Εκεί μας περίμενε φαγητό ενώ αρκετοί είχαν φέρει ποτά από τους τόπους τους.
Την τρίτη και τελευταία μέρα των ομιλιών, είδα την ομιλία του Robert McQueen με τίτλο Is the Linux Desktop Really Dead? Κάθε χρόνο ακούμε φέτος θα είναι η χρονιά του Linux Desktop. Ήμουν νιος και γέρασα. Μήπως φταίμε και εμείς που δεν έχουμε φτιάξει ένα ελκυστικό desktop για τους αμετανόητους χρήστες; Ακόμη μια ομιλία που παρακολούθησα ήταν του φίλου Γιάννη Κωνσταντινίδη με τίτλο GDPR and ePrivacy: Compliance Nightmares for GNOME and Open-Source Projects? Αρκετά σημεία γνωστά. Όμως από αυτά που ανέλυσε ο Γιάννης, βλέπω ότι ακόμα και μετά από τον χρόνο προσαρμογής, καταστήματα αλλά ίσως και εμείς δεν τηρούμε ότι προβλέπεται. Η επόμενη ομιλία αφορούσε αποκλειστικά το GNOME και συγκεκριμένα έγινε από τον Executive Director του GNOME, Neil McGovern με τίτλο The Growth of GNOME. Αναφέρθηκε στην παρούσα κατάσταση του Foundation και του project αλλά και για το μέλλον τους και επισήμανε το πλάνο για το μέλλον.
Στις Lightning Talks με τράβηξε η ομιλία του Richard Brown σχετικά με το τι κάνουν οι οργανωτές εάν κάποιος ομιλητής πάθε καρδιακή προσβολή την ώρα που μιλάει. Είναι αληθινό γεγονός και το έζησα και εγώ σε συνέδριο του openSUSE. Ανέφερε κάποιες ενέργειες που πρέπει να έχουν γίνει από πριν (θα γράψω ένα αρθράκι σχετικό). Εμείς ευτυχώς είχαμε καλέσει εθελοντές του ερυθρού σταυρού και δεν είχαμε κάποιο μεγάλο γεγονός. Η ημέρα έκλεισε με την ομιλία της keynote speaker, Deb Nicholson, με τίτλο Free Software/Utopia.
Η ημέρα τελείωσε με τον καθιερωμένο αγώνα ποδοσφαίρου.
Τις επόμενες 2 ημέρες το πρόγραμμα είχε τα BoFs. Η αλήθεια είναι ότι ήθελα να παρακολουθήσω το GNOME Documentation and Localization αλλά επειδή ήταν χαλαρή μεν ημέρα, ξεκίνησε η εξεταστική των φοιτητών και είχε πολύ κόσμο, έφαγα την περισσότερη ώρα να κατευθύνω τους συμμετέχοντες στις αίθουσες, να φροντίσω τα τεχνικά αιτήματα (πχ Ιντερνετ κλπ). Οπότε όλη η ώρα μου καταναλώθηκε εκεί.
Την τελευταία ημέρα, μια ομάδα πήγε στην παραλία ενώ εγώ συμμετείχα στην επίσκεψη στα μουσεία.
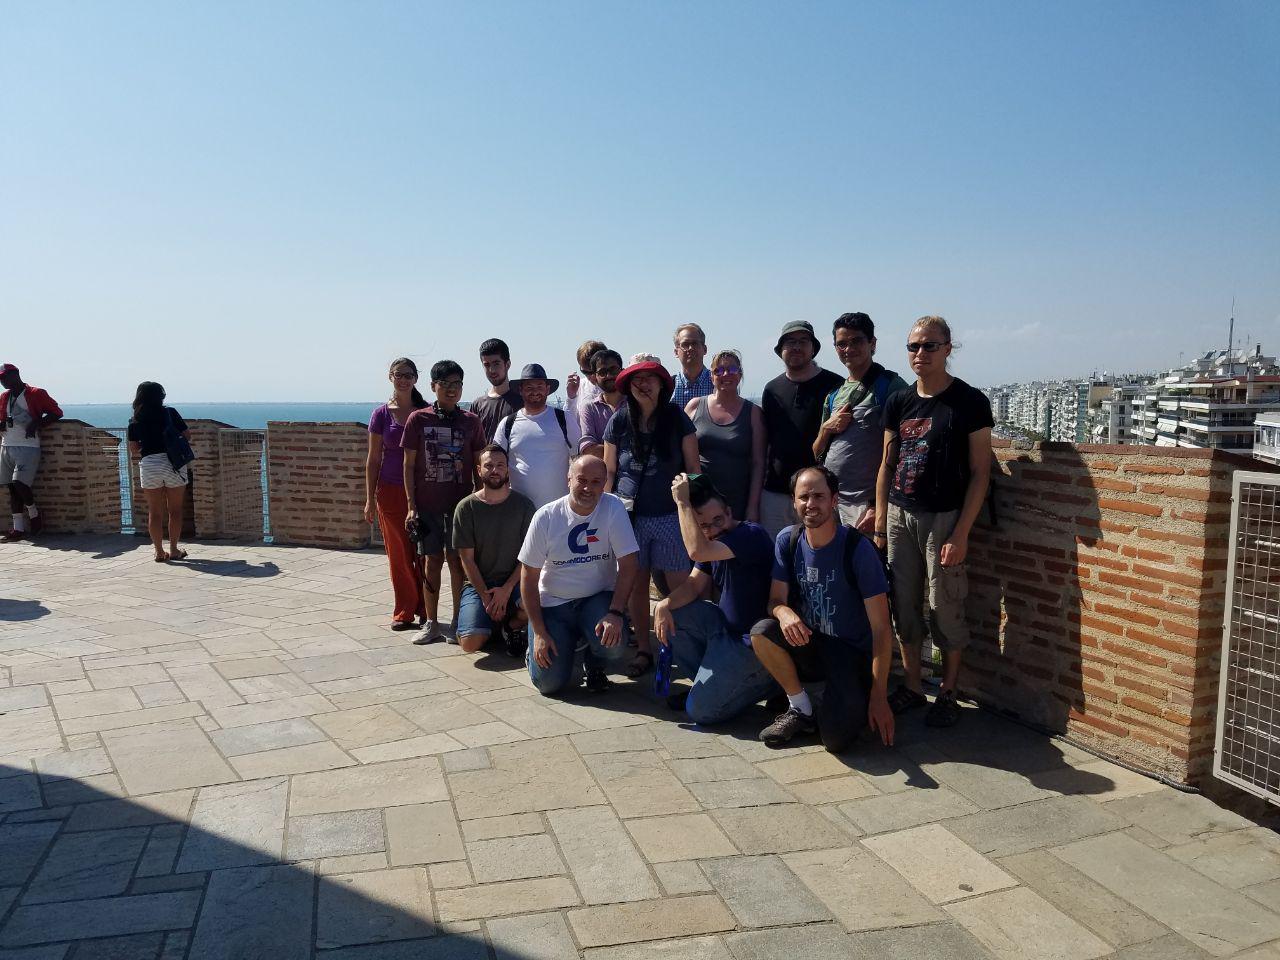
GUADEC Επίσκεψη στα μουσεία
Θέλω να ευχαριστήσω την Μαριέτ, την Πάτυ και την Τάνια και τον Μιχάλη από το Πανεπιστήμιο Μακεδονίας που μας βοήθησαν τόσο πριν όσο και κατά την διάρκεια του συνεδρίου. Υπάρχουν βέβαια και άλλοι του Πανεπιστημίου που κάνανε αθόρυβη δουλειά και δεν γνωρίζω ονόματα, οπότε θέλω να ευχαριστήσω και αυτούς. Επίσης θέλω να ευχαριστήσω όλους τους εθελοντές που χωρίς την βοήθειά τους δεν θα είχαμε ένα τόσο πετυχημένο συνέδριο. Τέλος θέλω να ευχαριστήσω και τους συμμετέχοντες διότι δεν αντιμετωπίσαμε κάποιο ιδιαίτερο πρόβλημα. Θα σας συναντήσω και στο μέλλον.
Όσοι δεν μπορέσατε να παρευρεθείτε, μπορείτε να δείτε τα βίντεο:
1. Ubicast (θα ζήσουν για ένα χρόνο)
2. Youtube
Επίσης, υπάρχουν πολλά σετ από φωτογραφίες.
1. https://2019.guadec.org/pages/photos.html
2. Google Photos
3. Flickr
4. Engagement εκεί που λέει GUADEC 2019
5. https://fidencio.fedorapeople.org/guadec2019/
6. Richard Brown photos
7. Olivier's photos

Cloudwatch + Alarm with EC2 CPU Utilization 測試小記
- 這邊我有透過 -v 把本機上面的三個平台的設定檔掛載到容器內, 還有 .ssh 目錄 也掛載上面, 因為 google 的 SSH 金鑰 也會存放在裡面


- stress-ng



VirtScreen on openSUSE | Turn a Tablet into a Second Monitor

openSUSE Conference 2019

The openSUSE Conference is the annual openSUSE community event that brings people from around the world together to meet and collaborate.
I attended the openSUSE Conference in Nuremberg, Germany, which was held at Z-Bau (House for Contemporary Culture) between 24 to 26 May.
Z-Bau is an iconic building with a long history. It was built by the Nazis to be used as barracks. After the second world war the building went through renovations and was converted into an arts centre.

There a nice spot right outside the building called the "beer garden". That's where the geeks would have their beers or coffee during a session break or simply to sit and have a conversation.


Right at the entrance you'd find several tables with goodies from different companies.

Shelly had asked me to buy her a Rubik's cube while on the conference trip but guess what, the folks from Amazon were giving away Rubik's cubes among other awesome goodies.
The conference started with a keynote speech/presentation by the President of Engineering, Product & Innovation at SUSE, Dr. Thomas Di Giacomo.
Dr. Giacomo welcomed the geeks to oSC 2019. He gave some SUSE updates, such as the company being independent since the March 15th, having reached 1750 employees, and that SUSE making a revenue of $ 400M.
He mentioned a few projects where SUSE is contributing upstream like openATTIC, Ceph, Stratos and Airship.

While talking about SUSE code contributions to openSUSE he explained the idea behind "factory first", i.e SUSE Linux Enterprise (SLE) pushed to the factory repo which then lands in openSUSE Tumbleweed and Leap. He mentioned the release of openSUSE Leap 15.1 and encouraged users to upgrade.
Dr. Giacomo also talked about openSUSE Kubic, MicroOS and the developers who are working on cool stuff for the community.
In the afternoon I had marked a few sessions on openSUSE MicroOS to attend. The first presentation was by the openSUSE Chairman, Richard Brown. He started the presentation with a little bit of history of how computers were originally programmed to do one thing at a time and then with the advent of networking, the Internet and the Personal Computer, technologies evolved rapidly.
He then related how we started thinking less about servers and datacenters and the focus become more cloud-centric. He talked about a new world that is made up of the Cloud, Virtualization, Internet of Things and Containers.

Richard talked about Podman, CRI-O, Kubernetes and the efforts made for easy container deployment using openSUSE Kubic. His mention about Kured (KUbernetes REboot Daemon) particularly caught my attention. I was previously asked about the "automatic reboots" becoming a problem in Kubic by a friend. The answer was if you do not trust unattended reboots to be safe then you should probably disable transactional updates. Then, that defeats the whole purpose of a "self-serving" system that openSUSE Kubic aims to be.
My presentation themed "openSUSE MicroOS in Production" was scheduled for 15h45 that day.

It was the first time that I did a presentation outside of Mauritius. I was nervous. The openSUSE Conference brings geeks from around the world and you can expect the top nerds of the community to be there.
I had a second talk during oSC 2019. It was a "Lightning Beer and Wein (Not Wine) Talks" session. I spoke about Netiquette within the openSUSE community. I had to hold a beer (also drink it), hold a microphone and change slides while talking about netiquette. That was fun and this time I was not nervous at all. Although I cannot say whether the confidence came from the German beer or I owe it to the many friends I had made during those three days. Either way, the conference helped me find myself within the openSUSE community, which is a great feeling for a lad from a small island in the middle of an ocean.

Principles

We recently did a post about the Nextcloud Mission and Principles we discussed at the previous Contributor Week. I guess it is mostly the easy-to-agree on stuff, so let me ruin the conversation a bit with the harder stuff. Warning: black and white don't exist beyond this point.
Open Source
In an internal conversation about some community pushback on something we did, I linked to islinuxaboutchoice.com - people often think that 'just' because a product is open source, it can't advertise to them, it has to be chock full of options, it has to be made by volunteers, it can't cost money and so on...But if you want to build a successful product and change the world, you have to be different. You have to keep an eye on usability. You have to promote what you do - nobody sees the great work that isn't talked about. You have to try and build a business so you can pay people for their work and speed up development. Or at least make sure that people can build businesses around your project to push it forward.
I personally think this is a major difference between KDE and GNOME, with the former being far less friendly to 'business' and thus most entrepreneurial folks and the resources they bring go into GNOME. And I've had beers with people discussing SUSE's business and its relationship with openSUSE - just like Fedora folks must think about how they work with Red Hat, all the time. I think the openSUSE foundation is a good idea (I've pushed for it when I was community manager), but going forward I think the board should have a keen eye on how they can enable and support commercial efforts around openSUSE. In my humble opinion the KDE board has been far to little focused on that (I've ran for the board on this platform) and you also see the LibreOffice's Document Foundation having trouble in this area. To help the projects be successful, the boards on these organizations need to have people on them who understand business and its needs, just like they need to have community members who understand the needs of open source contributors.
But companies bring lots of complications to open source. When they compete (as in the LibreOffice ecosystem), when they advertise, when they push for changes in release cycles... Remember Mark Shuttleworth arguing KDE should adopt a 6-month release cycle? In hindsight, I think we should have!
Principles
So, going back to the list of Nextcloud's Mission and Principles, I say they are the easy stuff, because they are. They show we want to do the right thing, they show what our core motivation was behind starting this company: building a project that helps people regain control over their privacy. But, in day to day, I see myself focus almost exclusively on the needs of business. And you know what, businesses don't need privacy... That isn't why we do this.Oh, I'm very proud we put in significant effort in home users when we can - our Simple Signup program has cost us a lot of effort and won't ever make us a dime. The Nextcloud Box was, similarly, purely associated with our goals, not a commercial project. Though you can argue both had marketing benefits - in the end, a bigger Nextcloud ecosystem helps us find customers.
I guess that's what keeps me motivated - customers help us improve Nextcloud, more Nextcloud users help us find more customers and so both benefit.
Pragmatism and the real hard questions
Personally, I'd add an item about 'pragmatism' to the list, though you can say it is inferred from our rather large ambitions. We want to make a difference, a real difference. That means you have to keep focused on the goal, put in the work and be pragmatic.An example is the conversation about github. Would we prefer a more decentralized solution? Absolutely. Are we going to compromise our goals by moving away from the largest open source collaboration network to a platform which will result in less contributions? No.... As long as github isn't making our work actively harder, does not act unethically and its network provides the biggest benefits to our community by helping us reach our goals, we will stay...
More questions and the rabbit hole
Would you buy a list of email addresses to send them information about Nextcloud? No, because it harms those users' privacy and probably isn't even really legal. Would you work with a large network to reach its members, even if you don't like that network and its practices? Yes - that is why we're on Facebook and Twitter, even though we're not fans of either.Let's make it even harder. How about the choice of who you sell to. Should we not sell to Company X even if that deal would allow us to hire 10 great developers on making Nextcloud better for the whole world and further our goals? Would you work with a company that builds rockets and bombs to earn money for Nextcloud development? We've decided 'nope' a few times already, we don't want that money. But what about their suppliers? And suppliers of suppliers? A company that makes screws might occasionally sell to Boeing which also makes money from army fighters... Hard choices, right?
And do you work with countries that are less than entirely awesome? Some would argue that would include Russia and China, others would say the USA should be on a black list, too... What about Brazil under its current president? The UK? You can't stop anyone from using an open source product anyway, of course... It gets political quick, we've decided to stick to EU export regulations but it's a tough set of questions. Mother Teresa took money from dictators. Should she have? No?
It might seem easy to say, in a very principled way, no to all the above questions, but then your project won't be successful. And your project wants to make the world better, does it not?
Conclusion?
We discuss these things internally and try to be both principled and pragmatic. That is difficult and I would absolutely appreciate thoughts, feedback, maybe links to how other organizations make these choices. Please, post them here, or in the comments section of the original blog. I can totally imagine you'd rather not comment here as this blog is hosted by blogger.com - yes, a Google company. For pragmatic reasons... I haven't had time to set up something else!There's lots of grey areas in this, it isn't always easy, and sometimes you do something that makes a few people upset. As the Dutch say - **Waar gehakt wordt vallen spaanders**.
PS and if you, despite all the hard questions, still would want to work at a company that tries to make the world better, we're hiring! Personally, I need somebody in marketing to help me organize events like the Nextcloud Conference, design flyers and slide decks for sales and so on... Want to work with me? Shoot me an email!

Migrating from Jekyll to org-mode and Github Actions
Introduction
My website has been generated until now by Github pages using a static site generator tool called Jekyll and the Lagom theme.
Github Pages
Github Pages allows to host static sites in Github repositories for free. It is very simple, you would just put the website in a branch (eg. gh-pages) and Github will serve it as username.github.io/repo, or via a custom domain by adding a simple CNAME text file to the repository.
Static Site Generators
If you did not want to write HTML directly, you could use a static site generator to keep a set of templates and content in the git repository and putting the output of the generator (the HTML files) into the gh-pages branch to be served by Github.
In addition to be able to write the content in Markdown, site generators made much easier to maintain content like a blog, with features like different templates for posts, code syntax highlighting, drafts and support for themes, which allowed to change the look and feel of the site by just changing one configuration option and just re-generating it.
If you wanted this process to be automatic, you could run the generation as part of some CI job (eg. with TravisCI), so that the site is re-generated when its sources are updated.
Jekyll support in Github Pages
Jekyll is one of these site generators and it was the most popular for a while. The nice part was that if you used Jekyll, Github Pages will generate your website automatically, without having to setup CI. Just push your changes and a minute later your site was published.
On the other hand, you were limited by using the Jekyll version that was installed at Github, and you could not just install any add-on that you wanted. You did not control the environment to the level you did in a typical CI.
Moving away from Jekyll
Jekyll just worked. I can’t complain about it. However, I feel too tied to the Github Pages environment. You had to use a Jekyll version that was close to a year behind and live with the plugins that the environment supported, and nothing more.
If I was to setup my own CI workflow to overcome this limitation, why keep using Jekyll?. Hugo started to feel faster, easier to deploy locally and mostly compatible.
I have been using Emacs for more than 10 years. 3 years ago, I switched mail clients from Thunderbird to mu4e on top of Emacs. Then I discovered org-mode as a plain-text personal organization system and gradually started to live more time inside emacs. Microsoft did a so good job with Visual Studio Code that for a moment I thought I would not resist. However, Microsoft created an ecosystem by making the interaction with programming languages a standard, via the Language Server Protocol, and emacs-lsp made my programming experience with emacs just better.
I knew that org-mode was quite good at exporting. After I saw a couple of websites generated from org, I started to toy with the idea of using org too. It could also be a good chance to learn Emacs Lisp for real. So I started learning about org and websites.
Inspiration
As I did not know where to start, I started by reading a lot of solutions by other people, documentation, posts, etc.
Most of the structure of the final solution, its ideas, conventions, configuration and some snippets were taken from the following projects:
- Toon Claes’s blog
- Example org-mode website using GitLab Pages by Rasmus
- https://github.com/bastibe/org-static-blog
- The theme is a port of the original Lagom theme I was using with Jekyll
Implementation
Principles
Once I had a clear picture of the domain, I made up my mind of how I wanted it and my own requirements:
- Use as much standard packages as possible. eg. org-publish. Avoid using “frameworks” on top of emacs/org
- Links to old posts should still work (I had configured Jekyll to use
/year/month/day/post-name.html) - Initially, I thought about the ability to migrate content gradually, eg. supporting Markdown posts for a while
- Self contained. Everything should be in a single git repo, not interfering with my
emacs.d. - Ability to run it from the command line, so that CI could be used to automatically generate the site from git
Emacs concepts to be used
There are a bunch of emacs concepts that help putting all the pieces together:
Emacs batch mode
While I could have most of the configuration in my ~/.emacs.d/init.el, I wanted a self-contained solution, not depending on my personal emacs configuration being available.
There are a bunch of emacs options that help achieving this:
$ emacs --help
...
--batch                     do not do interactive display; implies -q
...
--no-init-file, -q          load neither ~/.emacs nor default.el
...
--load, -l FILE         load Emacs Lisp FILE using the load function
...
--funcall, -f FUNC      call Emacs Lisp function FUNC with no arguments
...
With these options, we can put all our configuration and helper functions in a lisp file, call emacs as a script engine, skip our personal configuration, have emacs load the file with the configuration, and call a function to run everything.
org-mode Export (ox)
org-mode includes an Export subsystem with several target formats (ASCII, beamer, HTML, etc). Every backend/converter is a set of functions that take already parsed org-mode structures (eg. a list, a timestamp, a paragraph) and converts it to the target format. Worg, a section of the Org-mode web site that is written by a volunteer community of Org-mode fans, provide documentation on how to define an export backend (org-export-define-backend). From here is important to understand the filter system and org-export-define-derived-backend, which allows to define a backend by overriding an existing one. This is what I will end using to tweak, for example, how timestamps are exported.
org-publish
org-mode includes a publishing management system that helps exporting a interlinked set of org files. There is a nice tutorial also available.
Using org-publish boils down to defining a list of components (blog posts, assets, RSS), their options (base directory, target directory, includes/excludes, publishing function) being the publishing function one of the most interesting ones, as org comes with a few predefined ones eg. org-html-publish-to-html to publish HTML files and org-publish-attachment to publish static assets. The most important thing to learn here is that you can wrap those in your own to do additional stuff and customize publishing very easily. I use this for example, to skip draft posts or to write redirect files for certain posts in addition to the post itself.
The solution
Directory Structure
├── CNAME
├── css
│   ├── index.css
│   └── site.css
├── index.org
├── Makefile
├── posts
│   ├── 2019-10-31-some-post
│   │   └── index.org
│   ├── 2014-06-11-other-post
│   │   ├── images
│   │   │   ├── someimage.png
│   │   │   └── another-image.png
│   │   └── index.org
│   ├── archive.org
│   └── posts.org
├── public
├── publish.el
├── README.org
├── snippets
│   ├── analytics.js
│   ├── postamble.html
│   └── preamble.html
└── tutorials
    └── how-to-something
        └── index.org
Inside the directory tree, you can find:
- a publish.el file with the org-publish project description and all the support code and helper functions
- a CNAME file for telling Github Pages my domain name
- a folder with a CSS file for all the site. Another one that is included only on the index page
- a Makefile that just calls emacs with the parameters we described above and calls the function duncan-publish-all
- a subdirectory for each post, and another one for tutorials
- a public directory where the output files are generated and the static assets copied
- a snippets directory with the preamble, postamble and Google analytics snippets
publish.el
The main file containing code and configuration includes a few custom publishing functions that are used as hooks for publishing and creating sitemaps.
org-publish project
The org-publish project (org-publish-project-alist) is defined in the variable duncan–publish-project-alist, and defines the following components:
-
blog
This components reads all org files in the
./posts/directory, and exports them to HTML using duncan/org-html-publish-post-to-html as the publishing function.This function injects the date as the page subtitle in the property list before delegating to the original function. This is a common pattern that you can use to override the publishing function. Note that subtitle is a recognized configuration property of the HTML export backend.
(defun duncan/org-html-publish-post-to-html (plist filename pub-dir)
  "Wraps org-html-publish-to-html.  Append post date as subtitle to PLIST.  FILENAME and PUB-DIR are passed."
  (let ((project (cons 'blog plist)))
    (plist-put plist :subtitle
               (format-time-string "%b %d, %Y" (org-publish-find-date filename project)))
    (duncan/org-html-publish-to-html plist filename pub-dir)))
The function also checks the #+REDIRECT_TO property, and generates redirect pages accordingly, by spawning another export to a different path in the same pub_dir.
This component is configured with a sitemap function which, even if goes through all posts, it is programmed to take only a few ones and write an org file with links to them. This file (posts.org) is then included in index.org and used as the list of recent posts.
-
archive-rss
This component also operates on
/.posts/, but instead of generating HTML, it uses the RSS backend to generate the full site archive as RSS.The sitemap function is also configured, like in the blog component, but this function generates an org file with all posts, not just the latest ones. The sitemap-format-entry function is shared between the sitemaps functions, as the list of posts looks the same.

-
site
The rest of the content of the site, including the index.org page and the generated org files for the archive (archive.org) and latest posts (posts.org).
-
assets
All files that are just copied over
-
tutorials
It works just like posts, but I setup each (don’t expect to have many) to use the ReadTheOrg theme. It uses the default HTML publishing function.

Export workflow

Look & Feel
I managed to port most of the Lagom look and feel by starting a CSS from scratch (learned CSS Grid in the process) and manually fixing each difference. I was quite satisfied with the final result. I had to use some extra page-specific CSS to hide the title in the front-page, or to display FontAwesome icons.
Before

After

Publishing
While locally you can test by running emacs via the Makefile, I wanted a new way to run the generation on every git push:
- I started with Travis, but I could not find container jobs anymore. When I relalized that Ubuntu had an older Emacs version I just lost interest.
- Gitlab was easy to get working. Not only because is very simple and elegant, but some of the examples I took inspiration from where already using it, along the Emacs Alpine container image. However, I did not want to have everything in Github, except my site
- Then I realized Github Actions was in beta, but I was not yet in. Until:
You’re in 🥰
— Nat Friedman (@natfriedman) August 26, 2019
Setting up a workflow to build the site
While, on Linux, Github actions run on Ubuntu, they allow you to execute an action inside a container.
name: Build and publish to pages
on:
  push:
    branches:
    - master

jobs:
  build:
    runs-on: ubuntu-latest
    steps:
    - uses: actions/checkout@master
      with:
	fetch-depth: 1
    - name: build
      env:
	ENV: production
      uses: docker://iquiw/alpine-emacs
      if: github.event.deleted == false
      with:
	args: ./build.sh
    - name: deploy
      uses: peaceiris/actions-gh-pages@v3
      if: success()
      with:
	github_token: ${{ secrets.GITHUB_TOKEN }}
	publish_dir: ./public
Combining actions/checkout, our own build script running as a container docker://iquiw/alpine-emacs inside the VM, and peaceiris/actions-gh-pages we get the desired results.
As a caveat, you need to setup a personal access token for the action, as the default one will not work and what gets pushed to the gh-pages will not show up in your website.
The experience with Github Actions has been very positive. I will definitely replace most of my TravisCI usage in my repositories. Kudos to the Github team.
Conclusions
Not only I have a website powered by the tool I use daily, but it is also packed with awesome features. For example, the diagrams in this post are inlined as PlantUML code in the org file and exported via Org Babel.
It also gave me project to learn Emacs Lisp. I do plan to add some minor features, like blog tags or categories and perhaps commenting. The learning will also benefit personalizing my editor and mail client.
The source of this site is available on Github.
Regolith Linux | Review from an openSUSE User

Немного о быстрой (и тихой) загрузке
Данная запись дополняет мою прошлую заметку про загрузку Linux без экранных сообщений. В этот раз я покажу, как можно организовать загрузку в обход Grub2, т.е. обойтись без стороннего загрузчика вообще. Нам понадобится система с поддержкой UEFI и примерно 5 минут времени.
Современных компьютеров без UEFI днём с огнём не сыщешь, и даже моя рабочая лошадка родом из 2011 года прекрасно поддерживает эту технологию. В Linux имеется замечательная утилита efibootmgr, управляющая загрузочными записями прямо в ПЗУ материнской платы. С помощью Efibootmgr можно добавлять, удалять и менять приоритет загрузки этих записей. Efibootmgr может добавить запись, ссылающуюся на grub2-efi — в этом случае вы увидите меню Grub вашего дистрибутива. Но можно сразу указать путь к vmlinuz и initrd, а также произвольный набор параметров ядра, и тогда Linux будет загружаться безо всякого Grub. Если у вас на ПК установлена только одна ОС, то это прекрасный способ сделать процесс загрузки более быстрым и плавным.
Для реализации этой идеи для начала нужно скопировать образы vmlinuz и initrd из /boot куда-нибудь внутрь EFI-раздела. В моём случае это директория efi/opensuse. Я переименовал эти файлы в initrd.img и vmlinuz.efi для удобства, но названия могут быть любыми. Далее следует ввести команду примерно такого вида:
efibootmgr --create --disk /dev/sda --part 1 --label "opensuse" -u --loader '\efi\opensuse\vmlinuz.efi'

"root=/dev/sda2 initrd=/efi/opensuse/initrd.img resume=/dev/sda2 splash=silent plymouth.enable=0 quiet elevator=noop logo.nologo acpi_osi=Linux acpi_backlight=vendor audit=0 rd.timeout=120 scsi_mod.use_blk_mq=1 dm_mod.use_blk_mq=1 systemd.show_status=0 rd.udev.log-priority=3 ipv6.disable=1 loglevel=3 vt.global_cursor_default=0 systemd.log_target=null systemd.journald.forward_to_console=0 systemd.default_standard_output=null systemd.default_standard_error=null init=/bin/systemd"
На что нужно обратить внимание:
- У меня EFI-раздел находится на /dev/sda1, а корневой — на /dev/sda2 (у вас может быть иначе);
- Я отключил заставку Plymouth, указал планировщик ввода/вывода Noop, отключил IPv6 и убрал вывод сообщений на экран (тут довольно много опций, с избытком);
- Нужно не забыть передать UEFI-загрузчику путь до Systemd. В openSUSE это /bin/systemd, но в других системах может быть иначе, например в Росе это /lib/systemd/systemd.
Далее нужно указать приоритет записей:
efibootmgr -o <номер 1>,<номер 2>...
Можно просто удалить все остальные записи кроме нашей:
efibootmgr -b <номер записи> -B
Дополнительно имеет смыл залезть в UEFI BIOS и включить там быструю загрузку, когда система не показывает логотип производителя, не пытается опрашивать USB-устройства и т.д.
Мой результат: от нажатия кнопки питания на системном блоке до полной прогрузки KDE Plasma проходит 25 секунд, причём половина этого времени проходит ещё до загрузки Linux.
Вот и всё. Если ваш дистрибутив всё равно загружается слишком долго, посмотрите вывод команды systemd-analyze blame. Скорее всего, какой-то сервис инициализируется слишком долго — иногда его проще отключить.
P.S.
Для отключения неопрятных сообщений в консоли, которые мигают, например, перед выключением/перезагрузкой системы, существует простой хак:
sudo systemctl disable getty@tty1.service
Теперь у вас нет консольного терминала, но зато выглядит всё просто отлично!
Noodlings 1 | openSUSE News and other Blatherings

Highlights of YaST Development Sprint 83
The summer is almost gone but, looking back, it has been pretty productive from the YaST perspective. We have fixed a lot of bugs, introduced quite interesting features to the storage layer and the network module refactoring continues to progress (more or less) as planned.
So it is time for another sprint report. During the last two weeks, we have been basically busy squashing bugs and trying to get the network module as feature-complete as possible. But, after all, we have had also some time to improve our infrastructure and organize for the future.
YaST2 Network Refactoring Status
Although we have been working hard, we have not said a word about the yast2-network refactoring progress since the end of July, when we merged part of the changes into yast2-network 4.2.9 and pushed it to Tumbleweed. That version included quite a lot of internal changes related to the user interface and a few bits of the new data model, especially regarding routing and DNS handling.
However, things have changed a lot since then, so we would like you to give you an overview of the current situation. Probably, the most remarkable achievement is that the development version is able to read and write the configuration using the new data model. OK, it is not perfect and does not cover all the use cases, but we are heading in the right direction.
In the screencast below you can see it in action, reading and writing the configuration of an interface. The demo includes handling aliases too, which is done way better than the currently released versions.

Moreover, we had brought back support for many types of devices (VLAN, InfiniBand, qeth, TAP, TUN, etc.), improved the WiFi set-up workflow and reimplemented the support for renaming devices.
Now, during the current sprint, we are focused on taking this new implementation to a usable state so we can release the current work as soon as possible and get some feedback from you.
Finally, if you like numbers, we can give you a few. Since our last update, we have merged 34 pull requests and have increased the unit test coverage from 44% in openSUSE Leap 15.0/SUSE Linux Enterprise SP1 to around 64%. The new version is composed of 31.702 (physical) lines of code scattered through 231 files (around 137 lines per file) vs 22.542 in 70 files of the old one (more than 300 lines per file). And these numbers will get better as we continue to replace the old code. :smiley:
Missing Packages in Leap
It turned out that some YaST packages were not updated in Leap 15.1. The problem is that, normally, the YaST packages are submitted to the SLE15 product and they are automatically mirrored to the Leap 15 distribution via the build service bots. So we do not need to specially handle the package updates for Leap.
However, there are few packages which are not included in the SUSE Linux Enteprise product line, but are included in openSUSE Leap. Obviously these packages cannot be updated automatically from SUSE Linux Enterprise because they are not present there. In this case Leap contained the old package versions from the initial 15.0 release.
In order to fix this issue, we manually submitted the latest packages to the Leap 15.2 distribution. To avoid this problem in the future we asked the Leap maintainers to add the Leap specific packages to a check list so they are verified before the next release. Of course, if you see any outdated YaST package in Leap you can still open a bug report. :wink:
Just for reference, the affected packages are: yast2-alternatives,
yast2-slp-server, yast2-docker and skelcd-control-openSUSE (the
content is only present on the installation medium, it’s not released as
an RPM).
Let’s use all disks!
As you may remember, three sprints ago we added some extra configuration options to make the storage guided proposal able to deal with the SUSE Manager approach. We even wrote a dedicated blog post about it!
Despite offering the new options in the Guided Setup, we tried to keep the default initial behavior of the installer consistent with other (open)SUSE products. So the installer initially tried to install the whole system in a single disk, unless that was impossible or it was told by the user to expand on several disks.
But the SUSE Manager folks found that to be contrary to the new ideas introduced in their Guided Setup. According to their feedback, in this case remaining consistent with other (open)SUSE product was not reducing the confusion, but rather increasing it. SUSE Manager should try from the very beginning to expand the product as much as possible among all available disks.
For that reason, during this sprint we introduced the first improvement (a.k.a. another configuration option), so now it is possible to tell whether the initial proposal should try to use multiple disks as first try.
Bootloader and Small MBR Gaps
We received a bug report because a system was not able to boot after installation. In this case, the user decided to use Btrfs and placed the root file system in a logical partition. In theory, this scenario should work but, unfortunately, the MBR gap was too small to embed the Grub2 bootloader code.
At first sight, this problem could be solved by asking YaST to install the bootloader into the logical partition and the generic boot code in the MBR. But this will only work if you set the logical partition as the active one. Sadly, some BIOSes could insist on having a primary partition as the active one.
But don’t worry, we have good news. Grub2 maintainers took care of this problem. In case the MBR gap is too small, Grub2 will automatically fall-back to the Btrfs partition. That’s all. And what does it mean for YaST? Well, thanks to this fix, YaST will simply work out of the box and your system will be bootable again. But not so fast! You still have to wait a little bit more to have these Grub2 improvements available in a Tumbleweed installer.
Handling Empty Comment Lines in NTP Configuration
AutoYaST supports defining an specific NTP configuration to be applied
during the installation and it relies in Augeas to read/write the
ntp.conf file. But it seems that Augeas has some problems when it
tries to write comments with empty lines, as you can see in bug
1142026. The solution was to adapt YaST to filter out empty comment
lines before saving the configuration file, working around the Augeas
problem.
Error Resizing Some Partitions
Typically, an MS-DOS partition table reserves its first MiB for the MBR gap, so the partitions normally start after that point. But it is possible, especially in partitions for old Windows systems, that it starts before that first MiB. In that case, if we try to resize that partition (e.g., by using the Expert Partitioner), YaST crashes due to an error when calculating the resize information. Fortunately, this problem is gone now, and you will be able to resize this kind of partitions as well.
Side Effects of Keyboard Layouts Unification
During the sprint 81, the openSUSE and SUSE Linux Enterprise
console keyboard layouts were unified after some minor changes. One of
those changes was to stop using the, in appearance, useless keymaps
symlinks for Arabic and Cambodian. But they were there for a reason: are
being used by YaST to correctly adapt the keyboard in the X11
environment. Just visit the pull request if you prefer to
scare yourself want to dive in more technical details.
Fortunately for the users of those keyboards, we realized about this problem before the upcoming SLE-15-SP2 was released. :smile: And, it’s fixed.
House Keeping Tasks
As part of our development duties for this sprint, we invested quite some time in reviewing and updating our continuous integration (CI) set up. Apart from using Travis CI for pull requests, we rely on Jenkins to run the tests and submit the code to the appropriate projects in the Open Build Service instances.
Then, when the development of a new version starts or when the product is about to be released, we need to adjust the configuration. Just in case you are wondering, we do not do this work by hand anymore and we use Salt and Jenkins Job Builder to handle this configuration.
Closing Thoughts
During the next sprint (actually, the current one) we are working in three different areas, apart from squashing bugs: improving encryption support in the storage layer, adding some features to the installer (repo-less installer, support for reading product licenses from a tarball, etc.) and, of course, refactoring the network code. Obviously, we will give you all sort of details in our next sprint report.