
Удаленная сетевая консоль ядра Linux
Полное описание сетевой консоли находится в документации ядра. Для настройки достаточно добавить в modprobe.d/99-local.conf:
options netconsole netconsole=@/,514@192.168.10.7/00:0C:29:F3:92:97Здесь, 514 - номер UDP порта, 192.168.10.7 - IP удаленного хоста куда будет отсылаться информация, 00:0C:29:F3:92:97 - его MAC адрес, если его не указать явно то будет использоваться широковещательный адрес FF:FF:FF:FF:FF:FF, что может затруднить передачу информации в зависимости от настроек сетевого оборудования.
И загрузить модуль netconsole или, по желанию, поставить его на автозагрузку при старте системы.
После загрузки модуля netconsole, сетевая консоль начинает немедленно функционировать, а в системном журнале можно увидеть примерно следующее:
May  1 18:57:51 192.168.10.4 kernel: [162255.522603] netconsole: local port 6665
May  1 18:57:51 192.168.10.4 kernel: [162255.522673] netconsole: local IP 0.0.0.0
May  1 18:57:51 192.168.10.4 kernel: [162255.522710] netconsole: interface eth0
May  1 18:57:51 192.168.10.4 kernel: [162255.522746] netconsole: remote port 514
May  1 18:57:51 192.168.10.4 kernel: [162255.522784] netconsole: remote IP 192.168.10.7
May  1 18:57:51 192.168.10.4 kernel: [162255.522826] netconsole: remote ethernet address 00:0c:29:f3:92:97
May  1 18:57:51 192.168.10.4 kernel: [162255.522881] netconsole: local IP 192.168.10.4
May  1 18:57:51 192.168.10.4 kernel: [162255.523032] console [netcon0] enabled
May  1 18:57:51 192.168.10.4 kernel: [162255.523349] netconsole: network logging started
Данные приходят в самом простом текстовом виде и их можно читать самым простым способом:
netcat -u -l 514Если у нас в наличии есть syslog-ng — можно использовать его следующим образом:
source s_remote_udp {
        network(transport("udp") ip(0.0.0.0) port(514));
};
filter f_remote_remhost {
        netmask(192.168.10.4);
};
destination d_remote_remhost {
        file("/var/log/remote/remhost.log");
};
log {
        source(s_remote_udp);
        filter(f_remote_remhost);
        destination(d_remote_remhost);
};
Проверить, что всё работает можно следующим образом:
echo '<7>Hello world!' > /dev/kmsg
dmesg -n 8
Сообщение должно появиться в журнале и быть передано по сети на удаленный хост.
Удаленная отладка ядра Linux
Опции конфигурации ядра должны быть такими:
CONFIG_KGDB=y
CONFIG_KGDB_SERIAL_CONSOLE=y
Кроме того, драйвер последовательного порта должен быть включен в состояние Y.
Далее нам понадобятся отладочные символы и исходные коды ядра, которые находятся в пакетах -debuginfo и -debugsource. Скорее всего, архитектуры удаленной и локальной системы не будут совпадать, так как особенно часто ядро Linux не работает на архитектуре armv7l, поэтому просто распакуем данные следующим образом:
> rpm2cpio kernel-default-base-debuginfo-4.2.rc4-1.1.gaf243bc.armv7hl.rpm | cpio -id
> rpm2cpio kernel-default-debuginfo-4.2.rc4-1.1.gaf243bc.armv7hl.rpm | cpio -id
> rpm2cpio kernel-default-debugsource-4.2.rc4-1.1.gaf243bc.armv7hl.rpm | cpio -id
В текущей директории будет создана поддиректория /usr содержащая отладочные символы и исходные коды в стандартной иерархии. Кроме того, нам понадобятся сами бинарные файлы ядра:
> rpm2cpio kernel-default-base-4.2.rc4-1.1.gaf243bc.armv7hl.rpm | cpio -id
> rpm2cpio kernel-default-4.2.rc4-1.1.gaf243bc.armv7hl.rpm | cpio -id
Далее, следует подключить последовательный порт, и открыть удаленную консоль следующим, например, образом:
> screen /dev/ttyUSB0 115200и начать загрузку целевого устройства. Для активации механизма kgdb потребуется добавить параметры командной строки ядра в загрузчике:
U-Boot# setenv append "kgdboc=ttyO0,115200 kgdbwait"
U-Boot# boot
Если все пойдет правильно, то загрузка ядра остановится после примерно следующих строк:
[    3.753423] 44e09000.serial: ttyO0 at MMIO 0x44e09000 (irq = 154, base_baud = 3000000) is a OMAP UART0
[    4.497783] console [ttyO0] enabled
[    4.502387] STMicroelectronics ASC driver initialized
[    4.507960] KGDB: Registered I/O driver kgdboc
[    4.512673] KGDB: Waiting for connection from remote gdb...

Entering kdb (current=0xdb0b3480, pid 1) on processor 0 due to Keyboard Entry
[0]kdb>
kdb ождает ввода команд, среди прочего доступна команда help, выводящая список базовых команд. На этом консоль можно закрыть: Ctrl-A :quit и открыть отладчик gdb.
Для начала установим пути к отладочным символам и исходным кодам и загрузим объектный файл ядра целевой системы (внимание, сначала этот файл нужно будет распаковать командой gz).
(gdb) set debug-file-directory /tmp/dbg/usr/lib/debug
(gdb) directory /tmp/dbg/usr/src/debug/kernel-default-4.2.rc4/linux-4.2-rc4/linux-obj
(gdb) file /tmp/dbg/boot/vmlinux-4.2.0-rc4-1.gaf243bc-default
Reading symbols from /tmp/dbg/boot/vmlinux-4.2.0-rc4-1.gaf243bc-default...Reading symbols from /tmp/dbg/usr/lib/debug/boot/vmlinux-4.2.0-rc4-1.gaf243bc-default.debug...done.
done.
После этого нужно подключиться к целевой системе:
(gdb) target remote /dev/ttyUSB0
Remote debugging using /dev/ttyUSB0
0xc031dc08 in arch_kgdb_breakpoint () at ../arch/arm/include/asm/outercache.h:142
Далее можно использовать отладчик как обычно. Через команду monitor доступны все команды из консоли kdb, среди них есть достаточно полезные, например dmesg или lsmod:
(gdb) monitor lsmod
Module                  Size  modstruct     Used by
musb_am335x             1431  0xbf000278    1  (Loading) 0xbf000000 [ ]
Обратите внимание, что команда lsmod любезно нам показывает адрес 0xbf000000, куда в памяти загружен модуль musb_am335x. Этот адрес нужен чтобы отлаживать код из модуля:
(gdb) add-symbol-file /tmp/dbg/lib/modules/4.2.0-rc4-1.gaf243bc-default/kernel/drivers/usb/musb/musb_am335x.ko 0xbf000000
 ximion
Akademy 2015
I am very late with this, but I still wanted to write a few words about Akademy 2015.
First of all: It was an awesome conference! Meeting all the great people involved with KDE and seeing who I am working with (as in: face to face, not via email) was awesome. We had some very interesting discussions on a wide variety of topics, and also enjoyed quite some beer together. Particularly important to me was of course talking to Daniel Vrátil who is working on XdgApp, and Aleix Pol of Muon Discover fame.
Also meeting with the other Kubuntu members was awesome – I haven’t seen some of them for about 3 years, and also met many cool people for the first time.
My talk on AppStream/Limba went well, except that I got slightly confused by the timer showing that I had only 2 minutes left, after I had just completed the first half of my talk. It turned out that the timer was wrong 
Another really nice aspect was to be able to get an insight into areas where I am usually not involved with, like visual design. It was really interesting to learn about the great work others are doing and to talk to people about their work – and I also managed to scratch an itch in the Systemsettings application, where three categories had shown the same icon. Now Systemsettings looks like it is supposed to be, finally 
The only thing I could maybe complain about was the weather, which was more Scotland/Wales like than Spanish – but that didn’t stop us at all, not even at the social event outside. So I actually don’t complain
We also managed to discuss some new technical stuff, like AppStream for Kubuntu, and plenty of other things that I’ll write about in a separate blog post.
Generally, I got so many new impressions from this year’s Akademy, that I could write a 10-pages long blogpost about it while still having to leave out things.
Kudos to the organizers of this Akademy, you did a fantastic job! I also want to thank the Ubuntu community for funding my trip, and the Kubuntu community for pushing me a little to attend :-).
KDE is a great community with people driving the development of Free Software forward. The diversity of people, projects and ideas in KDE is a pleasure, and I am very happy to be part of this community.

 Member
KDE Applications 15.08 RC for openSUSE
KDE has recently released the newest Release Candidate of the Applications 15.08 release. Among the new features and changes of this release, there is a technology preview of the new KF5-based KDE PIM suite (including reworked, faster Akonadi internals), new applications ported to KF5 (the most notable ones being Dolphin and Ark). After some consideration and thinking on how to allow users to test this release without affecting their setups too much, the openSUSE community KDE team is happy to bring this latest RC to openSUSE Tumbleweed and openSUSE 13.21.
To install this new release, add the KDE:Applications repository either using YaST or zypper. One special mention is the PIM suite: as upstream KDE labels it as a technology preview, we decided to allow installation only with an explicit choice of the user. To do so, one should install the kmail5 package and the akonadi-server package (other components of the PIM suite are also there, with the 5 suffix): this operation will uninstall the 4.14 packages (but not remove any local data) and install the new version of mail and PIM. To go back, install akonadi-runtime and the respective packages without the 5 suffix (e.g., kmail, korganizer).
It is essential for upstream KDE to have proper bug reports, in particular for PIM, so please report any issues you find. If instead you find a bug in the packaging, turn over to openSUSE’s Bugzilla.
-
Not all packages are available on openSUSE 13.2 due to the version of KF5 and extra-cmake-modules that is shipped there. ↩
Instalasi dan Konfigurasi Web Server
Pada kesempatan yang lain, penulis pernah mencoba menginstalasi web server menggunakan XAMPP versi Linux yang bisa diunduh di url https://www.apachefriends.org/. Setelah bermigrasi ke openSUSE Tumbleweed, penulis mencoba melakukan instalasi web server dengan metode yang sama. Akan tetapi pada proses instalasi tersebut, penulis gagal menjalankan servis MySQL dan FTPD. Walau mungkin solusinya bisa dicari, akan tetapi terlintas ide untuk menginstal web server dari repositori openSUSE itu sendiri. di langsir dari portal https://en.opensuse.org/SDB:LAMP_setup, untuk menginstal web server Anda perlu mengunduh beberapa aplikasi yang diperlukan, antara lain sebagai berikut.
- Apache2, buka terminal kemudian ketik sudo zypper in apache2. Untuk menjalankan servicenya, ketik diterminal (login sebagai root) systemctl start apache2.service
- PHP5, buka terminal kemudian ketik sudo zypper in php5 php5-mysql apache2-mod_php5
- MariaDB, buka terminal kemudian ketik sudo zypper in mariadb mariadb-tools. Untuk menjalankan servicenya, ketik (login sebagai root) systemctl start mysql.service
- Jika ingin menginstal phpMyAdmin ketik di terminal, sudo zypper in phpMyAdmin. Untuk mengaksesnya (misal lokal) ketik http://localhost/phpMyAdmin/.
Setelah service yang dibutuhkan dijalankan, sekarang untuk mengetesnya ketik di browser http://localhost/, jika hasilnya seperti gambar berikut, maka langkah pertama berhasil.

Sebelum melanjutkan ke langkah selanjutnya, mengenai proses instalasi web server juga bisa dilakukan melalui YaST, berikut langkah – langkahnya.
- Buka YaST – Software – Software Management
- Ubah pilihan filter menjadi Patterns
- Scrolldown pilihan ke bawah, ceklist group Web and Lamp Server
- Pilih paket yang akan diinstal, atau jika tidak mau repot openSUSE secara default sudah menceklist semua paket yang tersedia di group tersebut.
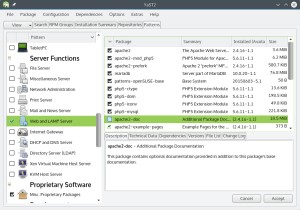
- Pilih Accept untuk menginstalnya, pastikan tersedia koneksi internet
Pada saat pengetesan melalui browser maka akan diperoleh keterangan Access forbidden!. Hal ini dikarenakan secara default openSUSE akan mengaktifkan folder yang memiliki file index.html. Untuk mengatasi permasalahan ini, Anda hanya perlu mengubah file default-server.conf yang terletak di direktori /etc/apache2. Ubah baris Option None menjadi Option All.
Folder utama dari web server terletak di /srv/www/htdocs, meski demikian Anda bisa mengubahnya ke direktori tertentu (misal diset ke direktori home). Caranya mengubah baris pada file yang sama (default-server.conf), pada baris DocumentRoot “/srv/www/htdocs” dan <Directory “/srv/www/htdocs”>, /srv/www/htdocs diganti sesuai direktori yang anda inginkan misal /home/muksidin/web. Setelah itu nyalakan ulang service servernya dengan mengetik systemctl restart apache2.service.
Setelah konfigurasi diatas selesai, namun index.php tidak bisa menampilkan halaman yang semestinya seperti pada gambar berikut.

Jalankan perintah a2enmod php5 di terminal dengan login sebagai root.
Livros - As Fontes do Paraíso
Première milestone Leap et nouveau site officiel
Ça y est, la première version de développement d’openSUSE Leap est sortie : la milestone 1.
La version finale sortira en Novembre, elle sera numérotée 42.1 et sera la première version standard (par rapport à Tumbleweed qui est en développement perpétuel) à être en partie basée sur SUSE Linux Entreprise.
Elle apporte de nombreuses mises à jour par rapport à la version 13.2 actuelle : le noyau Linux 4.1, GNOME 3.16, KDE Plasma 5, Firefox 38 et de nombreux autres logiciels mis à jour.
Voici quelques captures, pour l’instant très proches de Tumbleweed :
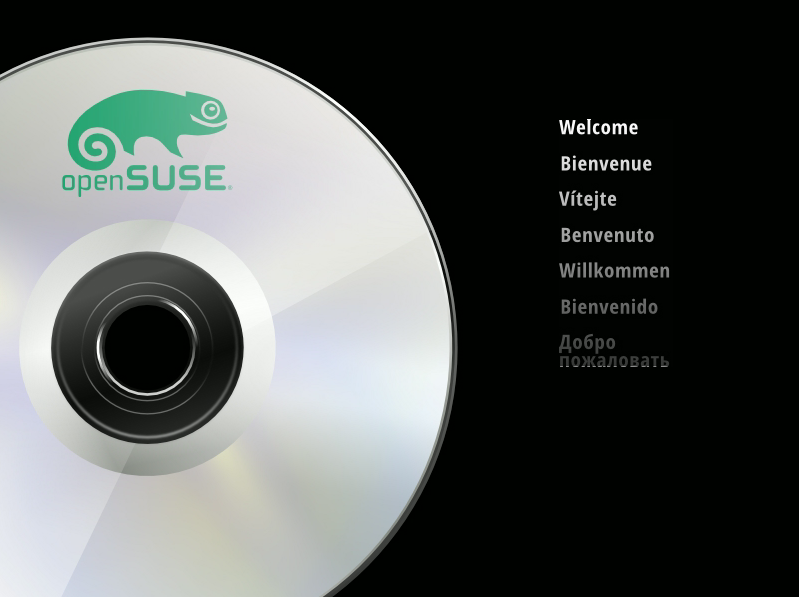
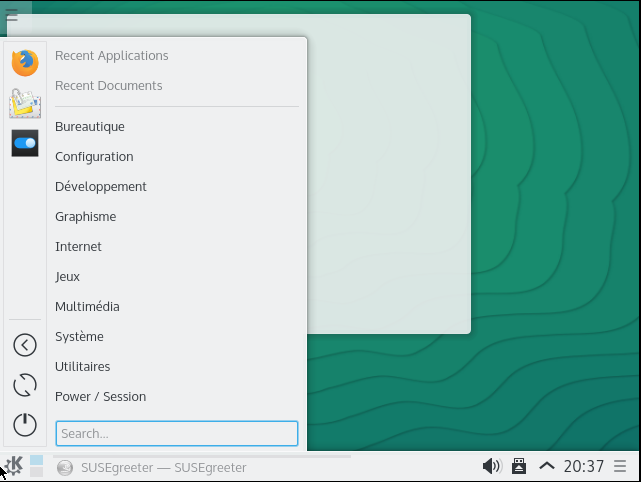
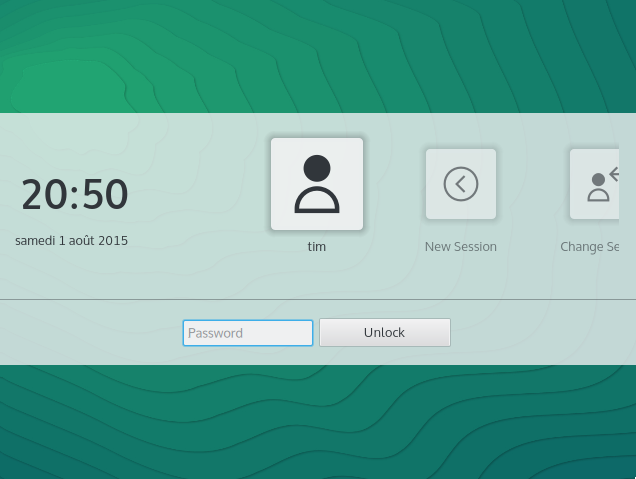
Depuis le démarrage du projet 5450 paquets ont été compilés, dont 1150 proviennent de SUSE Linux Entreprise 12 et le reste d’openSUSE Tumbleweed.
N’hésitez pas à la tester en la téléchargeant ici. Si vous trouvez un bug et qu’il n’est pas dans la liste des bugs connus, vous pouvez le signaler.
Autre nouvelle, un énorme changement se prépare pour la page d’accueil du site officiel d’openSUSE :

Vous pouvez voir la démo ici : http://cyntss.github.io/opensuse-landing-page/
Toutes les infos à cette adresse : https://github.com/cyntss/opensuse-landing-page
En parlant du site web, openSUSE Leap a déjà droit à son portail : https://en.opensuse.org/Portal:Leap et à une page d’info : https://en.opensuse.org/openSUSE:Leap. On voit que le projet redonne de la motivation à toutes les équipes !
—
Syvolc
Sources :
Article Alionet.org : https://www.alionet.org/content.php?695-Premi%C3%A8re-milestone-d-openSUSE-Leap
Annonce officielle : https://news.opensuse.org/2015/07/24/opensuse-releases-first-milestone-for-leap-2/

CALL FOR GNOME.ASIA SUMMIT 2016 HOST PROPOSALS

CALL FOR GNOME.ASIA SUMMIT 2016 HOST PROPOSALS
- Local community support for hosting the conference.
- Venue details. Information about infrastructure and facilities to hold the conference should be provided.
- Preliminary schedule with main program & different activities.
- Information about how Internet connectivity will be managed.
- Lodging choices ranging from affordable housing to nicer hotels, and information about distances between the venue and lodging options.
- The availability of restaurants or the organization of catering on-site, cost of food/soft drinks/beer.
- The availability and cost of travel from major Asian and European cities.
- Local industries, universities and government support.
- Plans for local sponsorship's

Smaller Docker containers for Go apps
At litl we use Docker images to package and deploy our Room for More services, using our Galaxy deployment platform. This week I spent some time looking into how we might reduce the size of our images and speed up container deployments.
Most of our services are in Go, and thanks to the fact that compiled Go binaries are mostly-statically linked by default, it’s possible to create containers with very few files within. It’s surely possible to use these techniques to create tighter containers for other languages that need more runtime support, but for this post I’m only focusing on Go apps.
The old way
We built images in a very traditional way, using a base image built on top of Ubuntu with Go 1.4.2 installed. For my examples I’ll use something similar.
Here’s a Dockerfile:
FROM golang:1.4.2
EXPOSE 1717

RUN go get github.com/joeshaw/qotd

# Don't run network servers as root in Docker
USER nobody

CMD qotd
The golang:1.4.2 base image is built on top of Debian Jessie. Let’s
build this bad boy and see how big it is.
$ docker build -t qotd .
...
Successfully built ae761b93e656

$ docker images qotd
REPOSITORY     TAG         IMAGE ID          CREATED           VIRTUAL SIZE
qotd           latest      ae761b93e656      3 minutes ago     520.3 MB
Yikes. Half a gigabyte. Ok, what leads us to a container this size?
$ docker history qotd
IMAGE               CREATED BY                                      SIZE
ae761b93e656        /bin/sh -c #(nop) CMD ["/bin/sh" "-c" "qotd"]   0 B
b77d0ca3c501        /bin/sh -c #(nop) USER [nobody]                 0 B
a4b2a01d3e42        /bin/sh -c go get github.com/joeshaw/qotd       3.021 MB
c24802660bfa        /bin/sh -c #(nop) EXPOSE 1717/tcp               0 B
124e2127157f        /bin/sh -c #(nop) COPY file:56695ddefe9b0bd83   2.481 kB
69c177f0c117        /bin/sh -c #(nop) WORKDIR /go                   0 B
141b650c3281        /bin/sh -c #(nop) ENV PATH=/go/bin:/usr/src/g   0 B
8fb45e60e014        /bin/sh -c #(nop) ENV GOPATH=/go                0 B
63e9d2557cd7        /bin/sh -c mkdir -p /go/src /go/bin && chmod    0 B
b279b4aae826        /bin/sh -c #(nop) ENV PATH=/usr/src/go/bin:/u   0 B
d86979befb72        /bin/sh -c cd /usr/src/go/src && ./make.bash    97.4 MB
8ddc08289e1a        /bin/sh -c curl -sSL https://golang.org/dl/go   39.69 MB
8d38711ccc0d        /bin/sh -c #(nop) ENV GOLANG_VERSION=1.4.2      0 B
0f5121dd42a6        /bin/sh -c apt-get update && apt-get install    88.32 MB
607e965985c1        /bin/sh -c apt-get update && apt-get install    122.3 MB
1ff9f26f09fb        /bin/sh -c apt-get update && apt-get install    44.36 MB
9a61b6b1315e        /bin/sh -c #(nop) CMD ["/bin/bash"]             0 B
902b87aaaec9        /bin/sh -c #(nop) ADD file:e1dd18493a216ecd0c   125.2 MB
This is not a very lean container, with a lot of intermediate layers. To reduce the size of our containers, we did two additional steps:
(1) Every repo has a clean.sh script that is run inside the
container after it is initially built. Here’s part of a script for
one of our Ubuntu-based Go images:
apt-get purge -y software-properties-common byobu curl git htop man unzip vim \
python-dev python-pip python-virtualenv python-dev python-pip python-virtualenv \
python2.7 python2.7 libpython2.7-stdlib:amd64 libpython2.7-minimal:amd64 \
libgcc-4.8-dev:amd64 cpp-4.8 libruby1.9.1 perl-modules vim-runtime \
vim-common vim-tiny libpython3.4-stdlib:amd64 python3.4-minimal xkb-data \
xml-core libx11-data fonts-dejavu-core groff-base eject python3 locales \
python-software-properties supervisor git-core make wget cmake gcc bzr mercurial \
libglib2.0-0:amd64 libxml2:amd64

apt-get clean autoclean
apt-get autoremove -y

rm -rf /usr/local/go
rm -rf /usr/local/go1.*.linux-amd64.tar.gz
rm -rf /var/lib/{apt,dpkg,cache,log}/
rm -rf /var/{cache,log}
(2) We run Jason Wilder’s excellent
docker-squash
tool. It is especially helpful when combined with the clean.sh
script above.
These steps are time intensive. Cleaning and squashing take minutes and dominate the overall build and deploy time.
In the end, we have built a mostly-statically linked Go binary sitting alongside an entire Debian or Ubuntu operating system. We can do better.
Separating containers for building and running
There have been a handful of good blog posts about how to do this in the past, including one by Atlassian this week. Here’s another one from Xebia, and another from Codeship.
However, all these posts focus on building a completely static Go
binary. This means you eschew cgo by setting CGO_ENABLED=0 and
the benefits that go along with it. On OS X, you lose access to the
system’s SSL root CA certificates. On Linux, user.Current() from
the os/user package no longer works. And in both cases you must use
the Go DNS resolver rather than the one provided by the operating
system. If you are not testing your application with CGO_ENABLED=0
prior to building a Docker container with it then you are not testing
the code you ship.
We can use a few purpose-built base Docker images and the tricks from Jamie McCrindle’s Dockerception to build two separate Docker containers: one larger container to build our software and another smaller one to run it.
The builder
We create a Dockerfile.build, which is responsible for initializing
the build environment and building the software:
FROM golang:1.4.2

RUN go get github.com/joeshaw/qotd
COPY / Dockerfile.run

# This command outputs a tarball which can be piped into
# `docker build -f Dockerfile.run -`
CMD tar -cf - -C / Dockerfile.run -C $GOPATH/bin qotd
This container, when run, will output a tarball to standard out,
containing only our qotd binary and Dockerfile.run, used to build
the runner.
Dynamically linked binary
Notice that we did not set CGO_ENABLED=0 here, so our binary is
still dynamically linked against GNU libc:
$ ldd $GOPATH/bin/qotd
	linux-vdso.so.1 (0x00007ffea6b8a000)
	libpthread.so.0 => /lib/x86_64-linux-gnu/libpthread.so.0 (0x00007f6e76e50000)
	libc.so.6 => /lib/x86_64-linux-gnu/libc.so.6 (0x00007f6e76aa7000)
        /lib64/ld-linux-x86-64.so.2 (0x00007f6e7706d000)
We need to run this binary in an environment that has glibc
available to us. That means we cannot use stock BusyBox (which uses
uClibc) or Alpine (which uses musl). However, the BusyBox
distribution that ships with Ubuntu is linked against glibc, and
that’ll be the foundation for our running container.
The busybox:ubuntu-14.04 image only has a root user, but you should
never run network-facing servers as root, even in a container. Use
my joeshaw/busybox-nonroot
image
— which adds a nobody user with UID 1 — instead.
The runner
Now we create a Dockerfile.run, which is responsible for creating
the environment in which to run our app:
FROM joeshaw/busybox-nonroot
EXPOSE 1717

COPY qotd /bin/qotd

USER nobody
CMD qotd
Putting them together
First, create the builder image:
docker build -t qotd-builder -f Dockerfile.build .
Next, run the builder container, piping its output into the creation of the runner container:
docker run --rm qotd-builder | docker build -t qotd -f Dockerfile.run -
Now we have a qotd container which has the basic BusyBox
environment, plus our qotd binary. The size?
$ docker images qotd
REPOSITORY     TAG         IMAGE ID          CREATED           VIRTUAL SIZE
qotd           latest      92e7def8f105      3 minutes ago     8.611 MB
Under 9 MB. Much improved. Better still, it doesn’t require squashing, which saves us a lot of time.
Conclusion
In this example, we were able to go from a 500 MB image built from
golang:1.4.2 and containing a whole Debian installation down to a 9
MB image of just BusyBox and our binary. That’s a 98% reduction in
size.
For one of our real services at litl, we reduced the image size from
300 MB (squashed) to 25 MB and the time to build and deploy the
container from 8 minutes to 2. That time is now dominated by building
the container and software, and not by cleaning and squashing the
resulting image. We didn’t have to give up on using cgo and
glibc, as some of its features are essential to us. If you’re using
Docker to deploy services written in Go, this approach can save you a
lot of time and disk space. Good luck!
In der Deinen Arme
Im Gedenken an meine Großmutter.
Ungeachtet all der Frühling Blüten
Warst Du müd' dem täglich’ brüten,
Der Sehnsucht nachzufolgen jenen,
Den Vermissten, den zu früh Gegangenen.

Doch bei der Erde Komm’ und Geh’n,
Hast auch Du nun Deinen Gott geseh’n
Und viele, die mir so lieb und dir so teuer -
Es brennt nicht mehr Dein Lebensfeuer.

So ist der Hinterblieb’nen Trauer nu’
Dein Eintritt in des ew’ge Garten Ruh’
Ein Trost nach all der Jahre Sehnen
Dich in der Deinen Arme zu wähnen.
Für Oma
v...