
 Member
 Diamond_gr
Travel Support Program presentation video from oSC15

With this post, I would like to thank Andy Waafa for presenting Travel Support Program at openSUSE Conference 2015 at Den Haag.
Unfortunately, I couldn't make it to the conference due to family health problems (everything will be fine by the end of June 2015).
For those of you who didn't make it to the conference, here is the presentation.
Thank you Andy for helping me, Izabel and Marcel.

Working remotely as a Software Engineer


SUSE Ruling the Stack in Vancouver

Last week during the the OpenStack Summit in Vancouver, Intel organized a Rule the Stack contest. That's the third one, after Atlanta a year ago and Paris six months ago. In case you missed earlier episodes, SUSE won the two previous contests with Dirk being pretty fast in Atlanta and Adam completing the HA challenge so we could keep the crown. So of course, we had to try again!
For this contest, the rules came with a list of penalties and bonuses which made it easier for people to participate. And indeed, there were quite a number of participants with the schedule for booking slots being nearly full. While deploying Kilo was a goal, you could go with older releases getting a 10 minutes penalty per release (so +10 minutes for Juno, +20 minutes for Icehouse, and so on). In a similar way, the organizers wanted to see some upgrade and encouraged that with a bonus that could significantly impact the results (-40 minutes) — nobody tried that, though.
And guess what? SUSE kept the crown again. But we also went ahead with a new challenge: outperforming everyone else not just once, but twice, with two totally different methods.
For the super-fast approach, Dirk built again an appliance that has everything pre-installed and that configures the software on boot. This is actually not too difficult thanks to the amazing Kiwi tool and all the knowledge we have accumulated through the years at SUSE about building appliances, and also the small scripts we use for the CI of our OpenStack packages. Still, it required some work to adapt the setup to the contest and also to make sure that our Kilo packages (that were brand new and without much testing) were fully working. The clock result was 9 minutes and 6 seconds, resulting in a negative time of minus 10 minutes and 54 seconds (yes, the text in the picture is wrong) after the bonuses. Pretty impressive.
But we also wanted to show that our product would fare well, so Adam and I started looking at this. We knew it couldn't be faster than the way Dirk picked, and from the start, we targetted the second position. For this approach, there was not much to do since this was similar to what he did in Paris, and there was work to update our SUSE OpenStack Cloud Admin appliance recently. Our first attempt failed miserably due to a nasty bug (which was actually caused by some unicode character in the ID of the USB stick we were using to install the OS... we fixed that bug later in the night). The second attempt went smoother and was actually much faster than we had anticipated: SUSE OpenStack Cloud deployed everything in 23 minutes and 17 seconds, which resulted in a final time of 10 minutes and 17 seconds after bonuses/penalties. And this was with a 10 minutes penalty due to the use of Juno (as well as a couple of minutes lost debugging some setup issue that was just mispreparation on our side). A key contributor to this result is our use of Crowbar, which we've kept improving over time, and that really makes it easy and fast to deploy OpenStack.
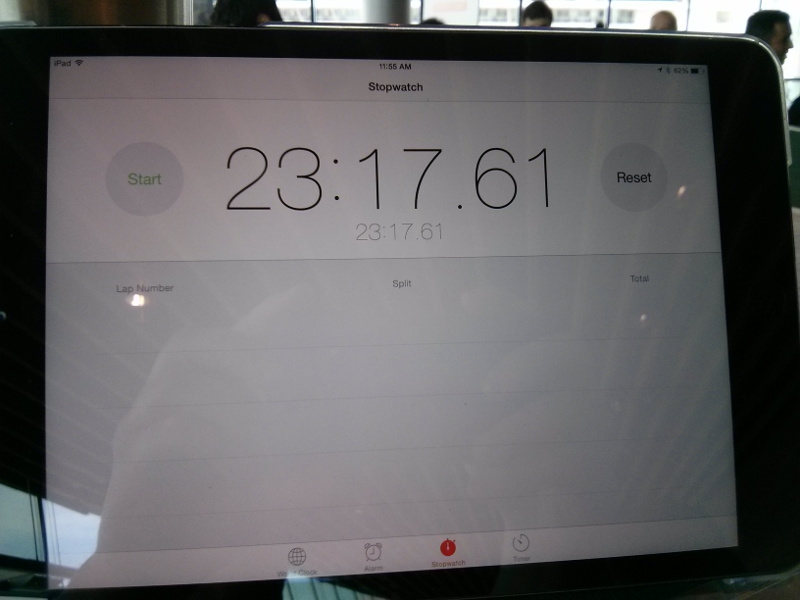
Wall-clock time for SUSE OpenStack Cloud
These two results wouldn't have been possible without the help of Tom and Ralf, but also without the whole SUSE OpenStack Cloud team that works on a daily basis on our product to improve it and to adapt it to the needs of our customers. We really have an awesome team (and btw, we're hiring)!
For reference, three other contestants succeeded in deploying OpenStack, with the fastest of them ending at 58 minutes after bonuses/penalties. And as I mentioned earlier, there were even more contestants (including some who are not vendors of an OpenStack distribution), which is really good to see. I hope we'll see even more in Tokyo!

Results of the Rule the Stack contest
Also thanks to Intel for organizing this; I'm sure every contestant had fun and there was quite a good mood in the area reserved for the contest.
Update: See also the summary of the contest from the organizers.
Install ddclient on your openSUSE Raspberry Pi
1. First of all, install the program.
2. Create the confing file
with the following content
timeout=10
syslog=no # log update msgs to syslog
#mail=root # mail all msgs to root
#mail-failure=root # mail failed update msgs to root
pid=/var/run/ddclient.pid # record PID in file.
ssl=yes # use ssl-support. Works with
# ssl-library
use=if, if=eth0
server=freedns.afraid.org
protocol=freedns
login=login_name
password=the_password
somedomain.mooo.com
Change the ones that are in bold letters.
3. Start the service
Reboot
Upgrade your openSUSE Raspberry Pi from 13.1 to 13.2

We've seen how to create an SD card. I used the 13.1 version. The wiki page https://en.opensuse.org/HCL:Raspberry_Pi is not very clear (to me) about resize partitions. So I tried to upgrade the version 13.1. Here what I did.
1. Check if the update repository already exists and is enabled.
You should have the following enabled
If not, then add it
2. Refresh and update your system
3. Remove all third party/OBS repos you no longer need.
# Remove with
$ zypper rr (alias or number)
4. Change all remaining repo URLs to the new version of the distribution (needs to be run as root).
5. Change the repos.
6. Refresh new repositories (you might be asked to accept new gpg key)
If you haven't removed third party/OBS repositories you may encounter some errors as these repositories may not exist yet or they may have different unguessable URL. It is always recommended to remove them and add their newer version after upgrade.
7. Upgrade
Now you have to wait. Reboot at the end, just to be sure that everything went smooth.
Run copy.com on your openSUSE Raspberry Pi
The cloud service I prefer is always ownCloud.
Here I used http://www.copy.com. It provides 15GB of disk but you can increase it.
First of all download the file
Then extract it
This will create a folder called “copy,” and in it there will be three sub-folders: “armv6h,” “x86,” and “x86_64.” The first one contains the Copy client binaries for the Raspberry Pi, the second contains the Copy client for 32-bit Linux on a PC, and the third the same client but for 64-bit Linux PCs.
$ cd armv6h
Now there are 2 ways of using copy. The CopyCmd tool and CopyConsole.
CopyCmd
List of the directories
Upload all content of local /home/user/directory/ to remote /directory
CopyConsole
The CopyConsole tool keeps a folder on your Raspberry Pi synchronized with the data on Copy.com.
The sync app runs in the background and is started like this:
This will sync the local /home/user/directory to copy.com. If you delete something from there, it'll delete from local folder as well.
Remeber to run this command everytime you restart your pi. It's better to run it manually because there is username and password that are personal (unless you created an account just for your raspberry pi).
Make your openSUSE Raspberry Pi a seedbox
Here I will show you how to setup Transmission, vftpd and suggestions for Android programs.
First of all, download and create the openSUSE SD card (resize your SD card to full size or you can mount the extra size as extra partition. Since it's not something important, then you can use full size of your SD card).
Then setup the dynamic dns service (see previous posts).
Finally set a static IP (to use it with port forward of your router).
First install transmission:
Create 2 folders for incomplete torrents and completed torrents:
Configure proper permissions for transmission:
$ chgrp transmission /torrents/complete
$ chmod 770 /torrents/incomplete
$ chmod 777 /torrents/complete
Now edit transmission settings.json file using:
$ rm /var/lib/transmission/.config/transmission/settings.json
and
$ nano /var/lib/transmission/.config/transmission/settings.json
Here is the content of your file:
"alt-speed-down": 50,
"alt-speed-enabled": false,
"alt-speed-time-begin": 540,
"alt-speed-time-day": 127,
"alt-speed-time-enabled": false,
"alt-speed-time-end": 1020,
"alt-speed-up": 50,
"bind-address-ipv4": "0.0.0.0",
"bind-address-ipv6": "::",
"blocklist-enabled": false,
"blocklist-url": "http://www.example.com/blocklist",
"cache-size-mb": 4,
"dht-enabled": false,
"download-dir": "/torrents/complete",
"download-limit": 100,
"download-limit-enabled": 0,
"download-queue-enabled": true,
"download-queue-size": 5,
"encryption": 1,
"idle-seeding-limit": 30,
"idle-seeding-limit-enabled": false,
"incomplete-dir": "/torrents/incomplete",
"incomplete-dir-enabled": true,
"lpd-enabled": false,
"max-peers-global": 200,
"message-level": 2,
"peer-congestion-algorithm": "",
"peer-limit-global": 91,
"peer-limit-per-torrent": 150,
"peer-port": 51413,
"peer-port-random-high": 65535,
"peer-port-random-low": 49152,
"peer-port-random-on-start": false,
"peer-socket-tos": "default",
"pex-enabled": false,
"port-forwarding-enabled": true,
"preallocation": 1,
"prefetch-enabled": 1,
"queue-stalled-enabled": true,
"queue-stalled-minutes": 30,
"ratio-limit": 2,
"ratio-limit-enabled": false,
"rename-partial-files": true,
"rpc-authentication-required": true,
"rpc-bind-address": "0.0.0.0",
"rpc-enabled": true,
"rpc-password": "{2dc2c41724aab07ccc301e97f56360cb35f8ba1fGVVrdHDX",
"rpc-port": 9091,
"rpc-url": "/transmission/",
"rpc-username": "transmission",
"rpc-whitelist": "*.*.*.*",
"rpc-whitelist-enabled": false,
"scrape-paused-torrents-enabled": true,
"script-torrent-done-enabled": false,
"script-torrent-done-filename": "",
"seed-queue-enabled": false,
"seed-queue-size": 10,
"speed-limit-down": 250,
"speed-limit-down-enabled": true,
"speed-limit-up": 0,
"speed-limit-up-enabled": true,
"start-added-torrents": true,
"trash-original-torrent-files": false,
"umask": 18,
"upload-limit": 100,
"upload-limit-enabled": 0,
"upload-slots-per-torrent": 14,
"utp-enabled": true
}
Username: transmission
Password: transmission
Port: 9091
Start and enable the service.
$ systemctl enable transmission-daemon
You're done. All you have to do is to open your browser to http://RASPI.IP.ADDRESS:9091/ and use the login/password (default for above config transmission/transmission)
Let's say that the file is i your pi disk. You're not at home. How can you check it? Maybe the easiest way is to setup an FTP server. Maybe the best program is vsftpd. You can install it:
Create a folder for ftp users (if it's not there).
Create a group called ftp-users.
Create a sample user called seedbox with home directory /srv/ftp/, and assign the user to ftp-users group.
Set password for the new user.
Now you should change few things:
And uncomment:
write_enable=YES
Start the service and you're done:
$ systemctl enable vsftpd
Personally I use the program filezilla but you can also use the Firefox addon FireFTP.
OK, you installed torrent server. How can you access the downloaded files from your computer? Well it's easy. Just install SAMBA. For that reason, I followed the tutorial here.
First of all, install SAMBA.
Then all you have to do is to change SAMBA configuration file.
$ nano /etc/samba/smb.cnf
Just add the following lines:
comment = Public Shares
path = /torrents/complete
writeable = Yes
only guest = Yes
create mask = 0777
directory mask = 0777
browseable = Yes
public = yes
You should restart SAMBA or you can reboot your Pi.
$ systemctl enable smb nmb
Now you can access your Pi from Nautilus (check here how to do that).
If you want to use it via android phone/tablet, you can use the program Remote Transmission
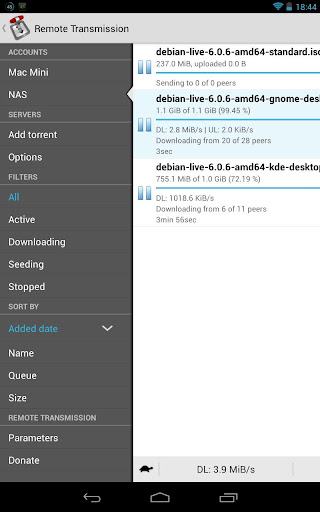
More applications are Transdrone and TorrentToise.
Set static IP on your openSUSE Raspberry Pi
In openSUSE is easier. Everything can be done under YaST.
1. Open YaST and go to Network Devices>Network Settings.

2. Then choose Statically Assigned IP Address (move with tab button and click on space button). Give the static IP you want (IP address needs to be in the same range as the router's) and as Subnet Mask, 255.255.255.0. Press Next (press enter).

3. You'll see an overview of the ethernet card.

4. Go to Hostname/DNS and add Google's DNS servers (optional).

5. Next, go to Routing and add your router ip (usually 192.168.1.1).

Now press OK, reboot and try to login again with SSH.
inadyn and openSUSE Raspberry Pi
Fortunately, there's not only this service but other services too. Just for reference, here are some (not only free):
http://www.dyndns.org
http://freedns.afraid.org
http://www.zoneedit.com
http://www.no-ip.com
http://www.easydns.com
http://www.tzo.com
http://www.3322.org
http://www.dnsomatic.com
http://www.tunnelbroker.net
http://dns.he.net/
http://www.dynsip.org
http://www.sitelutions.com
http://www.dnsexit.com
http://www.changeip.com
http://www.zerigo.com
http://www.dhis.org
https://nsupdate.info
http://duckdns.org
https://www.loopia.com
https://www.namecheap.com
https://domains.google.com
https://www.ovh.com
https://www.dtdns.com
http://giradns.com
Let's see one of them https://freedns.afraid.org. After you register, go to Dynamic DNS link (on the left top box-for members).
Add your host with type A and subdomain and domain what you like as host.
Now there's going to be a list of your host names. Right click on the Direct Link and copy the link. You should keep the alpha-numeric key. The address will be something like http://freedns.afraid.org/dynamic/update.php?[alpha-numeric-key]
Now it's time to install the client. I've found it from https://github.com/troglobit/inadyn.
1. First of all, install the needed programs to build the service.
2. Then
cd inadyn
3. Download the program from ftp://troglobit.com/inadyn/
and decompress it
4. Go to the directory
5. Compile and install
make install
6. Create the confing file
with the following content
--password PASSWORD
--update_period 3600
--forced_update_period 14400
--alias HOSTNAME,alphanumeric key
--background
--dyndns_system default@freedns.afraid.org
--syslog
The bold words are the ones you should change. Remember the alphanumeric key is the one you got from right click on the Direct Link.
7. Start the client. Create the service file.
8. Add the following content.
Description=inadyn Dynamic DNS Update Client
After=network.target
[Service]
Type=forking
ExecStart=/usr/local/sbin/inadyn
[Install]
WantedBy=multi-user.target
9. Start the service
and enable the service
10. Reboot and check if the service is running.
you should get results something like:
no-ip and openSUSE Raspberry Pi
Next step is to be sure that we can have access from outside our house (since most of the times, Raspberry Pi is located at home).
To do that we use Dynamic DNS services. A free service (so far) is No-IP. Most of the routers support it. You can use your router's service. But what if you want 2 different host names on the same IP? Let's say you have different ARM boards on the same router or you have a server etc.
1. First of all, install the needed programs to build the service (same as I did with ZNC)
2. Then
cd noip
3. Download the program
and decompress it
4. Go to the directory
5. Compile and install
make install
While it install’s the software you will prompted to enter the username & password. Once that is done it will ask you teh refresh interval … leave it.. to have the default value. You are required to answer some more questions … just ans NO an d you should be good to go.
6. Start the client
To check if the service is running, use the command:
and the results should be like
Process 1516, started as noip2, (version 2.1.9)
Using configuration from /usr/local/etc/no-ip2.conf
Last IP Address set EXTERNAL IP
Account USERNAME
configured for:
host HOSTNAME
Updating every 30 minutes via /dev/eth0 with NAT enabled.
Auto start the client on reboot
But what if you reboot? You want to start the client everytime you reboot. This can be done with systemd.
1. Create the service file.
2. Add the following content.
Description=No-IP Dynamic DNS Update Client
After=network.target
[Service]
Type=forking
ExecStart=/usr/local/bin/noip2
[Install]
WantedBy=multi-user.target
3. Start the service
and enable the service