
 Member
 mvyskocil
Ruby style method injection in Python
Ruby has a nice, but very dangerous feature called open classes. That means you can extend any class definition if you want it.
This example shows it
#!/usr/bin/ruby
class Foo
    def do_foo
        return "foo"
    end
end

aFoo = Foo.new()

puts aFoo.do_foo()

class Foo
    def do_bar
        return "bar"
    end
end

puts aFoo.do_bar()
That means you dynamically extend the definition of Foo class, so the last line prints “bar”.
Python behavior is different, because it does not allows this extending. Python just redefines a class Foo, so new instance of Foo will have a do_bar method only. But this not affected an existing ones, like Ruby does.
class Foo:

    def do_foo(self):
        return "foo"

aFoo1 = Foo()

class Bar(Foo):

    def do_nothing(self):
        pass

print issubclass(Bar, Foo)
print isinstance(aFoo1, Foo)

class Foo:

    def do_bar(self):
        return "bar"

aFoo2 = Foo()
aBar  = Bar()

print issubclass(Bar, Foo)
print isinstance(aFoo1, Foo)
print isinstance(aFoo2, Foo)

print dir(aFoo1)
print dir(aFoo2)
print dir(aBar)
But what about method injection? My solution is based on ideas of Recipe 81732: Dynamically added methods to a class.
import types

def funcToMethod(func, instance, method_name=None):
    cls = instance.__class__ if type(instance) != types.TypeType else instance
    setattr(cls, \
            method_name or func.__name__, \
            types.MethodType(func, instance, cls))
And that’s all. The funcToMethod bounds func to instances’s class and allows under method_name (default name is a same as a function one). So lets do some testing.
class Foo(object):

    def list(self):

        return [meth for meth in dir(self) if meth[:3] == 'do_' and type(getattr(self, meth)) == types.MethodType]

    def do_bar(self):

        return "bar"

def do_foo(inst):

    return "foo"

class Bar(Foo):

    def do_nothing(self):
        pass

aBar = Bar()

aFoo1 = Foo()
print aFoo1.list()
# calling it with class instead of instance is also possible and is equivalent
#funcToMethod(do_foo, Foo, "do_foo")
funcToMethod(do_foo, aFoo1, "do_foo")

aFoo2 = Foo()
print aFoo1.list()
print aFoo2.list()

print aFoo1.do_foo()
print aFoo2.do_foo()

print aBar.list()
print aBar.do_foo()
When you run the code, you will see that funcToMethod adds a new method to Foo class and this changes both existing and new instances as Ruby does too. And subclassing is not a problem, they are be affected too.
OpenSUSE Nicaragua @ FLISOL 2009
On Saturday April 25th, the Nicaraguan OpenSUSE Community joined forces with the Free Software Community (GUL-Nic) to celebrate the Latin American Free Software Installation Festival, (FLISOL in Spanish).
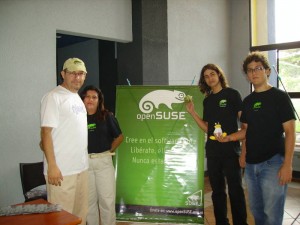
My wife Sonia and me, plus Agustin Chavarria and another SuSE fan!
The Festival took place at the Universidad Nacional de Ingenieria Campus (UNI-IES), reaching more than 300 visitors.
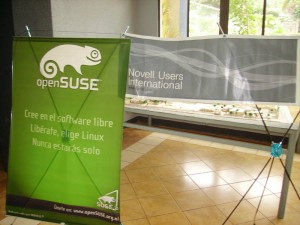
OpenSUSE and Novell banners!
Although there were several LUGs performing, OpenSUSE was one of the most solicited distros for installing. We installed the 11.1 version on 7 laptops. And as usual, all others distros were after our stuffed penguins and geekos!

My wife Sonia. Yeah, she loves the Penguin too!
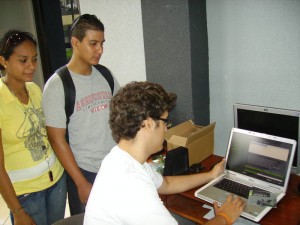
Agustin Chavarria performing the First Instalation of the event: OpenSUSE 11.1!
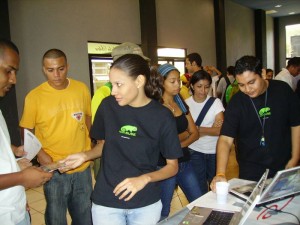
Fatima Mendoza and Hellman Taleno
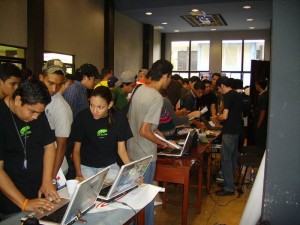
A glimpse of the crowd in the Show Room. More and more coming during the day!
We continue working spreading the word of the Green Lizards!
*Update: I corrected the name… shame of me! hehe*

How (not) to install openSUSE 11.1 on ThinkPad T-series
And now repeat after me:
A small intermezzo: though I've been pretending that I'm doing some YaST development for almost 3 years already ;-) I'm not really a technical person. I know a lot about widgets, user interface, usability and all that fancy stuff, but my knowledge of the system configuration ends in /etc/sysconfig or /etc/fstab at most. When it comes to something like system boot, I'm completely lost. At least I admit to it :-) :-D
The installation went on fine - I picked KDE4 as my default desktop environment, had the partitioner shrink Windows partition, created root and /home partition, double-checked whether I got the bootloader installation options right ("Boot from root partition" - check, "Boot from MBR" - uncheck, "Set active flag for boot partition" - check, "Write generic code to MBR" - uncheck) and watched the slideshow. The standard set of 1st stage finish scripts followed and then bang! - "Failed to install the bootloader. Try the configuration again?" (or something along those lines). Hm, if I answer "Yes" now, I'm smart enough to figure out it'll fail again, I thought, unless I change something - but what? Looking at y2log did not make me any less helpless - the last thing I saw was how bootloader uses some cryptic Perl script (/usr/lib/YaST2/bin/tp_mbr, to be exact) to detect ThinkVantage sequence in MBR and preserve it.
Nevermind, I rebooted, picked "Repair installed system" from the installation options and hoped that yast2-repair will help me find out what went wrong. Not surprisingly, it did not. It only showed me already well-known message about failed bootloader installation - quite a cruel joke :) At this point, I gave up. Trying to solve a problem where I don't understand a single bit of its principles is not that much like me. And after all, there are more pleasant ways how to spend Friday night - dancing salsa, for example ... :)
But don't get desperate, my friends - this story has a good ending. I brought my laptop to the wizard :-) I was not looking over his shoulder as he was working, so I don't know what magic spells and potions he used, but I know he did the following:
- Created partitioning setup with separate /boot partition and told the bootloader to boot from it (that was maybe the crucial point)
- Added a repository with openSUSE 11.1 updates as an add-on during installation
- Made extended partition (with swap, /, /home and /boot) 1 cylinder smaller, as ThinkVantage partition at the very end of the disk did not begin exactly at the cylinder boundary
In conclusion, I consider myself to be quite lucky that I'm surrounded by many wizards (bootloader wizard, installation wizard, KDE wizard, some wireless stuff wizards, suspend wizard, ... ) ;-) What do normal openSUSE users who can't grab their machine and bring it to a wizard do, if the same (or similar) thing happens to them? "Oh, they go to #suse and cry there. Or they simply give up and go using Ubuntu" says Darix (whom I sometimes chat with when I suffer from insomnia and he stays at work at night). Sad to say that, but it's probably true ... :-(
What’s New in 11.2: Install Debuginfo Package by build-id
With the help of a unique identifier that is stored in every binary executable matching the executable, a coredump and the corresponding debuginfo together becomes really easy. You don’t need to know the package name and the version-release string to download and install the correct debuginfo package. This is achieved by extending the linker, some additional tools and the package management itself.
The build id is a unique identifier stored in the .note.gnu.build-id note section of the executable file and loaded into the process image during run-time. Different means to compute the unique identifier are supported although the default setting is to use a 20 byte SHA1 hash of the unstripped executable (see ld linker documentation for further information about the –build-id option).
To be able to read the build id from a core dump the kernel must include the ELF header pages in file-backed private memory areas (see documentation on /proc/<pid>/coredump_filter). This is the default setting on recent openSUSE kernel versions.
Different tools can be used to print out the build-id. eu-readelf (from the elfutils package) prints the contents of the note sections given the -n option in a human readable fashion. pbuildid (from the ptools package) is prints the build-id from executables and from core files including the build-id of all loaded shared objects during the crash.
Now, zypper can be asked to install the debuginfo package that provides the debuginfo for the given build-id.
# zypper install -C "debuginfo(build-id)=b75bab63c9a25eb13264bb95f1fef190e157f865"
Loading repository data...
Reading installed packages...
Resolving package dependencies...

The following NEW package is going to be installed:
  bash-debuginfo


Overall download size: 605.0 K. After the operation, additional 2.1 M will be used.
Continue? [YES/no]: yes
Retrieving package bash-debuginfo-3.2-148.2.x86_64 (1/1), 605.0 K (2.1 M unpacked)
Retrieving: bash-debuginfo-3.2-148.2.x86_64.rpm [done]
Installing: bash-debuginfo-3.2-148.2 [done]
#
If you are really lazy you can call the following script to do the job for you:
#!/bin/bash
#
# Sample script how to install debuginfo packages by build-id
#

IDS=''
for f in "$*"; do
    case "$(file -L $f)" in
        *ELF*)
            IDS+="$(pbuildid $f 2>/dev/null | awk '{print $NF}') "
            ;;
        *)
            ;;
    esac
done

echo "Install Debuginfo for following build-ids: $IDS"

CMDLINE=""
for i in $IDS; do
    CMDLINE+="debuginfo(build-id)=$i "
done

echo $CMDLINE | xargs zypper install -C
ARM support in openSUSE Buildservice – fixed
The issue caused by the OBS worker update on arm builds is fixed by a new qemu.
This new qemu version also has fixed the Fedora 10 @ ARM build problem.
So we have the following working ARM target distros available for ARM: Fedora 10, Debian 5.0 and Ubuntu 9.04.
Have fun.

Yeah, I'm a Rails fanboy now
A lot of my day job now involves working with Ruby on Rails. At first I wasn’t sure how much I would like Rails or ruby, given that I had been doing a lot of C#/C/whatever desktop work before. Not surprisingly, though, I’ve become quite addicted. The test-driven nature of development is a welcome change — most desktop apps I worked on didn’t even have tests. The Rails community has done a great job of banging automated testing into people’s heads. Almost every tutorial, book, or random blog post I’ve seen emphasizes the importance of good automated tests. Hopefully it has helped decrease the instances of ‘snorpage’, but perhaps my co-workers would disagree :)
Anyway, I love Rails so much that I’ve converted my blog from Wordpress to Enki. Enki is more of a create-your-own-blog construction kit than a turn-key solution like Wordpress. That was one of the main reasons I chose it over Typo or Mephisto — I wanted to be able to easily hack on it.
I wrote a quick and dirty script to help me import the Wordpress posts into Enki. Any fellow Enki hackers can grab it here.
ARM support for openSUSE Buildservice and openSUSE – Status update
Its a while since I posted the status about the ongoing work for ARM support in the OBS and for an openSUSE port. It all started with my participation in the OBS development as an external contributor. Then, on Hackweek 2008, we had the idea to enforce a new solution other than the traditional methods of compiling code either natively or via a cross compiler on a host system. The idea was to give build scripts as much of the target enviroment as they need to just work without changes in the packaging definition – in order not to change thousands of package descriptions which define a linux distribution.
A lot happened in the meantime. And I can now report some significant progess in bringing the joys of OBS and openSUSE also to all the ARM users:
To accelerate the openSUSE @ ARM development itself, we want to involve more people of the community. We have an IRC Channel #opensuse-arm for OBS and openSUSE @ ARM – i invite you to visit us there. We will also find a solution to bring the needed changes into the openSUSE Factory codebase so regular build for openSUSE can take place once the base system is working. I will inform you once we have a working base system that can be used to port many other packages. The soon starting Summer of Code Project “Porting openSUSE to ARM platform” is intended as the starting point here.
The next steps are to bring in all the useful applications into OBS, so you have the wide range of applications that is already available for x86 or powerpc then also on ARM. You will see interesting things happening during the next time here. To support this, more and more of the tested ARM targets will be made available also on the public OBS. I will follow up with status updates.
ARM support in openSUSE Buildservice – currently broken
With this message I want to make you aware that the ARM builds inside OBS are currently broken. This is due to an update of the buildservice worker code on Friday. This update removes the limit of 2 GB for the build results from the buildservice. Also, the performance of the buildservice backend code has been improved for high loads with lots of new events.
We are now faced with an incompatibility of the underlying QEMU emulator with this new code to extract the build results in the combination of XEN and QEMU user mode. You can in fact see in your build logs for ARM error messages like:
… saving built packages
/usr/src/packages/DEBS/dsme-tools_0.6mer3_armel.deb
Unsupported ioctl: cmd=0x0002 (0)
FIGETBSZ: Function not implemented
Unsupported ioctl: cmd=0x80041272 (4)
We are working on a solution already. A new QEMU with this and another issues fixed is already under test and has been dropped to openSUSE:Tools:Devel/qemu-svn. I will inform you when we have this fixed in the public build service.
openSUSE-Education Live Media including official updates
Currently, the openSUSE-Education team is “playing” with the new features of the external build service. As a first result, we’re proud to announce our new live/installable DVD!
This DVD includes:
- the official updates to all packages since the openSUSE 11.1 release
- fully pre-configured, ready to run KIWI-LTSP server
- tons of applications from openSUSE Education repository
You can get it from here: http://download.opensuse.org/repositories/Education/images/iso/ – it’s called openSUSE-Edu-KIWI-LTSP-live*.iso (the openSUSE-Edu-KIWI-LTSP-live-unstable*.iso is for development only). Please watch for the Build Numbers at the end of the ISO-Name if you report bugs in our bugzilla.
Have a look at CyberOrgs blog on the most efficient ways to download the image.
[XZ]en and the art of giving compliments - part II
Needless to say more :
"Not sure how you are doing it, but you always make me smile when we are talking."
"I know how - because you are doing the same. It is then easy to smile in return."
Wish you a nice day (evening/night, depending on the timezone you are in) and if you haven't got any compliment today so far, try to give some out :)
P.S. Exceptionally, I am being positive. Enjoy it, it does not happen to me very often :D