
 Member
 baltolkien
Promo de Paco Estrada para Akademy-es 2024 de València #esLibre edition #akademyes
Me alegra compartir con vosotros la promo de Paco Estrada para Akademy-es 2024 de València #esLibre edition. Una pieza creada gracias a Paco Estrada, que ha puesto la voz, a Juan Febles, que es quien inició este tipo de promos, a David Marzal y Fernando Rosa, que es quienes lo han montado utilizando un comando de ffmpeg y han incluido la transcripción para hacerlo más accesible.
Promo de Paco Estrada para Akademy-es 2024 de València #esLibre edition #akademyes
Tener dentro del Software Libre una voz radiofónica tan nítida, potente y clara como la de Paco Estrada es un tesoro que no se puede desaprovechar.
Es por ello que le hemos pedido que nos haga una pieza para promocionar el evento, 3 minutos donde Paco explica casi todos los detalles del evento.
A continuación hemos montado un pequeño audiograma, como los que montamos tradicionalmente para promocionar las charlas como las del 2023 o 2022 (y que este año también tendremos) y se ha añadido la transcripción.
Este es el resultado:
¿Qué es Akademy-es?
Akademy-es (#akademyes, que es la etiqueta para las redes sociales) es evento más importante para los desarrolladores y simpatizantes de KDE, que se ha ido celebrando desde el 2006 con éxito creciente.
En general, las Akademy-es son el lugar adecuado para conocer a los desarrolladores, diseñadores, traductores, usuarios y empresas que mueven este gran proyecto.

En ellas se realizan ponencias, se presentan programas, se hace un poco de caja para los proyectos libres (camisetas, chapas, etc) pero sobre todo se conoce a gente muy interesante y se cargan baterías para el futuro.
Podéis repasar las anteriores ediciones en estas entradas del blog:
- Camino Akademy-es 2013: Las anteriores ediciones (I): 2006 – 2008
- Camino Akademy-es 2013: Las anteriores ediciones (II): 2009-2010
- Camino Akademy-es 2013: Las anteriores ediciones (III): 2011-2012
- Anteriores ediciones de Akademy-es (IV): 2013 y 2014
La entrada Promo de Paco Estrada para Akademy-es 2024 de València #esLibre edition #akademyes se publicó primero en KDE Blog.

Τι είναι η openSUSE Slowroll; Πως να την εγκαταστήσω;
Τι είναι;
Η Slowroll είναι μια νέα διανομή από το 2023 που βασίζεται στο Tumbleweed, αλλά "κυλάει" πιο αργά. Με μεγάλες ενημερώσεις κάθε έναν ή δύο μήνες, και συνεχείς διορθώσεις σφαλμάτων και διορθώσεις ασφαλείας καθώς εμφανίζονται.
Εγκατάσταση - Χρήση
Για αρχική εγκατάσταση, μπορείτε να χρησιμοποιήσετε το DVD iso από τη διεύθυνση http://download.opensuse.org/slowroll/iso/ αλλά να αφήσετε τα διαδικτυακά αποθετήρια απενεργοποιημένα (έτσι δεν τραβάει νεότερα πακέτα Tumbleweed από online repos). Μπορείτε επίσης να μεταβείτε απευθείας από οποιαδήποτε κυκλοφορία Leap ή Tumbleweed στο Slowroll αντικαθιστώντας τα αποθετήρια.Μετά την εγκατάσταση από DVD, πρέπει να αντικαταστήσετε το Tumbleweed με τα αποθετήρια Slowroll. Το ίδιο ισχύει όταν αλλάζετε από το Leap ή ένα παλαιότερο στιγμιότυπο του Tumbleweed στο Slowroll.
Δεν συνιστούμε τη χρήση αποθετηρίων ανάπτυξης, εκτός εάν αυτά έχουν μεταγλωττιστεί ειδικά για το Slowroll. Τα αποθετήρια τρίτων που δεν έχουν δοκιμαστεί με το Tumbleweed ενδέχεται να χαλάσουν την εγκατάστασή σας.
Το Packman μπορεί να λειτουργεί, αλλά μπορεί επίσης να χαλάει το σύστημα περιστασιακά. Υπάρχει ένα ειδικό αποθετήριο packman για το Slowroll:
Όπως το Tumbleweed, χρησιμοποιήστε το zypper dup για αναβάθμιση.
Πηγές
RedditForums.o.o
Mailing-list
Wiki
Bugzilla TBD
Ανάπτυξη
Ο bmwiedemann έκανε το σχεδιασμό και το script .Η ανάπτυξη γίνεται στο https://build.opensuse.org/project/show/openSUSE:Slowroll με τη χρήση του https://github.com/bmwiedemann/slowroll-tools
Τα μη δοκιμασμένα πακέτα μπαίνουν στη διεύθυνση https://build.opensuse.org/project/show/openSUSE:Slowroll:Staging πρώτα και ελέγχονται από το openQA (TBD)
Οι περισσότερες ενημερώσεις θα πρέπει να υποβάλλονται στο Factory και θα μετεγκατασταθούν αυτόματα στο Slowroll μετά την αποδοχή. Φροντίστε να αναφέρετε σχετικές επιδιορθώσεις CVE και αναφορές boo# σε αρχεία .changes για να επιταχύνετε τη μετεγκατάσταση. Οι άμεσες υποβολές θα πρέπει να χρειάζονται μόνο για backport επειγουσών επιδιορθώσεων που απαιτούν ενημερωμένα βασικά πακέτα στο Factory (τα οποία είναι πολύ επικίνδυνα για γρήγορη ενημέρωση)
Nuevo «Yo voy a Akademy-es 2024 de València #esLibre edition» #akademyes
El 24 y 25 de mayo se va a celebrar el mayor evento de la Asociación KDE España. Si quieres ayudar en la promoción de este evento aquí te dejo una forma de hacerlo de forma muy sencilla: comparto el nuevo «Yo voy a Akademy-es 2024 de València #esLibre edition» en tus redes sociales para que lleguemos a todo el mundo. Pon tu granito de arena para que seamos una gran montaña de conocimiento compartido.
Nuevo «Yo voy a Akademy-es 2024 de València #esLibre edition» #akademyes
Un año más… y ya no recuerdo cuantos llevamos ya, tenemos un banner expresamente creado para el evento, fruto de la ayuda desinteresada de Rosanna García, compañera y amiga de cientos horas de docencia, paciencia y terapia en forma de charla.
Gracias a sus dotes artísticas creó un banner que vamos a ir adaptando para todas las necesidades de promoción que deseemos. De hecho ya lo he utilizado en el blog para buscar patrocinadores del evento, para anunciar el programa y lo reutilicé para poner el clásico «Yo voy…» que muchos eventos utilizan. Pero no estaba bien del todo así que lo he hecho de nuevo.

El banner está inspirado en la Lonja de la Seda de Valencia o Lonja de los Mercaderes (en valenciano Llotja de la Seda o Llotja de Mercaders) es una obra maestra del gótico civil valenciano situada en el centro histórico de la ciudad de Valencia (España). (vía wikipedia)
¿Qué es Akademy-es?
Akademy-es (#akademyes, que es la etiqueta para las redes sociales) es evento más importante para los desarrolladores y simpatizantes de KDE, que se ha ido celebrando desde el 2006 con éxito creciente.
En general, las Akademy-es son el lugar adecuado para conocer a los desarrolladores, diseñadores, traductores, usuarios y empresas que mueven este gran proyecto.
En ellas se realizan ponencias, se presentan programas, se hace un poco de caja para los proyectos libres (camisetas, chapas, etc) pero sobre todo se conoce a gente muy interesante y se cargan baterías para el futuro.
Podéis repasar las anteriores ediciones en estas entradas del blog:
- Camino Akademy-es 2013: Las anteriores ediciones (I): 2006 – 2008
- Camino Akademy-es 2013: Las anteriores ediciones (II): 2009-2010
- Camino Akademy-es 2013: Las anteriores ediciones (III): 2011-2012
- Anteriores ediciones de Akademy-es (IV): 2013 y 2014
La entrada Nuevo «Yo voy a Akademy-es 2024 de València #esLibre edition» #akademyes se publicó primero en KDE Blog.
Reproducir música mediante ssh con VLC
Cómo reproducir con VLC música guardada en un equipo remoto mediante ssh

Pongamos todo en contexto. Tengo un miniPC de Slimbook en el que tengo varios servicios corriendo, además de música guardada en su disco duro.
Lo que quiero es conectarme en remoto con mi portátil y reproducir en el portátil música que tengo guardada en el miniPC. Para ello utilizaré el reproducto multimedia VLC y la conexión ssh entre ambos equipos.
Ya debes tener configurada la conexión ssh entre ambos equipos. Ahora abro el reproductor VLC en mi portátil y vamos al menú Medio → Abrir ubicación de red
En el recuadro que nos aparece para introducir la dirección del medio a reproducir metemos la siguiente utilizando el protocolo sftp que utiliza ssh:
sftp://victorhck@192.168.1.35/home/victorhck/Música
Por supuesto tu tendrás que cambiar lo que sea necesario metiendo tu nombre de usuario dirección IP local y carpeta del equipo remoto a la que quieras que VLC se conecte.
Al aceptar, VLC nos mostrará todos los archivos de dicha carpeta del equipo remoto, ya queda nevegar por los archivos para reproducir el que queramos ¡y a disfrutar de nuestra colección de música desde cualquier dispositivo de la red!
Enlaces de interés


How to install SLE-15-SP6 on NVIDIA’s Jetson AGX Orin, Jetson Orin Nano/NX and IGX Orin
This covers the installation of updated Kernel, out-of-tree nvidia kernel modules package, how to get GNOME desktop running and installation/run of glmark2 benchmark. Also it describes how to get some CUDA and TensorRT samples running. In addition it describes the firmware update on Jetson AGX Orin and Jetson Orin Nano and how to connect a serial console to Jetson Orin Nano.
Firmware Update on Jetson AGX Orin
On Jetson AGX Orin first update the firmware to Jetpack 6.1/36.4.0.
Download Driver Package (BSP) from this location. Extract Jetson_Linux_R36.4.0_aarch64.tbz2.
tar xf Jetson_Linux_R36.4.0_aarch64.tbz2Then connect with two cables your computer to the Micro-USB port and Type-C port (next to the 40pin connector) of Jetson AGX Orin.
Now switch Jetson AGX Orin to recovery mode (using your Micro-USB cable).
cd Linux_for_Tegra
sudo ./tools/board_automation/boardctl -t topo recovery
Check that Jetson AGX Orin is now in recovery mode.
lsusb
[...]
Bus 003 Device 099: ID 0955:7023 NVIDIA Corp. APX
[...]
Now flash your firmware (using the Type-C cable). Make sure you have package dtc installed, because the tool fdtoverlay is needed.
sudo ./flash.sh p3737-0000-p3701-0000-qspi externalReboot Jetson AGX Orin.
sudo ./tools/board_automation/boardctl -t topo power_onAfter reboot you should see in the Firmware setup - shown on your monitor or on your serial console - the firmware version 36.4.0-gcid-XXXXXXXX.
Firmware Update on Jetson Orin Nano
Updating the firmware on Jetson Orin Nano is similar to the process above for Jetson AGX Orin.
Unfortunately the board automation tools do not support Jetson Orin Nano. Therefore for switching this device in recovery mode instead of running boardctl you need to connect two pins or put a jumper on both respectively. These are the pins 9/10 (GND/FC REC) of the 12-pin J14 “button” header of carrier board located under the Jetson module (right below the fan next to the SD card slot).
So disconnect Jetson Orin Nano from power, then connect these pins and then reconnect power. With that the device should be in Recovery mode. Connect an USB cable to the Type-C port of Jetson Orin Nano and check if it is now in Recovery mode.
lsusb
[...]
Bus 003 Device 105: ID 0955:7523 NVIDIA Corp. APX
[...]
Now flash your firmware. Make sure you have package dtc installed, because the tool fdtoverlay is needed.
sudo ./flash.sh p3768-0000-p3767-0000-a0-qspi externalDisconnect Jetson Orin Nano from power and reconnect it to power. After reboot you should see in the Firmware setup - shown on your monitor or on your serial console - the firmware version 36.4.0-gcid-XXXXXXXX.
Serial Console on Jetson Orin Nano
In order to have a serial console on Jetson Orin Nano you need a 3.3.V USB-UART adapter/cable. Connect it to the pins 3/4/7 (RXD/TXD/GND) of the 12-pin J14 “button” header of carrier board located under the Jetson module (right below the fan next to the SD card slot).
SP6
Download SLE-15-SP6 (Arm) installation image. This you can put on a regular USB stick or on an SD card using dd command.
Boot from the USB stick/SD card, that you wrote above and install SP6. You can install via serial console or connect a monitor to the display port.
When using a connected monitor for installation
This needs for the installation a special setting in the Firmware of the machine.
--> UEFI Firmware Settings
 --> Device Manager
  --> NVIDIA Configuration
   --> Boot Configuration
    --> SOC Display Hand-Off Mode <Always>
This setting for SOC Display Hand-Off Mode will change automatically to Never later with the installation of the graphics driver.
Installation
Once grub starts you need to edit the grub entry Installation. Press e for doing this and add console=tty0 exec="date -s 2025-01-27" (when using a connected monitor for intallation) or exec="date -s 2025-01-27" (when installing on a serial console and add also console=ttyTCU0,115200 on Jetson Orin Nano) to the linux [...] line. Replace 2025-01-27 with the current date.
### When using a connected monitor for intallation
[...]
linux /boot/aarch64/linux splash=silent console=tty0 exec="date -s 2025-01-27"
[...]
### When installing on a serial console
[...]
linux /boot/aarch64/linux splash=silent exec="date -s 2025-01-27"
# On Jetson Orin Nano
linux /boot/aarch64/linux splash=silent console=ttyTCU0,115200 exec="date -s 2025-01-27"
[...]The reason for this is that during installation the driver nvvrs-pseq-rtc for the battery-backed RTC0 (Real Time Clock) is not yet available and therefore the non-battery-backed RTC1 is used, which doesn’t have the correct time set during installation. So this is a workaround to avoid a product registration failure later due to a certificate, which is not valid yet.
Then press F10 to continue to boot.
Make sure you select the following modules during installation:
- Basesystem (enough for just installing the kernel driver)
- Containers (needed for podman for CUDA libraries)
- Desktop Applications (needed for running a desktop)
- Development Tools (needed for git for CUDA samples)
Select SLES with GNOME for installation.
In Clock and Time Zone dialogue chose Other Settings to open Change Date and Time dialogue. There enable Synchronize with NTP Server.
--> Clock and Time Zone dialogue
 --> Other Settings
  --> Change Date and Time dialogue
   --> (x) Synchronize with NTP Server
Kernel + KMP drivers
After installation update kernel and install our KMP (kernel module package) for all nvidia kernel modules.
Installation on NVIDIA’s Jetson AGX Orin and Jetson Orin Nano/NX
The KMP is available as a driver kit via the SolidDriver Program. For installation please use the following commands:
# flavor either default or 64kb (check with `uname -r` command)
sudo zypper up kernel-<flavor>
sudo zypper ar https://drivers.suse.com/nvidia/Jetson/NVIDIA_JetPack_6.1/sle-15-sp6-aarch64/1.0/install jetson-kmp
sudo zypper ar https://drivers.suse.com/nvidia/Jetson/NVIDIA_JetPack_6.1/sle-15-sp6-aarch64/1.0/update  jetson-kmp-update
sudo zypper ref
sudo zypper in -r jetson-kmp nvidia-jetson-kmp-<flavor>
Installation on NVIDIA IGX Orin
We plan to make the KMP available as a driver kit via the SolidDriver Program. For now please install an updated kernel and the KMP after checking the build status (type ‘igx’ in Search… field; rebuilding can take a few hours!) from our open buildservice:
# flavor either default or 64kb (check with `uname -r` command)
sudo zypper up kernel-<flavor>
sudo zypper ar https://download.opensuse.org/repositories/X11:/XOrg/SLE_15_SP6/ igx-kmp
sudo zypper ref
sudo zypper in -r jetson-kmp nvidia-igx-kmp-<flavor>
Userspace/Desktop
Installation on NVIDIA’s Jetson AGX Orin and Jetson Orin Nano/NX
Please install userspace on these devices by using the following commands:
sudo zypper ar https://repo.download.nvidia.com/jetson/sle15-sp6/jp6.1/ jetson-userspace
sudo zypper ref
sudo zypper in nvidia-jetpack-all
Installation on NVIDIA IGX Orin
Unfortunately installing the userspace on this device is still a non-trivial task.
Download Bootloader(QSPI) Package from this location (select IGX-SW 1.1.1 Production Release). Extract Jetson_Linux_R36.4.5_aarch64.tbz2.
tar xf Jetson_Linux_R36.4.5_aarch64.tbz2Then you need to convert debian packages from this content into tarballs.
pushd Linux_for_Tegra
sed -i -e 's/lbzip2/bzip2/g' -e 's/-I zstd //g' nv_tools/scripts/nv_repackager.sh
./nv_tools/scripts/nv_repackager.sh -o ./nv_tegra/l4t_tar_packages --convert-all
popd
From the generated tarballs you only need these:
nvidia-l4t-3d-core_36.4.5-20250205154014_arm64.tbz2
nvidia-l4t-camera_36.4.5-20250205154014_arm64.tbz2
nvidia-l4t-core_36.4.5-20250205154014_arm64.tbz2
nvidia-l4t-cuda_36.4.5-20250205154014_arm64.tbz2
nvidia-l4t-firmware_36.4.5-20250205154014_arm64.tbz2
nvidia-l4t-gbm_36.4.5-20250205154014_arm64.tbz2
nvidia-l4t-multimedia-utils_36.4.5-20250205154014_arm64.tbz2
nvidia-l4t-multimedia_36.4.5-20250205154014_arm64.tbz2
nvidia-l4t-nvfancontrol_36.4.5-20250205154014_arm64.tbz2
nvidia-l4t-nvml_36.4.5-20250205154014_arm64.tbz2
nvidia-l4t-nvpmodel_36.4.5-20250205154014_arm64.tbz2
nvidia-l4t-nvsci_36.4.5-20250205154014_arm64.tbz2
nvidia-l4t-pva_36.4.5-20250205154014_arm64.tbz2
nvidia-l4t-tools_36.4.5-20250205154014_arm64.tbz2
nvidia-l4t-vulkan-sc-sdk_36.4.5-20250205154014_arm64.tbz2
nvidia-l4t-wayland_36.4.5-20250205154014_arm64.tbz2
nvidia-l4t-x11_36.4.5-20250205154014_arm64.tbz2
nvidia-l4t-nvml_36.4.5-20250205154014_arm64.tbz2
And from this tarball nvidia-l4t-init_36.4.5-20250205154014_arm64.tbz2 you only need these files:
etc/asound.conf.tegra-ape
etc/asound.conf.tegra-hda-jetson-agx
etc/asound.conf.tegra-hda-jetson-xnx
etc/nvidia-container-runtime/host-files-for-container.d/devices.csv
etc/nvidia-container-runtime/host-files-for-container.d/drivers.csv
etc/nvsciipc.cfg
etc/sysctl.d/60-nvsciipc.conf
etc/systemd/nv_nvsciipc_init.sh
etc/systemd/nvpower.sh
etc/systemd/nv.sh
etc/systemd/system.conf.d/watchdog.conf
etc/systemd/system/multi-user.target.wants/nv_nvsciipc_init.service
etc/systemd/system/multi-user.target.wants/nvpower.service
etc/systemd/system/multi-user.target.wants/nv.service
etc/systemd/system/nv_nvsciipc_init.service
etc/systemd/system/nvpower.service
etc/systemd/system/nv.service
etc/udev/rules.d/99-tegra-devices.rules
usr/share/alsa/cards/tegra-ape.conf
usr/share/alsa/cards/tegra-hda.conf
usr/share/alsa/init/postinit/00-tegra.conf
usr/share/alsa/init/postinit/01-tegra-rt565x.conf
usr/share/alsa/init/postinit/02-tegra-rt5640.conf
So first let’s repackage nvidia-l4t-init_36.4.5-20250205154014_arm64.tbz2:
pushd Linux_for_Tegra/nv_tegra/l4t_tar_packages/
cat > nvidia-l4t-init.txt << EOF
etc/asound.conf.tegra-ape
etc/asound.conf.tegra-hda-jetson-agx
etc/asound.conf.tegra-hda-jetson-xnx
etc/nvidia-container-runtime/host-files-for-container.d/devices.csv
etc/nvidia-container-runtime/host-files-for-container.d/drivers.csv
etc/nvsciipc.cfg
etc/sysctl.d/60-nvsciipc.conf
etc/systemd/nv_nvsciipc_init.sh
etc/systemd/nvpower.sh
etc/systemd/nv.sh
etc/systemd/system.conf.d/watchdog.conf
etc/systemd/system/multi-user.target.wants/nv_nvsciipc_init.service
etc/systemd/system/multi-user.target.wants/nvpower.service
etc/systemd/system/multi-user.target.wants/nv.service
etc/systemd/system/nv_nvsciipc_init.service
etc/systemd/system/nvpower.service
etc/systemd/system/nv.service
etc/udev/rules.d/99-tegra-devices.rules
usr/share/alsa/cards/tegra-ape.conf
usr/share/alsa/cards/tegra-hda.conf
usr/share/alsa/init/postinit/00-tegra.conf
usr/share/alsa/init/postinit/01-tegra-rt565x.conf
usr/share/alsa/init/postinit/02-tegra-rt5640.conf
EOF
tar xf nvidia-l4t-init_36.4.5-20250205154014_arm64.tbz2
rm nvidia-l4t-init_36.4.5-20250205154014_arm64.tbz2
tar cjf nvidia-l4t-init_36.4.5-20250205154014_arm64.tbz2 $(cat nvidia-l4t-init.txt)
popd
On NVIDIA IGX Orin with dedicated graphics card (dGPU systems) you need to get rid of some files due to conflicts with dGPU userspace drivers.
# repackage nvidia-l4t-x11_ package
tar tf nvidia-l4t-x11_36.4.5-20250205154014_arm64.tbz2 | grep -v /usr/bin/nvidia-xconfig \
  > nvidia-l4t-x11_36.4.5-20250205154014.txt
tar xf  nvidia-l4t-x11_36.4.5-20250205154014_arm64.tbz2
rm      nvidia-l4t-x11_36.4.5-20250205154014_arm64.tbz2
tar cjf nvidia-l4t-x11_36.4.5-20250205154014_arm64.tbz2 $(cat nvidia-l4t-x11_36.4.5-20250205154014.txt)

# repackage nvidia-l4t-3d-core_ package
tar tf nvidia-l4t-3d-core_36.4.5-20250205154014_arm64.tbz2 | \
  grep -v \
       -e /etc/vulkan/icd.d/nvidia_icd.json \
       -e /usr/lib/xorg/modules/drivers/nvidia_drv.so \
       -e /usr/lib/xorg/modules/extensions/libglxserver_nvidia.so \
       -e /usr/share/glvnd/egl_vendor.d/10_nvidia.json \
       > nvidia-l4t-3d-core_36.4.5-20250205154014.txt
tar xf  nvidia-l4t-3d-core_36.4.5-20250205154014_arm64.tbz2
rm      nvidia-l4t-3d-core_36.4.5-20250205154014_arm64.tbz2
tar cjf nvidia-l4t-3d-core_36.4.5-20250205154014_arm64.tbz2 $(cat nvidia-l4t-3d-core_36.4.5-20250205154014.txt)
Then extract the generated tarballs to your system.
pushd Linux_for_Tegra/nv_tegra/l4t_tar_packages
for i in \
nvidia-l4t-core_36.4.5-20250205154014_arm64.tbz2 \
nvidia-l4t-3d-core_36.4.5-20250205154014_arm64.tbz2 \
nvidia-l4t-cuda_36.4.5-20250205154014_arm64.tbz2 \
nvidia-l4t-firmware_36.4.5-20250205154014_arm64.tbz2 \
nvidia-l4t-gbm_36.4.5-20250205154014_arm64.tbz2 \
nvidia-l4t-multimedia-utils_36.4.5-20250205154014_arm64.tbz2 \
nvidia-l4t-multimedia_36.4.5-20250205154014_arm64.tbz2 \
nvidia-l4t-nvfancontrol_36.4.5-20250205154014_arm64.tbz2 \
nvidia-l4t-nvpmodel_36.4.5-20250205154014_arm64.tbz2 \
nvidia-l4t-tools_36.4.5-20250205154014_arm64.tbz2 \
nvidia-l4t-x11_36.4.5-20250205154014_arm64.tbz2 \
nvidia-l4t-nvsci_36.4.5-20250205154014_arm64.tbz2 \
nvidia-l4t-pva_36.4.5-20250205154014_arm64.tbz2 \
nvidia-l4t-wayland_36.4.5-20250205154014_arm64.tbz2 \
nvidia-l4t-camera_36.4.5-20250205154014_arm64.tbz2 \
nvidia-l4t-vulkan-sc-sdk_36.4.5-20250205154014_arm64.tbz2 \
nvidia-l4t-nvml_36.4.5-20250205154014_arm64.tbz2 \
nvidia-l4t-init_36.4.5-20250205154014_arm64.tbz2; do
  sudo tar xjf $i -C /
done
popd
On systems without dedicated graphics (internal GPU systems) card you still need to move
/usr/lib/xorg/modules/drivers/nvidia_drv.so
/usr/lib/xorg/modules/extensions/libglxserver_nvidia.so
to
/usr/lib64/xorg/modules/drivers/nvidia_drv.so
/usr/lib64/xorg/modules/extensions/libglxserver_nvidia.so
So let’s do this.
sudo mv /usr/lib/xorg/modules/drivers/nvidia_drv.so \
          /usr/lib64/xorg/modules/drivers/
sudo mv /usr/lib/xorg/modules/extensions/libglxserver_nvidia.so \
          /usr/lib64/xorg/modules/extensions/
sudo rm -rf /usr/lib/xorg
Then add /usr/lib/aarch64-linux-gnu and
/usr/lib/aarch64-linux-gnu/tegra-egl to
/etc/ld.so.conf.d/nvidia-tegra.conf.
echo /usr/lib/aarch64-linux-gnu | sudo tee -a /etc/ld.so.conf.d/nvidia-tegra.conf
echo /usr/lib/aarch64-linux-gnu/tegra-egl | sudo tee -a /etc/ld.so.conf.d/nvidia-tegra.conf
Run ldconfig
sudo ldconfigVideo group for regular users
A regular user needs to be added to the group video to be able to log in to the GNOME desktop as regular user. This can be achieved by using YaST, usermod or editing /etc/group manually.
Reboot the machine with the previously updated kernel
sudo rebootSelect first entry SLES 15-SP6 for booting.
Basic testing
First basic testing will be running nvidia-smi.
sudo nvidia-smiGraphical desktop (GNOME) should work as well. Linux console will also be available. Use either a serial console or a ssh connection if you don’t want to use the graphical desktop/Linux console or need remote access to the system.
glmark2
Install phoronix-test-suite
sudo zypper ar https://cdn.opensuse.org/distribution/leap/15.6/repo/oss/ repo-oss
sudo zypper ref
sudo zypper in phoronix-test-suite
Run phoronix-test-suite
sudo zypper in gcc gcc-c++
# Prepare for realistic numbers
# 1. Logout from your GNOME session
# 2. Login again, but select IceWM Session as desktop instead of GNOME
# 3. Start xterm and run the following command
phoronix-test-suite benchmark glmark2
This should give you an average score of about 4500 running in 1920x1080 resolution with MaxN Power and best performance settings (see Misc/Performance and Misc/MaxN/MaxN_Super Power below) on Jetson AGX Orin and about 2500 on Jetson Orin Nano (also with best performance settings).
Wayland based Desktop
In order to enable our GNOME on Wayland desktop you need to install two additional packages: xwayland and gnome-session-wayland.
sudo zypper in xwayland gnome-session-waylandAfterwards restart GDM
sudo systemctl restart display-manager.serviceor reboot your machine.
CUDA/Tensorflow
Containers
NVIDIA provides containers available for Jetson that include SDKs such as CUDA. More details here. These containers are Ubuntu based, but can be used from SLE as well. You need to install the NVIDIA container runtime for this. Detailed information here.
1. Install podman and nvidia-container-runtime
sudo zypper install podman
sudo zypper ar https://nvidia.github.io/libnvidia-container/stable/rpm/nvidia-container-toolkit.repo
sudo zypper modifyrepo --enable nvidia-container-toolkit-experimental
sudo zypper --gpg-auto-import-keys install -y nvidia-container-toolkit
sudo nvidia-ctk cdi generate --mode=csv --output=/var/run/cdi/nvidia.yaml
sudo nvidia-ctk cdi list
2. Download the CUDA samples
sudo zypper install git
cd
git clone https://github.com/NVIDIA/cuda-samples.git
cd cuda-samples
git checkout v12.5
3. Start X
sudo rcxdm stop
sudo Xorg -retro &> /tmp/log &
export DISPLAY=:0
xterm &
Monitor should now show a Moiree pattern with an unframed xterm on it. Otherwise check /tmp/log.
4. Download and run the JetPack6 container
sudo podman run --rm -it -e DISPLAY --net=host --device nvidia.com/gpu=all --group-add keep-groups --security-opt label=disable -v $HOME/cuda-samples:/cuda-samples nvcr.io/nvidia/l4t-jetpack:r36.4.0 /bin/bash
# needed in container for nbody
apt-get install libglu1-mesa freeglut3
apt-get install --fix-missing libglu1-mesa-dev freeglut3-dev
CUDA
5. Build and run the samples in the container
cd /cuda-samples
make -j$(nproc)
./bin/aarch64/linux/release/deviceQuery
./bin/aarch64/linux/release/nbody
Tensorrt
6. Build and run Tensorrt in the container
This is both with the GPU and DLA (deep-learning accelerator).
cd /usr/src/tensorrt/samples/
make -j$(nproc)
cd ..
./bin/sample_algorithm_selector
./bin/sample_onnx_mnist
# Fails on Jetson Orin Nano due to lack of Deep Learning Accelerator(s) (DLA)
./bin/sample_onnx_mnist --useDLACore=0
./bin/sample_onnx_mnist --useDLACore=1
Misc
Performance
You can improve the performance by giving the clock a boost. For best performance you can run jetson_clocks to set the device to max clock settings
sudo jetson_clocks --show
sudo jetson_clocks
sudo jetson_clocks --show
The 1st and 3rd command just prints the clock settings.
MaxN/MaxN_Super Power
For maximum performance you also need to set MaxN/MaxN_Super Power. This can be done by running
# Jetson AGX Orin
sudo nvpmodel -m 0
# Jetson Orin Nano
sudo ln -snf nvpmodel/nvpmodel_p3767_0003_super.conf /etc/nvpmodel.conf
sudo nvpmodel -m 2
Afterwards on Jetson AGX Orin you need to reboot the system though.
sudo rebootIn order to check for the current value run
sudo nvpmodel -qKnown Issues
Jetson Orin Nano: Super Mode
Unfortunately Super mode of Jetson Orin Nano needs Jetpack 6.2.1/36.4.4 for Firmware, KMP drivers and userspace. We’re currently working on providing these as easily installable packages in addition to our packages for Jetpack 6.1/36.4.0. This document will be updated accordingly once these are available. Therefore currently when trying to switch Jetson Orin Nano into Super mode with
sudo nvpmodel -m 2you’ll get an error message. Of course the other non-Super modes on Jetson Orin Nano are still available and working.
How to install SLE-15-SP6 on NVIDIA Jetson platform (Jetson AGX Orin/IGX Orin)
This covers the installation of updated Kernel, out-of-tree nvidia kernel modules package, how to get GNOME desktop running and installation/run of glmark2 benchmark. Also it describes how to get some CUDA and TensorRT samples running.
SP6
Download SLE-15-SP6 (Arm) installation image. This you can put on a regular USB stick or on an SD card using dd command.
Boot from the USB stick/SD card, that you wrote above and install SP6. You can install via serial console or connect a monitor to the display port.
When using a connected monitor for installation
This needs for the installation a special setting in the Firmware of the machine.
--> UEFI Firmware Settings
 --> Device Manager
  --> NVIDIA Configuration
   --> Boot Configuration
    --> SOC Display Hand-Off Mode <Always>
This setting for SOC Display Hand-Off Mode will change automatically to Never later with the installation of the graphics driver.
Installation
Once grub starts you need to edit the grub entry Installation. Press e for doing this and add console=tty0 exec="date -s 2025-01-27" (when using a connected monitor for intallation) or exec="date -s 2025-01-27" (when installing on a serial console) to the linux [...] line. Replace 2025-01-27 with the current date.
### When using a connected monitor for intallation
[...]
linux /boot/aarch64/linux splash=silent console=tty0 exec="date -s 2025-01-27"
[...]
### When installing on a serial console
[...]
linux /boot/aarch64/linux splash=silent exec="date -s 2025-01-27"
[...]The reason for this is that during installation the driver nvvrs-pseq-rtc for the battery-backed RTC0 (Real Time Clock) is not yet available and therefore the non-battery-backed RTC1 is used, which doesn’t have the correct time set during installation. So this is a workaround to avoid a product registration failure later due to a certificate, which is not valid yet.
Then press F10 to continue to boot.
Make sure you select the following modules during installation:
- Basesystem (enough for just installing the kernel driver)
- Containers (needed for podman for CUDA libraries)
- Desktop Applications (needed for running a desktop)
- Development Tools (needed for git for CUDA samples)
Select SLES with GNOME for installation.
In Clock and Time Zone dialogue chose Other Settings to open Change Date and Time dialogue. There enable Synchronize with NTP Server.
--> Clock and Time Zone dialogue
 --> Other Settings
  --> Change Date and Time dialogue
   --> (x) Synchronize with NTP Server
Kernel + KMP drivers
After installation update kernel and install our KMP (kernel module package) for all nvidia kernel modules.
We plan to make the KMP available as a driver kit via the SolidDriver Program. For now please install an updated kernel and the KMP after checking the build status (type ‘jetson’ in Search… field; rebuilding can take a few hours!) from our open buildservice:
# flavor either default or 64kb (check with `uname -r` command)
sudo zypper up kernel-<flavor>
sudo zypper ar https://download.opensuse.org/repositories/X11:/XOrg/SLE_15_SP6/  jetson-kmp
sudo zypper ref
sudo zypper in -r jetson-kmp nvidia-jetson-36_4-kmp-<flavor> kernel-firmware-nvidia-jetson-36_4
Userspace/Desktop
Unfortunately installing the userspace is a non-trivial task.
Installation
Download Driver Package (BSP) from this location. Extract Jetson_Linux_R36.4.0_aarch64.tbz2.
tar xf Jetson_Linux_R36.4.0_aarch64.tbz2Then you need to convert debian packages from this content into tarballs.
pushd Linux_for_Tegra
sed -i -e 's/lbzip2/bzip2/g' -e 's/-I zstd //g' nv_tools/scripts/nv_repackager.sh
./nv_tools/scripts/nv_repackager.sh -o ./nv_tegra/l4t_tar_packages --convert-all
popd
From the generated tarballs you only need these:
nvidia-l4t-3d-core_36.4.0-20240912212859_arm64.tbz2
nvidia-l4t-camera_36.4.0-20240912212859_arm64.tbz2
nvidia-l4t-core_36.4.0-20240912212859_arm64.tbz2
nvidia-l4t-cuda_36.4.0-20240912212859_arm64.tbz2
nvidia-l4t-gbm_36.4.0-20240912212859_arm64.tbz2
nvidia-l4t-multimedia-utils_36.4.0-20240912212859_arm64.tbz2
nvidia-l4t-multimedia_36.4.0-20240912212859_arm64.tbz2
nvidia-l4t-nvfancontrol_36.4.0-20240912212859_arm64.tbz2
nvidia-l4t-nvml_36.4.0-20240912212859_arm64.tbz2
nvidia-l4t-nvpmodel_36.4.0-20240912212859_arm64.tbz2
nvidia-l4t-nvsci_36.4.0-20240912212859_arm64.tbz2
nvidia-l4t-pva_36.4.0-20240912212859_arm64.tbz2
nvidia-l4t-tools_36.4.0-20240912212859_arm64.tbz2
nvidia-l4t-vulkan-sc-sdk_36.4.0-20240912212859_arm64.tbz2
nvidia-l4t-wayland_36.4.0-20240912212859_arm64.tbz2
nvidia-l4t-x11_36.4.0-20240912212859_arm64.tbz2
nvidia-l4t-nvml_36.4.0-20240912212859_arm64.tbz2
And from this tarball nvidia-l4t-init_36.4.0-20240912212859_arm64.tbz2 you only need these files:
etc/asound.conf.tegra-ape
etc/asound.conf.tegra-hda-jetson-agx
etc/asound.conf.tegra-hda-jetson-xnx
etc/nvidia-container-runtime/host-files-for-container.d/devices.csv
etc/nvidia-container-runtime/host-files-for-container.d/drivers.csv
etc/nvsciipc.cfg
etc/sysctl.d/60-nvsciipc.conf
etc/systemd/nv_nvsciipc_init.sh
etc/systemd/nvpower.sh
etc/systemd/nv.sh
etc/systemd/system.conf.d/watchdog.conf
etc/systemd/system/multi-user.target.wants/nv_nvsciipc_init.service
etc/systemd/system/multi-user.target.wants/nvpower.service
etc/systemd/system/multi-user.target.wants/nv.service
etc/systemd/system/nv_nvsciipc_init.service
etc/systemd/system/nvpower.service
etc/systemd/system/nv.service
etc/udev/rules.d/99-tegra-devices.rules
usr/share/alsa/cards/tegra-ape.conf
usr/share/alsa/cards/tegra-hda.conf
usr/share/alsa/init/postinit/00-tegra.conf
usr/share/alsa/init/postinit/01-tegra-rt565x.conf
usr/share/alsa/init/postinit/02-tegra-rt5640.conf
So first let’s repackage nvidia-l4t-init_36.4.0-20240912212859_arm64.tbz2:
pushd Linux_for_Tegra/nv_tegra/l4t_tar_packages/
cat > nvidia-l4t-init.txt << EOF
etc/asound.conf.tegra-ape
etc/asound.conf.tegra-hda-jetson-agx
etc/asound.conf.tegra-hda-jetson-xnx
etc/nvidia-container-runtime/host-files-for-container.d/devices.csv
etc/nvidia-container-runtime/host-files-for-container.d/drivers.csv
etc/nvsciipc.cfg
etc/sysctl.d/60-nvsciipc.conf
etc/systemd/nv_nvsciipc_init.sh
etc/systemd/nvpower.sh
etc/systemd/nv.sh
etc/systemd/system.conf.d/watchdog.conf
etc/systemd/system/multi-user.target.wants/nv_nvsciipc_init.service
etc/systemd/system/multi-user.target.wants/nvpower.service
etc/systemd/system/multi-user.target.wants/nv.service
etc/systemd/system/nv_nvsciipc_init.service
etc/systemd/system/nvpower.service
etc/systemd/system/nv.service
etc/udev/rules.d/99-tegra-devices.rules
usr/share/alsa/cards/tegra-ape.conf
usr/share/alsa/cards/tegra-hda.conf
usr/share/alsa/init/postinit/00-tegra.conf
usr/share/alsa/init/postinit/01-tegra-rt565x.conf
usr/share/alsa/init/postinit/02-tegra-rt5640.conf
EOF
tar xf nvidia-l4t-init_36.4.0-20240912212859_arm64.tbz2
rm nvidia-l4t-init_36.4.0-20240912212859_arm64.tbz2
tar cjf nvidia-l4t-init_36.4.0-20240912212859_arm64.tbz2 $(cat nvidia-l4t-init.txt)
popd
On IGX Orin platform with dedicated graphics card (dGPU systems) you need to get rid of some files due to conflicts with dGPU userspace drivers.
# repackage nvidia-l4t-x11_ package
tar tf nvidia-l4t-x11_36.4.0-20240912212859_arm64.tbz2 | grep -v /usr/bin/nvidia-xconfig \
  > nvidia-l4t-x11_36.4.0-20240912212859.txt
tar xf  nvidia-l4t-x11_36.4.0-20240912212859_arm64.tbz2
rm      nvidia-l4t-x11_36.4.0-20240912212859_arm64.tbz2
tar cjf nvidia-l4t-x11_36.4.0-20240912212859_arm64.tbz2 $(cat nvidia-l4t-x11_36.4.0-20240912212859.txt)

# repackage nvidia-l4t-3d-core_ package
tar tf nvidia-l4t-3d-core_36.4.0-20240912212859_arm64.tbz2 | \
  grep -v \
       -e /etc/vulkan/icd.d/nvidia_icd.json \
       -e /usr/lib/xorg/modules/drivers/nvidia_drv.so \
       -e /usr/lib/xorg/modules/extensions/libglxserver_nvidia.so \
       -e /usr/share/glvnd/egl_vendor.d/10_nvidia.json \
       > nvidia-l4t-3d-core_36.4.0-20240912212859.txt
tar xf  nvidia-l4t-3d-core_36.4.0-20240912212859_arm64.tbz2
rm      nvidia-l4t-3d-core_36.4.0-20240912212859_arm64.tbz2
tar cjf nvidia-l4t-3d-core_36.4.0-20240912212859_arm64.tbz2 $(cat nvidia-l4t-3d-core_36.4.0-20240912212859.txt)
Then extract the generated tarballs to your system.
pushd Linux_for_Tegra/nv_tegra/l4t_tar_packages
for i in \
nvidia-l4t-core_36.4.0-20240912212859_arm64.tbz2 \
nvidia-l4t-3d-core_36.4.0-20240912212859_arm64.tbz2 \
nvidia-l4t-cuda_36.4.0-20240912212859_arm64.tbz2 \
nvidia-l4t-gbm_36.4.0-20240912212859_arm64.tbz2 \
nvidia-l4t-multimedia-utils_36.4.0-20240912212859_arm64.tbz2 \
nvidia-l4t-multimedia_36.4.0-20240912212859_arm64.tbz2 \
nvidia-l4t-nvfancontrol_36.4.0-20240912212859_arm64.tbz2 \
nvidia-l4t-nvpmodel_36.4.0-20240912212859_arm64.tbz2 \
nvidia-l4t-tools_36.4.0-20240912212859_arm64.tbz2 \
nvidia-l4t-x11_36.4.0-20240912212859_arm64.tbz2 \
nvidia-l4t-nvsci_36.4.0-20240912212859_arm64.tbz2 \
nvidia-l4t-pva_36.4.0-20240912212859_arm64.tbz2 \
nvidia-l4t-wayland_36.4.0-20240912212859_arm64.tbz2 \
nvidia-l4t-camera_36.4.0-20240912212859_arm64.tbz2 \
nvidia-l4t-vulkan-sc-sdk_36.4.0-20240912212859_arm64.tbz2 \
nvidia-l4t-nvml_36.4.0-20240912212859_arm64.tbz2 \
nvidia-l4t-init_36.4.0-20240912212859_arm64.tbz2; do
  sudo tar xjf $i -C /
done
popd
On systems without dedicated graphics (internal GPU systems) card you still need to move
/usr/lib/xorg/modules/drivers/nvidia_drv.so
/usr/lib/xorg/modules/extensions/libglxserver_nvidia.so
to
/usr/lib64/xorg/modules/drivers/nvidia_drv.so
/usr/lib64/xorg/modules/extensions/libglxserver_nvidia.so
So let’s do this.
sudo mv /usr/lib/xorg/modules/drivers/nvidia_drv.so \
          /usr/lib64/xorg/modules/drivers/
sudo mv /usr/lib/xorg/modules/extensions/libglxserver_nvidia.so \
          /usr/lib64/xorg/modules/extensions/
sudo rm -rf /usr/lib/xorg
Then add /usr/lib/aarch64-linux-gnu and
/usr/lib/aarch64-linux-gnu/tegra-egl to
/etc/ld.so.conf.d/nvidia-tegra.conf.
echo /usr/lib/aarch64-linux-gnu | sudo tee -a /etc/ld.so.conf.d/nvidia-tegra.conf
echo /usr/lib/aarch64-linux-gnu/tegra-egl | sudo tee -a /etc/ld.so.conf.d/nvidia-tegra.conf
Run ldconfig
sudo ldconfigVideo group for regular users
A regular user needs to be added to the group video to be able to log in to the GNOME desktop as regular user. This can be achieved by using YaST, usermod or editing /etc/group manually.
Reboot the machine with the previously updated kernel
sudo rebootIn Mokmanager (Perform MOK management) select Continue boot. Although Secureboot is enabled by default in BIOS it seems it hasn’t been implemented yet (BIOS from 04/04/2024). Select first entry SLES 15-SP6 for booting.
Basic testing
First basic testing will be running nvidia-smi.
sudo nvidia-smiGraphical desktop (GNOME) should work as well. Unfortunately Linux console is not available. Use either a serial console or a ssh connection if you don’t want to use the graphical desktop or need remote access to the system.
glmark2
Install phoronix-test-suite
sudo zypper ar https://cdn.opensuse.org/distribution/leap/15.6/repo/oss/ repo-oss
sudo zypper ref
sudo zypper in phoronix-test-suite
Run phoronix-test-suite
sudo zypper in gcc gcc-c++
phoronix-test-suite benchmark glmark2
CUDA/Tensorflow
Containers
NVIDIA provides containers available for Jetson that include SDKs such as CUDA. More details here. These containers are Ubuntu based, but can be used from SLE as well. You need to install the NVIDIA container runtime for this. Detailed information here.
1. Install podman and nvidia-container-runtime
sudo zypper install podman
sudo zypper ar https://nvidia.github.io/libnvidia-container/stable/rpm/nvidia-container-toolkit.repo
sudo zypper modifyrepo --enable nvidia-container-toolkit-experimental
sudo zypper --gpg-auto-import-keys install -y nvidia-container-toolkit
sudo nvidia-ctk cdi generate --mode=csv --output=/var/run/cdi/nvidia.yaml
sudo nvidia-ctk cdi list
2. Download the CUDA samples
sudo zypper install git
cd
git clone https://github.com/NVIDIA/cuda-samples.git
cd cuda-samples
git checkout v12.4
3. Start X
sudo rcxdm stop
sudo Xorg -retro &> /tmp/log &
export DISPLAY=:0
xterm &
Monitor should now show a Moiree pattern with an unframed xterm on it. Otherwise check /tmp/log.
4. Download and run the JetPack6 container
sudo podman run --rm -it -e DISPLAY --net=host --device nvidia.com/gpu=all --group-add keep-groups --security-opt label=disable -v $HOME/cuda-samples:/cuda-samples nvcr.io/nvidia/l4t-jetpack:r36.2.0 /bin/bashCUDA
5. Build and run the samples in the container
cd /cuda-samples
make -j$(nproc)
pushd ./Samples/5_Domain_Specific/nbody
make
popd
./bin/aarch64/linux/release/deviceQuery
./bin/aarch64/linux/release/nbody
Tensorrt
6. Build and run Tensorrt in the container
This is both with the GPU and DLA (deep-learning accelerator).
cd /usr/src/tensorrt/samples/
make -j$(nproc)
cd ..
./bin/sample_algorithm_selector
./bin/sample_onnx_mnist
./bin/sample_onnx_mnist --useDLACore=0
./bin/sample_onnx_mnist --useDLACore=1
Misc
Performance
You can improve the performance by giving the clock a boost. For best performance you can run jetson_clocks to set the device to max clock settings
sudo jetson_clocks --show
sudo jetson_clocks
sudo jetson_clocks --show
The 1st and 3rd command just prints the clock settings.
MaxN Power
For maximum performance you also need to set MaxN Power. This can be done by running
sudo nvpmodel -m 0Afterwards you need to reboot the system though.
sudo rebootIn order to check for the current value run
sudo nvpmodel -qIconos Nature para tu PC, simples y elegantes
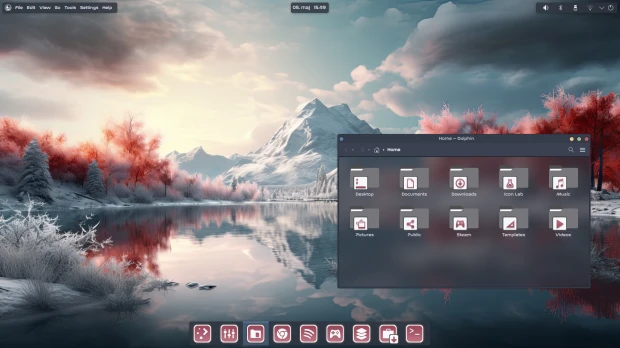
Hago una descanso en la promoción de Akademy-es 2024 de València y os traigo una entrada ligera. Os presento el tema de iconos Nature para tu PC, una colección de avatares para aplicaciones, acciones y otros elementos gráficos que destacan por su sencillez y elegancia.
Iconos Nature para tu PC, simples y preciosos
Como he dicho muchas veces, me fascina la variedad que tenemos a nuestra disposición tanto de forma, estilo o colores. Tenemos iconos clásicos, minimalistas, lineales, 3D, que simulan otros sistemas operativos, imaginativos, que recuerdan a objetos cotidianeos, etc.
Hoy os presento un pack de iconos creados por Thalic que ha nombrado como Nature. Se trata de unos iconos minimalistas, simples y de un bonoto color rojo pastel, que quedan muy elegantes en un entorno oscuro.
En palabras de su creador:
Este es mi primer intento de hacer un tema de iconos para KDE ya que normalmente lo hago para DE’s basados en GTK. Pero me he pasado a KDE en todos mis ordenadores, así que necesito algunos temas de iconos que me gusten y la forma de hacerlo es construirlos uno mismo.
El tema de iconos de la naturaleza está todavía en una etapa temprana, así que no dudes en reportar errores o hacer sugerencias y peticiones, para que pueda evolucionar el tema de iconos Nature al máximo. Voy a añadir más colores para elegir, pero empiezo con el color rojo.

Y como siempre digo, si os gusta el pack de iconos podéis pagarlo de muchas formas en la página en continua evolución de KDE Store, que estoy seguro que el desarrollador lo agradecer: puntúale positivamente, hazle un comentario en la página o realiza una donación. Ayudar al desarrollo del Software Libre también se hace simplemente dando las gracias, ayuda mucho más de lo que os podéis imaginar, recordad la campaña I love Free Software Day 2017 de la Free Software Foundation donde se nos recordaba esta forma tan sencilla de colaborar con el gran proyecto del Software Libre y que en el blog dedicamos un artículo.
Más información: KDE Store
La entrada Iconos Nature para tu PC, simples y elegantes se publicó primero en KDE Blog.
Lista de reproducción con las emisoras de somaGM
Quiero compartir en el blog una lista de reproducción actualizada que he recopilado con las emisoras disponibles de la radio online SomaFM

Por el blog ya he escrito varios artículos relacionados con SomaFM y como escuchar sus diferentes emisoras. Pero hoy quiero simplemente compartir una lista de reproducción que he recopilado con todas las emisoras disponibles, a fecha de publicación del blog, de la emisora online SomaFM.
Se trata de un archivo eb formato .m3u de lista de reproducción con todos los enlaces a las emisoras de los distintos géneros de música disponibles en SomaFM.
Además de las URL a las emisoras de SomaFM, he añadido los metadatos, con la información de qué es cada canal según publican en la propia SomaFM.
El archivo está en un gist en GitHub y lo podéis descargar con wget mediante:
wget https://gist.githubusercontent.com/victorhck/2c9491f8dbd0873ffd3af6bdce07d8e3/raw/d45f4da8c8086497948a0f873334d65195ddc1d8/soma_fm.m3u -O soma_fm.m3u
Después lo podéis abrir con el reproductor de audio que mejor os parezca. VLC, Amarok, etc… Y a disfrutar de música en muchos estilos, sin cortes comerciales.

Enlaces de interés
Lista de reproducción con las emisoras de SomaFM
Quiero compartir en el blog una lista de reproducción actualizada que he recopilado con las emisoras disponibles de la radio online SomaFM

Por el blog ya he escrito varios artículos relacionados con SomaFM y como escuchar sus diferentes emisoras. Pero hoy quiero simplemente compartir una lista de reproducción que he recopilado con todas las emisoras disponibles, a fecha de publicación del blog, de la emisora online SomaFM.
Se trata de un archivo eb formato .m3u de lista de reproducción con todos los enlaces a las emisoras de los distintos géneros de música disponibles en SomaFM.
Además de las URL a las emisoras de SomaFM, he añadido los metadatos, con la información de qué es cada canal según publican en la propia SomaFM.
El archivo está en un gist en GitHub y lo podéis descargar con wget mediante:
wget https://gist.githubusercontent.com/victorhck/2c9491f8dbd0873ffd3af6bdce07d8e3/raw/d45f4da8c8086497948a0f873334d65195ddc1d8/soma_fm.m3u -O soma_fm.m3u
Después lo podéis abrir con el reproductor de audio que mejor os parezca. VLC, Amarok, etc… Y a disfrutar de música en muchos estilos, sin cortes comerciales.
Enlaces de interés

openSUSE Asia Summit Set for Tokyo
openSUSE.Asia Summit will come back to Tokyo, Japan
The openSUSE Project is exciting to announce that openSUSE.Asia Summit 2024 is going to be held in Tokyo, Japan. The openSUSE.Asia Summit is an annual conference for users and contributors of openSUSE and FLOSS enthusiasts. During this summit, they will gather in person to share knowledge and experiences about openSUSE including applications running on it.
The venue of the summit will be located in Tokyo, the capital of Japan, blending tradition and cutting-edge technology. Its infrastructure and global connectivity make it a primal location for promoting collaboration among openSUSE users and developers. Moreover, Tokyo is a center of information technology; Many technology companies have their offices in Tokyo, with numerous engineers residing in the surrounding areas.
Tokyo is also a popular place for sightseeing with its unique culture, food, etc. Especially, characters from video games, anime, and comics, which are now common in the world, attract tourists to Japan. In Tokyo, you can easily find character shops and get items related to works you love.
The number of tourists from abroad has recovered last year to the same level as before COVID-19. Due to the currency exchange rate, it will be a great chance to enjoy your trip to Japan while saving your money. Even though you may have attended the last summit in Tokyo, you will discover new facets, developed before the TOKYO 2020 Summer Olympics.
Please see also:
The expected summit date is Nov. 2 and 3 soon after Open Source Summit Japan. Our call for speakers is going to end around the end of July. For more details including the venue, please stay tuned until the next announcement in a couple of weeks.