
RPM Spec files conditionals and forcing package versions
This whole blog post was born from the idea to clarify how to nicely force a newer compiler on older distros. But of course we have to start with the basics.
RPM conditionals basics
RPM supports two main forms of conditionals %if and %ifarch. The last one is easy … it lets us do architecture specific things:
%ifarch x86_64 aarch64
[snip]
%endif
The %if is a bit more flexible. We can use it to compare strings.
The year of Agama
At the end of 2023 we announced Agama 7 stating that version is the first prototype we could consider to be (quoting ourselves) "functional enough", covering areas such as localization, network configuration, storage setup, authentication basis and some software selection. Now it's time to go deeper into every area... and we have a plan for that.
The Agama roadmap for 2024
They say "plans are useless, but planning is indispensable". So we decided to do the indispensable exercise of planning the first months of 2024 and we came with this useless plan.
Although we will keep delivering new versions of Agama at a relatively constant pace, we established two milestones as check points. The first milestone is expected around mid April, the second one is scheduled to mid July. Then we used those two milestones to group the next tasks we want to tackle.
April's milestone should result in a revamped architecture for Agama which should not longer depend on Cockpit and in a more comprehensive user interface for configuring the storage setup. Both aspects are explained in depth in this blog post.
July's milestone should bring mechanisms to make Agama more adaptable and many improvements to unattended installation, turning Agama into a worthy contender to AutoYaST.
Let's dive into the improvements expected for the first milestone.
Architectural changes
So far, we have built Agama on top of the infrastructure provided by the Cockpit project. That allowed us to bootstrap the project quickly without having to invest too much on aspects like authentication or serving files to the web interface. But after more than a year of Agama development we now have a clear view on how we want to do certain things, and Cockpit is starting to feel like a limiting factor.
See more details at this Github discussion, but in short we concluded the small of amount of functionality we are getting out of Cockpit does not justify the strong dependency, especially now that Cockpit is adopting Python as an integral part of its runtime.
So we will invest the following months in changing a bit the approach as described in the mentioned discussion at Github. That should unblock many paths to improve Agama in the near future.
A more powerful user interface for the storage proposal
The mentioned architectural changes are important for remote or unattended installation and also regarding integration of Agama into bigger solutions, but they may not be that visible for the casual user. That doesn't imply next months will be boring in the area of interactive installation. Quite the opposite, we plan many improvements in the Agama's proposal page that allows to tweak the storage configuration.
The new interface aims to be easy enough for newcomers, as you can see in the following mock-up. But we know (open)SUSE users have big expectations in terms of customizing their setups. Thus, we updated the document that describes how the new interface will work and all the possibilities it will offer for those who decide to go beyond the initial proposal. If you want to check whether your basic needs would be covered, don't hesitate to take a look to the document and the extended mock-ups included on it.

If interface descriptions and mock-ups are not your cup of tea, worry not. We already started implementing some parts of the new interface, so you will be able to try the changes for real as they land incrementally at upcoming Agama prototypes.
openSUSE conference in the horizon
If you look closely at the dates of both milestones described above, you will notice there is something happening almost in the middle - openSUSE Conference 2024!
We hope at that point in time Agama will be able to replace YaST for some scenarios and distributions. And, as such, we would like to use the conference to chat with the community about the possible future of Agama at openSUSE.
But, as we have mentioned in several previous occasions, the installation experience goes beyond the installer itself. The environment in which the installer is executed is also a crucial aspect. So apart from replacing YaST with Agama we would also need to replace the current so-called "installation image" with some modern alternative. So far, the testing Agama Live ISO has served us for demo purposes, but we would appreciate any help at building a system suitable for more real installation scenarios.
If you have good ideas about reducing the size of the live image, properly integrating the distribution repositories into it, streamlining the boot process, or any other topic... you know where to find us.
Stay in touch
As said, your contributions and opinions are a key element to make sure Agama reach its goals, so
never hesitate to contact the YaST team at the YaST Development mailing
list, our #yast
channel at Libera.chat or the Agama project at
GitHub.
Help us to make 2024 the year of the new lizard!
 Member
 baltolkien
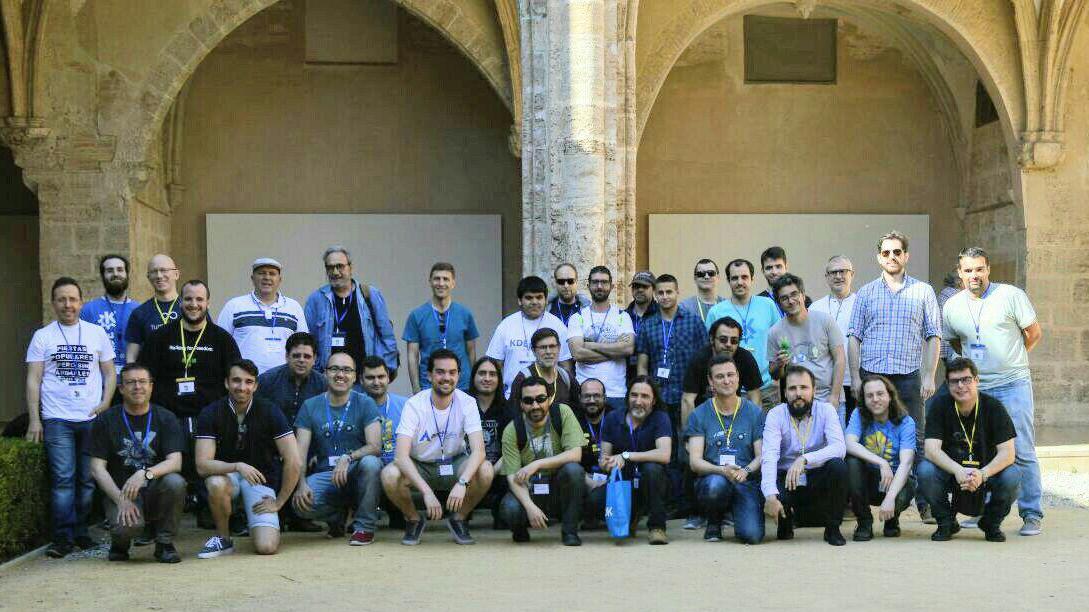
Akademy-es 2024 se celebrará en València integrada en esLibre #akademyes
¡Ya tenemos sede! Hoy ha sido anunciada la gran noticia de la semana para los simpatizantes y miembros de la Comunidad KDE: Akademy-es 2024 se celebrará en València el 24 y 25 de mayo integrada en esLibre, evento coorganizado por la Asociación GNU/Linux València, Un evento que al que no puedes dejar de acudir si te gusta el Software Libre, y más si eres usuarios o colaborador del proyecto KDE.
Akademy-es 2024 se celebrará en València integrada en esLibre #akademyes
Como me gusta recordar cada cierto tiempo,el momento clave de mi vida que hizo que en estos momentos sea un miembro orgulloso de la Comunidad KDE fue mi primera Akademy-es, la del 2010 de Bilbao.
A lo largo de este evento me encontré con grandes personas y actuales amigos, descubrí lo enorme y fabulosa que era la gente que rodeaba a KDE. De esta forma llegué a la conclusión mientras conducía camino a casa que era un buen proyecto donde focalizar mis proyectos intereses personales y mis momentos de ocio.
Por eso me llena de alegría que KDE España siga realizando eventos de este tipo que no son más que unos excelentes momentos para compartir mucho más que conocimiento digital.
En fin, el escueto anuncio oficial, al que pronto le seguirán muchas más novedades, es el siguiente:
La asociación KDE España anuncia la celebración de Akademy-es 2024 en València dentro del gran evento libre esLibre el 24 y 25 de mayo, co-organizado por la comunidad anfitriona GNU/Linux València, en Las Naves, el centro de innovación social y urbana de la ciudad de València, y La Mutant, el espacio de artes vivas.
Con esta será la segunda ocasión que los simpatizantes del proyecto KDE visiten la histórica capital de la Comunidad Valenciana tras Akademy-es del 2018.
Los datos básicos son:
Fecha: 24 y 25 de mayo
Durante el evento, como es costumbre, se realizarán charlas tanto para usuarios como para desarrolladores, además de talleres prácticos y otras actividades de carácter más social con las que se pretenden cumplir los siguientes objetivos:
- Poner en contacto a desarrolladores de KDE de toda España, para que puedan hablar de los proyectos en que están trabajando, compartir código, experiencias y conocimiento.
- Dar a conocer los proyectos KDE como el entorno de escritorio nuevos usuarios.
- Divulgar acerca de las tecnologías KDE, tanto para nuevos desarrolladores como para usuarios que quieran conocer mejor KDE.
- Y por supuesto, el objetivo principal es que todos disfrutemos aprendiendo más sobre Software Libre y KDE.
¡Os esperamos!
La entrada Akademy-es 2024 se celebrará en València integrada en esLibre #akademyes se publicó primero en KDE Blog.
I ♥️ Free Software Day 2024 de Barcelona Free Software
Reaparecieron al final del 20232 y este año se estrenan con un charla clásica enmarcada dentro del «I ♥️ Free Software Day 2024». DE esta forma os invito a asistir al evento organizado por los chicos y chicas de Barcelona Free Software que se celebrará el próximo 14 de febrero y donde se realizará una charla a cargo de Xavi de Blas, conferenciante de prestigio y gran divulgador.
I ♥️ Free Software Day 2024 de Barcelona Free Software
La pandemia fue un duro golpe para todos los eventos presenciales. Muchos se adaptaron para convertirse virtuales pero otros no resistieron el corte de la desaparición del factor presencial. Poco a poco se van recuperando casi todos los encuentros que teníamos, como es el caso de las reuniones de Barcelona Free Software.

En palabras de sus organizadores:
Os invitamos a celebrar el «I ♥️ Free Software Day» del 2024 y a mostrar vuestro agradecimiento en los colaboradores del software libre, que hacen un trabajo esencial para nuestra sociedad.
Juntos, reconocemos la importancia de sus esfuerzos y su dedicación en la creación de un mundo digital libre y abierto para todo el mundo.
Os esperamos con ilusión.Veníd y compartíd esta jornada especial con nosotros! Habrá comida y bebida para todos los #asistente.
Xavier de Blas a mediados de la década de los 2000 hizo 111 conferencias-espectáculo sobre software libre. Llegado a este número decidió reorientar los esfuerzos en la programación. Por el Y ♥️ *Free Software *Day 2024 nos comentará algunas anécdotas divertidas de aquella época y nos ofrecerá un nuevo espectáculo en pequeño formato denominado «*ManipulaSo» donde jugará con los sensores y las herramientas de software y hardware libre que desarrolla a diario.
La información básica de la charla es:
- Día: Miércoles, 14 de febrero de 2024
- Hora: 19:00
- Lugar: Kiwi.com Gran Via de les Corts Catalanes 613, 4th Floor · Barcelona, ak
Y el programa es el siguiente:
19:00 h: Bienvenida
19:15 h: Introducción lúdica y divulgativa en el Software Libre, a cargo de Xavi de Blas
19:45 h: Celebración y *networking
No te lo pienses. ¡Te esperamos el miércoles 14 de febrero!
Más información: Barcelona Free Software
La entrada I ♥️ Free Software Day 2024 de Barcelona Free Software se publicó primero en KDE Blog.
Juegos libres de calidad y en desarrollo Febrero 2024
Repito entradilla. Esta entrada tiene como objetivo promocionar los juegos libres, pero no quiere ser una página que quede obsoleta o sea un cementerio de proyectos muertos, así que la voy a realizar poco a poco y con conocimiento de causa. Por ello, y conciendo mis limitaciones y mi estilo de trabajo, la voy a ir actualizando de forma mensual y su contenido se irá ampliando poco a poco a. De esta forma, bienvenidos a la entrada de juegos libres de calidad y en desarrollo de febrero 2024 en la que recopilo los juegos libres presentados en forma de entrada «tocha» en el blog ampliándola con SuperTuKart.
Juegos libres de calidad y en desarrollo Febrero 2024
Como decía en la entradilla, esta primera entrada de la serie Juegos Libre de Calidad y en Desarrollo, prentende ser una entrada viva y creciente, que tenga una parte fija pero dinámica en la que muestre no solo juegos libres sino también su estado de desarrollo, sus novedades principales y, si es posible, alguna noticia relevante de alguno de ellos: lanzamientos especiales, vídeos, premios, cambios notables, etc.

Para empezar utilizaré una tabla para mostrar la información y los juegos iniciales que aparecen son aquellos que he analizado a fondo en el blog dado que son los que tengo más claro su desarrollo, y cada més añadiré el siguiente que tengo en mente analizar.
| Género | Nombre | Presentado en el blog | Última actualización | Comentario | Otros juegos alternativos Libres o no. |
| Conducción | Speedreams | Si | Agosto 2021 Versión 2.2.3 |
Need For Speed | |
| Conducción | SuperTux Kart | Si | Septiembre 2023 1.4 |
Última entrada de la serie Juegos Linux del blog | SuperMario Kart |
| Estrategia por turnos | The Battle of Wesnoth | Si | 3 de enero de 2024 Versión Estable 1.16.11 |
Tiene dos ramas de desarrollo: la 1.16 (estable) y 1.17 (beta). Más información: Forum Wesnoth |
?¿??¿ |
| Estrategia por turnos | Hedgewars | No | Septiembre2019 1.0 |
Próxima entrada de la serie Juegos Linux del blog | Worms Warmux (proyecto libre sin desarrollo) |
| FPS | Xonotic | Si |
20/06/2023 Versión 0.8.6 |
No necesita instalación | Quake, Doom, Nexuiz |
| MMORPG | Ryzom | Si | 3 de julio de 2021 Versión 3.4.0 |
Es posible que esta no sea la última versión ya que se parchea muy seguido. | World of Warcraft |
| Plataformas | Supertux | Si | 2021 Versón 0.6.3 |
Se estima que la 0.7.0 saldrá en agosto de 2024. | Super Mario |
Novedades de los juegos de la tabla
Esta sección la voy a dedicar a ofrecer una noticia de actualidad de los juegos de la tabla, de esta forma podremos ver si las comunidades siguen activas:
- Speedreams: ha anunciado en su cuenta de twitter que han llegado a los 100 seguidores. ¡Enhorabuena!
- The Battle of Wesnoth ha lanzado nueva versión beta el pasado 29 de enero. La 1.17.25.
- Xonotic: he descubierto que tienen un hilo en su foro para agradecer su trabajo. Recordad que un simple gracias también ayuda.
- Ryzom: este juego MMORPG también tiene eventos como el del pasado domingo.
- Supertux el usuario Komaros ha recreado Mundo de Entrenamiento de Cheeseman en Super Tux. Puedes verlo en el vídeo de abajo. Cheeseman es un fork de Super Tux.
La entrada Juegos libres de calidad y en desarrollo Febrero 2024 se publicó primero en KDE Blog.
Saca todo el partido a #LibreOffice Writer 24.2 con este libro
Aprende todos los secretos del editor de texto LibreOffice Writer 24.2 para sacarle todo el provecho

El pasado 31 de enero de 2024 la comunidad de LibreOffice publicaba la versión 24.2 (la primera que comienza un nuevo modo de numeración de versiones con el año/mes) de esta nueva «suite» ofimática libre, gratuita y multiplataforma. Este software es una alternativa comunitaria, ética y profesional a la conocida «suite» creada por Micosoft.
Entre todo el conjunto de programas ofimáticos está incluido el editor de texto Writer. Un editor de texto potente, que trabaja con compatibilidad con documentos de Microsoft al que muchas personas están más habituados. Writer puede servir para crear o editar textos de manera profesional o para el usuario medio.
¿Cómo sacar todo el provecho a este editor de texto? ¿Cómo conocer todo lo que el editor nos ofrece y que nos hace nuestros trabajo de edición más fácil?
En la red hay muchos tutoriales, e incluso un foro en el que exponer nuestras dudas. Yo te traigo hoy al blog, el libro que ha editado de manera libre y gratuita un miembro desde hace años del proyecto y que conoce bien cómo sacarle todo el partido a LibreOffice Writer.
El libro en cuestión se titula «Domando al escritor» escrito por Ricardo Gabriel Berlasso o también conocido como RGB (o el pingüino Tolkiano), en foros relacionados con temáticas de software libre.
Tienes el libro disponible para descargar de manera libre y gratuita desde su propio blog en el siguiente enlace:
RGB ha publicado esta nueva revisión de su libro justo el mismo día que LibreOffice publicaba la nueva versión. Esta edición cubre todas las novedades de la nueva versión de Writer.
El libro está disponible en formato PDF y también en formato para dispositivos «e-ink» o tinta electrónica. Puedes descargarlo para leerlo poco a poco o como medio de consulta puntual cuando te encuentres que quieres hacer algo y no sabes cómo hacerlo.
RGB ha vuelto a dedicar una gran parte de tiempo y esfuerzo, no solo a testear e incluir las novedades de esta nueva versión. Si no también a corregir, adaptar y reestructurar partes de lo ya escrito para mantener su vigencia.
Desde aquí darle las gracias a RGB por su gran trabajo y dedicación desde hace años al proyecto y por eso he querido darle promoción a ese compromiso en mi pequeño blog.
Enlaces de interés
#openSUSE Tumbleweed revisión de las semanas 4 y 5 de 2024
Tumbleweed es una distribución de GNU/Linux «Rolling Release» o de actualización contínua. Aquí puedes estar al tanto de las últimas novedades.

openSUSE Tumbleweed es la versión «rolling release» o de actualización continua de la distribución de GNU/Linux openSUSE.
Hagamos un repaso a las novedades que han llegado hasta los repositorios esta semana.
Y recuerda que puedes estar al tanto de las nuevas publicaciones de snapshots en esta web:
El anuncio original lo puedes leer en el blog de Dominique Leuenberger, publicado bajo licencia CC-by-sa, en este este enlace:
Vamos a hacer un repaso de dos semanas, en las que ha habido batantes actualizaciones y además alguna muy jugosa.
Esta revisión cubre lo acontecido en estas dos semanas pasadas en las que se han publicado 12 nuevas snapshots (0119, 0121…0126, 0128…0201)
Los cambios más relevantes que han traído a los repositorios son:
- rpm-config-SUSE
- libvirt 10.0.0
- PHP 8.2.15
- NetworkManager-applet 1.36.0
- Linux kernel 6.7.1 & 6.7.2. Durante la versión 6.7.1, hubo algunos cambios en el diseño del paquete, lo que desafortunadamente resultó en la reutilización de los contadores de compilación; esto se había mostrado como «conflictos de archivos» en algunos casos. La actualización posterior a 6.7.2 resolvió esto nuevamente para siempre.
- PAM 1.6.0
- Mesa 23.3.3 & 23.3.4
- Ruby 3.3: es el nuevo sistema predeterminado. Ruby 3.2 todavía está en los repositorios, lo que a su vez significa que zypper dup no lo limpiará de tu sistema. Si tienes Ruby principalmente por yast, probablemente puedas desinstalar Ruby3.2 sin perder funcionalidad (asegúrate de revisar cuidadosamente los paquetes que deseas eliminar).
- Mozilla Firefox 122.0
- Postfix 3.8.5
- Ghostscript 10.02.1
- cURL 8.6.0
- RPM 4.19.1
Y próximas actualizaciones traerán entre otros, estas actualizaciones en las que se están trabajando:
- glibc 2.39
- Python 3.12
- GStreamer 1.22.9
- QEmu 8.2.0
- dbus-broker
- libxml 2.12.x
- openSSL 3.2.0
- c-ares 1.21.0
- GCC 14
Si quieres estar a la última con software actualizado y probado utiliza openSUSE Tumbleweed la opción rolling release de la distribución de GNU/Linux openSUSE.
Mantente actualizado y ya sabes: Have a lot of fun!!
Enlaces de interés
- ¿Por qué deberías utilizar openSUSE Tumbleweed?
- zypper dup en Tumbleweed hace todo el trabajo al actualizar
- ¿Cual es el mejor comando para actualizar Tumbleweed?
- ¿Qué es el test openQA?
- http://download.opensuse.org/tumbleweed/iso/
- https://es.opensuse.org/Portal:Tumbleweed

——————————–
openSUSE Tumbleweed – Review of the weeks 2024/04 & 05
Dear Tumbleweed users and hackers,
Once again I dared not to be at my desk last Friday, which resulted in me having to cover two weeks of Tumbleweed updates again. Quite a few larger things are happening, and you certainly want to know what has been coming – and will be coming – your way. The review covers the 12 snapshots released since my last ‘weekly review’ (0119, 0121…0126, 0128…0201)
The most relevant changes to your Tumbleweed system have been:
- rpm-config-SUSE: enable full ksym() dependencies in Tumbleweed
- libvirt 10.0.0
- PHP 8.2.15
- NetworkManager-applet 1.36.0
- Linux kernel 6.7.1 & 6.7.2. During the 6.7.1 lifetime, there were some package layout changes, which unfortunately resulted in build counters being reused; this had shown as ‘file conflicts’ in some cases. The later update to 6.7.2 solved this again for good.
- PAM 1.6.0
- Mesa 23.3.3 & 23.3.4
- Ruby 3.3 (rebuild, to get all ruby3.3-rubygem packages built). Ruby 3.3 is the new system default. Ruby 3.2 is still in the repos, which in turn means zypper dup will not clean it up from your system. If you have Ruby mostly for yast, you can likely uninstall ruby3.2 without loss of functionality (make sure to carefully check the packages to be removed – if in doubt, week it installed)
- Mozilla Firefox 122.0
- Postfix 3.8.5
- Ghostscript 10.02.1
- cURL 8.6.0
- RPM 4.19.1: some stricter spec file parsing. As a packager, make sure to read https://lists.opensuse.org/archives/list/factory@lists.opensuse.org/thread/HG2JKUIKDTWQQIQSA43A4VWHX7YKJQT3
These things are currently being staged and being prepared for future inclusion into Tumbleweed:
- glibc 2.39
- Python 3.12 (python modules built for it, but /usr/bin/python3 will still point to Python 3.11 for now)
- GStreamer 1.22.9
- QEmu 8.2.0: causes build failures of ovmf
- dbus-broker: a big step forward; upgrades seem to be an issue that needs to be addressed
- libxml 2.12.x: slow progress
- openSSL 3.2.0
- c-ares 1.21.0: nA new cycle has formed: appstream-glib, c-ares, curl, googletest, nghttp2, python311. This should be eliminated, as cycles cause massive trouble when branching new code streams
- GCC 14: our usual 2-phase approach to introduce it. Currently working on phase 1, meaning GCC14 will be providing the base libraries (libgcc_s1, libstdc++…). The compiler itself will stay at version 13 for now.
Once we integrate glibc 2.39 plus the python 3.12 changes, we will let OBS sort the dep chain for the new Python 3.12 modules, as this task is not handled by our external bot that usually takes care of the rebuild strategy. This will result in a huge snapshot, likely to be published early next week.
FLISOL 2024 de Ecuador busca colaboradores
Cada año hay un evento que en relidad no lo es, ya que en realidad es un marco que promueve que se realicen eventos en ciudades de toda América del Sur, Portugal y España. Suele tener una fecha aproximada situada sobre el último domingo de abril, por lo que es relativamente fácil encontrar uno que se adapte a ti. Hoy me complace compartir con vosotros que FLISOL 2024 de Ecuador busca colaboradores para sus sedes, que son más de una, y que la convierten de momento en el mayor evento FLISOL del mundo. Una nueva oportunidad de iniciarse en el mundo del Software Libre y conocer esa maravillosa Comunidad.
FLISOL 2024 de Ecuador busca colaboradores

Cada año, desde 2008, el cuarto sábado de abril se organizan unas jornadas de difusión de Software Libre de forma simultánea en multitud de lugares del planeta. Este evento recibe el nombre de FLISOL y como principal objetivo es promover el uso del software libre mediante charlas y eventos.
Este 2024 FLISOL cae el 27 de abril, lo cual significa que los diversos eventos que se organizan con esta idea en mente se celebrarán alrededor de esta fecha. Y Ecuador se postula como uno de los países que más va a apostar por este evento.
En el momento de redactar esta noticia hay 9 sedes propuestas en las que se va a compartir conocimiento, experiencias y todas las bondades del Software Libre.
Si además de asistir estás interesado en colaborar de forma activa te animo a hacerlo presentando tu propuesta de colaboración en cualquiera de las sedes: Santo Domingo (13 de abril), Azogues (20 de abril), Cuenca (27 de abril), Latacunga (27 de abril), Loja (18 de mayo), Guayaquil (1 de junio), Ambato (8 de junio), Guaranda (15 de junio) y Quito (22 de junio).
Para agilizar el proceso han habilitado un formulario donde puedes poner la información que necesitan los organizadores para poder gestionar todas las propuestas, desde las ponencias hasta los patrocinios pasando por las tareas organizativas.

Más información: FLISOL Ecuador
¿Qué es Flisol?
Para los que todavía no conozcan Flisol, se trata de un evento «… de difusión de Software Libre más grande en Latinoamérica y está dirigido a todo tipo de público: estudiantes, académicos, empresarios, trabajadores, funcionarios públicos, entusiastas y aun personas que no poseen mucho conocimiento informático…»
La asistencia es gratuita y su principal objetivo es promover el uso del software libre, dando a conocer al público en general su filosofía, alcances, avances y desarrollo.
Tenemos un canal de telegram donde los asistentes al evento recibirán información actualizada GRUPO DE TELEGRAM PARA ASISTENTES.
La entrada FLISOL 2024 de Ecuador busca colaboradores se publicó primero en KDE Blog.
Kdenlive 24.02.0 RC está listo para su testeo
Este mes de febrero pasará a la historia por tener una buena cantidad de grandes actualizaciones, y el editor de vídeo de KDE no es una excepción. El pasado 2 de febrero de 2024 fue anunciado que Kdenlive 24.02.0 RC está listo para su testeo. Os recuerdo que esta revisión solo es apta para aquellos que quieran que reportar errores y que su versión funcione a las mil maravilla.
Kdenlive 24.02.0 RC está listo para su testeo
Hoy quiero comentar que ha sido lanzado la versión Kdenlive 24.02.0 RC, es decir, una versión candidata (no estabe) del programa de montaje y edición de videos Open Source (código abierto) lanzado alrededor del año 2003.

En palabras de sus desarrolladores:

El desarrollo de Kdenlive ha estado muy activo desde nuestro sprint de noviembre, centrándonos en la 24.02 KDE Mega Release, que estará basada en Qt6 (pero sigue siendo compatible con Qt5) y KF6. Además de las tareas esenciales de portabilidad, hemos dedicado esfuerzos a corregir numerosos errores para mejorar la estabilidad y hemos introducido algunas nuevas características interesantes, que se detallarán en un próximo post. También se han hecho progresos notables en el empaquetado. Además de las versiones para Linux y Windows, estamos encantados de anunciar la primera versión nativa para procesadores Mac Arm.
La versión final está prevista para finales de mes, así que ahora es el momento de que la comunidad nos ayude a probar la versión candidata y nos informe de cualquier regresión o error que encuentre. Deja tu opinión en los comentarios de abajo, infórmanos en nuestro bugtracker o cuéntanoslo en nuestro próximo Kdenlive online Café el 9 de febrero a las 9PM UTC.
A continuación encontrarás los enlaces a los distintos binarios. Recuerde que se trata de un software de pre-lanzamiento recomendado únicamente para pruebas.
Kdenlive binaries:
- Linux Appimage
- Windows installer
- Mac ARM Package (requires macOS 11 or later)
- Mac Intel Package (requires macOS 11 or later)
Más información: Kdenlive
Y, recuerda, todo este software es gratuito y sin publicidad en todos los sentidos: no te cuesta ni un euro y no se cobra en en forma de datos personales. No obstante, si quieres ayudar a su desarrollo siempre puedes participar en con donaciones.
¿Qué es Kdenlive?

Kdenlive (acrónimo del inglés: KDE Non-Linear Video Editor) (?ke?d?n?la?v) es un editor de video no lineal para KDE que soporta todos los formatos de vídeos de codificador FFmpeg (DV, HDV, mpeg, avi, mp4, mov, flv, ogg, wav, mp3, vorbis, …) y los formatos de imágenes clásicas (gif, png, jpeg, xcf, exr, tiff, svg, …)
Kdenlive se cimenta sobre Qt y la infraestructura (framework) de librerías KDE. Gran parte de los procesamientos de video son efectuados a través de MLT Framework, que se basan a su vez en otros proyectos Open Source tales como FFmpeg, freOr, movit, padspa, sox, etc.
Kdenlive ha sido concebido para responder a las más diversas exigencias de montaje y edición, desde nivel básico hasta los más elaborados niveles de edición profesional. No obstante, está desarrollado por un pequeño grupo de personas y la incorporación de nuevos miembros al equipo será siempre muy bienvenida e invaluablemente apreciada.
Además, tiene las siguientes características:
- Dispone de linea de tiempo con función búsqueda.
- Copiado y pegado de clips.
- Función deshacer completa.
- Captura de por Firewire: DV y HDV
- Captura por Video4Linux
- Exporta en diferentes formatos: mpeg, avi, dv, flash, mov, …
- Múltiples efectos como: Automask, Box Blur, Charcoal, etc.
Más información: Kdenlive
La entrada Kdenlive 24.02.0 RC está listo para su testeo se publicó primero en KDE Blog.