
 Member
 baltolkien
SuperTuxKart, juego de Karts libre – Juegos Linux (VI)
Sigo con la serie de grandes juegos libres que empecé con estrategia por turnos con The Battle for Wesnoth, seguí con uno de velocidad con Speed Dreams, continué con un MMORPG Ryzom para posteriormente presenté uno de plataformas, SuperTux. El último fue Xonotic, un FPS frenético. Incluso hace poco inicié una entrada recurrente que recopile, con información extra, este listado creciente de juego y donde comenté que el siguiente de la lista sería SuperTuxKart, un gran juego de Karts para GNU/Linux» que ya fue presentado en el blog por una gran alumna mía, Nuria Rubio, pero que he decidido reescribir para adaptarlo a la serie.
SuperTuxKart, juego de Karts libre – Juegos Linux (VI)

Hoy le toca al turno a uno de los juegos más famosos del mundo del desarrollo libre, protagonista incluso de Akademy-es virtuales.
Se trata de un juego de karts que conducen mascotas de proyectos GNU/Linux como pueden ser el protagonista del título, Tux (de Linux), de Gnu (de GNU), Geeko (de openSUSE) o Konqi (de KDE).

SuperTuxKart es un juego libre y gratuito de carreras de coches tipos arcade en 3D, el protagonista de la cual es Tux, la mascota del kernel Linux. La idea de su creación surgió como una mejora alternativa del juego TuxKart, de parte del grupo Game of the Month. Sin embargo, al final se optó para realizar un juego totalmente nuevo.
En palabras de sus desarrolladores:
Karts. Nitro. Acción! SuperTuxKart es un juego de carreras 3D de código abierto con una gran variedad de personajes, circuitos y maneras de jugar. Nuestro objetivo es crear un juego que sea más divertido que realista, y proporcionar una experiencia agradable para todas las edades.
Tenemos varios circuitos con diferentes ambientaciones donde podrás disfrutar de lo lindo, desde conducir bajo el agua, tierras de cultivo rurales, selvas o incluso ¡en el espacio!Dalo todo mientras evitas que los otros karts te avancen, pero no te comas los plátanos! Vigila con las bolas de bolos, desatascdores , chicles y pasteles lanzados por tus oponentes.
Puedes correr una sola carrera contra otros karts, competir en uno o varios campeonatos, intentar superar las puntuaciones máximas en tus propias carreras contra reloj, jugar en modo batalla contra el ordenador o tus amigos, y más!Para un desafío todavía más grande, compite en línea contra jugadores de todo el mundo y demuestra tus habilidades al volante!
La última versión de SuperTuxKart es la 1.4, que fue lanzada el 30 de septiembre de 2023 y ofrecía, como era de esperar muchas mejoras visuales, de rendimiento y de jugabilidad.
Las características de SuperTuxKart
Como es habitual, aunque el juego está basado en el clásico de SuperMario Kart, este juego libre va adquiriendo las novedades que se van generando para este tipo de juegos de carreras, donde una de sus características principales es que lo largo del recorrido se encuentran nitros y cajas sorprendida, que incluyen desde elementos de ayuda hasta trampas.
SuperTuxKart ofrece varias formas de juego, incluyendo
- Un jugador: Puedes competir solo contra la computadora.
- Multijugador local: Hasta cuatro jugadores pueden competir en la misma pantalla.
- Multijugador en línea: Puedes unirte a jugadores de todo el mundo para competir en línea.
- Modos de juego adicionales: Además de las carreras normales, el juego también incluye modos como contrarreloj, sigue al líder, fútbol, capturar la bandera y modo batalla.
Estas opciones brindan una experiencia de juego variada y emocionante para jugadores de todos los niveles.
¿Cómo conseguir SuperTux Kart?
Como era de esperar, SuperTux Kart está disponible para los sistemas operativos más famosos Linux, Windows y macOS, pero es que además los desarrolladores han preparado versiones para plataformas móviles como Android o consolas como la Nintendo Switch.
En la mayoría de las distribuciones GNU/Linux está disponible para instarlarse desde los repositorios pero el equipo de desarrollo también ha pensado que no está de más tener versiones en Faltpak y AppImage.

¿Puedo participar en su desarrollo?
Evidentemente la respuesta es que si. Cualquier proyecto libre necesita ayuda para su desarrollo bien sea programando, diseñando, organizando, etc. Además, siempre puede ayudar donando para los temas económicos como mantenimiento de servidores y, porqué no decirlo, para intentar que el juego tenga desarrolladores a tiempo completo.
En el caso de SuperTu Kart, los desarrolladores han creado una página para la comunidad donde, dividido en columnas, ponen los campos donde programadores, artistas y todo el mundo pueden colaborar.
De esta forma, a modo de ejemplo, para los desarrolladores además de programación pura y dura se puede colaborar con el control de versiones, compilando o ayudando a los principiantes. Mientras que para los artistas además de las tareas básicas de diseño creando circuito o persaonajes se puede trabajar en el mundo de las licencias o en los estilos generales del juego.
Para finalizar, todo el mundo puedo colaborar añadiendo voces, traduciendo o reportando errores.
La entrada SuperTuxKart, juego de Karts libre – Juegos Linux (VI) se publicó primero en KDE Blog.


Where's my python code?
![]()
Python is a interpreted language, so the python code are just text
files with the .py extension. For simple scripts it's really easy to
have your files located, but when you starts to use dependencies and
different projects with different requirements the thing starts to get
more complex.
PYTHONPATH
The Python interpreter uses a list of paths to try to locate python modules, for example this is what you can get in a modern GNU/Linux distribution by default:
Python 3.11.7 (main, Dec 15 2023, 10:49:17) [GCC] on linux
Type "help", "copyright", "credits" or "license" for more information.
>>> import sys
>>> sys.path
['',
 '/usr/lib64/python311.zip',
 '/usr/lib64/python3.11',
 '/usr/lib64/python3.11/lib-dynload',
 '/usr/lib64/python3.11/site-packages',
 '/usr/lib64/python3.11/_import_failed',
 '/usr/lib/python3.11/site-packages']
These are the default paths where the python modules are installed. If
you install any python module using your linux packaging tool, the
python code will be placed inside the site-packages folder.
So system installed python modules can be located in:
-
/usr/lib/python3.11/site-packagesfor modules that are architecture independent (pure python, all.pyfiles) -
/usr/lib64/python3.11/site-packagesfor modules that depends on the arquitecture, that's something that uses low level libraries and needs to build so there are some.sofiles.
pip
When you need a new python dependency you can try to install from your
GNU/Linux distribution using the default package manager like
zypper, dnf or apt, and those python files will be placed in the
system paths that you can see above.
But distributions doesn't pack all the python modules and even if they do, you can require an specific version that's different from the one packaged in your favourite distribution, so in python it's common to install dependencies from the Python Package Index (PyPI).
Python has a tool to install and manage Python packages that looks for desired python modules in PyPI.
You can install new dependencies with pip just like:
$ pip install django
And that command looks for the django python module in the PyPI,
downloads and install it, in your user
$HOME/.local/lib/python3.11/site-packages folder if you
use --user, or in a global system path like /usr/local/lib or
/usr/lib if you run pip as root.
But the usage of pip directly in the system is something not
recommended today, and even it's disabled in some
distributions, like openSUSE Tumbleweed.
[danigm@localhost ~] $ pip install django
error: externally-managed-environment

× This environment is externally managed
╰─> To install Python packages system-wide, try
    zypper install python311-xyz, where xyz is the package
    you are trying to install.

    If you wish to install a non-rpm packaged Python package,
    create a virtual environment using python3.11 -m venv path/to/venv.
    Then use path/to/venv/bin/python and path/to/venv/bin/pip.

    If you wish to install a non-rpm packaged Python application,
    it may be easiest to use `pipx install xyz`, which will manage a
    virtual environment for you. Install pipx via `zypper install python311-pipx` .

note: If you believe this is a mistake, please contact your Python installation or OS distribution provider. You can override this, at the risk of breaking your Python installation or OS, by passing --break-system-packages.
hint: See PEP 668 for the detailed specification.
virtualenvs
Following the current recommendation, the correct way of installing
third party python modules is to use virtualenvs.
The virtualenvs are just specific folders where you install your
python modules and some scripts that make's easy to use it in
combination with your system libraries so you don't need to modify the
PYTHONPATH manually.
So if you've a custom project and want to install python modules you can create your own virtualenv and use pip to install dependencies there:
[danigm@localhost tmp] $ python3 -m venv myenv
[danigm@localhost tmp] $ . ./myenv/bin/activate
(myenv) [danigm@localhost tmp] $ pip install django
Collecting django
...
Successfully installed asgiref-3.7.2 django-5.0.1 sqlparse-0.4.4
So all dependencies are installed in my new virtualenv folder and if I use the python from the virtualenv it's using those paths, so all the modules installed there are usable inside that virtualenv:
(myenv) [danigm@localhost tmp] $ ls myenv/lib/python3.11/site-packages/django/
apps  contrib  db        forms  __init__.py  middleware   shortcuts.py  templatetags  urls   views
conf  core     dispatch  http   __main__.py  __pycache__  template      test          utils
(myenv) [danigm@localhost tmp] $ python3 -c "import django; print(django.__version__)"
5.0.1
(myenv) [danigm@localhost tmp] $ deactivate
With virtualenvs you can have multiple python projects, with different dependencies, isolated, so you use different dependencies when you activate your desired virtualenv:
- activate
$ . ./myenv/bin/activate - deactivate
$ deactivate
High level tools to handle virtualenvs
The venv module is a default Python module and as you can see
above, it's really simple to use, but there are some tools that
provides some tooling around it, to make it easy for you, so usually
you don't need to use venv directly.
pipx
For final python tools, that you are not going to use as dependencies in your python code, the recommended tool to use is pipx.

The tool creates virtualenv automatically and links the binaries so
you don't need to worry about anything, just use as a way to install
third party python applications and update/uninstall using it. The
pipx won't mess your system libraries and each installation will use
a different virtualenv, so even tools with incompatible dependencies
will work nicely together in the same system.
Libraries, for Python developers
In the case of Python developers, when you need to manage dependencies for your project, there are a lot of nice high level tools for managing dependencies.
These tools provides different ways of managing dependencies, but all
of them relies in the use of venv, creating the virtualenv in
different locations and providing tools to enable/disable and manage
dependencies inside those virtualenvs.
For example, poetry creates virtualenvs by default inside the
.cache folder, in my case I can find all poetry created virtualenvs
in:
/home/danigm/.cache/pypoetry/virtualenvs/
Most of these tools add other utilities on top of the dependency
management. Just for installing python modules easily you can always
use default venv and pip modules, but for more complex projects
it's worth to investigate high level tools, because it'll make easy to
manage your project dependencies and virtualenvs.
Conclusion
There are a lot of python code inside any modern Linux distribution and if you're a python developer it's possible to have a lot of python code. Make sure to know the source of your modules and do not mix different environments to avoid future headaches.
As a final trick, if you don't know where's the actual code of some python module in your running python script, you can always ask:
>>> import django
>>> django.__file__
'/tmp/myenv/lib64/python3.11/site-packages/django/__init__.py'
This could be even more complicated if you start to use containers and different python versions, so keep you dependencies clean and up to date and make sue that you know where is your Python code.
Quinto audio de Podcast Linux «Linux Connexion con Yoyo Fernández» – Podcast Linux #5
Aunque el proyecto Podcast Linux está parado esto no significa que no tenga cabida en el blog y, mientras pueda, seguirépromocionándolo con la esperanza de que reviva, como cierto pájaro mitológico. Y he pensado hacerlo de una forma sencilla para mi y creo que benificiosa para todas, creando poco a poco un índice de todas sus emisiones, de forma que podamos encontrar en este blog una alternativa a su magnífica obra. Así que bienvenidos al quinto audio de Podcast Linux «Linux Connexion con Yoyo Fernández» que puede que sea el primer encuentro entre dos de los grandes comunicadores del mundo GNU/Linux.
Quinto audio de Podcast Linux «Linux Connexion con Yoyo Fernández» – Podcast Linux #5
Como los lectores del blog sabrán hace un tiempo Podcast Linux cerró sus emisiones por motivos que solo incumben a su creador. Desde el blog no quiero dejar que su recuerdo se desvanezca así que seguiré publicitando sus audios ya que su calidad no debe caer en el olvido.
Hace poco decidí empezar por el principio, mostrando su primer audio, el cual no promocioné en su día. Lo mismo ocurría con los siguientes, y, si las búsquedas no me engañan no fue hasta los episodios 19, 20, 21 y 22 cuando empecé a hacerlo.
De esta forma continuo con su quinto audio que, en palabras de Juan, se nos presentaba así:
Iniciamos unos episodios especiales. Linux Connexion.
Con ellos pretendo acercar a las personas que han salido en la sección Comunidad Linux.
El motivo es bien sencillo.
Lo más importante de GNU/Linux, en mi humilde opinión, no es ni sus distribuciones, ni sus aplicaciones, ni su código, ni su filosofía. Son las personas que lo hacen posible, y que con su trabajo y esfuerzo, fomentan el uso de nuestro sistema operativo preferido.Hoy en este episodio especial Linux Connexion tenemos con nosotros a Yoyo Fernández, invitado del 3º episodio de la sección Comunidad Linux. Un Linuxero muy especial para mí.
@yoyo308
@salmorejogeek
@killallradio
http:/www.salmorejogeek.com
Más información: Podcast Linux
Sigue a Podcast Linux
Aprovecho para animaros a seguir Podcast Linux en algunos de los canales de comunicación que tiene:
- Twitter: https://twitter.com/podcastlinux
- Mastodon: https://mastodon.social/@podcastlinux/
- Correo: podcastlinux@disroot.org
- Web: https://podcastlinux.com/
- Telegram: https://t.me/podcastlinux
- Telegram Juan Febles: https://t.me/juanfebles
- Youtube: https://www.youtube.com/PodcastLinux
- Feed Podcast Linux: https://podcastlinux.com/feed
- Feed Linux Express (Audios Telegram): https://podcastlinux.com/Linux-Express/feed
La entrada Quinto audio de Podcast Linux «Linux Connexion con Yoyo Fernández» – Podcast Linux #5 se publicó primero en KDE Blog.
Recopilación del boletín de noticias de la Free Software Foundation – febrero de 2024
Recopilación y traducción del boletín mensual de noticias relacionadas con el software libre publicado por la Free Software Foundation.

La Free Software Foundation (FSF) es una organización creada en Octubre de 1985 por Richard Stallman y otros entusiastas del software libre con el propósito de difundir esta filosofía, frente a las restricciones y abusos a los usuarios por parte del software privativo.
La Fundación para el software libre (FSF) se dedica a eliminar las restricciones sobre la copia, redistribución, entendimiento, y modificación de programas de computadoras. Con este objeto, promociona el desarrollo y uso del software libre en todas las áreas de la computación, pero muy particularmente, ayudando a desarrollar el sistema operativo GNU.
Mensualmente publican un boletín (supporter) con noticias relacionadas con el software libre, sus campañas, o eventos. Una forma de difundir los proyectos, para que la gente conozca los hechos, se haga su propia opinión, y tomen partido si creen que la reivindicación es justa!!
- En este enlace podéis leer el original en inglés: https://www.fsf.org/free-software-supporter/2024/february
- Y traducido en español (cuando el equipo de traducción lo tenga disponible) en este enlace: https://www.fsf.org/free-software-supporter/2024/febrero

Puedes ver todos los números publicados en este enlace: http://www.fsf.org/free-software-supporter/free-software-supporter
Después de muchos años colaborando en la traducción al español del boletín, desde inicios del año 2020 decidí tomarme un descanso en esta tarea.
Pero hay detrás un pequeño grupo de personas que siguen haciendo posible la difusión en español del boletín de noticias de la FSF.
¿Te gustaría aportar tu ayuda en la traducción y colaborar con la FSF? Lee el siguiente enlace:
Por aquí te traigo un extracto de algunas de las noticias que ha destacado la FSF este mes de febrero de 2024.
Si la historia de Horizon Post Office se trata como un escándalo, nada cambiará
Del 20 de enero por John Naughton
A pesar del escándalo de Post Office Horizon, Fujitsu, el gigante de TI detrás del software privativo y que funciona mal, sigue siendo uno de los proveedores clave de servicios y funciones críticas en Gran Bretaña.
El gobierno del Reino Unido ha perdido el control sobre las empresas a las que ha subcontratado infraestructura tecnológica crítica y se ha vuelto demasiado dependiente del software privativo.
Exigimos que los gobiernos no sean rehenes del software privativo. Solicite la adopción de software libre por parte de su gobierno.
- https://www.theguardian.com/commentisfree/2024/jan/20/horizon-post-office-story-scandal-crisis-fujitsu
- https://www.fsf.org/campaigns/priority-projects/free-software-adoption-by-governments
- https://libreplanet.org/wiki/Group:Free_Software_in_Government
Proyecto de la UE para impulsar pagos en línea privados y seguros de próxima generación
Del 17 de enero por Anke Langelaan
Next Generation Internet (NGI) Taler es un proyecto para un sistema de pago en línea para Europa que pretende ser social, ecológica y fiscalmente responsable.
Está basado en GNU Taler, que se diferencia de los métodos de pago online actuales, como tarjetas de crédito o transferencias bancarias, porque es software libre y ofrece privacidad al comprador.
- https://www.tue.nl/en/news-and-events/news-overview/17-01-2024-tue-coordinates-eu-project-to-push-next-generation-private-and-secure-online-payments
- https://directory.fsf.org/wiki/Taler
¡FeretDB lanza v1.18.0 con soporte OpLog!
Del 8 de enero por Alexander Fashakin
Se ha publicado la última versión de FerretDB v1.18.0 con soporte para la funcionalidad básica OpLog, junto con otras características interesantes.
FerretDB tiene la misión de agregar compatibilidad de MongoDB a otros backends de bases de datos, incluidos Postgres y SQLite. Todas las funciones nuevas de esta versión nos ayudarán a mejorar la compatibilidad con más aplicaciones y casos de uso.

Estas son solo algunas de las noticias recogidas este mes, ¡¡pero hay muchas más muy interesantes!! si quieres leerlas todas (cuando estén traducidas) visita este enlace:
Y todos los números del «supporter» o boletín de noticias de 2024 en español, francés, portugués e inglés aquí:

—————————————————————
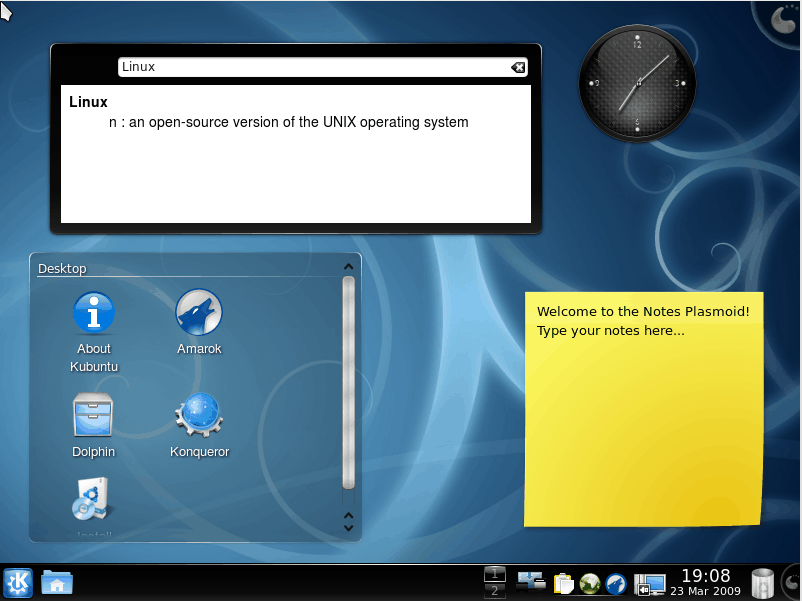
25 plasmoides más para el escritorio Plasma, del 76 al 100
Uno de los temas recurrentes del blog son los plasmoides. Hace ya mucho tiempo que publiqué los artículos recopilatorios del 1 al 25, 26 al 50 y del 51 al 75 pero sigo teniendo pendiente hacer los siguientes. Ahora que estamos a punto de llegar a los 250 es el momento de seguir con 25 plasmoides más para el escritorio Plasma, en esta ocasión del 76 al 100.
¿Qué son los plasmoides?
Para los no iniciados en el blog, quizás la palabra plasmoide le suene un poco rara pero no es mas que el nombre que reciben los widgets para el escritorio Plasma de KDE.
En otras palabras, los plasmoides no son más que pequeñas aplicaciones que puestas sobre el escritorio aumentan las funcionalidades del mismo, nos dan información útil o simplemente lo decoran.
25 plasmoides más para el escritorio Plasma, del 76 al 100
La siguiente lista puede tener algún que otro plasmoide desactualizado pero es un buen repaso a estas miniaplicaciones que llenan de funcionalidad al escritorio más completo que puedes encontrar en el mercado… y uno de los que tienen mejor precio: 0 €.
- RSS Indicator: un lector de rss para nuestro escritorio
- Ttrss pocket: otro lector de rss y pocket
- Server Status: conoce estado de tus servidores
- Bitcoin Price: controlando el valor de la moneda
- Vallpaper:, un fondo de pantalla diferente para escritorio
- Win7 Volume Mixer: gestor alternativo de volumen
- PlasmaTube: youtube en tu fondo de pantalla
- KDE Connect SMS Sender: KDE Connect ya puede enviar SMS
- UMenu: otro lanzador de aplicaciones
- Plasma Inline Clock: reloj en línea
- Ultimate Gmail Feed: lista de los correos no leídos de tu bandeja de entrada
- AlphaBlack Control: controlando los colores de tu tema
- Sysmon: monitorizando tu equipo
- YearProgress: viendo el progreso del año
- Volume Slider: simple barra para el control del volumen
- Window Buttons: aumentando las opciones de los botones de las ventanas
- Minimal menu: un lanzadorde aplicaciones minimalista
- Air Quality Widget: controlar la calidad del aire recogiendo los datos de proyecto World Air Quality Project.
- Philips Hue light control: controla la iluminació de las bombillas Philips Hue.
- Unibody Kickoff: otro lanzador de aplicaciones
- Full Notifications KDE 5: mejorando las notificaciones de Plasma
- KDE Connect Device: otro plasmoide para KDE Connect
- Intel P-state y CPUFreq Manager: controlando mejor tu procesador
- Plasma-applet-brighty: controla el brillo de tu pantalla
- CSol para Plasma 5: mira el astro rey sin peligro
Y con esto llegamos a los 100… todavía me quedan más de 15 por recopilar. Ya se hará,
La entrada 25 plasmoides más para el escritorio Plasma, del 76 al 100 se publicó primero en KDE Blog.
Lanzada la segunda RC de KDE 6, el megalanzamiento de la Comunidad KDE
Los desarrolladores de la Comunidad KDE están inmersos en un salto tecnológico que lleva eleverá a cotas superiores la excelencia de los productos KDE. Fruto de este movimiento se ha preparado un lanzamiento colectivo de Plasma 6, KDE Frameworks 6 y KDE Gear 24.02 para el 28 de febrero. A falta de un nombre mejor me he permitido bautizarlo como KDE 6, ya que utilizará tecnología de las librerías Qt 6. Es por ello que hay que preprarar bien las cosas y de esta forma hoy miércoles ha sido lanzada la segunda RC de KDE 6, el megalanzamiento de la Comunidad KDE que empieza a generar mucha expectativa. Así que, para los que disfruten de probar cosas nuevas es el momento de testear esta versión y reportar los errores que se encuentren. ¡No pierdas la oportunidad de contribuir al desarrollo de Plasma!
Lanzada la segunda RC de KDE 6, el megalanzamiento de la Comunidad KDE
Hoy 31 de enero ha sido lanzada la segunda RC de KDE 6 ( es decir, de Plasma 6, KDE Frameworks 6 y KDE Gear 24.02). Este conjunto de software está previsto que sea lanzado el 28 de febrero de 2024. Esta primera versión liberada no es apta todavía para el usuario que busquen estabilidad, así que abstenerse usuarios finales si no queréis que se os rompa el sistema.

En palabras de sus desarrolladores:
Cada pocos años adaptamos los componentes clave de nuestro software a una nueva versión de Qt, aprovechando la oportunidad para eliminar cosas innecesarias y sacar partido de las funciones actualizadas que nos ofrece la versión más reciente de Qt.
Faltan menos de 30 días para el megarelease de KDE. A finales de febrero de 2024 publicaremos Plasma 6, Frameworks 6 y todo un nuevo conjunto de aplicaciones en una edición especial de KDE Gear de una sola vez.
Si has estado siguiendo las actualizaciones aquí, aquí, aquí y aquí, sabrás que estamos superando la fase de pruebas y alcanzando poco a poco la estabilidad. KDE pone hoy a su disposición la segunda versión Release Candidate de todo el software que incluiremos en la megalanzamiento.
Al igual que con las versiones Alfa , Beta y la primera RC, se trata de una versión preliminar destinada a desarrolladores y probadores. El software proporcionado se acerca a la estabilidad, pero aún no es seguro al 100% para su uso en un entorno de producción. Te recomendamos que sigas utilizando las versiones estables de Plasma, Frameworks y aplicaciones para tu trabajo diario. Pero si utilizas esto, ten cuidado con los errores e infórmanos de ellos rápidamente, para que podamos solucionarlos.
Más información: KDE
Pruébalo y reporta errores

Todas las tareas dentro del mundo del Software Libre son importantes: desarrollar, traducir, empaquetar, diseñar, promocionar, etc. Pero hay una que se suele pasar por alto y de la que solo nos acordamos cuando las cosas no nos funcionan como debería: buscar errores.
Desde el blog te animo a que tú seas una de las personas responsables del éxito del nuevo lanzamiento de la Comunidad KDE. Para ello debes participar en la tarea de buscar y reportar errores, algo básico para que los desarrolladores los solucionen para que el despegue del escritorio esté bien pulido. Debéis pensar que en muchas ocasiones los errores existen porque no le han aparecido al grupo de desarrolladores ya que no se han dado las circunstancias para que lo hagan.
Para ello debes instalarte esta RC y comunicar los errores que salgan en bugs.kde.org, tal y como expliqué en su día en esta entrada del blog.
La entrada Lanzada la segunda RC de KDE 6, el megalanzamiento de la Comunidad KDE se publicó primero en KDE Blog.

SUSE BuildOPS Team
Descubre GCompris, otro vídeo promocional
Hace unos meses fue lanzado GCompris 3.3 , una nueva versión que venía con nuevos idiomas añadidos, correcciones de errores, alguna que otra mejora gráfica y mejoras en la usabilidad del teclado. Otro paso de una aplicación que sigue ofreciendo verdaderas maravillas para niñas y niños y que no deja de evolucionar. No obstante, nunca está de más seguir promocionando esta suite educativa como hizo The KDE Community hace 4 meses con un vídeo titulado «Descubre GCompris». Si os gusta difundid la palabra y hablad de ella a todos los maestros y maestras que conozcáis.
Descubre GCompris, otro vídeo promocional
Uno de las aplicaciones más completas y, en mi opinión, más infrautilizadas en el mundo educativo es GCompris, una suite compuesta de casi 200 actividades, con niveles y elementos de gamificación que es ideal para cualquier escuela y recomendado para cualquier familia dado su carácter libre, respetuoso con la privacidad y libre de publicidad.
En esta ocasión os comparto otro vídeo promocional en que se muestran algunas de las bondades de esta suite educativa que no para de crecer y mejorar.
Puedes encontrar GCompris (disponible para GNU/Linux, Windows, Raspberry Pi y MacOS) en la página de descargas. También está disponible en la Play Store de Android, el repositorio F-Droid y en la Windows Store.
Quisiera destacar que en mi opinión esta aplicación debería estar presente en todas las comunidades educativas, como lo está en muchos centros logopédicos.
Más información: GCompris
¿Qué es GCompris?
GCompris es un colección de aplicaciones educativas que contiene diferentes actividades para niños entre 2 y 10 años de edad. Originalmente GCompris estaba escrito lenguaje C y Python utilizando las herramientas de GTK+ pero a principios de 2014, desde que sus desarrolladores anunciaron que pasaban a ser un proyecto de la Comunidad KDE, se ha reescrito en a C++ y QML utilizando las herramientas Qt.

Más información: GCompris
La entrada Descubre GCompris, otro vídeo promocional se publicó primero en KDE Blog.

GCP Authentication with Terraform 小記 - ADCs

GCP Authentication with Terraform 小記 - ADCs
Terraform: 1.7.1-dev
Google Cloud SDK 461.0.0.0
OS: openSUSE Leap 15.5 in Azure
今天要來實作 Terraform 驗證方式
如果你是練習 Terraform 官方文件
在 Set up GCP 那段, 你可能用的是 Service Account Key 的方式來進行驗證, 在 Provider 的credentials 指定檔案所在的 位置 NAME.json

這個時候就會有個想法, 我在使用 Terraform in GCP 的時候一定要建立 Service Account Key 嗎? 還是有不同的方式?
這邊引用一下 Terraform 官方的文件
在自己的 workstation 可以使用 ADCs (https://cloud.google.com/sdk/gcloud/reference/auth/application-default )
在 Google Cloud 可以用 Service Account
Service Account 的方式在 Terrafrom 的官方練習就嘗試過了
今天來 Lab Application Default Credentials (ADC) 方式
首先我在 Azure 上面建立一個 openSUSE Leap 15.5 的 VM
因為在 GCP 上面就可以直接用 Cloud Shell, 或是 gcloud SDK 取得也相對方便, 所以在不同的平台上面建立 VM 驗證
安裝 Terraform - 參考之前自己的文件 https://sakananote2.blogspot.com/2023/12/terraform-in-opensuse-leap-155.html
登入 openSUSE Leap 15.5
觀察資訊
> ls ~/.config/gcloud/
active_config config_sentinel configurations default_configs.db gce logs
此時剛裝好 terraform 以及 google Cloud SDK
進行初始化
> gcloud init
Welcome! This command will take you through the configuration of gcloud.
Your current configuration has been set to: [default]
You can skip diagnostics next time by using the following flag:
gcloud init --skip-diagnostics
Network diagnostic detects and fixes local network connection issues.
Checking network connection...done.
Reachability Check passed.
Network diagnostic passed (1/1 checks passed).
You must log in to continue. Would you like to log in (Y/n)? Y
Go to the following link in your browser:
https://accounts.google.com/o/oauth2/auth?response_type=code&client_id=31555942549.apps.googleusercontent.com&redirect_uri=https%3A%2F%2Fsdk.cloud.google.com%2Fauthcode.html&scope=openid+https%3A%2F%2Fwww.googleapis.com%2Fauth%2Fuserinfo.email+https%3A%2F%2Fwww.googleapis.com%2Fauth%2Fcloud-platform+https%3A%2F%2Fwww.googleapis.com%2Fauth%2Fappengine.admin+https%3A%2F%2Fwww.googleapis.com%2Fauth%2Fsqlservice.login+https%3A%2F%2Fwww.googleapis.com%2Fauth%2Fcompute+https%3A%2F%2Fwww.googleapis.com%2Fauth%2Faccounts.reauth&state=oxpO5ubmYhf7xOYF0yyADDXPA4pWkW&prompt=consent&access_type=offline&code_challenge=lQ7DbRpJUX1eFFBejQlR8qbiRoywmEgfJsgl4qx6Nbk&code_challenge_method=S256
Enter authorization code: 4/0AfJohXlD7SgI9MOd7zfJLph0sKwGcU1p5_i5rwby9G32SjPE8yoBiUItUwe5V2OLda2gxw
開啟連結, 填入 authorization code
選取預設的 project
決定要不要設定預設的 Region
初始化完成後, 再次觀察目錄
> ls ~/.config/gcloud/
access_tokens.db config_sentinel credentials.db gce logs
active_config configurations default_configs.db legacy_credentials
先不執行 gcloud auth application-default login
來直接執行 Terraform 看看會發生那種狀況
參考官方文件
建立實作目錄
> mkdir learn-terraform-gcp
進入工作目錄
> cd learn-terraform-gcp
建立 main.tf
terraform {
required_providers {
google = {
source = "hashicorp/google"
version = "4.51.0"
}
}
}
provider "google" {
# credentials = file("<NAME>.json")
project = "sakana-3"
region = "us-central1"
zone = "us-central1-c"
}
resource "google_compute_network" "vpc_network" {
name = "terraform-network"
}
這邊我故意先把 credentials 註解起來
進行 初始化
> terraform init
> terraform plan
Planning failed. Terraform encountered an error while generating this plan.
╷
│ Error: Attempted to load application default credentials since neither `credentials` nor `access_token` was set in the provider block. No credentials loaded. To use your gcloud credentials, run 'gcloud auth application-default login'. Original error: google: could not find default credentials. See https://developers.google.com/accounts/docs/application-default-credentials for more information.
│
│ with provider["registry.terraform.io/hashicorp/google"],
│ on main.tf line 10, in provider "google":
│ 10: provider "google" {
這邊因為找不到驗證資訊就會出現錯誤
建立 local authentication credentials
> gcloud auth application-default login
Go to the following link in your browser:
https://accounts.google.com/o/oauth2/auth?response_type=code&client_id=764186021852-6qr4p6gpi6hn506pt8ejuq83di341hur.apps.googleusercontent.com&redirect_uri=https%3A%2F%2Fsdk.cloud.google.com%2Fapplicationdefaultauthcode.html&scope=openid+https%3A%2F%2Fwww.googleapis.com%2Fauth%2Fuserinfo.email+https%3A%2F%2Fwww.googleapis.com%2Fauth%2Fcloud-platform+https%3A%2F%2Fwww.googleapis.com%2Fauth%2Fsqlservice.login&state=NdqQVFWU6dxpcH7eO5XqyqgGJalzr6&prompt=consent&access_type=offline&code_challenge=XrLVHJTkJCx00pDeoOEHSBLy9W0W-gWoZmc69lIEXSY&code_challenge_method=S256
Enter authorization code: 4/0AgJohXnEmaeA3UmFir2QTz_Dgi6zFJtvsWQqsu-t39J9jtI8Wli1CqxbEWrTFtJfYeEUug
Credentials saved to file: [/home/sakana/.config/gcloud/application_default_credentials.json]
These credentials will be used by any library that requests Application Default Credentials (ADC).
Quota project "sakana-3" was added to ADC which can be used by Google client libraries for billing and quota. Note that some services may still bill the project owning the resource.
一樣驗證驗證碼
會產生 Credentials 到 ~/.config/gcloud/application_default_credentials.json
觀察資訊
> ls ~/.config/gcloud/
access_tokens.db application_default_credentials.json configurations default_configs.db legacy_credentials
active_config config_sentinel credentials.db gce logs
再次嘗試
> terraform plan
Terraform used the selected providers to generate the following execution plan. Resource actions are indicated with the
following symbols:
+ create
Terraform will perform the following actions:
# google_compute_network.vpc_network will be created
+ resource "google_compute_network" "vpc_network" {
+ auto_create_subnetworks = true
+ delete_default_routes_on_create = false
+ gateway_ipv4 = (known after apply)
+ id = (known after apply)
+ internal_ipv6_range = (known after apply)
+ mtu = (known after apply)
+ name = "terraform-network"
+ project = (known after apply)
+ routing_mode = (known after apply)
+ self_link = (known after apply)
}
Plan: 1 to add, 0 to change, 0 to destroy.
────────────────────────────────────────────────────────────────────────────────────────────────────────────────────────
Note: You didn't use the -out option to save this plan, so Terraform can't guarantee to take exactly these actions if
you run "terraform apply" now.
也可以實際 apply 測試
> terraform apply
建立成功, 也可以到 console 觀察

練習結束 刪除資源
> terraform destroy
這個實驗可以多注意到一件事情, 我的 main.tf 中沒有使用 credentials = file("<NAME>.json")
也就是你是使用 ADCs 不一定要進行該項設定
又往 Terraform and GCP 前進一步
~ enjoy it
Reference
https://sakananote2.blogspot.com/2023/12/terraform-in-opensuse-leap-155.html
https://sakananote2.blogspot.com/2023/09/opensuse-leap-155.html
https://developer.hashicorp.com/terraform/tutorials/gcp-get-started
https://developer.hashicorp.com/terraform/tutorials/gcp-get-started/google-cloud-platform-build
Using OpenTelemetry between syslog-ng instances
Do you have to forward large amounts of logs between two syslog-ng instances? OTLP (OpenTelemetry protocol) support in syslog-ng was contributed by Axoflow, and it can solve this problem. Just like the ewmm() destination, syslog-ng-otlp() forwards most name-value pairs, however, unlike a tcp() connection, it scales well with multiple CPU cores.
Support for OpenTelemetry was added to syslog-ng a couple of releases ago. OpenTelemetry is an observability framework, mainly used in Linux / Cloud / Kubernetes environments. However, I already had users asking to make this feature available on FreeBSD. (It already worked once, but now it fails to compile again.)
Version 4.6.0 added many new OTLP-related enhancements. Batching and multiple workers make OTLP connections significantly faster, while compression can save you bandwidth at the expense of some more CPU usage. This changes the syslog-ng-otlp() destination from an interesting experiment into something really useful. It enables you to send a lot more log messages between two syslog-ng instances than with a tcp() connection, while using less bandwidth.
Read more at https://www.syslog-ng.com/community/b/blog/posts/using-opentelemetry-between-syslog-ng-instances