
Releasing version 0.8
Six weeks ago we announced D-Installer 0.7 and a lot has happened since then. The most important news is that we just released a new prototype with version 0.8, integrating several exciting new features we will go through in this post. But this prototype is not only important because of those features, but also because it will be the last D-Installer release! Fear not, we are not abandoning the project... quite the opposite.
We want to consolidate D-Installer in the following months from the experimental project it currently is into a solid alternative for installing several Linux distributions. And the name was perceived by some people as an obstacle for that. So we will change it to an already decided alternative starting with the next prototype.
Adjusting the scope
As said, we want D-Installer to become a real alternative to install some of the future and even present (open)SUSE distributions. So the first step was to better define the list of supported distribution, called "products" in D-Installer jargon. If you grab the default flavor of the testing ISO we provide, you will see the following selection.

Take into account the YaST Team is not in charge of those distributions. D-Installer simply grabs the packages and default patterns from the corresponding repositories and installs them into your system. If you detect any inconsistency in the patterns of a distribution or any missing package, please contact the corresponding maintainers so they can fix the issue.
Support for s390x
One of the main highlights of the latest D-Installer prototype is the ability to install the mentioned distributions in s390x mainframes. That includes installing in LPAR mode, on z/VM and as a KVM guest.
That's a bigger achievement that it may look like. Sure having YaST under the hood eased the task of handling of the nuances of installing into such a special platform. But the real challenge here was making it possible to run D-Installer itself on all kind of s390 systems. We usually execute D-Installer using an slightly modified version of a live image in which we pack D-Installer and Firefox. The point is that regular (open)SUSE live images didn't come with full support for s390x out of the box.
Fortunately, SUSE is full of smart people that know a lot about Linux and all kind of hardware architectures. So after knocking on the appropriate doors we got a nice image that can be used to install any of the distributions supported by the D-Installer on any kind of s390x system by just following these instructions.
Advanced storage devices: iSCSI and DASD
Apart from its multi-architecture nature, another key aspect of the (open)SUSE installation process is its broad support for all kind of storage devices. D-Installer aims to simplify the installation experience without sacrificing those historical possibilities, like installing into network disks through iSCSI and FCoE or into disks relying on s390x technologies like DASD, XPRAM or zFCP.
The latest version of D-Installer supports configuring an iSCSI initiator and connecting to iSCSI targets during the installation process, including the configuration of both discovery and login authentication. Of course, the iSCSI configuration is transferred to the target system. If iBFT is used to configure iSCSI via firmware, D-Installer recognizes and displays the corresponding configuration and makes it possible to install the system into the remote iSCSI disk.

The iSCSI protocol is widely used in data-centers with all kind of hardware architectures. But in the mainframe world, DASD is probably the most common technology to provide storage space. DASDs need some previous configuration before they can accommodate a Linux system and now D-Installer offers the possibility to activate and format DASDs, together with other operations that have been traditionally available in YaST, like deactivation or configuration of the DIAG mode.

Interface polishing and reorganization
In addition to all the advanced features mentioned above, D-Installer 0.8 brings good news also for those geckos not running a full-featured data-center. 😉 First of all, we polished a bit the summary page to offer a more clear overview of the installation settings, moving configuration of authentication and network to new separate pages. See the screenshots at the corresponding pull request.
Moreover, we reorganized the sidebar that contains the advanced menu (which we fondly call "the hamburger menu). The actions are now grouped by topics and the menu offers contextual actions related to the current page, like configuration of iSCSI or DASD when the user is visiting the storage section.

Integrated terminal
In the screenshot above, you may have noticed the entry "Open terminal" in the "Diagnosis tools" sub-menu. No surprises there, it does exactly what you would expect. That is, offering a terminal embedded in the web interface that runs a shell on the very same Linux system that is executing D-Installer. Because we know our users can not resist to tweak and inspect all kind of things in the systems they run!

Kudos to the Cockpit project, relying on its infrastructure made this feature quite straightforward to implement.
Re-implemented command-line interface
You surely know D-Installer is way more than just a web front-end for YaST. Its architecture is designed to provide different kinds of interfaces and ways to operate. To make that more more visible than ever, D-Installer 0.8 comes with a new command-line interface rewritten from scratch (using the Rust programming language, if you are interested in those geeky details).
With the command-line interface you can drive the installation with sequences of command like:
dinstaller config set software.product=Tumbleweed
dinstaller config set user.fullName="Jane Doe" user.userName="jane.doe" user.password="12345"
dinstaller install
What is even better, that command-line is a crucial building block for another very relevant feature...
Preliminary support for unattended installation
Many (open)SUSE users rely on AutoYaST to install their systems. D-Installer aims to also be useful in the kind of unattended and mass-deployment scenarios in which AutoYaST shines. But D-Installer will follow a slightly different path. First of all, D-Installer offers two alternative approaches.
On the one hand, the user can provide a file, known as a "profile", with the settings to use during installation. This might sound familiar to AutoYaST users. The format and philosophy of D-Installer profiles is different from the AutoYaST ones, although there are plans to partially support AutoYaST profiles at D-Installer.
On the other hand, D-Installer can accept just a plain shell script, enabling custom installation workflows that rely on the D-Installer infrastructure and, potentially, also on other tools available in the installation media.
A more detailed explanation of both modes can be found at this document that covers several topics like the different ways to trigger an unattended installation, the format of the profile files, the mechanisms to make those profiles dynamic, etc.
Stay in touch
The D-Installer project is heading into interesting times, starting with the rename already pointed at the beginning of this document. We also want to take some time to reflect on internal aspects like memory usage and usability topics like exposing more possibilities to configure the network or the storage layout.
All opinions and feedback are welcome. So do not hesitate to give D-Installer a try and tell us
about your experience and thoughts. You can contact us through the
GitHub project's page or, as usual, in our #yast channel at
Libera.chat or the
YaST Development mailing list.

Announcing D-Installer 0.8
Six weeks ago we announced D-Installer 0.7 and a lot has happened since then. The most important news is that we just released a new prototype with version 0.8, integrating several exciting new features we will go through in this post. But this prototype is not only important because of those features, but also because it will be the last D-Installer release! Fear not, we are not abandoning the project… quite the opposite.
We want to consolidate D-Installer in the following months from the experimental project it currently is into a solid alternative for installing several Linux distributions. And the name was perceived by some people as an obstacle for that. So we will change it to an already decided alternative starting with the next prototype.
Adjusting the Scope
As said, we want D-Installer to become a real alternative to install some of the future and even present (open)SUSE distributions. So the first step was to better define the list of supported distribution, called “products” in D-Installer jargon. If you grab the default flavor of the testing ISO we provide, you will see the following selection.

Take into account the YaST Team is not in charge of those distributions. D-Installer simply grabs the packages and default patterns from the corresponding repositories and installs them into your system. If you detect any inconsistency in the patterns of a distribution or any missing package, please contact the corresponding maintainers so they can fix the issue.
Support for s390x
One of the main highlights of the latest D-Installer prototype is the ability to install the mentioned distributions in s390x mainframes. That includes installing in LPAR mode, on z/VM and as a KVM guest.
That’s a bigger achievement that it may look like. Sure having YaST under the hood eased the task of handling of the nuances of installing into such a special platform. But the real challenge here was making it possible to run D-Installer itself on all kind of s390 systems. We usually execute D-Installer using an slightly modified version of a live image in which we pack D-Installer and Firefox. The point is that regular (open)SUSE live images didn’t come with full support for s390x out of the box.
Fortunately, SUSE is full of smart people that know a lot about Linux and all kind of hardware architectures. So after knocking on the appropriate doors we got a nice image that can be used to install any of the distributions supported by the D-Installer on any kind of s390x system by just following these instructions.
Advanced Storage Devices: iSCSI and DASD
Apart from its multi-architecture nature, another key aspect of the (open)SUSE installation process is its broad support for all kind of storage devices. D-Installer aims to simplify the installation experience without sacrificing those historical possibilities, like installing into network disks through iSCSI and FCoE or into disks relying on s390x technologies like DASD, XPRAM or zFCP.
The latest version of D-Installer supports configuring an iSCSI initiator and connecting to iSCSI targets during the installation process, including the configuration of both discovery and login authentication. Of course, the iSCSI configuration is transferred to the target system. If iBFT is used to configure iSCSI via firmware, D-Installer recognizes and displays the corresponding configuration and makes it possible to install the system into the remote iSCSI disk.

The iSCSI protocol is widely used in data-centers with all kind of hardware architectures. But in the mainframe world, DASD is probably the most common technology to provide storage space. DASDs need some previous configuration before they can accommodate a Linux system and now D-Installer offers the possibility to activate and format DASDs, together with other operations that have been traditionally available in YaST, like deactivation or configuration of the DIAG mode.

Interface Polishing and Reorganization
In addition to all the advanced features mentioned above, D-Installer 0.8 brings good news also for those geckos not running a full-featured data-center. :wink: First of all, we polished a bit the summary page to offer a more clear overview of the installation settings, moving configuration of authentication and network to new separate pages. See the screenshots at the corresponding pull request.
Moreover, we reorganized the sidebar that contains the advanced menu (which we fondly call “the hamburger menu). The actions are now grouped by topics and the menu offers contextual actions related to the current page, like configuration of iSCSI or DASD when the user is visiting the storage section.

Integrated Terminal
In the screenshot above, you may have noticed the entry “Open terminal” in the “Diagnosis tools” sub-menu. No surprises there, it does exactly what you would expect. That is, offering a terminal embedded in the web interface that runs a shell on the very same Linux system that is executing D-Installer. Because we know our users can not resist to tweak and inspect all kind of things in the systems they run!

Kudos to the Cockpit project, relying on its infrastructure made this feature quite straightforward to implement.
Re-implemented Command-line Interface
You surely know D-Installer is way more than just a web front-end for YaST. Its architecture is designed to provide different kinds of interfaces and ways to operate. To make that more more visible than ever, D-Installer 0.8 comes with a new command-line interface rewritten from scratch (using the Rust programming language, if you are interested in those geeky details).
With the command-line interface you can drive the installation with sequences of command like:
dinstaller config set software.product=Tumbleweed
dinstaller config set user.fullName="Jane Doe" user.userName="jane.doe" user.password="12345"
dinstaller install
What is even better, that command-line is a crucial building block for another very relevant feature…
Preliminary Support for Unattended Installation
Many (open)SUSE users rely on AutoYaST to install their systems. D-Installer aims to also be useful in the kind of unattended and mass-deployment scenarios in which AutoYaST shines. But D-Installer will follow a slightly different path. First of all, D-Installer offers two alternative approaches.
On the one hand, the user can provide a file, known as a “profile”, with the settings to use during installation. This might sound familiar to AutoYaST users. The format and philosophy of D-Installer profiles is different from the AutoYaST ones, although there are plans to partially support AutoYaST profiles at D-Installer.
On the other hand, D-Installer can accept just a plain shell script, enabling custom installation workflows that rely on the D-Installer infrastructure and, potentially, also on other tools available in the installation media.
A more detailed explanation of both modes can be found at this document that covers several topics like the different ways to trigger an unattended installation, the format of the profile files, the mechanisms to make those profiles dynamic, etc.
Stay in Touch
The D-Installer project is heading into interesting times, starting with the rename already pointed at the beginning of this document. We also want to take some time to reflect on internal aspects like memory usage and usability topics like exposing more possibilities to configure the network or the storage layout.
All opinions and feedback are welcome. So do not hesitate to give D-Installer a try and tell us
about your experience and thoughts. You can contact us through the GitHub
project’s page or, as usual, in our #yast channel at
Libera.chat or the YaST Development mailing
list.
 Member
 baltolkien
Episodio 16 de KDE Express: KDE en Telegram
Tras unos meses de silencio parece que el proyecto está tomando velocidad de crucero. Me congratula presentaros que tenemos a nuestra disposición el episodio 16 de KDE Express, titulado KDE en Telegram donde David Marzal nos cuenta cuáles son los grupos o canales donde encontrar «cosas» de la Comunidad KDE.
Episodio 16 de KDE Express: KDE en Telegram
Comenté ya casi hace un año que había nacido KDE Express, un audio con noticias y la actualidad de la Comunidad KDE y del Software Libre con un formato breve (menos de 30 minutos) que complementa los que ya genera la Comunidad de KDE España de forma casi mensual con sus ya veteranos Vídeo-Podcast que podéis encontrar en Archive.org, Youtube, Ivoox, Spotify y Apple Podcast.

De esta forma se llega al número 16, el cuarto de su segunda temporada y que cuenta con el incombustible e hiperactivo David Marzal, con la producción de Jorge Lama, donde nos cuenta cuáles son los grupos o canales donde encontrar «cosas» de la Comunidad KDE.
En palabras de David, que es quien hace la entradilla:
Episodio temático sobre Telegram grabado en movilidad en el que podréis descubrir las diferentes formas de estar informado y participar en la comunidad de KDE desde esta aplicación no del todo libre pero con mucho uso dentro del mundo de la informática y el SL.
Aquí tenéis la entrada de la wiki con casi todos los recursos en Telegram. De los cuales destacamos en el podcast los siguiente:
- Canal: KDE Express Podcast – En el que además podéis comentar los episodios.
- Canal: Planet KDE en Español
- Canal: Planet KDE in english
- Grupo y foro: KDE – Cañas y Bravas – Por favor decir algo al entrar que se sepa que sois humanos y no bots.
Y, como siempre, os dejo aquí el listado de los episodios. ¡Disfrutad!
Aprovecho para recordaro que
Y no nos olvidamos de recordar que AkademyES 2023 se celebrará en Málaga el 9 y 10 de junio dentro de Opensouthcode y que todavía estás a tiempo de presentar tu charla.
A mi me sigue gustando mucho, es rápido, directo al grano y muy dinámico, con lo cual es ideal para aquellos que les guste tener su pincelada de Kdeera en su podcaster. Evidentemente, no se profundiza en temas aunque si se da una visión muy personal de los mismos.
Por cierto, también podéis encontrarlos en Telegram: https://t.me/KDEexpress
La entrada Episodio 16 de KDE Express: KDE en Telegram se publicó primero en KDE Blog.
Syslog-ng 101, part 13: Updating syslog-ng, syslog-ng 4
Version 4 of syslog-ng is now available. The good news is that it is fully backwards compatible. If the version string in your configuration is set to a 3.X version, it will work as expected even after updating to version 4. Of course you might run into corner cases, but I had no problems even with complex configurations. Today, we learn about updating syslog-ng, and some of the new features of syslog-ng 4.
You can watch the video on YouTube:
and the complete playlist at https://www.youtube.com/playlist?list=PLoBNbOHNb0i5Pags2JY6-6wH2noLaSiTb
Or you can read the rest the tutorial as a blog at: https://www.syslog-ng.com/community/b/blog/posts/syslog-ng-101-part-13-updating-syslog-ng-syslog-ng-4
syslog-ng logo

Hands-on, Ad-free browsing at your home with Leap Micro 5.4 Beta
The Beta version of our Immutable HostOS Leap Micro 5.4 is now available. The update brings SELinux in enforcing mode by default as well as tuned. Leap Micro is not a traditional distribution, but rather a lightweight HostOS for running virtual machines and containerized workloads.
Leap Micro is an openSUSE equivalent of SUSE’s SLE Micro.
In this article, I would like to show you how it can be practically used to enhance your daily ad-free experience at home. I was able to replicate the entire setup in the VM, including downloading the image, in under 15 minutes.
My personal use case for Leap Micro is to have as much ad-free browsing as possible, DNS entries for local services, and a Nextcloud instance as a bridge to share pictures and videos in between my wife’s iPhone, kids tablet and my Android phone.
My private home setup is a Raspberry Pi 4 8GB with 1TB SDD connected via USB 3.0 to SATA III. I have a mesh via TP Link Deco X20. I do use port mapping from the Deco to expose services to the public via a static public IP.
The RPI has a reserved address based on its MAC address to keep stuff simple. If you have a dynamic public address, you can consider some dynamic DNS (DDNS) solutions.
I am personally happily using the described setup on my 8GB Raspberry Pi 4 with Leap Micro 5.3 along with Pi-hole for ad-free browsing and mapping of my NextCloud instance to a local address.
If you want to just test it out, virtual machines will work as well; just make sure that the VM’s virtual network interface is in bridge mode or uses forwarding of incoming connections. This can be easily set up with NetworkManager in just two clicks. Otherwise, you won’t be able to access web management of the VM services and the article becomes pointless.
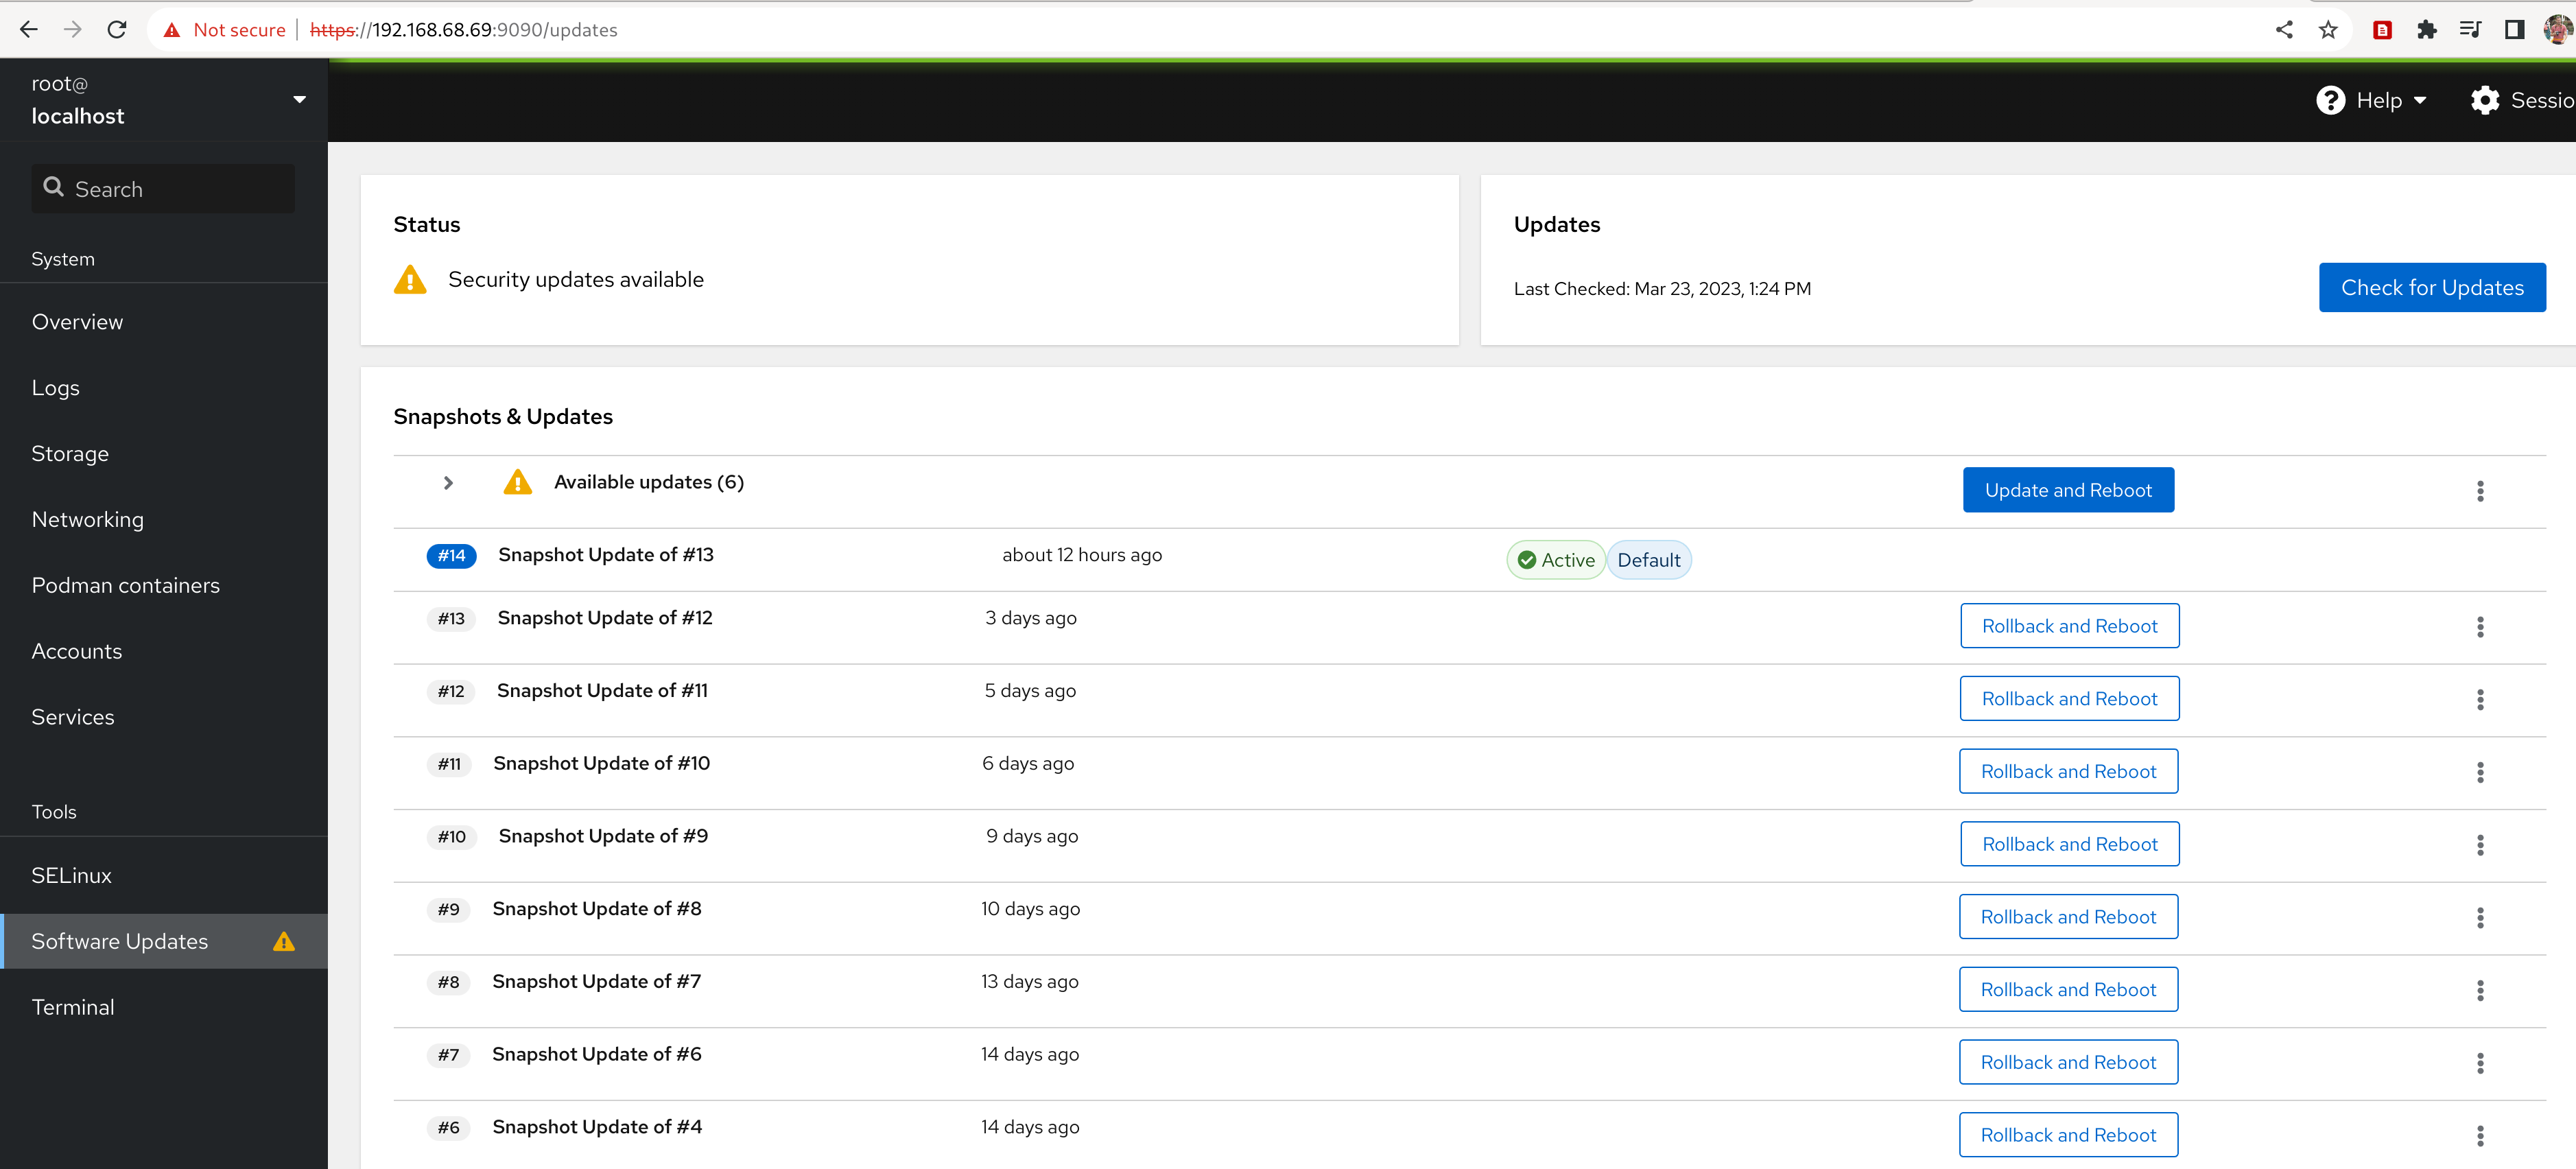
The benefit I see in using Leap Micro is that the machine does not require any of my attention. I have automatic updates and self-healing on. The machine automatically reboots into an updated snapshot in the defined maintenance window (set by default) and if there is an issue that requires my attention, then I simply resolve the issue with the Cockpit interface in the web browser.
Leap Micro is an immutable operating system with read-only root. openSUSE solves this via btrfs snapshots and tools that enable automatic rollback and boot into a previous snapshot in case a system identifies that the boot into a new snapshot has failed.
Getting the Leap Micro 5.4 Beta
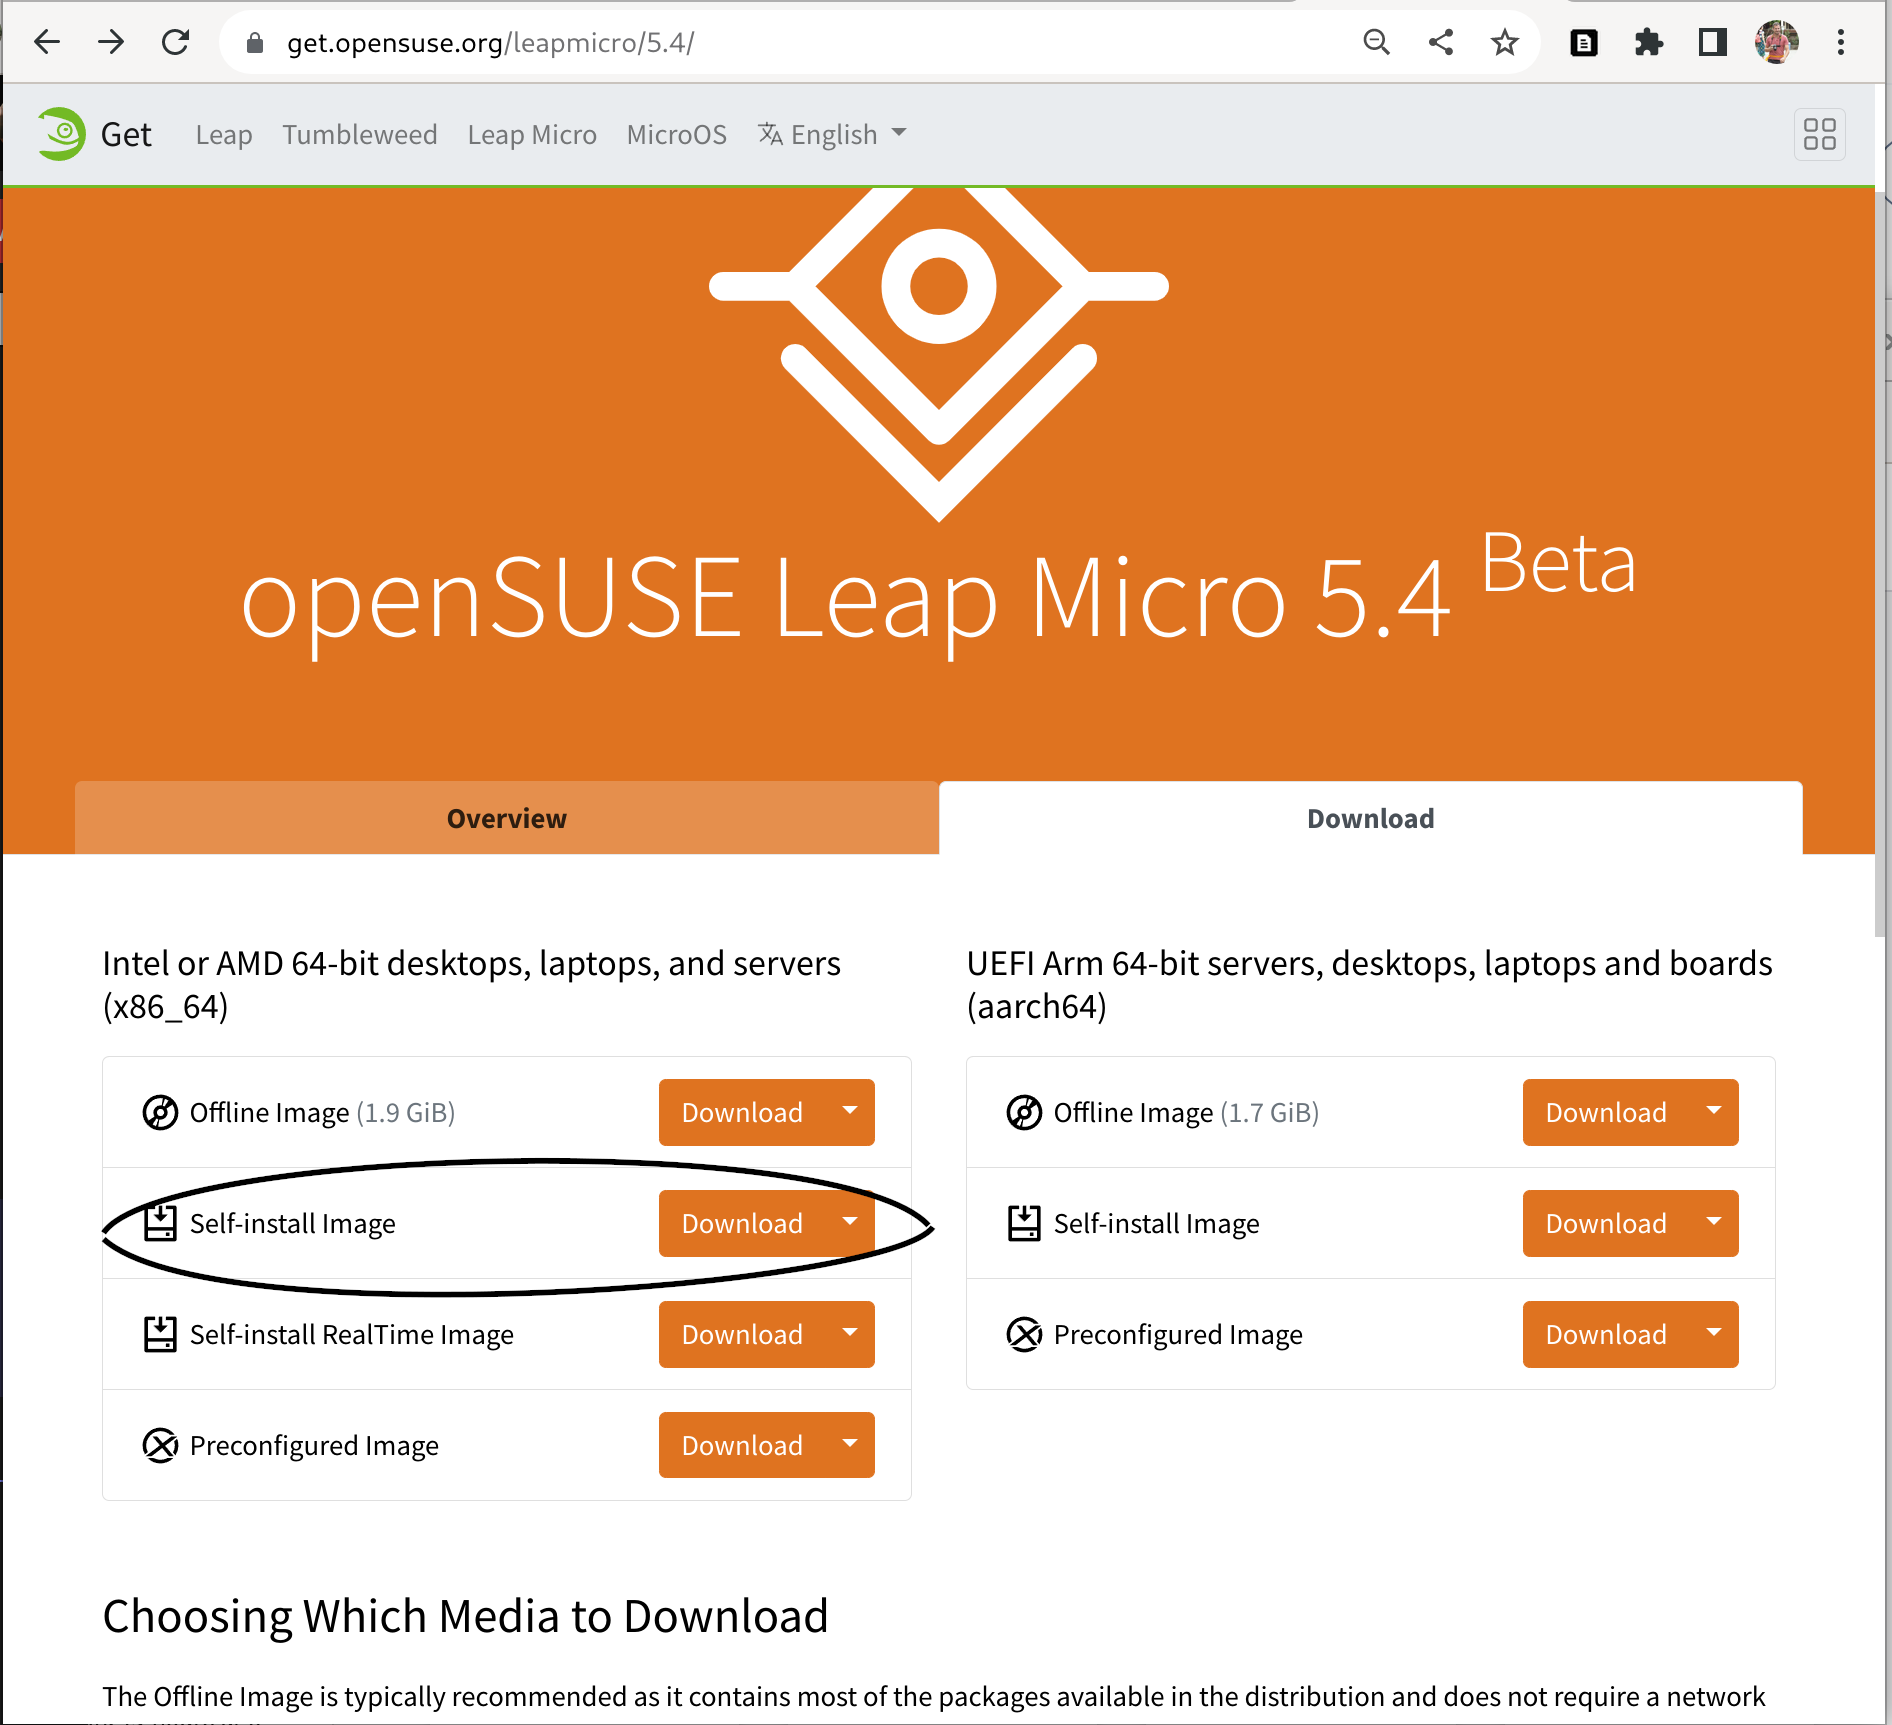
What is a self-install image?
The self-install image is essentially a bootable image that writes the pre-configured image of Leap Micro to the disk and enlarges system partitions to the disk size. In this way, installation takes less than two minutes in my VM (VM storage is a file, and I have PCI-e 4 gen M.2 SSD).
Download the self-install image from https://get.opensuse.org/leapmicro/5.4/ make sure to choose correctly the architecture x86-64, or AArch64 for arm devices. We’ll use a self-install x86-64 image as this article uses a VM for the demonstration.
If you are using a physical device then please use zypper to install image writer. Users on other distributions can install e.g. Fedora Media Writer from Flathub. Use the tool of your choice to write the downloaded image to the USB flash drive.
$ sudo zypper in imagewriter
or
$ flatpak --user install org.fedoraproject.MediaWriter
Follow these instructions if you are reading this article on Windows: https://en.opensuse.org/SDB:Create_a_Live_USB_stick_using_Windows
Note - Users using Raspberry Pi without the USB boot enabled: Please download directly the pre-configured image and write it to the SD Card via the following command. The rest of the steps are the same.
xzcat [image].raw.xz | dd bs=4M of=/dev/sdX iflag=fullblock oflag=direct status=progress; sync
Need to avoid user interaction during the installation?
Users who want to avoid user interaction during installation (e.g. due to not having connected peripherals to the machine) can use Ignition or Combustion https://en.opensuse.org/Portal:MicroOS/Combustion to do the initial setup for them. For that use case, please use the preconfigured image that you will write to the disk drive by yourself. Self-install media requires user confirmation on overwriting the disk. Check this video tutorial for more information https://www.youtube.com/watch?v=ft8UVx9elKc
Writing the self-install image to the USB drive
This can be skipped in case you’re using a virtual machine. Make sure to have a tool for writing an image to the drive such as our image writer or e.g. Fedora Media Writer from Flathub if you are on an immutable system and want to avoid a reboot.
Booting the image
For demonstration purposes, I will be using Leap Micro 5.4 Beta x86-64 self-install image running in GNOME Boxes.

The self-install image is pretty straightforward. As mentioned before, it’s essentially a bootable image that writes a pre-configured image of Leap Micro to the disk and enlarges system partitions to the disk size.
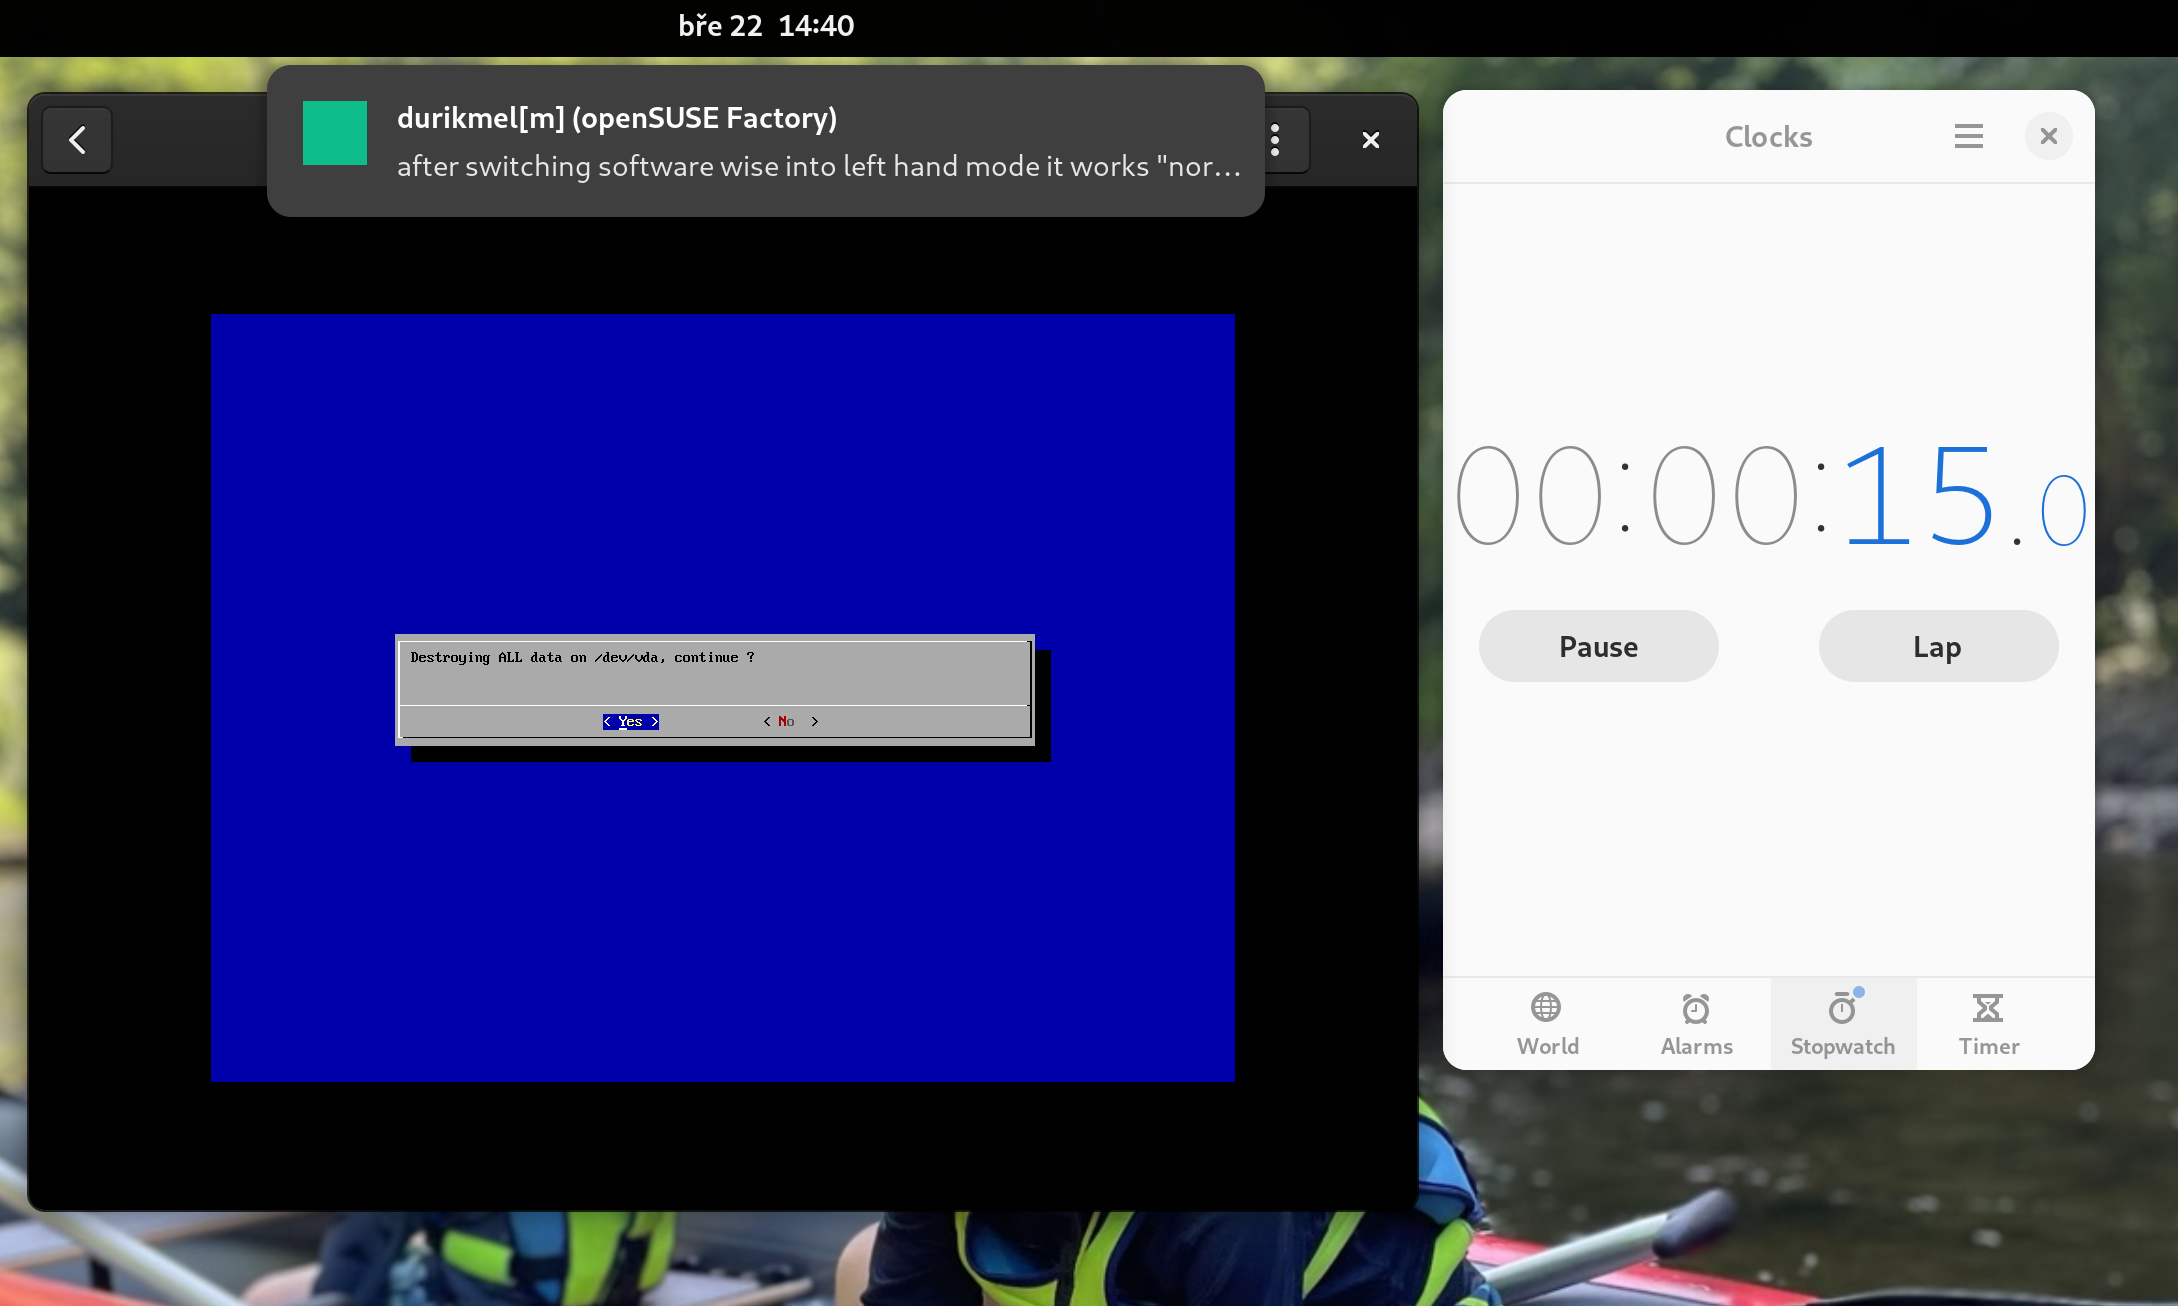
About a minute after we are already booting into the deployed Leap Micro 5.4 Beta.
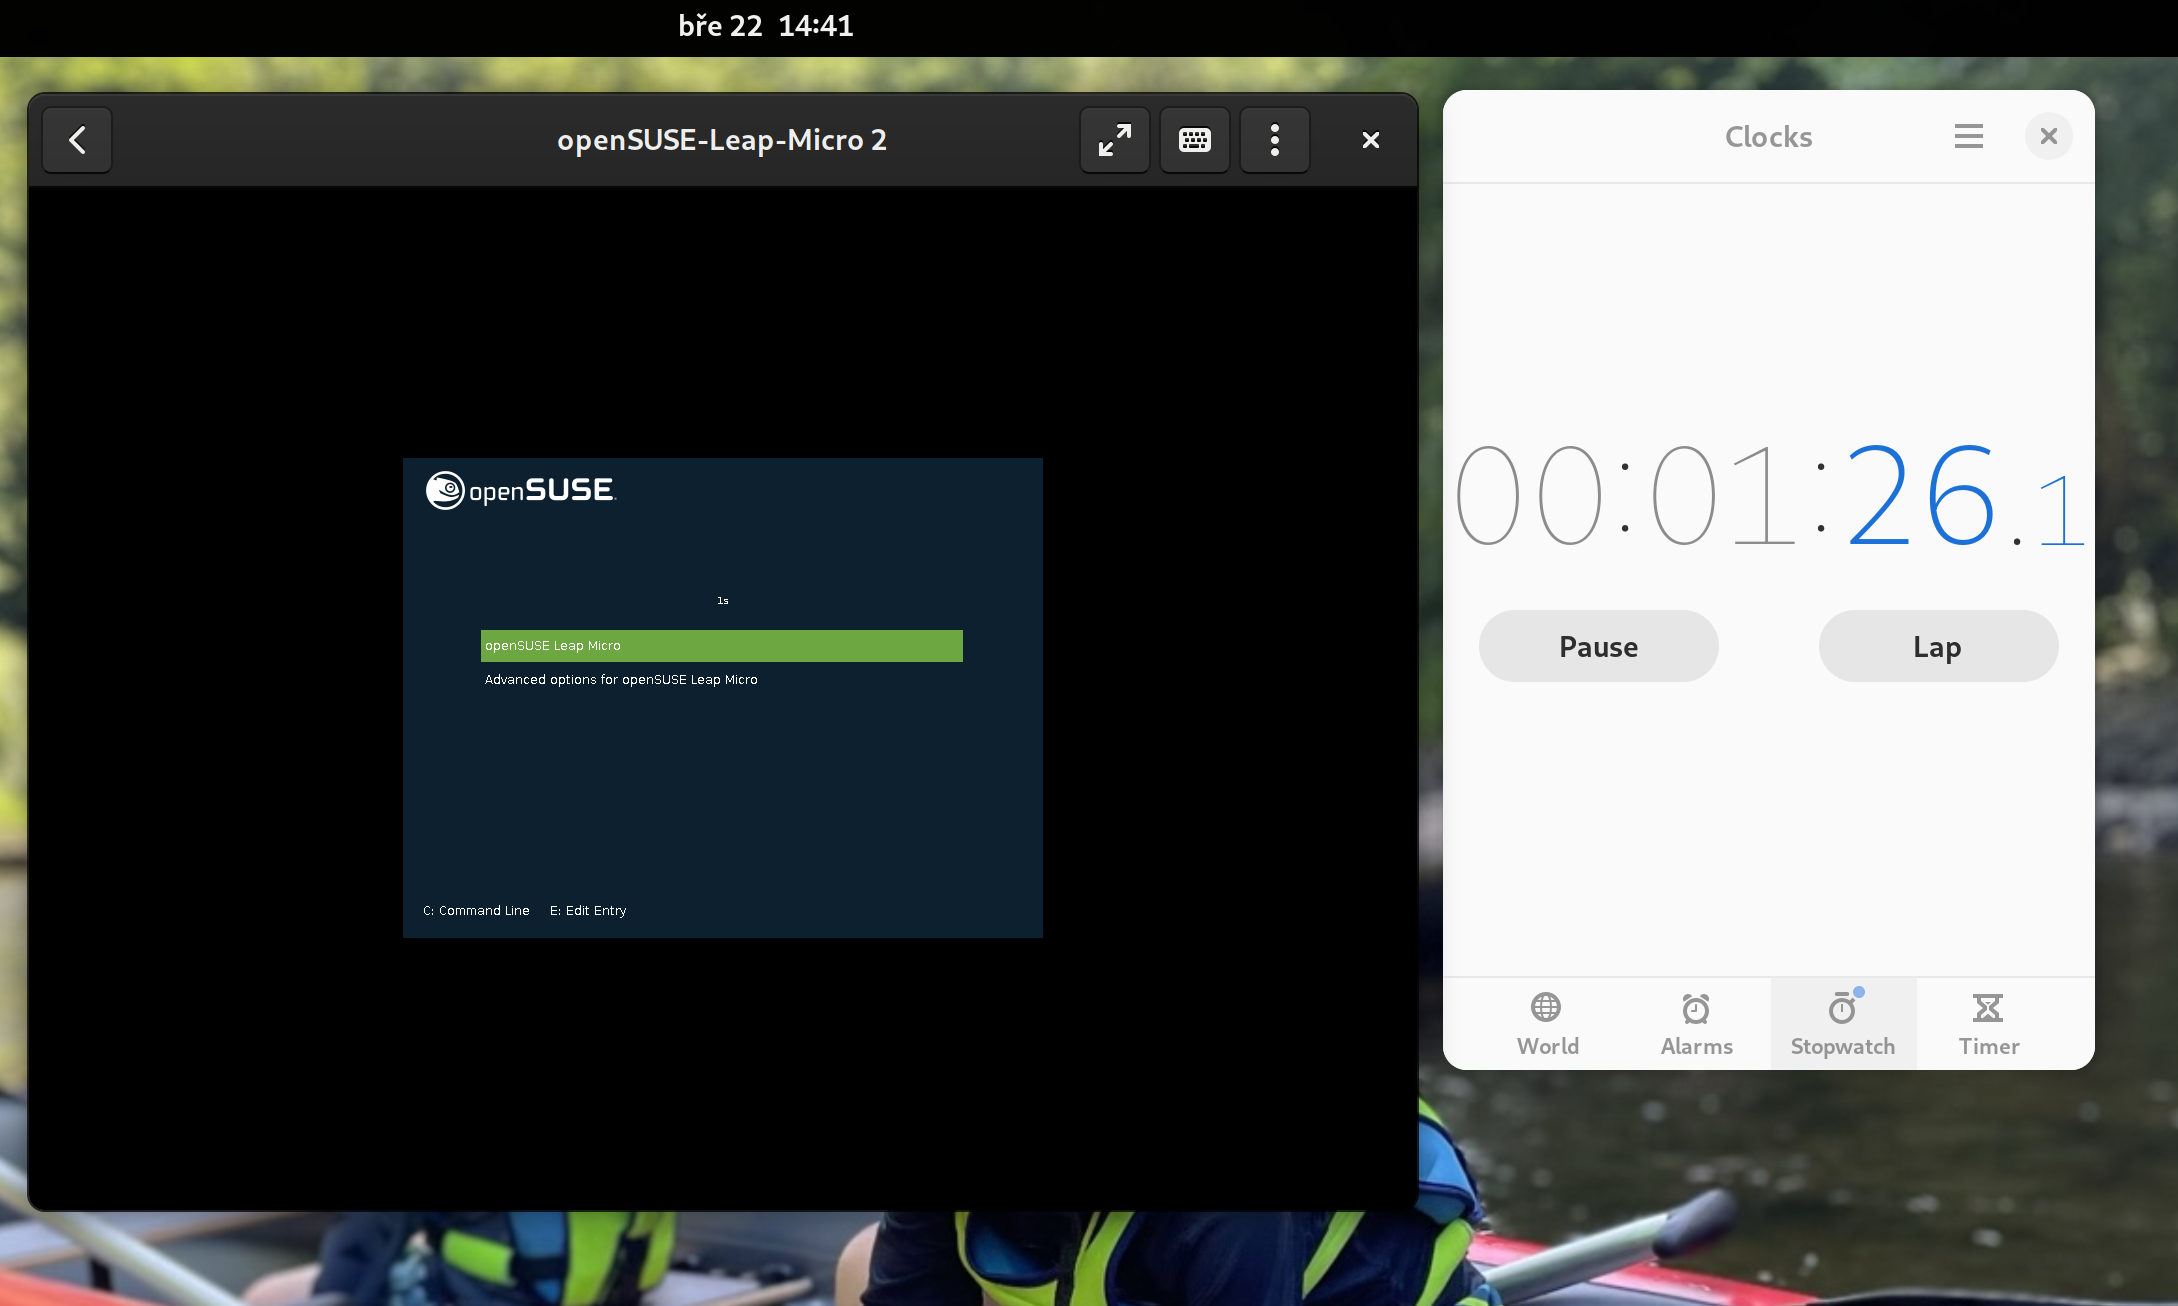
The boot itself takes a few seconds, and we are entering a simple first boot wizard known from our minimal images (used to be called JeOS).

First boot wizard lets you choose Timezone, Language and a root password, and your Leap Micro 5.4 is ready to be used (can be automated with Ignition/Combustion). We are ready to serve after two minutes including the initial configuration.
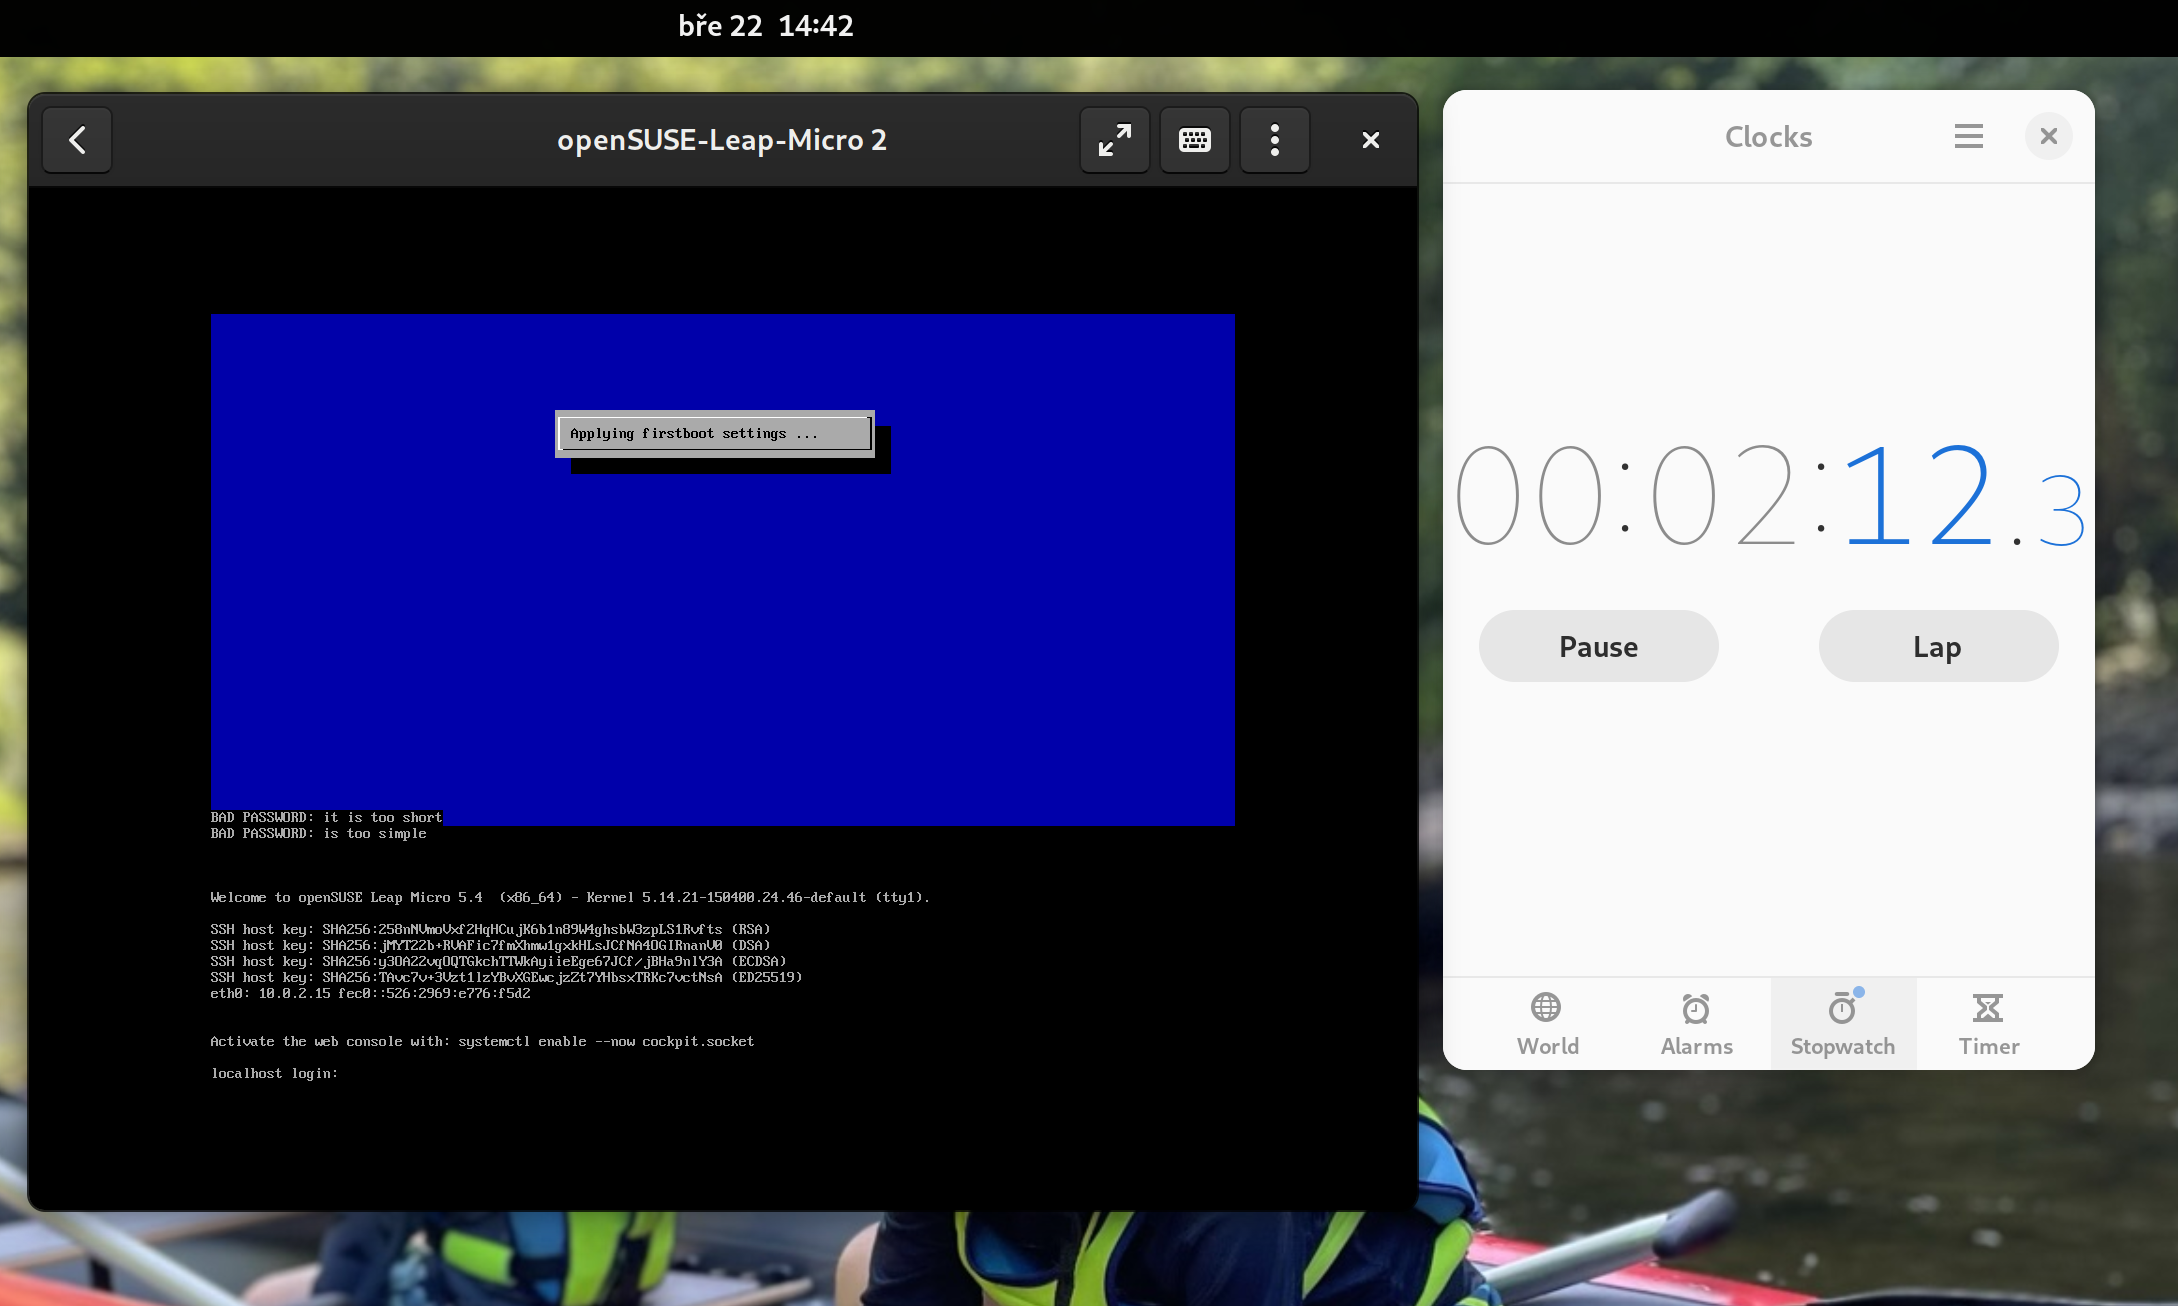
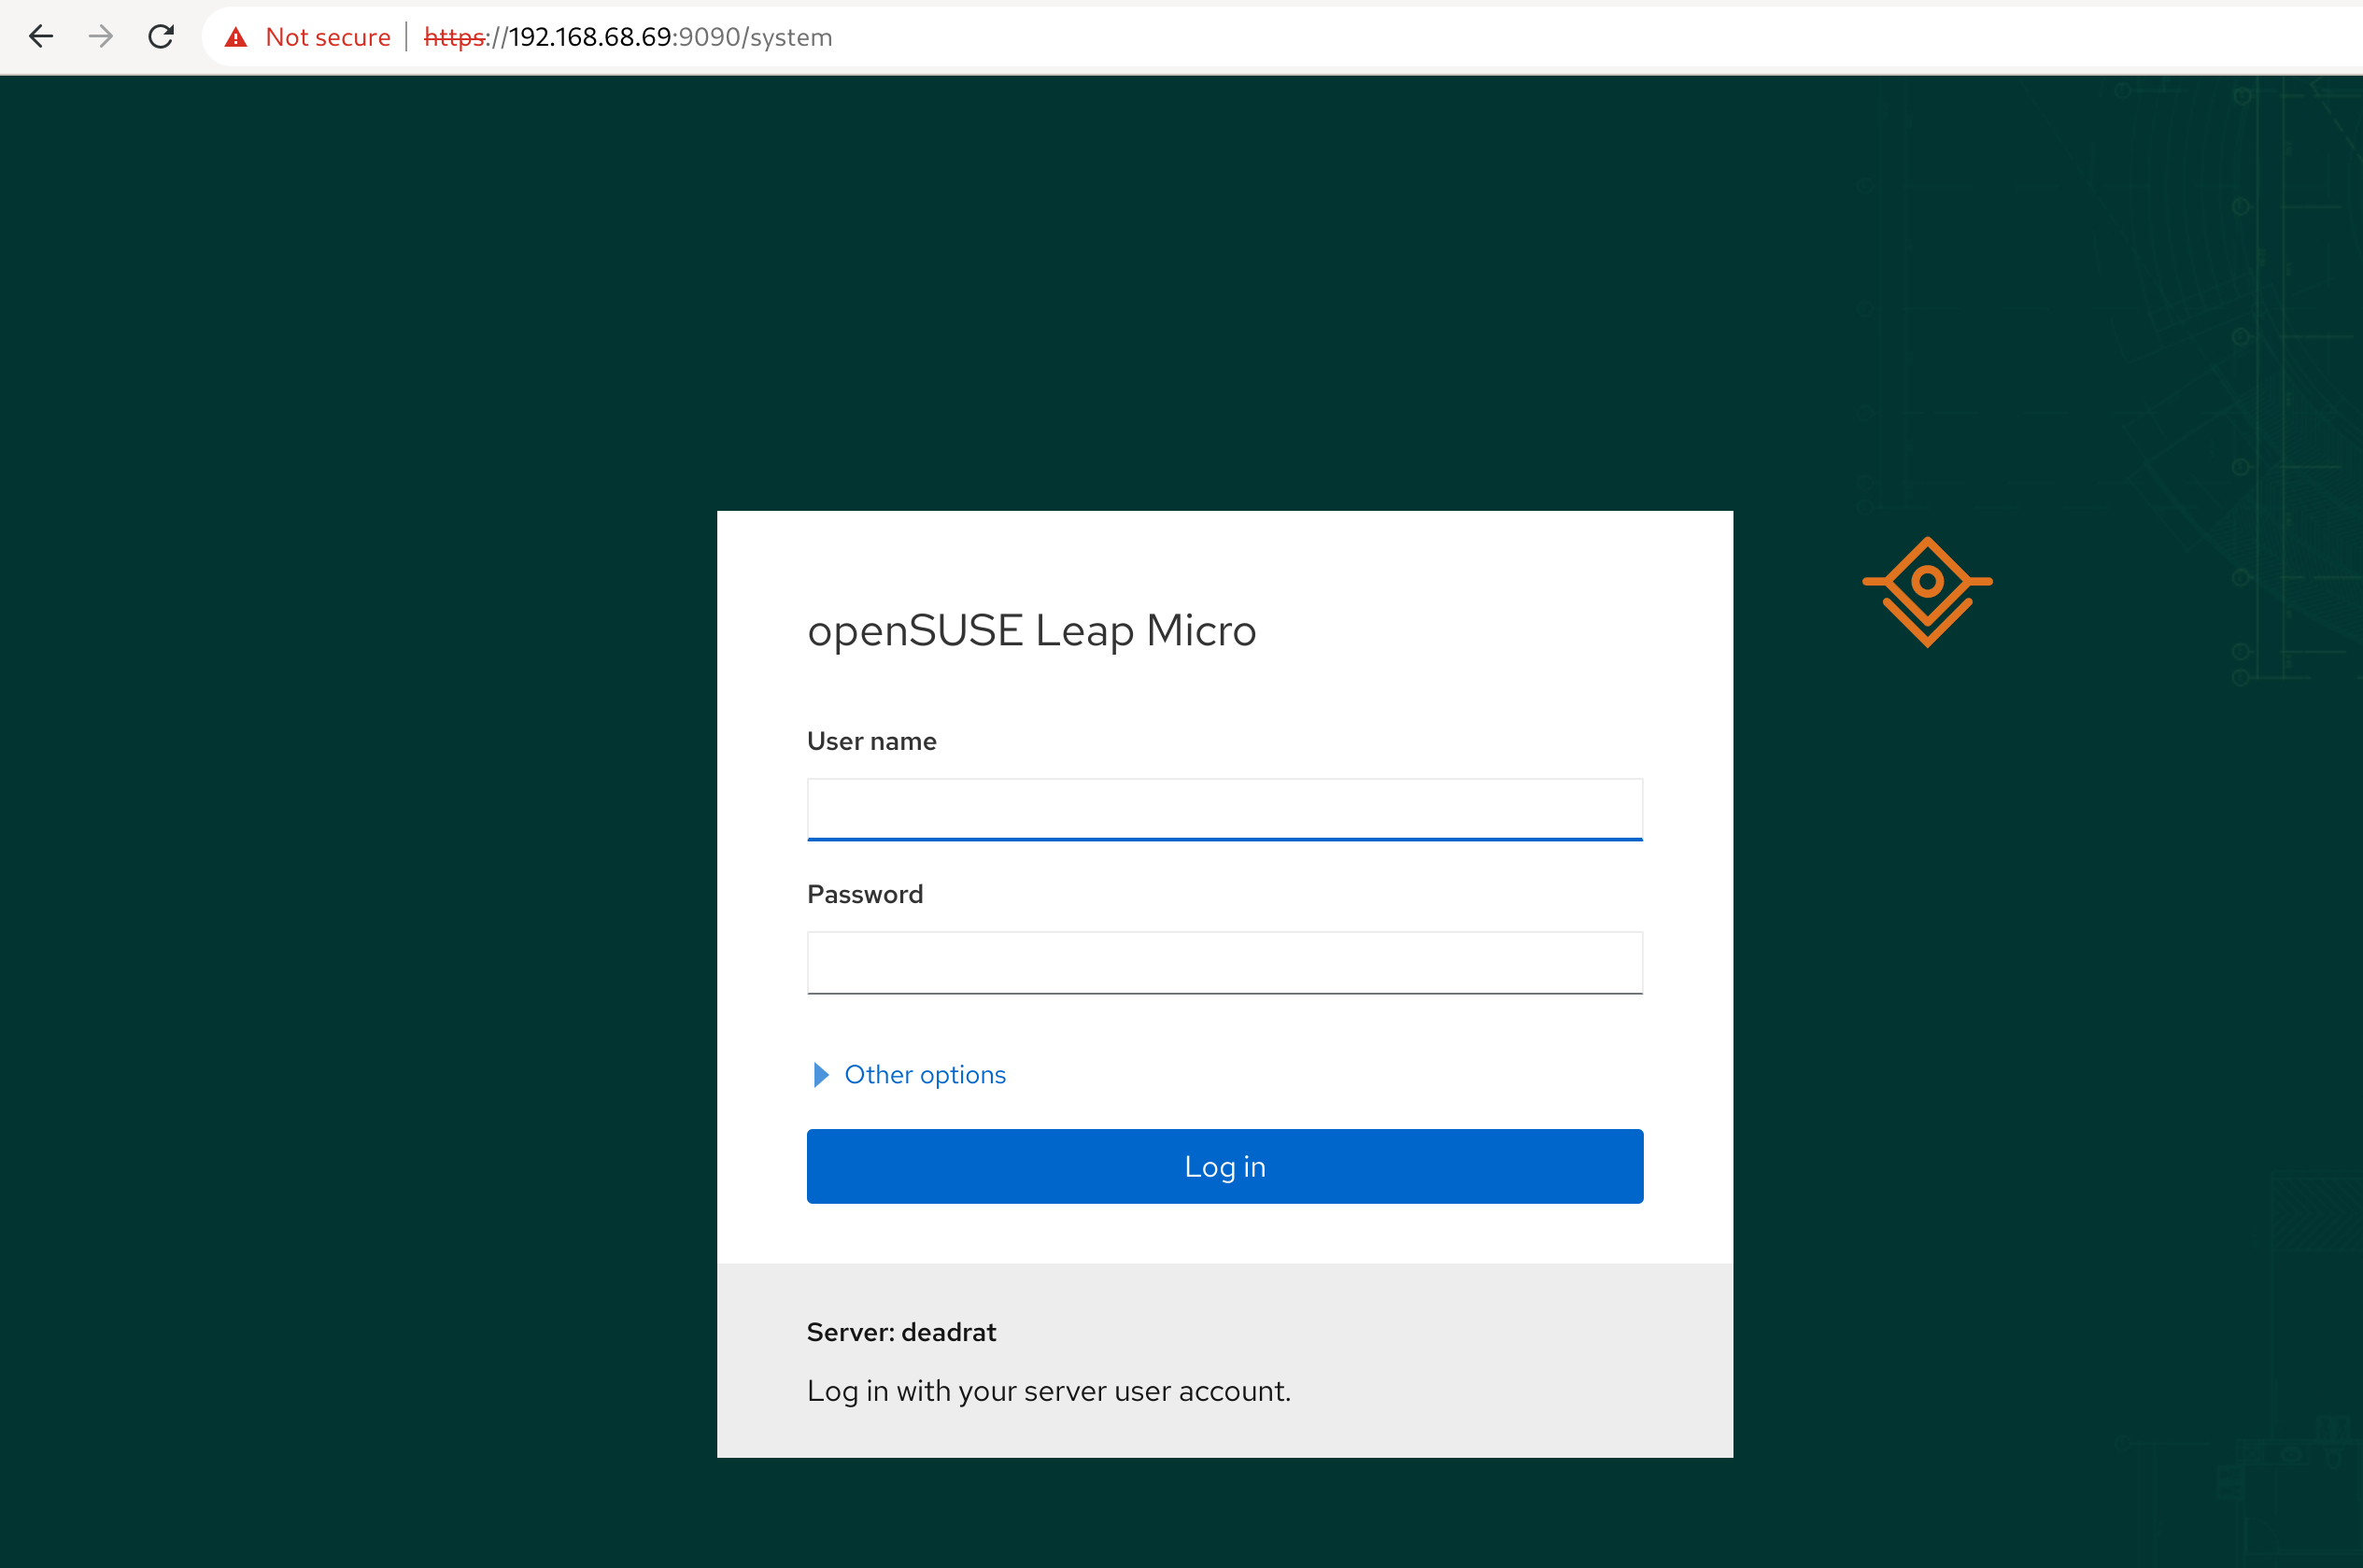
Getting into the cockpit
Message of the day (MOTD) suggests you enable the cockpit web. It will be accessible through the ip.address.of.this.server:9090. Login to the cockpit as root.
Note: For home purposes, I highly recommend not exposing this port to the public and keeping it for management only from your local network or at least that is how my setup looks like. You can completely skip SSH since the cockpit allows you to access the terminal via a web browser.
$ systemctl enable --now cockpit.socket
Podman vs Docker
In this tutorial, we will run Pi-hole as a containerized workload. Leap Micro uses a podman by default. Cockpit has a nice podman plugin so you can pull && run containers directly from cockpit.
Unless the suggested deployment is very Docker centric, you should be able to just substitute docker with podman respective podman-docker and be good.
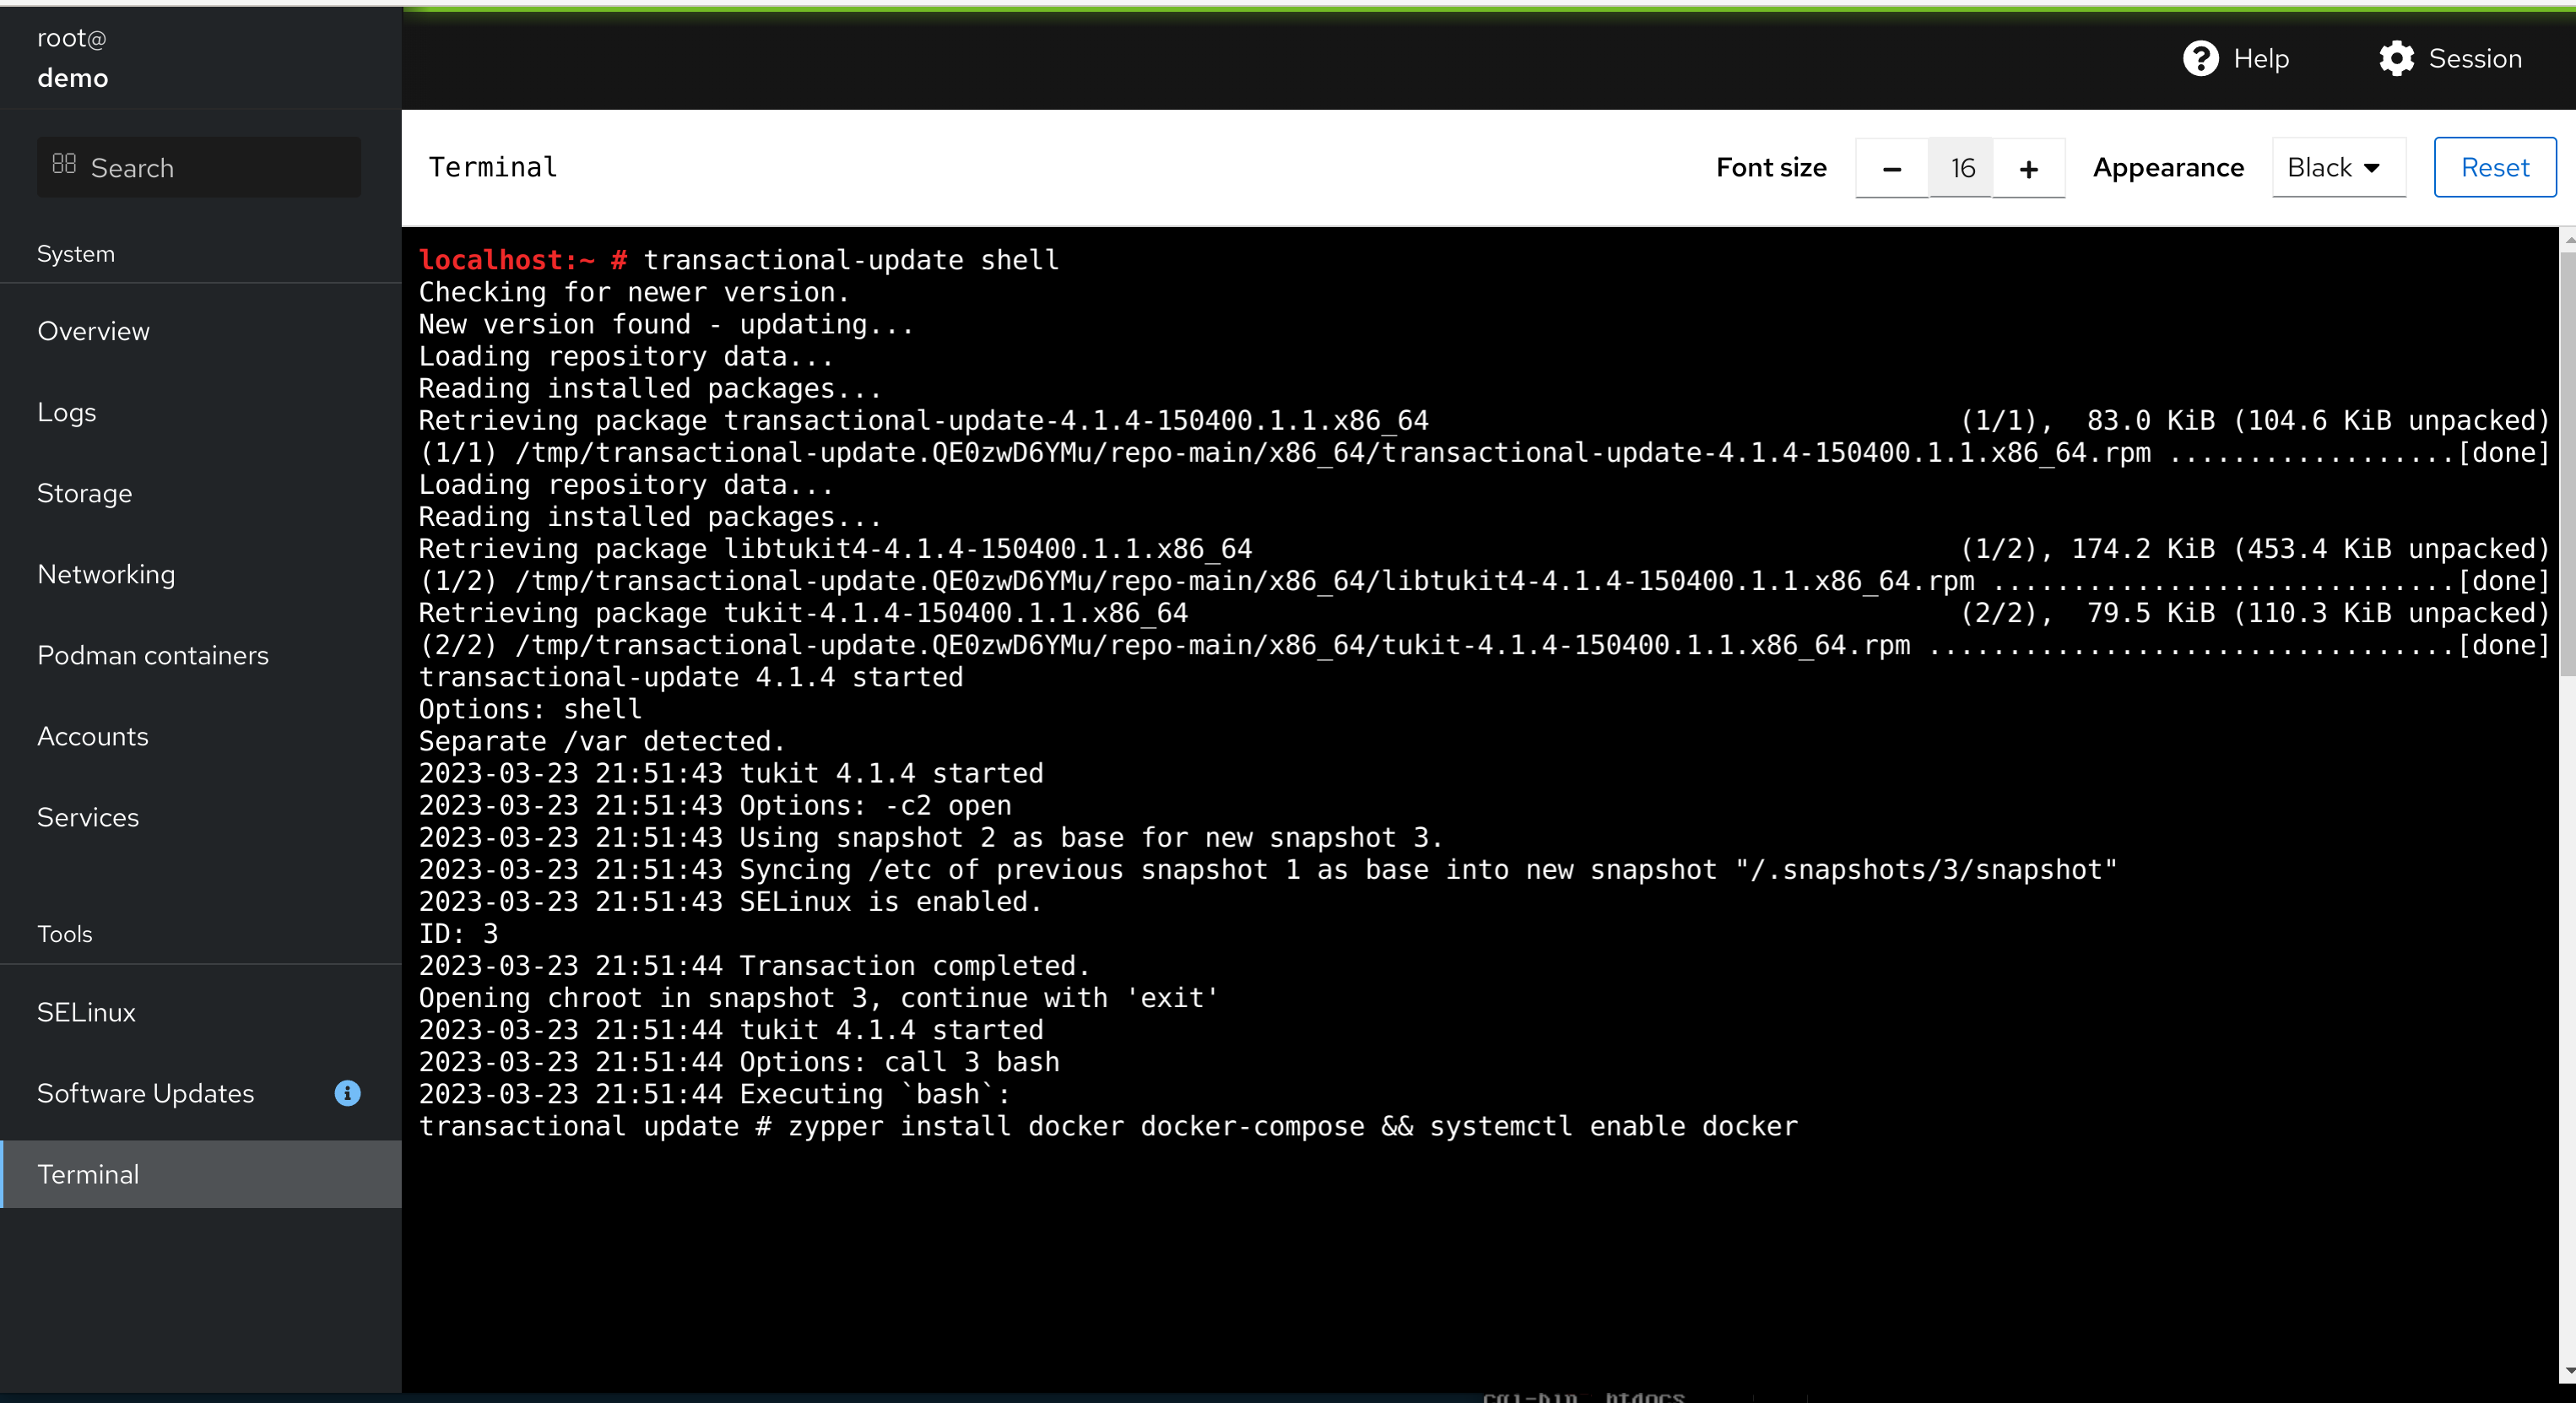
Pi-hole advertises Docker in its example; we can use this as an opportunity to show you how to install additional software on a transactional-update system.
You can use transactional-update pkg install docker or preferably use the transactional-update shell, which gets you a shell in a chroot of the newly created snapshot. There you can continue working just like it would be a traditional system.
# sudo transactional-update shell
# zypper install docker
# systemctl enable docker
# exit
# reboot
Do not forget to exit the transactional-update shell (type exit) and reboot afterward. All of the changes were done into a btrfs snapshot of the current environment, so we have to reboot it to see the changes. Fortunately, the reboot of vanilla Leap Micro takes less than 10 seconds
Note: A recommended way to install additional tools without a reboot is to use Distrobox
Deploying Pi-hole
We will follow instructions from https://github.com/pi-hole/docker-pi-hole#readme. This part took me literally two minutes.
This is essentially a copy-paste from the readme that runs the Pi-hole container in the background. Please change the password and set your time zone. Pay special attention to the host-to-container port mapping -p HOST_PORT:CONTAINER_PORT especially if you are running multiple workloads.
The -p 8888:80 says that we are mapping port 8888 of the Host to port 80 (web management interface) in the container. Port 53 (DNS) is mapped to the same port in the container.
You can store this in a wrapper e.g. /root/pihole_deploy.sh
Docker volume
In this example, we’re passing local /root/etc-pihole and /root/etc-dnsmaq.d directories to the container as Docker volumes where they’ll be present as /etc/pihole and /etc/dnsmasq.d respectively.
# mkdir -p /root/etc-pihole /root/etc-dnsmasq.d
# docker run -d \
--name pihole \
-p 53:53/tcp -p 53:53/udp \
-p 8888:80 \
-e TZ="Europe/Prague" \
-e WEBPASSWORD="CHANGEME" \
-v "/root/etc-pihole:/etc/pihole" \
-v "/root/etc-dnsmasq.d:/etc/dnsmasq.d" \
--dns=127.0.0.1 --dns=1.1.1.1 \
--restart=unless-stopped \
--hostname pi.hole \
-e VIRTUAL_HOST="pi.hole" \
-e PROXY_LOCATION="pi.hole" \
-e FTLCONF_LOCAL_IPV4="127.0.0.1" \
pihole/pihole:latest
Please wait until the state is healthy. You can proactively check the state with the following command.
# docker inspect -f "" pihole
Cleanup in case you messed up
# docker rm -f pihole # ^ re-do the above
Accessing Pi-hole web management
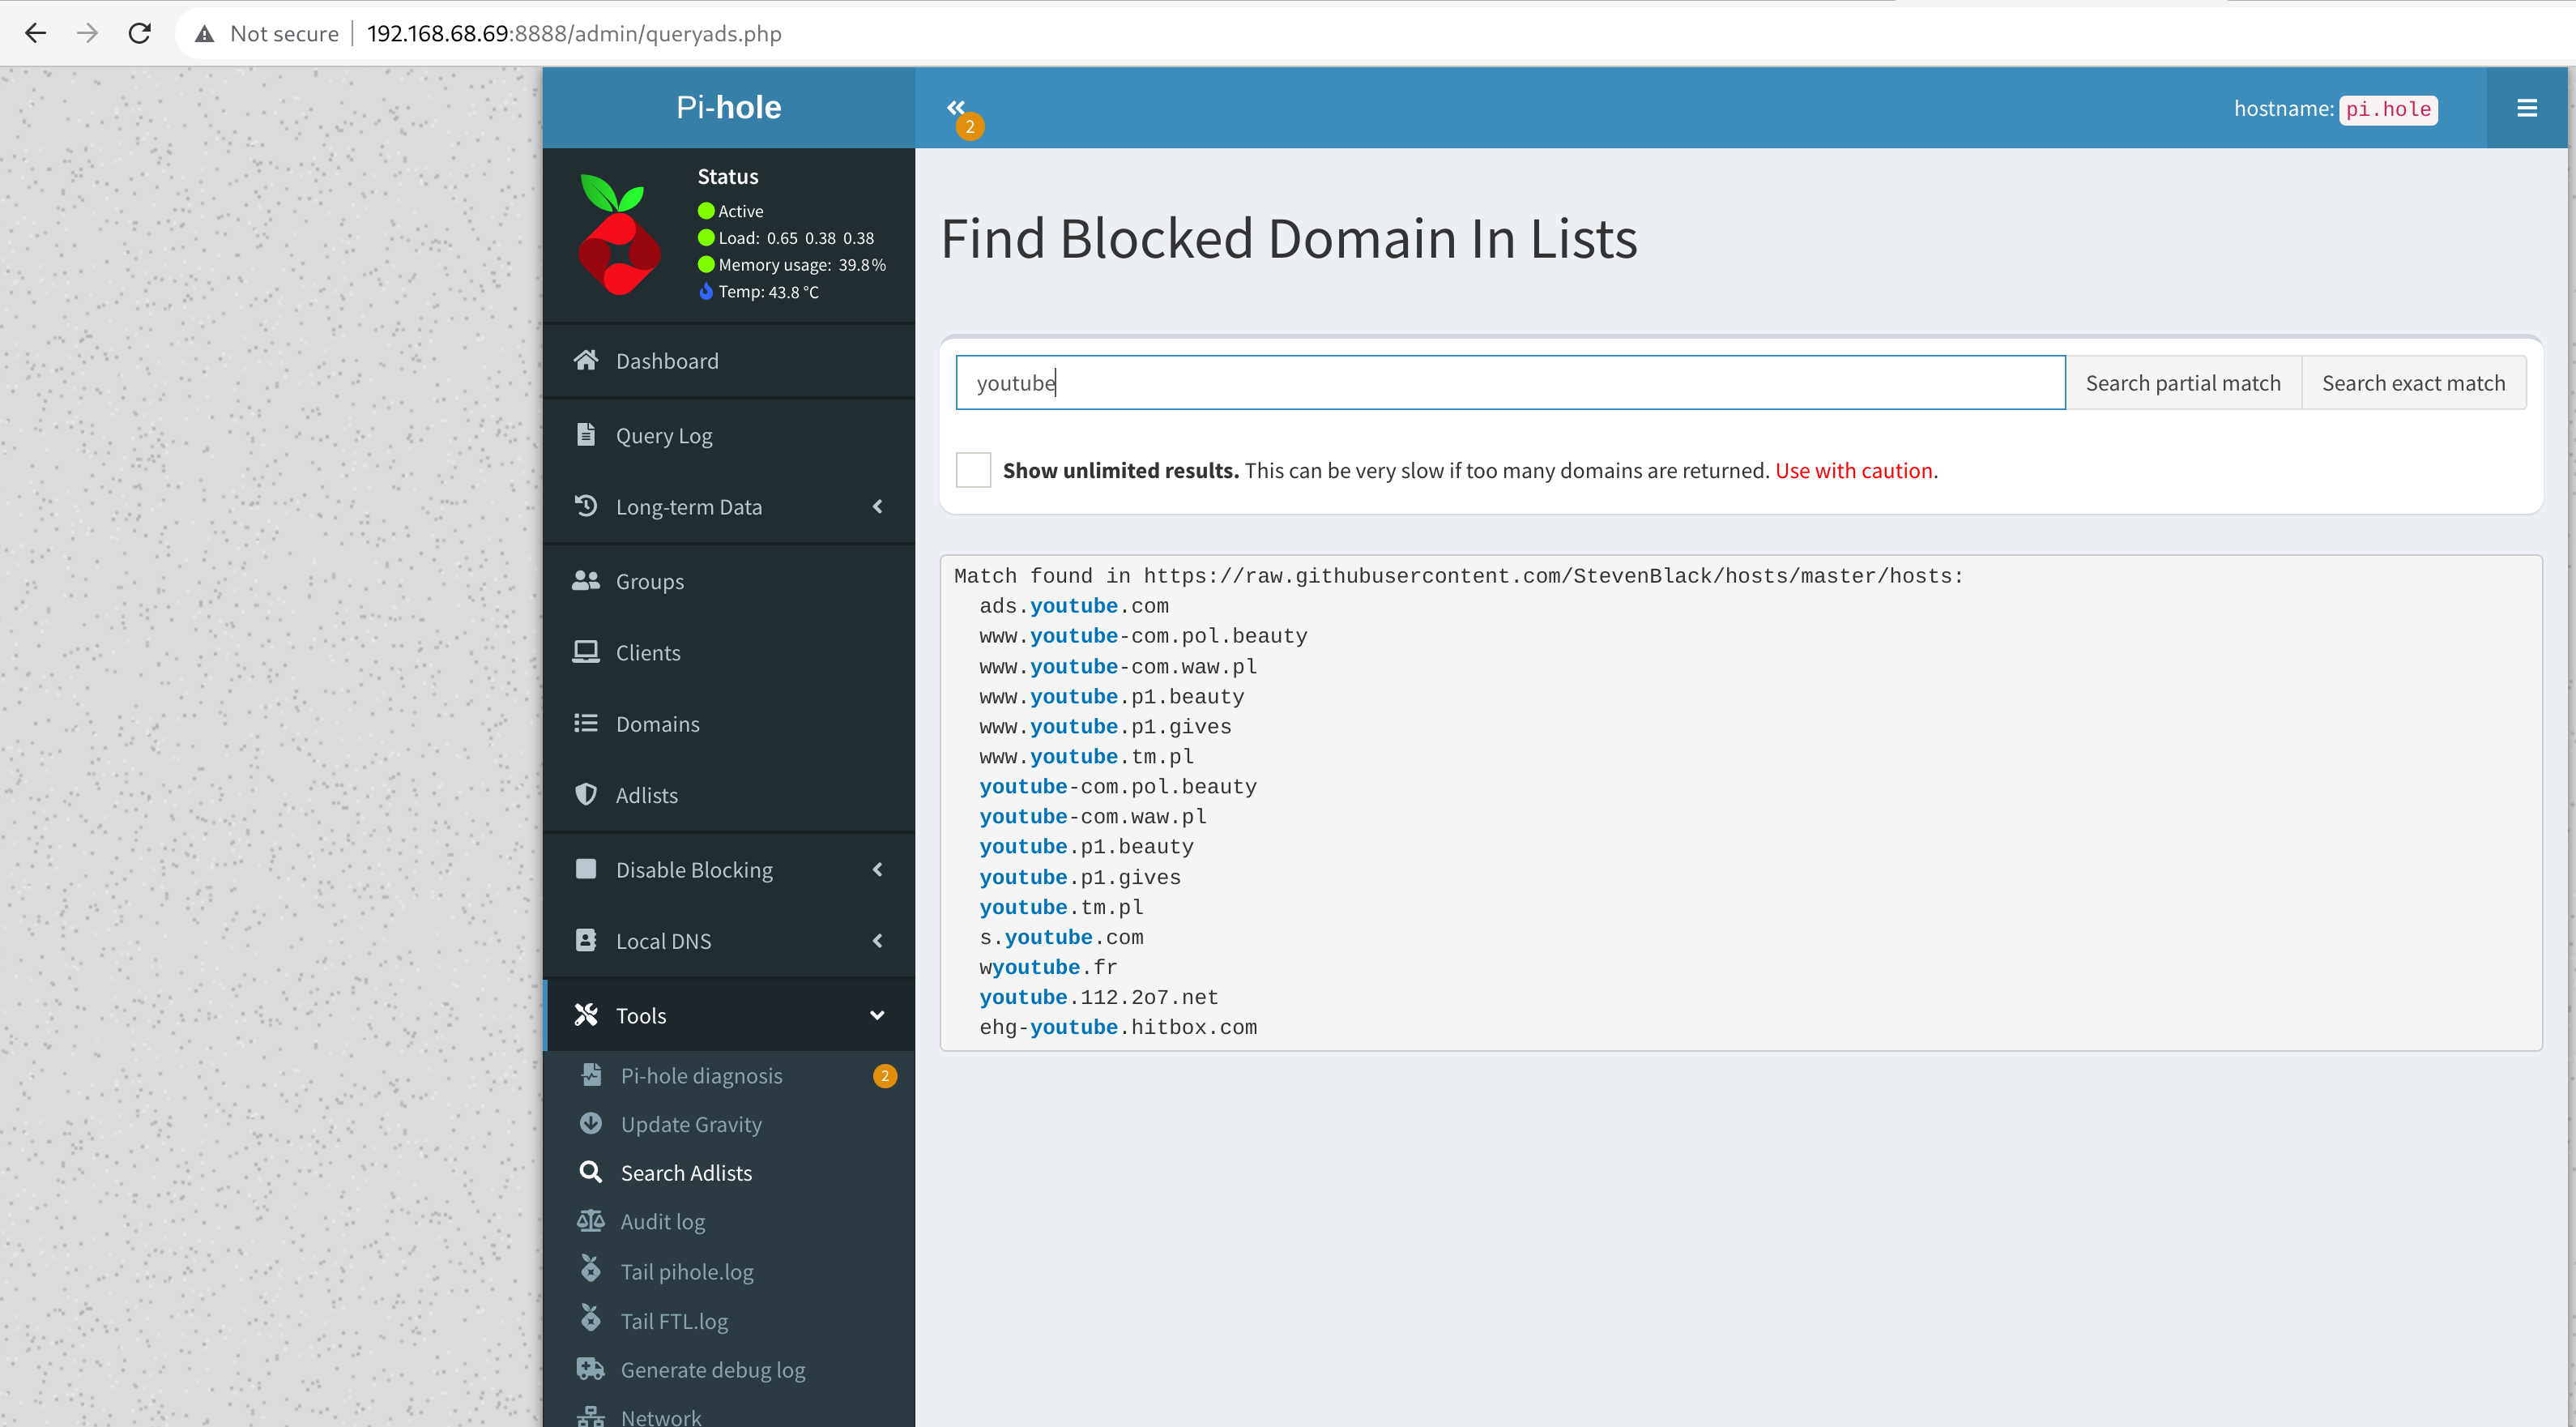
At this point, the containerized Pi-hole is already daemonized, and you can access the interface through ip.address.of.this.server:8888/admin
There is a default list; however, I did not find it sufficient for my ad-free youtube experience. You can use a builtin tool to look up further adlists.
Accessing services with external domain with a local IP
This is especially useful in our Nextcloud example later. Here I create local DNS records with local IP for my public domain, so I can access my NextCloud instance with an external domain name but interact with local IPs.
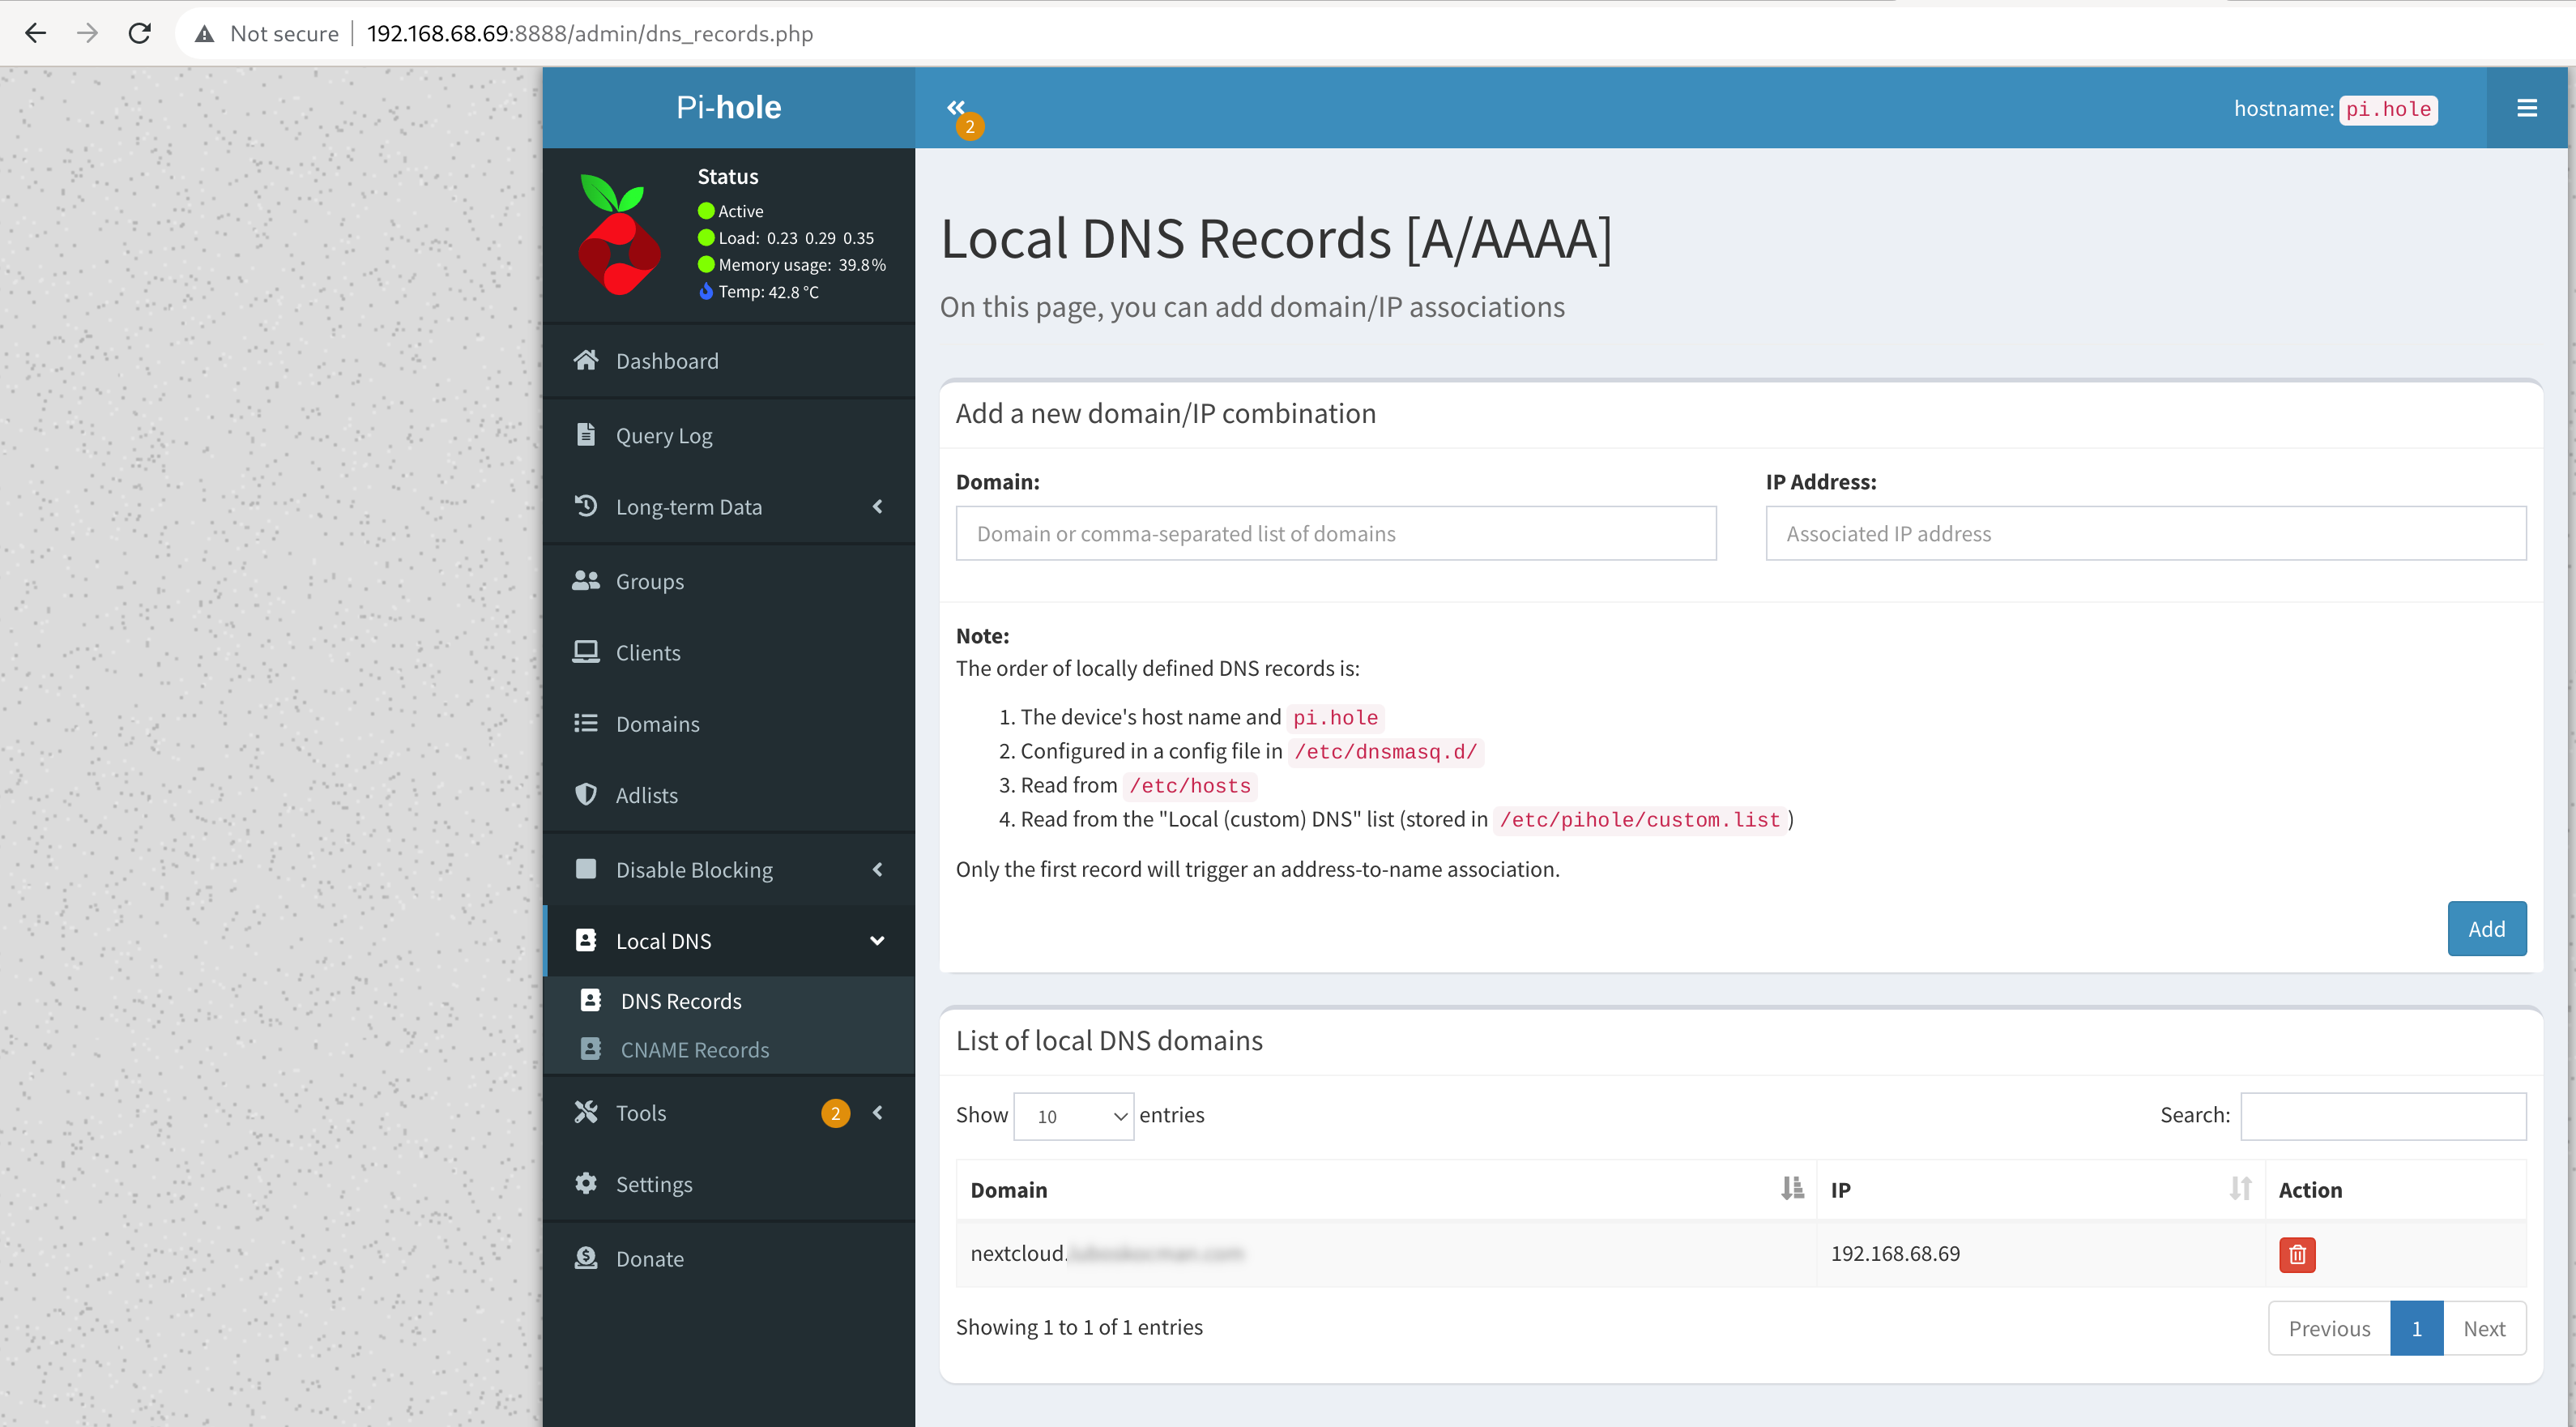
Using your new home DNS server with adlists
The last step is to configure your router’s DHCP server to use your new pi-hole instance as the DNS server. Please double-check that your end devices are using it as a DNS server. Otherwise, it will have no effect. In the example case, I did manually set the DNS entry in the DHCP settings of my TP-Link Deco to ip.address.of.this.server (in my case 192.168.68.69).
Tip: I find the function to temporarily disable blocking in case I am trying to debug issues with accessing certain sites.
And we’re done. Have a lot of fun!
El complemento docklike para #Xfce ya está disponible en #openSUSE
Ya puedes instalar en openSUSE el complemento docklike, que instala una barra estilo dock en el panel del escritorio Xfce

xfce4-docklike-plugin es una barra de tareas o panel moderno y minimalista del entorno de escritorio Xfce que ya está disponible para instalar desde los repositorios de openSUSE Tumbleweed o Leap.
Docklike se comporta de manera similar a muchos otros entornos de escritorio y sistemas operativos. Donde todas las ventanas de la aplicación se agrupan bajo un icono y se pueden anclar o fijar para actuar como un lanzador cuando la aplicación no se está ejecutando. Comúnmente conocido como dock.
En un reciente correo a la lista de correos de openSUSE, se anunciaba que estaba disponible ya empaquetado para la distribución este dock, por lo que instalarlo ahora es más sencillo, basta con añadir el repositorio (si no lo tenemos activado) e instalarlo ya sea via YaST o mediante zypper.
Aunque no uso mucho Xfce, sí lo tengo como una opción en mi sistema Tumbleweed, y me he decidido a instalarlo y probarlo.
Una vez instalado, en un panel, basta con hacer clic derecho y seleccionar «elementos nuevos…» y de la lista seleccionar Docklike Taskbar.
Lo podremos dejar solo como dock, y tener un segundo panel con lanzador, bandeja de sistema, etc. O integrarlo en el propio panel. Yo lo he hecho así, añadiendo separadores elásticos transparentes para que el dock quede centrado en el panel.
Si queremos que alguna aplicación quede anclada al dock, una vez abierta y visible en el dock, sobre el icono hacemos clic derecho y seleccionamos «Pinned to Dock» o anclar al Dock.
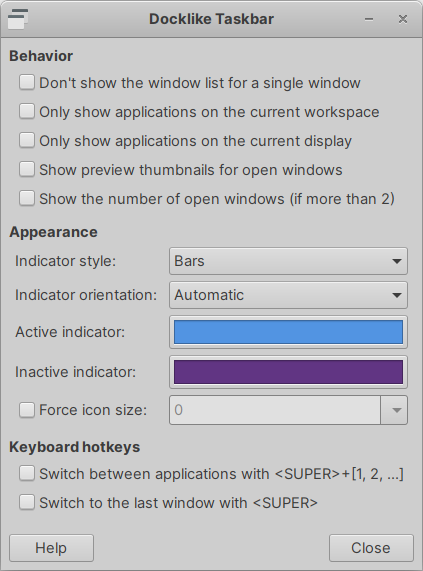
Aunque su uso es muy sencillo y claro, voy a explicar un poco las configuraciones del complemento:
Acciones del ratón
- ctrl+left-clik para arrastrar un elemento del dock
- ctrl+right-clik para acceder a las Propiedades, añadir o eliminar el complemento
- shift+click para lanzar otra instancia de la aplicación sobre la que hemos hecho clic
- middle-click para cerrar todas las instancias de una aplicaciónapplication
- mouse wheel para pasar en bucle a través de las ventanas abiertas en cualquier dirección
Atajos de teclado
Los atajos de teclado de manera predeterminada vienen inhabilitados para que no haya conflictos con atajos de teclado que ya tengas configurados.
- super+[1,2,…] para cambiar entre las aplicaciones, basadas en la posición del dock. Esta la he habilitado porque me resulta muy cómoda.
- super para cambiar a la ventana previa
Ajustes ocultos
El archivo con los ajustes se guarda en la ubicación ~/.config/xfce4/panel/docklike-1.rc de tu distribución GNU/Linux (o en alguna ubicación similar). El archivo solo se crea después de cambiar algo en la ventana Propiedades de xfce4-docklike-plugin.
- dockSize=<int> establece el ancho/alto mínimo (dependiendo de la orientación del panel) del widget de base (sin configurar de forma predeterminada)
- previewScale=<double> ajusta el factor de escala de las imágenes de vista previa (el valor predeterminado es 0,125)
- previewSleep=<int> ajusta el tiempo, en milisegundos, entre la generación de nuevas imágenes de vista previa (el valor predeterminado es 250)
Enlaces de interés
- https://docs.xfce.org/panel-plugins/xfce4-docklike-plugin/start
- https://gitlab.xfce.org/panel-plugins/xfce4-docklike-plugin/

Chat GPT Plasmoid, IA en tu escritorio – Plasmoides de KDE (218)
Seguimos con los widgets para el escritorio de la Comunidad KDE. En esta ocasión os presento Chat GPT, el plasmoide de KDE número 218 de la serie y que nos ofrece la posibilidad tener el servicio de IA en tu escritorio, esta tecnología que viene a revolucionar la humanidad.. y no lo digo por decir ya que lo he probado e incluso un artículo del blog lo he escrito a dos mans con la IA.
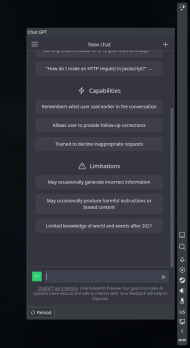
Chat GPT Plasmoid, IA en tu escritorio – Plasmoides de KDE (218)
Como he comentado en otras ocasiones, de plasmoides tenemos de todo tipo funcionales, de configuración, de comportamiento, de decoración o, como no podía ser de otra forma, de información sobre nuestro sistema como puede ser el uso de disco duro, o de memoria RAM, la temperatura o la carga de uso de nuestras CPUs.
Así que espero que le deis la bienvenida a un plasmoide llamado Chat GPT, una creación de dark-eye que nos trae a nuestro escritorio esta herramienta que viene a revolucionar un poco (o mucho) nuestro mundo.
En sus palabras:
Un simple plasmoide para permitir el acceso rápido a ChatGPT directamente desde los Paneles/Escritorio de KDE
Sólo una envoltura alrededor de la ChatGPT Sitio Web, pero funciona …
Y como siempre digo, si os gusta el plasmoide podéis «pagarlo» de muchas formas en la nueva página de KDE Store, que estoy seguro que el desarrollador lo agradecer?: puntúale positivamente, hazle un comentario en la página o realiza una donación. Ayudar al desarrollo del Software Libre también se hace simplemente dando las gracias, ayuda mucho más de lo que os podéis imaginar, recordad la campaña I love Free Software Day de la Free Software Foundation donde se nos recordaba esta forma tan sencilla de colaborar con el gran proyecto del Software Libre y que en el blog dedicamos un artículo.
Más información: KDE Store
¿Qué son los plasmoides?
Para los no iniciados en el blog, quizás la palabra plasmoide le suene un poco rara pero no es mas que el nombre que reciben los widgets para el escritorio Plasma de KDE.
En otras palabras, los plasmoides no son más que pequeñas aplicaciones que puestas sobre el escritorio o sobre una de las barras de tareas del mismo aumentan las funcionalidades del mismo o simplemente lo decoran.
La entrada Chat GPT Plasmoid, IA en tu escritorio – Plasmoides de KDE (218) se publicó primero en KDE Blog.
¿Cuanto sabes de GNU/Linux? Ponte a prueba (marzo)
Pon a prueba tus conocimientos sobre GNU/Linux con estas sencillas preguntas

En este blog que lees escribo desde hace ya muchos años sobre GNU/Linux. Encontrarás tutoriales, consejos, y formas de realizar ciertas tareas en este sistema operativo potente, estable y de software libre.
Pero ¿Te atreverías a poner a prueba tus conocimientos sobre este sistema operativo? La idea es publicar un artículo cada mes, en el que formularé algunas preguntas relacionadas con GNU/Linux, para ver si eres capaz de resolverlas sin mirar la ayuda o necesitas seguir el manido consejo de RTFM.
No sufras, las preguntas serán sencillas, pero por supuesto puedes leer la ayuda de los comandos, buscar ayuda en la red, etc. También yo te proporcionará la solución (eso sí, codificada en ROT13), para que no te quedes con la duda, la idea es aprender.
Seguro que sea cual sea tu nivel aprenderás algo con alguno de los retos propuestos. Mi idea inicial, es que sean retos mensuales (veremos si después la realidad me permite realizarlo durante todo el año).
Tengo en mente que cada mes sean 5 preguntas o retos, te pediría que no publicases las soluciones en los comentarios, para no hacer «spoilers», pero por supuesto puedes comentar lo que sea con cualquiera de los retos, errores, mejoras, si te resultaron interesantes, etc.
Espero que la idea os resulte atractiva, y ya veremos, igual la propuesta tiene aceptación y tengo que publicar más de un reto por mes! Bueno, el tiempo mandará…
Como digo, la idea es compartir y aprender, la idea es que practiquéis, busquéis información, probéis opciones, leáis ayuda, etc y así ir descubriendo nuevas funcionalidades. Además, no dudéis del valor de la serendipia, que os llevará por caminos de conocimiento paralelos.
Reto 1
PREGUNTA
En una consola en Bash estando en el directorio home de tu usuario ¿cómo podrías listar los archivos PDF que existen dentro de la carpeta Descargas y todas sus subcarpetas? Hacer que el comando sea válido para cualquier usuario
RESPUESTA
svaq ~/Qbjaybnqf/ -anzr «*.cqs»
Reto 2
PREGUNTA
Comando para mostrar el directorio de trabajo actual incluyendo el contenido de las subcarpetas
RESPUESTA
yf -E
Reto 3
PREGUNTA
¿Dónde se suele montar la partición EFI del sistema? (en los sistemas que usen EFI)
RESPUESTA
/obbg/rsv
Reto 4
PREGUNTA
¿Cuales son los comandos para montar y desmontar un sistema de archivos del sistema?
RESPUESTA
zbhag l hzbhag erfcrpgvinzragr (cbare ngrapvóa n dhr rf hzbhag ab hazbhag)
Reto 5
PREGUNTA
Aunque no es obligatorio ya que se puede realizar en cualquier ubicación ¿en qué directorio se suelen montar un sistema de archivos si lo realizamos de manera manual?
RESPUESTA
/zag
Al final entre unas cosas y otras, hacer un post como este me ha llevado más tiempo de lo esperado, pero creo que es interesante. Os animo a participar y medir vuestros conocimientos con GNU/Linux.

Tutorial de Krita, vídeo de David Revoy
Hoy os traigo una nuevo tutorial de Krita, un video-tutorial de más de una hora de duración que empieza con los conceptos básicos de Krita y acaba explicando hasta las técnicas más avanzadas.
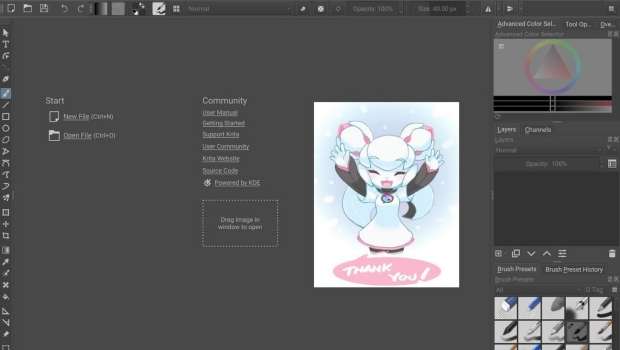
Tutorial de Krita, vídeo de David Revoy
Desde hace un tiempo he ido publicando los vídeos de Ramón Miranda y el fabuloso Krita, una forma de aprender a utilizar esta maravilloso programa de edición de imágenes y gráficos digitales que se utiliza principalmente para el dibujo y la pintura digital. De esta forma han aparecido en esta bitácora 10 trucos para Krita, pintando con Krita el «Tajo de Ronda», perspectiva con Krita, cómo grabar con Krita o cómo crear tus pinceles.
No obstante, la persona que hoy nos hablará de Krita no será Ramón sino un tal David Revoy, uno de los ilustradores más famosos utilizando y promocionando esta aplicación que se ha marcado un tutorial de una hora y veinte minutos de duración.
En sus propias palabras:
Un largo video tutorial de Krita de 1h22min totalmente comentado. Un verdadero curso completo adecuado para principiantes, pero también para pintores digitales avanzados. Empieza desde cero con un conjunto predeterminado de pinceles, preferencias y desglosa todo el proceso. Las partes repetitivas, mientras que la pintura se aceleró todo y se puede saltar fácilmente (un temporizador en la superposición aparece en la pantalla) Compruebe los códigos de línea de tiempo en virtud de navegar en el video.
Los subtítulos no están disponibles, lo siento por mi (fuerte) acento francés y mi pobre vocabulario. Era demasiado largo para escribirlos esta vez. Espero que la autogeneración funcione y no tengas muchos problemas para entenderme.
Grabé más de 6h de material, y al final estaba totalmente descerebrado. Pintar y hablar mientras grababa realmente me sobrecalentaba el cerebro, y además lo grabé bajo un clima super caluroso, 39°C , y tuve que apagar todos los ventiladores para reducir el ruido del micrófono. Fue todo un reto.
Un gran reconocimiento también al equipo del estudio OBS (por el software de grabación) y al equipo de Kdenlive (por el software de edición de vídeo). Por supuesto, también al equipo de Krita.
¿Qué es Krita?
Krita es una aplicación de software libre y de código abierto que se utiliza principalmente para crear ilustraciones digitales, animaciones y dibujos. Es una herramienta de dibujo y pintura digital que ha ganado popularidad entre los artistas digitales en los últimos años debido a su versatilidad y potencia.
Krita fue desarrollado originalmente en 1999 como un programa de procesamiento de imágenes para sistemas Unix y ha evolucionado significativamente desde entonces. En la actualidad, es compatible con Windows, macOS y Linux, y es utilizado por artistas de todo el mundo.
Krita es una herramienta única en el sentido de que está diseñada específicamente para artistas digitales y es altamente personalizable. Tiene una amplia variedad de herramientas de dibujo y pintura, como lápices, pinceles, aerógrafos, gomas de borrar y mucho más, que se pueden personalizar según las necesidades del artista. Además, Krita también ofrece herramientas avanzadas de edición de imágenes, como máscaras de capa, filtros y efectos especiales.
Una de las características más interesantes de Krita es su capacidad para trabajar con tabletas gráficas y pantallas táctiles. La aplicación cuenta con una serie de ajustes de sensibilidad a la presión que permiten al artista controlar la cantidad de tinta que se deposita en el lienzo en función de la cantidad de presión ejercida en la pluma. Esto hace que sea posible crear líneas de diferentes grosores y estilos, lo que puede ser muy útil para crear una variedad de efectos artísticos.
Otra característica que hace de Krita una herramienta popular para artistas digitales es su capacidad para trabajar con archivos en capas. Los archivos en capas son una característica común en muchos programas de diseño gráfico y permiten a los artistas trabajar en diferentes partes de una imagen sin afectar a otras partes. Krita permite a los usuarios crear y manipular capas, lo que les permite trabajar con múltiples elementos de una imagen de forma más eficiente.
En resumen, Krita es una aplicación de software libre y de código abierto que ofrece una gran variedad de herramientas de dibujo y pintura digital, así como herramientas avanzadas de edición de imágenes. Es altamente personalizable y está diseñado específicamente para artistas digitales. Krita es una herramienta popular para trabajar con tabletas gráficas y pantallas táctiles, y también permite a los usuarios trabajar con archivos en capas. Si eres un artista digital o simplemente estás interesado en la creación de arte digital, Krita es una herramienta que definitivamente vale la pena explorar.
La entrada Tutorial de Krita, vídeo de <a href="https://www.youtube.com/@DavidRevoy">David Revoy</a> se publicó primero en KDE Blog.
