
 Member
 baltolkien
Lanzada la segunda actualización de Plasma 5.25
Tal y como estaba previsto en el calendario de lanzamiento de los desarrolladores, hoy martes 28 de junio la Comunidad KDE ha comunicado que ha sido lanzada la segunda actualización de Plasma 5.25. Una noticia que aunque es esperada y previsible es la demostración palpable del alto grado de implicación de la Comunidad en la mejora continua de este gran entorno de escritorio de Software Libre.
Lanzada la segunda actualización de Plasma 5.25
No existe Software creado por la humanidad que no contenga errores. Es un hecho incontestable y cuya única solución son las actualizaciones. Es por ello que en el ciclo de desarrollo del software creado por la Comunidad KDE se incluye siempre las fechas de las actualizaciones.
De esta forma, el martes 28 de junio ha sido lanzada la segunda actualización de Plasma 5.25, la cual solo trae (que no es poco) soluciones a los bugs encontrados en esta semana de vida del escritorio y mejoras en las traducciones. Es por tanto, una actualización 100% recomendable.
Algunos de los errores solucionados han sido:
- Cambiado el requisito de versión de Qt 5 a 5.15.2 y el requisito de KF5 a 5.94.
- Corregido el tintado de la barra de título de la ventana en colorsapplicator.
- Ahora los los tooltips de la barra lateral respetan la configuración globall.
Más información: KDE
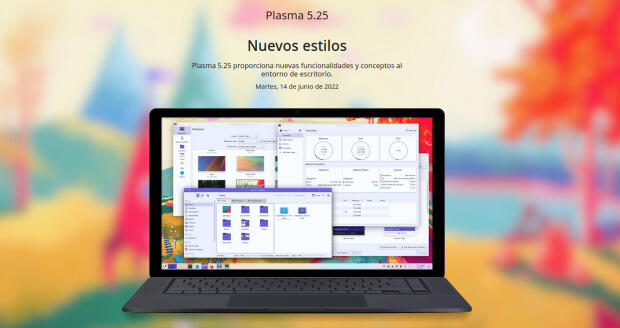
Las novedades de Plasma 5.25
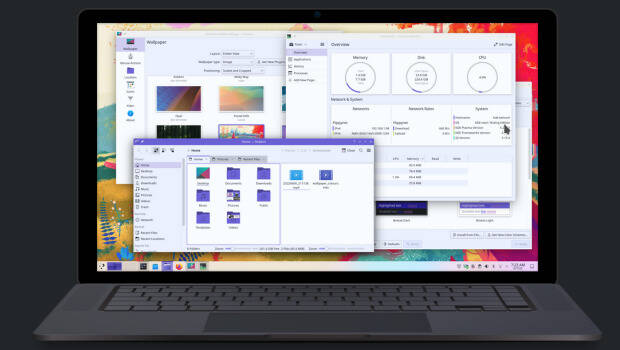
La Comunidad KDE publicó el 14 de junio Plasma 5.25, una versión que nos ofrecen un gran conjunto de novedades y propuestas que nos acercan a lo que vendrá cuando se realice la transición a Plasma 6.
En otras palabras, esta nueva versión de Plasma nos presenta una gran cantidad de nuevas funciones y geniales conceptos de Plasma 5.25 le traen un anticipo del futuro del escritorio de KDE.
Ya ha pasado el día de descarga y actualizaciones, y ya los estoy disfrutando en mi KDE Neon, así que os comento algunas de sus novedades:
- Rediseñado y mejorado la forma de navegar entre las ventanas y los espacios de trabajo.
- Gran actualización en la gestión del control de nuestro dispositivo mediante gestos.
- Sincronización del color de acentuación con el fondo de pantalla, de esta forma se puede aplicar el color dominante del fondo a todos los componentes que usan el color de acentuación.
- Activación del modo táctil desprendiendo la pantalla, rotándola 360° o seleccionándolo de forma manual.
- Añadidos los paneles flotantes que añaden un margen a su alrededor para hacer que floten, mostrando una animación cuando se vuelven normales al maximizar una ventana.
- Los efectos de mezcla entre esquemas se animan con elegancia, por ejemplo en la transición al cambiar el esquema de color actual.
- Posibilidad de mover todo el escritorio, con carpetas, widgets y paneles, de un monitor a otro con la ventana de gestión del contenedor.
Más información: KDE
La entrada Lanzada la segunda actualización de Plasma 5.25 se publicó primero en KDE Blog.

Fixing test coverage reports in at-spi2-core
Over the past weeks I have been fixing the test coverage report for at-spi2-core. It has been a bit of an adventure where I had to do these:
- Replace a code coverage tool for another one...
- ... which was easier to modify to produce more accessible HTML reports.
- Figuring out why some of at-spi2-core's modules got 0% coverage.
- Learning to mock DBus services.
What is a code coverage report?
In short — you run your program, or its test suite. You generate a coverage report, and it tells you which lines of code were executed in your program, and which lines weren't.
A coverage report is very useful! It lets one answer some large-scale questions:
-
Which code in my project does not get exercised by the tests?
-
If there is code that is conditionally-compiled depending on build-time options, am I forgetting to test a particular build configuration?
And small-scale questions:
-
Did the test I just added actually cause the code I am interested in to be run?
-
Are there tests for all the error paths?
You can also use a coverage report as an exploration tool:
- Run the program by hand and do some things with it. Which code was run through your actions?
I want to be able to do all those things for the accessibility infrastructure: use the report as an exploration tool while I learn how the code works, and use it as a tool to ensure that the tests I add actually test what I want to test.
A snippet of a coverage report
This is a screenshot of the report for at-spi2-core/atspi/atspi-accessible.c:

The leftmost column is the line number in the source file. The second column has the execution count and color-coding for each line: green lines were executed one or more times; red lines were not executed; white lines are not executable.
By looking at that bit of the report, we can start asking questions:
-
There is a
return -1for an error condition, which is not executed. Would the calling code actually handle this correctly, since we have no tests for it? -
The last few lines in the function are not executed, since the check before them works as a cache. How can we test those lines, and cause them to be executed? Are they necessary, or is everything handled by the cache above them? How can we test different cache behavior?
First pass: lcov
When I initially added continuous integration infrastructure to at-spi2-core, I copied most of it from libgweather, as Emmanuele Bassi had put in some nice things in it like static code analysis, address-sanitizer, and a code coverage report via lcov.
The initial runs of lcov painted a rather grim picture: test coverage was only at about 30% of the code. However, some modules which are definitely run by the test suite showed up with 0% coverage. This is wrong; those modules definitely have code that gets executed; why isn't it showing up?
Zero coverage
At-spi2-core has some peculiar modules. It does not provide a single program or library that one can just run by hand. Instead, it provides a couple of libraries and a couple of daemons that get used through those libraries, or through raw DBus calls.
In particular, at-spi2-registryd is the registry daemon for
accessibility, which multiplexes requests from assitive technologies
(ATs) like screen readers into applications. It doesn't even use the
session DBus; it registers itself in a separate DBus daemon specific
to accessibility, to avoid too much traffic in the main session bus.
at-spi2-registryd gets started up as soon as something requires the
accessibility APIs, and remains running until the user's session ends.
However, in the test runner, there is no session. The daemon
runs, and gets a SIGTERM from its parent dbus-daemon when it
terminates. So, while at-spi2-registryd has no persistent state
that it may care about saving, it doesn't exit "cleanly".
And it turns out that gcc's coverage data gets written out only if
the program exits cleanly. When you compile with the --coverage
option, gcc emits code that turns on the flag in libgcc to write out
coverage information when the program ends (libgcc is the
compiler-specific runtime helper that gets linked into normal programs
compiled with gcc).
It's as if main() had a wrapper:
void main_wrapper(void)
{
    int r = main(argc, argv);

    write_out_coverage_info();

    exit(r);
}

int main(int argc, char **argv)
{
    /* your program goes here */
}
Of course, if your program terminates prematurely through SIGTERM, the wrapper will not finish running and it will not write out the coverage info.
So, how do we simulate a session in the test runner?
Mocking gnome-session
I recently learned of a fantastic tool, python-dbusmock, which makes it really easy to create mock implementations of DBus interfaces.
There are a couple of places in at-spi2-core that depend on watching the user session's lifetime, and fortunately they only need two things from the gnome-session interfaces:
- Register themselves as a session client.
- Get notified when the session ends so the daemon can exit.
I wrote a mock of these DBus interfaces so that the daemons can register against the fake session manager. Then I made the test runner ask the mock session to tell the daemons to exit when the tests are done.
With that, at-spi2-registryd gets coverage information written out
properly.
Obtaining coverage for atk-adaptor
atk-adaptor is a bunch of glue code between atk, the GObject-based
library that GTK3 uses to expose accessible interfaces, and
libatspi, the hand-written DBus binding to the accessibility
interfaces.
The tests for this are very interesting. We want to simulate an
application that uses atk to make itself accessible, and to test
that e.g. the screen reader can actually interface with them. Instead
of creating ATK implementations by hand, there is a helper program
that reads XML descriptions of accessible objects, and exposes them
via ATK. Each individual test uses a different XML file, and each
test spawns the helper program with the XML it needs.
Again, it turns out that the test runner just sent a SIGTERM to the helper program when each test was done. This is fine for running the tests normally, but it prevents code coverage from being written out when the helper program terminates.
So, I installed a gmain signal handler in the helper program, to make it exit cleanly when it gets that SIGTERM. Problem solved!
Missing coverage info for GTK2
The only part of at-spi2-core that doesn't have coverage information
yet is the glue code for GTK2. I think this would require running a
test program under xvfb so that its libgtk2 can load the module
that provides the glue code. I am not sure if this should be tested
by at-spi2-core itself, or if that should be the responsibility of
GTK2.
Are the coverage reports accessible?
For a sighted person, it is easy to look at a coverage report like the example above and just look for red lines — those that were not executed.
For people who use screen readers, it is not so convenient. I asked around a bit, and Eitan Isaacson gave me some excellent tips on improving the accessibility of lcov and grcov's HTML output.
Lcov is an old tool, and I started using it for at-spi2-core because it is what libgweather already used for its CI. Grcov is a newer tool, mostly by Mozilla people, which they use for Firefox's coverage reports. Grcov is also the tool that librsvg already uses. Since I'd rather baby-sit one tool instead of two, I decided to switch at-spi2-core to use grcov as well and to improve the accessibility of its reports.
The extract from the screenshot above looks like a table with three
columns (line number, execution count, source code), but it is not a
real HTML <table> — it is done with div elements and
styling. Something like this:
<div>
  <div class="columns">
    <div class="column">
      line number
    </div>
    <div class="column color-coding-executed">
      execution count
    </div>
    <div class="column color-coding-executed">
      <pre>source code</pre>
    </div>
  </div>
  <!-- repeat the above for each source line -->
</div>
Eitan showed me how to use ARIA tags to actually
expose those divs as something that can be navigated as a table:
-
Add
role="table" aria-label="Coverage report"to the main<div>. This tells web browsers to go into whatever interaction model they use for navigating tables via accessible interfaces. It also gives a label to the table, so that it is easy to find by assistive tools; for example, a screen reader may let you easily navigate to the next table in a document, and you'd like to know what the table is about. -
Add
role="row"to each row'sdiv. -
Add
role="cell"to an individual cell'sdiv. -
Add an
aria-labelto cells with the execution count: while the sighted version shows nothing (non-executable lines), or just a red background (lines not executed), or a number with a green background, the screen reader version cannot depend on color coding alone. Thataria-labelwill say "no coverage", or "0", or the actual execution count, respectively.
Time will tell whether this makes reports easier to peruse. I was mainly worried about being able to scan down the source quickly to find lines that were not executed. By using a screen reader's commands for tabular navigation, one can move down in the second column until you reach a "zero". Maybe there is a faster way? Advice is appreciated!
Grcov now includes that patch, yay!
Next steps
I am starting to sanitize the XML interfaces in at-spi2-core, at least in terms of how they are used in the build. Expect an update soon!

openSUSE Leap 15.4 release retrospective
We are seeking feedback regarding the release of openSUSE Leap 15.4, which was released to the general public on June 8.
With this survey, what we’re looking from you is both positive and negative feedback related to the availability and individual experience with openSUSE Leap 15.4. Your participation is very valuable for us.
Participating is very simple, this survey consists of only two questions, in this way we’ll try to continue doing what went well and try to address what went wrong. So follow this link to partipate in this survey:
The deadline for collecting responses is July 7. Your responses will be then grouped and reviewed and passed to the respective openSUSE teams.
Here you can find the results from previous retrospective.
We care about your privacy, that’s why the record of your survey responses does not contain any identifying information about you, unless a specific survey question explicitly asked for it. Feedback might be adjusted to fit our report.
Thanks a lot for being part of openSUSE community.
#openSUSE Tumbleweed revisión de la semana 25 de 2022
Tumbleweed es una distribución «Rolling Release» de actualización contínua. Aquí puedes estar al tanto de las últimas novedades.

openSUSE Tumbleweed es la versión «rolling release» o de actualización continua de la distribución de GNU/Linux openSUSE.
Hagamos un repaso a las novedades que han llegado hasta los repositorios esta semana.
El anuncio original lo puedes leer en el blog de Dominique Leuenberger, publicado bajo licencia CC-by-sa, en este este enlace:
Normalmente este repaso semanal lo suelo publicar los viernes, pero la semana pasada (semana 25) no pude por falta de tiempo, así que nunca es tarde para ver qué ha ocurrido durante la semana en openSUSE Tumbleweed.
La semana 25 no estuvo exenta de de problemas, en concreto con una actualización con SELinux 3.4 que funcionaba en la mayoría de casos, pero no iba bien con los contenedores.
Así que hubo un parón en publicaciones en Tumbleweed para tratar de solucionar este problema. Aún así se publicaron 6 snapshots esta semana (0616,0617, 0618, 0619, 0622 y 0623).
Entre los cambios que han llegado a los repositorios, podemos destacar:
- Linux kernel 5.18.4
- Mozilla Firefox 101.0.1
- KDE Frameworks 5.95.0
- KDE Plasma 5.25.1
- Gimp 2.10.32
- Inkscape 1.2
- LibreOffice 7.3.4RC2
- NetworkManager 1.38.2
- krb5 1.20
- Samba 4.16.2
- SELinux 3.4
- Redis 7.0.2
- Mesa 22.1.2
- Sphinx 5
Una gran lista de paquetes importantes actualizados, pero todavía hay más actualizaciones que llegarán en próximas semanas. Entre las que llegarán podremos destacar:
- systemd 251.2
- Linux kernel 5.18.6
- rpmlint
Si quieres estar a la última con software actualizado y probado utiliza openSUSE Tumbleweed la opción rolling release de la distribución de GNU/Linux openSUSE.
Mantente actualizado y ya sabes: Have a lot of fun!!
Enlaces de interés

——————————–
Lanzado digiKam 7.7, mejorando los paquetes multisistemas
El mejor gestor de imágenes de la Comunidad KDE (y una de las mejores del mercado tanto libre como privado) sigue su desarrollo. De esta forma ha sido lanzado digiKam 7.7, una nueva versión de la séptima rama principal que se ha dedicado a mejorar el ensamblaje de los paquetes multisistemas
Lanzado digiKam 7.7, mejorando los paquetes multisistemas
Ayer 26 de junio fue lanzado digiKam 7.7 la nueva versión de uno de los gestores de imágenes más completo que puedes encontrar en el mundo GNU/Linux, e incluso en el mundo privativo.
En palabras de sus desarrolladores:
Después de tres meses de mantenimiento activo y de una nueva revisión de errores, el equipo de digiKam se enorgullece de presentar la versión 7.7.0 de su gestor de fotografías digitales de código abierto
Esta nueva versión menor (pero importante) se ha centrado en:
- Qt 5.15 LTS utilizado en el paquete de Windows y MacOS
- Actualización del Framework KDE y de Libraw
- 84 errores revisados y cerrados en bugzilla.
- Mejorado el soporte de los modernos contenedores de imágenes AVIF y JPEG-XL en todos los paquetes.
- Eliminada la copia interna más antigua de los códecs libheif y libde265 en favor de una más reciente de las bibliotecas del sistema para un mejor soporte del contenedor de imágenes HEIF utilizado por la cámara del iPhone.
- Correcciones de errores en condiciones específicas, correcciones de casos de uso de regresión.
- Más estabilidad con la base de datos Mysql remota.
- Actualizada la internacionalización de la aplicación.
Más información: Digikam 7.7
Las novedades de digiKam 7
Aunque gran parte del trabajo para esta nueva versión, como he dicho, se lo ha llevado el reconocimiento facial con interesantes mejoras, digiKam también nos ofrece jugosas novedades. Hagamos un repaso:
- Mejoras reconocimiento facial como:
- Porcentaje de acierto de un 97%.
- Mejoras en rapidez y eficiencia en el uso de recursos.
- Posibilidad de detectar caras no-humanas. También podremos tener registradas a nuestras mascotas!
- Posibilidad de detectar caras borrosas, cubiertas, pintadas, parciales, etc.

- Nuevo soporte para ficheros RAW files para nuevas cámaras como Canon CR3 o Sony A7R4.
- Mejorado el soporte para las imágenes con formato HEIF.
- Mejoras en el paquete binario con soporte para FlatPak.
- Nueva herramienta, ImageMosaicWall, para crear una imagen basada en otra colección de fotos.
- Nuevas opciones para escribir información de geolocalización en los metadatos del archivo.
- El plugin HTMLGallery introduce un nuevo tema llamado Html5Responsive.

Y, por supuesto, muchos errores solucionados, con lo que parece que tendremos la mejor versión de digiKam que puede tener vuestro ordenador.
¿Qué es digiKam?
La mejor forma de definir digiKam es buscar como se describe esta aplicación de userbase.kde.org y realizar una pequeña síntesis:
DigiKam es una aplicación que te permite la importación de fotografías desde cámaras, creación de Álbumes, etiquetado con fechas, temas y otras propiedades, utilidades de búsqueda excelentes y modificación de imágenes en masa.
La entrada Lanzado digiKam 7.7, mejorando los paquetes multisistemas se publicó primero en KDE Blog.

molecule test: failed to connect to bus in systemd container
Ansible Molecule is a project to help you test your ansible roles. I’m using molecule for automatically testing the ansible roles of geekoops.
So, while hacking on the geekoops roles, molecule test was complaining on my Tumbleweed machine:
Mix de novedades de Plasma 5.25
Tras los cuatro meses de rigor en los que los desarrolladores han estado trabajando en el siguiente paso del escritorio de la Comunidad KDE, ésta se congratuló en anunciar que había sido lanzado Plasma 5.25. Ha pasado casi dos semanas de desde su lanzamiento, ya tenemos la primera actualización y la segunda a la vuelta de la esquina, y finalizamos el repaso de sus detalles con el mix de novedades de Plasma 5.25 donde se engloban las pequeñas mejoras que no tienen cabida en ninguna categoría antes descrita.
Mix de novedades de Plasma 5.25
Sigue la evolución y la constante mejora de KDE Plasma 5.25. Hoy simplemente finalizo el repaso a sus mejoras con una ensalada de las mismas:
- Las preferencias del tema global le permiten escoger las partes que se deben aplicar, por lo que puede aplicar solo las partes que prefiera de un tema global.
- La página de aplicaciones de Discover se ha rediseñado y le proporciona enlaces a la documentación y el sitio web de la aplicación, además de mostrar los recursos del sistema a los que tiene acceso.
- Si se equivoca al introducir su contraseña, las pantallas de bloqueo e inicio de sesión tiemblan, proporcionándole una señal visual para que vuelva a intentarlo.
- Se ha reescrito la página de preferencias de los guiones de KWin, haciendo que sea más fácil la gestión de guiones del gestor de ventanas.
- Los paneles de Plasma permiten navegación mediante el teclado y se pueden asignar accesos rápidos personalizados para centrar paneles individuales.
De nuevo, estas mejoras se pueden entender mejor con el siguiente vídeo.
Las novedades de Plasma 5.25
La Comunidad KDE publicó el 14 de junio Plasma 5.25, una versión que nos ofrecen un gran conjunto de novedades y propuestas que nos acercan a lo que vendrá cuando se realice la transición a Plasma 6.
En otras palabras, esta nueva versión de Plasma nos presenta una gran cantidad de nuevas funciones y geniales conceptos de Plasma 5.25 le traen un anticipo del futuro del escritorio de KDE.
El martes fue el día de descarga y actualizaciones, y mientras espero que esté disponible para mi KDE Neon, os comenté algunas de sus novedades:
- Rediseñado y mejorado la forma de navegar entre las ventanas y los espacios de trabajo.
- Gran actualización en la gestión del control de nuestro dispositivo mediante gestos.
- Sincronización del color de acentuación con el fondo de pantalla, de esta forma se puede aplicar el color dominante del fondo a todos los componentes que usan el color de acentuación.
- Activación del modo táctil desprendiendo la pantalla, rotándola 360° o seleccionándolo de forma manual.
- Añadidos los paneles flotantes que añaden un margen a su alrededor para hacer que floten, mostrando una animación cuando se vuelven normales al maximizar una ventana.
- Los efectos de mezcla entre esquemas se animan con elegancia, por ejemplo en la transición al cambiar el esquema de color actual.
- Posibilidad de mover todo el escritorio, con carpetas, widgets y paneles, de un monitor a otro con la ventana de gestión del contenedor.
Más información: KDE
La entrada Mix de novedades de Plasma 5.25 se publicó primero en KDE Blog.

Terraform in openSUSE Leap 15.3 安裝小記
Terraform in openSUSE Leap 15.3 安裝小記
OS: openSUSE Leap 15.3
最近因為雲端的關係, 可能針對 Terraform 要多一點練習
今天紀錄一下 Terraform 在 openSUSE Leap 上面的安裝
Terraform 官網上的的安裝頁面, 是沒有列出 openSUSE Linux 的
查了一下 https://software.opensuse.org/package/terraform 上面的資料
Tumbleweed 的版本跟目前官方的版本 1.2.3 是一致的, 但是 Leap 15.3 的版本就太舊了

所以就打算使用 snapd 來安裝
可以參考我之前的 openSUSE leap 15.3 的文章
在已經安裝好 snapd 的情況下
# snap install terraform --classic
terraform 1.2.3 from Jon Seager (jnsgruk) installed
確認安裝是否正常
> terraform --version
Terraform v1.2.3
on linux_amd64
開始往 Terraform 邁進
~ enjoy it
References
Afinando la personalización en Plasma 5.25
Tras los cuatro meses de rigor en los que los desarrolladores han estado trabajando en el siguiente paso del escritorio de la Comunidad KDE, ésta se congratuló en anunciar que había sido lanzado Plasma 5.25. Ha pasado más de una semana y una primera actualización, y ya estamos repasando los detalles de sus novedades. Y seguimos comentando como se está afinando la personalización en Plasma 5.25 con novedades en los paneles y en la gestión de escritorios.
Afinando la personalización en Plasma 5.25
Sigue la evolución y la constante mejora de KDE Plasma 5.25, y en esta ocasión es el momento de hablar de como se está perfilando y afinando el trabajo con los diferentes entorno de trabajo:
De esta forma, los paneles flotantes añaden un margen a su alrededor para hacer que floten, mostrando una animación cuando se vuelven normales al maximizar una ventana.
Además, los efectos de mezcla animan con elegancia la transición al cambiar el esquema de color actual.
Y, para finalizar, ahora se puede mover todo el escritorio, con carpetas, widgets y paneles, de un monitor a otro con la ventana de gestión del contenedor.
De nuevo, estas mejoras se pueden entender mejor con el siguiente vídeo.
Las novedades de Plasma 5.25
La Comunidad KDE publicó el 14 de junio Plasma 5.25, una versión que nos ofrecen un gran conjunto de novedades y propuestas que nos acercan a lo que vendrá cuando se realice la transición a Plasma 6.
En otras palabras, esta nueva versión de Plasma nos presenta una gran cantidad de nuevas funciones y geniales conceptos de Plasma 5.25 le traen un anticipo del futuro del escritorio de KDE.
El martes fue el día de descarga y actualizaciones, y mientras espero que esté disponible para mi KDE Neon, os comenté algunas de sus novedades:
- Rediseñado y mejorado la forma de navegar entre las ventanas y los espacios de trabajo.
- Gran actualización en la gestión del control de nuestro dispositivo mediante gestos.
- Sincronización del color de acentuación con el fondo de pantalla, de esta forma se puede aplicar el color dominante del fondo a todos los componentes que usan el color de acentuación.
- Activación del modo táctil desprendiendo la pantalla, rotándola 360° o seleccionándolo de forma manual.
- Añadidos los paneles flotantes que añaden un margen a su alrededor para hacer que floten, mostrando una animación cuando se vuelven normales al maximizar una ventana.
- Los efectos de mezcla entre esquemas se animan con elegancia, por ejemplo en la transición al cambiar el esquema de color actual.
- Posibilidad de mover todo el escritorio, con carpetas, widgets y paneles, de un monitor a otro con la ventana de gestión del contenedor.
Más información: KDE
La entrada Afinando la personalización en Plasma 5.25 se publicó primero en KDE Blog.
Más mejoras táctiles para Plasma 5.25
Tras los cuatro meses de rigor en los que los desarrolladores han estado trabajando en el siguiente paso del escritorio de la Comunidad KDE, ésta se congratuló en anunciar que había sido lanzado Plasma 5.25. Ha pasado más de una semana y una primera actualización, y ya estamos repasando los detalles de sus novedades. Y seguimos con más mejoras táctiles para Plasma 5.25 en aras de optimizar el uso de nuestros dispositivos,
Más mejoras táctiles para Plasma 5.25
Sigue la evolución y la constante mejora de KDE Plasma 5.25, y en esta ocasión seguimos comentando las mejoras táctiles que nos ofrecen el escritorio de la Comunidad.
Y es que el modo táctil se activa automáticamente si se separa la pantalla o se rota 360° en los dispositivos que tengan esa opción. Evidentemente también se puede seleccionar de forma manual.
Pero no acaban aquí las mejoras ya que el Gestor de tareas y la Bandeja del sistema se hacen más grandes en el modo táctil para facilitar el trabajo con los dedos. También se puede personalizar el tamaño de los iconos cuando el modo táctil está desactivado.
Para finalizar comentar que lLas barras de título de las aplicaciones de KDE se hacen más altas en el modo táctil, haciendo que sea más fácil pulsar, arrastrar y cerrar ventanas con el dedo. Los elementos del menú de contexto también se hacen más altos en el modo táctil, proporcionándo más espacio para tocar el correcto.
De nuevo, estas mejoras se pueden entender mejor con el siguiente vídeo.
Las novedades de Plasma 5.25
La Comunidad KDE publicó el 14 de junio Plasma 5.25, una versión que nos ofrecen un gran conjunto de novedades y propuestas que nos acercan a lo que vendrá cuando se realice la transición a Plasma 6.
En otras palabras, esta nueva versión de Plasma nos presenta una gran cantidad de nuevas funciones y geniales conceptos de Plasma 5.25 le traen un anticipo del futuro del escritorio de KDE.
El martes fue el día de descarga y actualizaciones, y mientras espero que esté disponible para mi KDE Neon, os comenté algunas de sus novedades:
- Rediseñado y mejorado la forma de navegar entre las ventanas y los espacios de trabajo.
- Gran actualización en la gestión del control de nuestro dispositivo mediante gestos.
- Sincronización del color de acentuación con el fondo de pantalla, de esta forma se puede aplicar el color dominante del fondo a todos los componentes que usan el color de acentuación.
- Activación del modo táctil desprendiendo la pantalla, rotándola 360° o seleccionándolo de forma manual.
- Añadidos los paneles flotantes que añaden un margen a su alrededor para hacer que floten, mostrando una animación cuando se vuelven normales al maximizar una ventana.
- Los efectos de mezcla entre esquemas se animan con elegancia, por ejemplo en la transición al cambiar el esquema de color actual.
- Posibilidad de mover todo el escritorio, con carpetas, widgets y paneles, de un monitor a otro con la ventana de gestión del contenedor.
Más información: KDE
La entrada Más mejoras táctiles para Plasma 5.25 se publicó primero en KDE Blog.