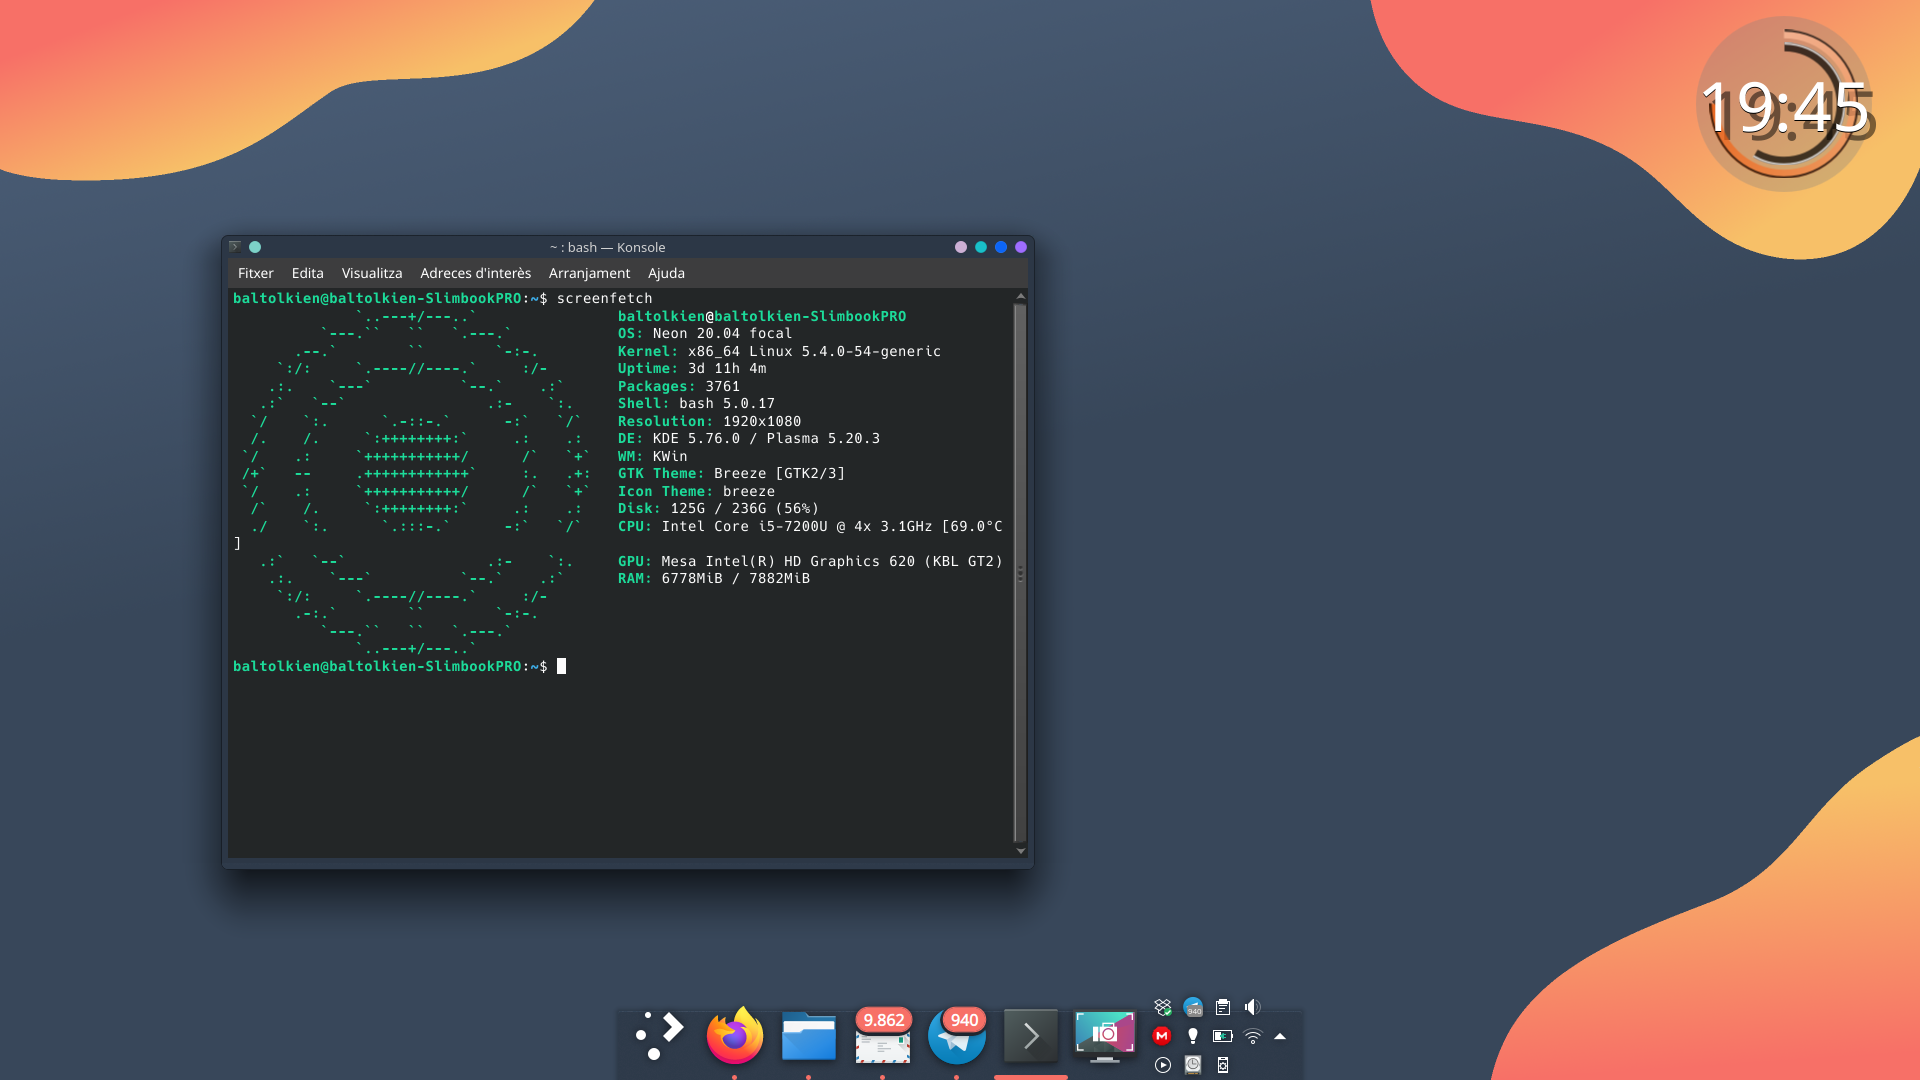
Boston, un tema de iconos minimalista para Plasma
Hace bastante tiempo que no aparecen los temas de iconos en el blog. No obstante eso no significa que dejen de aparecer en la Store de KDE. De esta forma hoy tengo el gusto de presentaros un tema de iconos con los que personalizar nuestro entorno de trabajo llamado Boston, que destaca por ser minimalista y funcional.
Boston, un tema de iconos minimalista para Plasma
Para el escritorio Plasma de la Comunidad KDE hay cientos de temas de todo tipo disponibles para los usuarios: iconos, cursores, emoticones, etc, Y como me gusta cambiar de vez en cuando, en el blog le he dedicado muchos artículos a cada uno de los packs.
No obstante, como suelo decir, cambiar el tema de iconos de un escritorio es una de las formas de adaptación más personal que puedes realizar sobre tu PC, ya que modifica totalmente el aspecto del mismo a la hora de interaccionar con tus aplicaciones, documentos y servicios.
Hoy os presento Boston, un bonito tema de iconos que nos viene de la mano de DChris que nos ofrece un conjunto de iconos para carpetas, aplicaciones y otros símbolos del sistema minimalista y funcional, en parte por el uso de formas básicas, paleta de colores reducida y una jerarquía visual muy definida.

Y como siempre digo, si os gusta el pack de iconos podéis “pagarlo” de muchas formas en la nueva página de KDE Store, que estoy seguro que el desarrollador lo agradecerá: puntúale positivamente, hazle un comentario en la página o realiza una donación. Ayudar al desarrollo del Software Libre también se hace simplemente dando las gracias, ayuda mucho más de lo que os podéis imaginar, recordad la campaña I love Free Software Day 2017 de la Free Software Foundation donde se nos recordaba esta forma tan sencilla de colaborar con el gran proyecto del Software Libre y que en el blog dedicamos un artículo.
Más información: KDE Store
Fast Kernel Builds - 2020
A number of months ago I did an “Ask Me Anything” interview on r/linux on redit. As part of that, a discussion of the hardware I used came up, and someone said, “I know someone that can get you a new machine” “get that person a new machine!” or something like that.
Fast forward a few months, and a “beefy” AMD Threadwripper 3970X shows up on my doorstep thanks to the amazing work of Wendell Wilson at Level One Techs.
Ever since I started doing Linux kernel development the hardware I use has been a mix of things donated to me for development (workstations from Intel and IBM, laptops from Dell) machines my employer have bought for me (various laptops over the years), and machines I’ve bought on my own because I “needed” it (workstations built from scratch, Apple Mac Minis, laptops from Apple and Dell and ASUS and Panasonic). I know I am extremely lucky in this position, and anything that has been donated to me, has been done so only to ensure that the hardware works well on Linux. “Will code for hardware” was an early mantra of many kernel developers, myself included, and hardware companies are usually willing to donate machines and peripherals to ensure kernel support.
This new AMD machine is just another in a long line of good workstations that help me read email really well. Oops, I mean, “do kernel builds really fast”…
For full details on the system, see this forum description, and this video that Wendell did in building the machine, and then this video of us talking about it before it was sent out. We need to do a follow-on one now that I’ve had it for a few months and have gotten used to it.
Benchmark tools
Below I post the results of some benchmarks that I have done to try to show the speed of different systems. I’ve used the tool Fio version fio-3.23-28-g7064, kcbench version v0.9.0 (from git), and perf version 5.7.g3d77e6a8804a. All of these are great for doing real-world tests of I/O systems (fio), kernel build tests (kcbench), and “what is my system doing at the moment” queries (perf). I recommend trying all of these out yourself if you haven’t done so already.
Fast Builds
I’ve been using a laptop for my primary development system for a number of years now, due to travel and moving around a bit, and because it was just “good enough” at the time. I do some local builds and testing, but have a “build machine” in a data center somewhere, that I do all of my normal stable kernel builds on, as it is much much faster than any laptop. It is set up to do kernel builds directly off of a RAM disk, ensuring that I/O isn’t an issue. Given that is has 128Gb of RAM, carving out a 40Gb ramdisk for kernel builds to run on (room for 4-5 at once), this has worked really well, with kernel builds of a full kernel tree in a few minutes.
Here’s the output of kcbench on my data center build box which is running Fedora 32:
Processor: Intel Core Processor (Broadwell) [40 CPUs]
Cpufreq; Memory: Unknown; 120757 MiB
Linux running: 5.8.7-200.fc32.x86_64 [x86_64]
Compiler: gcc (GCC) 10.2.1 20200723 (Red Hat 10.2.1-1)
Linux compiled: 5.7.0 [/home/gregkh/.cache/kcbench/linux-5.7]
Config; Environment: defconfig; CCACHE_DISABLE="1"
Build command: make vmlinux
Filling caches: This might take a while... Done
Run 1 (-j 40): 81.92 seconds / 43.95 kernels/hour [P:3033%]
Run 2 (-j 40): 83.38 seconds / 43.18 kernels/hour [P:2980%]
Run 3 (-j 46): 82.11 seconds / 43.84 kernels/hour [P:3064%]
Run 4 (-j 46): 81.43 seconds / 44.21 kernels/hour [P:3098%]
Contrast that with my current laptop:
Processor: Intel(R) Core(TM) i7-8565U CPU @ 1.80GHz [8 CPUs]
Cpufreq; Memory: powersave [intel_pstate]; 15678 MiB
Linux running: 5.8.8-arch1-1 [x86_64]
Compiler: gcc (GCC) 10.2.0
Linux compiled: 5.7.0 [/home/gregkh/.cache/kcbench/linux-5.7]
Config; Environment: defconfig; CCACHE_DISABLE="1"
Build command: make vmlinux
Filling caches: This might take a while... Done
Run 1 (-j 8): 392.69 seconds / 9.17 kernels/hour [P:768%]
Run 2 (-j 8): 393.37 seconds / 9.15 kernels/hour [P:768%]
Run 3 (-j 10): 394.14 seconds / 9.13 kernels/hour [P:767%]
Run 4 (-j 10): 392.94 seconds / 9.16 kernels/hour [P:769%]
Run 5 (-j 4): 441.86 seconds / 8.15 kernels/hour [P:392%]
Run 6 (-j 4): 440.31 seconds / 8.18 kernels/hour [P:392%]
Run 7 (-j 6): 413.48 seconds / 8.71 kernels/hour [P:586%]
Run 8 (-j 6): 412.95 seconds / 8.72 kernels/hour [P:587%]
Then the new workstation:
Processor: AMD Ryzen Threadripper 3970X 32-Core Processor [64 CPUs]
Cpufreq; Memory: schedutil [acpi-cpufreq]; 257693 MiB
Linux running: 5.8.8-arch1-1 [x86_64]
Compiler: gcc (GCC) 10.2.0
Linux compiled: 5.7.0 [/home/gregkh/.cache/kcbench/linux-5.7/]
Config; Environment: defconfig; CCACHE_DISABLE="1"
Build command: make vmlinux
Filling caches: This might take a while... Done
Run 1 (-j 64): 37.15 seconds / 96.90 kernels/hour [P:4223%]
Run 2 (-j 64): 37.14 seconds / 96.93 kernels/hour [P:4223%]
Run 3 (-j 71): 37.16 seconds / 96.88 kernels/hour [P:4240%]
Run 4 (-j 71): 37.12 seconds / 96.98 kernels/hour [P:4251%]
Run 5 (-j 32): 43.12 seconds / 83.49 kernels/hour [P:2470%]
Run 6 (-j 32): 43.81 seconds / 82.17 kernels/hour [P:2435%]
Run 7 (-j 38): 41.57 seconds / 86.60 kernels/hour [P:2850%]
Run 8 (-j 38): 42.53 seconds / 84.65 kernels/hour [P:2787%]
Having a local machine that builds kernels faster than my external build box has been a liberating experience. I can do many more local tests before sending things off to the build systems for “final test builds” there.
Here’s a picture of my local box doing kernel builds, and the remote machine doing builds at the same time, both running bpytop to monitor what is happening (htop doesn’t work well for huge numbers of cpus). It’s not really all that useful, but is fun eye-candy:

SSD vs. NVME
As shipped to me, the machine booted from a raid array of an NVME disk. Outside of laptops, I’ve not used NVME disks, only SSDs. Given that I didn’t really “trust” the Linux install on the disk, I deleted the data on the disks, and installed a trusty SATA SSD disk and got Linux up and running well on it.
After that was all up and running well (btw, I use Arch Linux), I looked into the NVME disk, to see if it really would help my normal workflow out or not.
Firing up fio, here are the summary numbers of the different disk systems using the default “examples/ssd-test.fio” test settings:
SSD:
Run status group 0 (all jobs):
READ: bw=219MiB/s (230MB/s), 219MiB/s-219MiB/s (230MB/s-230MB/s), io=10.0GiB (10.7GB), run=46672-46672msec
Run status group 1 (all jobs):
READ: bw=114MiB/s (120MB/s), 114MiB/s-114MiB/s (120MB/s-120MB/s), io=6855MiB (7188MB), run=60001-60001msec
Run status group 2 (all jobs):
WRITE: bw=177MiB/s (186MB/s), 177MiB/s-177MiB/s (186MB/s-186MB/s), io=10.0GiB (10.7GB), run=57865-57865msec
Run status group 3 (all jobs):
WRITE: bw=175MiB/s (183MB/s), 175MiB/s-175MiB/s (183MB/s-183MB/s), io=10.0GiB (10.7GB), run=58539-58539msec
Disk stats (read/write):
sda: ios=4375716/5243124, merge=548/5271, ticks=404842/436889, in_queue=843866, util=99.73%
NVME:
Run status group 0 (all jobs):
READ: bw=810MiB/s (850MB/s), 810MiB/s-810MiB/s (850MB/s-850MB/s), io=10.0GiB (10.7GB), run=12636-12636msec
Run status group 1 (all jobs):
READ: bw=177MiB/s (186MB/s), 177MiB/s-177MiB/s (186MB/s-186MB/s), io=10.0GiB (10.7GB), run=57875-57875msec
Run status group 2 (all jobs):
WRITE: bw=558MiB/s (585MB/s), 558MiB/s-558MiB/s (585MB/s-585MB/s), io=10.0GiB (10.7GB), run=18355-18355msec
Run status group 3 (all jobs):
WRITE: bw=553MiB/s (580MB/s), 553MiB/s-553MiB/s (580MB/s-580MB/s), io=10.0GiB (10.7GB), run=18516-18516msec
Disk stats (read/write):
md0: ios=5242880/5237386, merge=0/0, ticks=0/0, in_queue=0, util=0.00%, aggrios=1310720/1310738, aggrmerge=0/23, aggrticks=63986/25048, aggrin_queue=89116, aggrutil=97.67%
nvme3n1: ios=1310720/1310729, merge=0/0, ticks=63622/25626, in_queue=89332, util=97.63%
nvme0n1: ios=1310720/1310762, merge=0/92, ticks=63245/25529, in_queue=88858, util=97.67%
nvme1n1: ios=1310720/1310735, merge=0/3, ticks=64009/24018, in_queue=88114, util=97.58%
nvme2n1: ios=1310720/1310729, merge=0/0, ticks=65070/25022, in_queue=90162, util=97.49%
Full logs of both tests can be found here for the SSD, and here for the NVME array.
Basically the NVME array is up to 3 times faster than the SSD, depending on the specific read/write test, and is faster for everything overall.
But, does my normal workload of kernel builds matter when building on such fast storage? Normally a kernel build is very I/O intensive, but only up to a point. If the storage system can keep the CPU “full” of new data to build, and writes do not stall, a kernel build should be limited by CPU power, if the storage system can go fast enough.
So, is a SSD “fast” enough on a huge AMD Threadripper system?
In short, yes, here’s the output of kcbench running on the NVME disk:
Processor: AMD Ryzen Threadripper 3970X 32-Core Processor [64 CPUs]
Cpufreq; Memory: schedutil [acpi-cpufreq]; 257693 MiB
Linux running: 5.8.8-arch1-1 [x86_64]
Compiler: gcc (GCC) 10.2.0
Linux compiled: 5.7.0 [/home/gregkh/.cache/kcbench/linux-5.7/]
Config; Environment: defconfig; CCACHE_DISABLE="1"
Build command: make vmlinux
Filling caches: This might take a while... Done
Run 1 (-j 64): 36.97 seconds / 97.38 kernels/hour [P:4238%]
Run 2 (-j 64): 37.18 seconds / 96.83 kernels/hour [P:4220%]
Run 3 (-j 71): 37.14 seconds / 96.93 kernels/hour [P:4248%]
Run 4 (-j 71): 37.22 seconds / 96.72 kernels/hour [P:4241%]
Run 5 (-j 32): 44.77 seconds / 80.41 kernels/hour [P:2381%]
Run 6 (-j 32): 42.93 seconds / 83.86 kernels/hour [P:2485%]
Run 7 (-j 38): 42.41 seconds / 84.89 kernels/hour [P:2797%]
Run 8 (-j 38): 42.68 seconds / 84.35 kernels/hour [P:2787%]
Almost the exact same number of kernels built per hour.
So for a kernel developer, right now, a SSD is “good enough”, right?
It’s not just all builds
While kernel builds are the most time-consuming thing that I do on my systems, the other “heavy” thing that I do is lots of git commands on the Linux kernel tree. git is really fast, but it is limited by the speed of the storage medium for lots of different operations (clones, switching branches, and the like).
After I switched to running my kernel trees off of the NVME storage, it “felt” like git was going faster now, so I came up with some totally-artifical benchmarks to try to see if this was really true or not.
One common thing is cloning a whole kernel tree from a local version in a new directory to do different things with it. Git is great in that you can keep the “metadata” in one place, and only check out the source files in the new location, but dealing with 70 thousand files is not “free”.
$ cat clone_test.sh
#!/bin/bash
git clone -s ../work/torvalds/ test
sync
And, to make sure the data isn’t just coming out of the kernel cache, be sure to flush all caches first.
SSD output:
$ sudo sh -c "echo 3 > /proc/sys/vm/drop_caches"
$ perf stat ./clone_test.sh
Cloning into 'test'...
done.
Updating files: 100% (70006/70006), done.
Performance counter stats for './clone_test.sh':
4,971.83 msec task-clock:u # 0.536 CPUs utilized
0 context-switches:u # 0.000 K/sec
0 cpu-migrations:u # 0.000 K/sec
92,713 page-faults:u # 0.019 M/sec
14,623,046,712 cycles:u # 2.941 GHz (83.18%)
720,522,572 stalled-cycles-frontend:u # 4.93% frontend cycles idle (83.40%)
3,179,466,779 stalled-cycles-backend:u # 21.74% backend cycles idle (83.06%)
21,254,471,305 instructions:u # 1.45 insn per cycle
# 0.15 stalled cycles per insn (83.47%)
2,842,560,124 branches:u # 571.734 M/sec (83.21%)
257,505,571 branch-misses:u # 9.06% of all branches (83.68%)
9.270460632 seconds time elapsed
3.505774000 seconds user
1.435931000 seconds sys
NVME disk:
$ sudo sh -c "echo 3 > /proc/sys/vm/drop_caches"
~/linux/tmp $ perf stat ./clone_test.sh
Cloning into 'test'...
done.
Updating files: 100% (70006/70006), done.
Performance counter stats for './clone_test.sh':
5,183.64 msec task-clock:u # 0.833 CPUs utilized
0 context-switches:u # 0.000 K/sec
0 cpu-migrations:u # 0.000 K/sec
87,409 page-faults:u # 0.017 M/sec
14,660,739,004 cycles:u # 2.828 GHz (83.46%)
712,429,063 stalled-cycles-frontend:u # 4.86% frontend cycles idle (83.40%)
3,262,636,019 stalled-cycles-backend:u # 22.25% backend cycles idle (83.09%)
21,241,797,894 instructions:u # 1.45 insn per cycle
# 0.15 stalled cycles per insn (83.50%)
2,839,260,818 branches:u # 547.735 M/sec (83.30%)
258,942,077 branch-misses:u # 9.12% of all branches (83.25%)
6.219492326 seconds time elapsed
3.336154000 seconds user
1.593855000 seconds sys
So a “clone” is faster by 3 seconds, nothing earth shattering, but noticable.
But clones are rare, what’s more common is switching between branches, which checks out a subset of the different files depending on what is contained in the branches. It’s a lot of logic to figure out exactly what files need to change.
Here’s the test script:
$ cat branch_switch_test.sh
#!/bin/bash
cd test
git co -b old_kernel v4.4
sync
git co -b new_kernel v5.8
sync
And the results on the different disks:
SSD:
$ sudo sh -c "echo 3 > /proc/sys/vm/drop_caches"
$ perf stat ./branch_switch_test.sh
Updating files: 100% (79044/79044), done.
Switched to a new branch 'old_kernel'
Updating files: 100% (77961/77961), done.
Switched to a new branch 'new_kernel'
Performance counter stats for './branch_switch_test.sh':
10,500.82 msec task-clock:u # 0.613 CPUs utilized
0 context-switches:u # 0.000 K/sec
0 cpu-migrations:u # 0.000 K/sec
195,900 page-faults:u # 0.019 M/sec
27,773,264,048 cycles:u # 2.645 GHz (83.35%)
1,386,882,131 stalled-cycles-frontend:u # 4.99% frontend cycles idle (83.54%)
6,448,903,713 stalled-cycles-backend:u # 23.22% backend cycles idle (83.22%)
39,512,908,361 instructions:u # 1.42 insn per cycle
# 0.16 stalled cycles per insn (83.15%)
5,316,543,747 branches:u # 506.298 M/sec (83.55%)
472,900,788 branch-misses:u # 8.89% of all branches (83.18%)
17.143453331 seconds time elapsed
6.589942000 seconds user
3.849337000 seconds sys
NVME:
$ sudo sh -c "echo 3 > /proc/sys/vm/drop_caches"
~/linux/tmp $ perf stat ./branch_switch_test.sh
Updating files: 100% (79044/79044), done.
Switched to a new branch 'old_kernel'
Updating files: 100% (77961/77961), done.
Switched to a new branch 'new_kernel'
Performance counter stats for './branch_switch_test.sh':
10,945.41 msec task-clock:u # 0.921 CPUs utilized
0 context-switches:u # 0.000 K/sec
0 cpu-migrations:u # 0.000 K/sec
197,776 page-faults:u # 0.018 M/sec
28,194,940,134 cycles:u # 2.576 GHz (83.37%)
1,380,829,465 stalled-cycles-frontend:u # 4.90% frontend cycles idle (83.14%)
6,657,826,665 stalled-cycles-backend:u # 23.61% backend cycles idle (83.37%)
41,291,161,076 instructions:u # 1.46 insn per cycle
# 0.16 stalled cycles per insn (83.00%)
5,353,402,476 branches:u # 489.100 M/sec (83.25%)
469,257,145 branch-misses:u # 8.77% of all branches (83.87%)
11.885845725 seconds time elapsed
6.741741000 seconds user
4.141722000 seconds sys
Just over 5 seconds faster on an nvme disk array.
Now 5 seconds doesn’t sound like much, but I’ll take it…
Conclusion
If you haven’t looked into new hardware in a while, or are stuck doing kernel development on a laptop, please seriously consider doing so, the power in a small desktop tower these days (and who is traveling anymore that needs a laptop?) is well worth it if possible.
Again, many thanks to Level1Techs for the hardware, it’s been put to very good use.
Fast Kernel Builds
A number of months ago I did an “Ask Me Anything” interview on r/linux on redit. As part of that, a discussion of the hardware I used came up, and someone said, “I know someone that can get you a new machine” “get that person a new machine!” or something like that.
Fast forward a few months, and a “beefy” AMD Threadwripper 3970X shows up on my doorstep thanks to the amazing work of Wendell Wilson at Level One Techs.
Cómo instalar GitHub CLI en #openSUSE
Veamos cómo instalar la nueva herramienta para la gestión de repositorios en GitHub en openSUSE

A finales de agosto de este (aciago) año 2020 ya publiqué en el blog un adelante de la herramienta para la línea de comandos que estaba desarrollando GitHub, para la gestión de los repositorios en sus servidores.
La herramienta se llama GitHub CLI y está disponible también para GNU/Linux y además de Debian, Fedora, Arch y también openSUSE.
Hoy mismo 17 de septiembre de 2020 han publicado el anuncio de la publicación de la versión 1.0 bajo licencia MIT, de dicha herramienta ya para descargar e instalar y usarla en nuestros equipos.
Veamos cómo instalarla en nuestro openSUSE.
Tal como vemos en las instrucciones de instalación para openSUSE, de su repositorio propio en GitHub, lo mejor es añadir el repositorio oficial de la herramienta para openSUSE y desde ahí instalarla.
Para ello ejecutaremos con privilegios de superusuario los siguientes comandos en la línea de comandos:
zypper addrepo https://cli.github.com/packages/rpm/gh-cli.repo zypper ref zypper in gh
Después de añadir el repositorio, al hacer zypper ref, para refrescar el contenido de los repositorios, nos pedirá aceptar la firma de la clave GPG del nuevo repositorio. Deberemos aceptarla. Y después ya podremos instalar la herramienta.
También podremos descargar el .rpm para nuestra distribución o compilarla desde el código fuente. Aunque yo prefiero la primera opción, para beneficiarme de las actualizaciones que vayan subiendo al repositorio oficial.
Una vez instalada la herramienta, ya podremos gestionar nuestros repositorios en GitHub sin necesidad de abandonar la línea de comandos de nuestro equipo.
Lo primero será conectar nuestra herramienta recién instalada con nuestra cuenta en GitHub, para ello ejecutaremos
gh auth login
Nos irá ofreciendo unas opciones y podremos loguearnos mediante la interfaz web con una contraseña de un solo uso. Y después de seleccionar si preferimos https o SSL para conectar nuestros repositorios, ya estará vinculada.
Ahora podremos gestionar los “issues” de repositorios, hacer “pull request” y consultar muchas otras cosas de los repositorios en GitHub mediante la línea de comandos.
Puedes echar un vistazo al manual de uso de GitHub para ir familiarizándote de esta nueva herramienta que ofrece muchas posibilidades. Yo estoy empezando a utilizar la herramienta…
Enlaces de interés
- https://github.blog/2020-09-17-github-cli-1-0-is-now-available/
- https://cli.github.com/
- https://cli.github.com/manual/

Lanzada la beta de Plasma 5.20, más y mejor
Una vez finalizado el periodo de mantenimiento de Plasma 5.19 es hora de ir preparando el lanzamiento de la siguiente versión. Es por ello que me complace compartir con vosotros que ha sido lanzada la beta de Plasma 5.20, la próxima versión del escritorio de la Comunidad KDE que nos llega con novedades interesantes, muchas de las cuales se han ido desgranando en el blog de Nate Graham. Es el momento de que esta beta sea probada y que se reporten los errores que se encuentren. ¡No pierdas la oportunidad de contribuir al desarrollo de Plasma!
Lanzada la beta de Plasma 5.20
Hoy 17 de setiembre ha sido lanzada la beta de Plasma 5.20. En esta tercera versión liberada del 2020, no apta todavía para el usuario domésticos, se ha centrado en que el escritorio de la Comunidad KDE
Unas pinceladas de algunas de las novedades más destacada son:
- La barra de tareas por defecto será la de Solo Iconos, y además será un poco más ancho (una de las primeras cosas que suelo cambiar cuando configuro mi escritorio)
- Las visualizaciones en pantalla (OSD) que aparecen al cambiar el volumen o el brillo de la pantalla (por ejemplo) se han rediseñado para ser menos intrusivas.
- Ahora se notifica cuando el sistema está a punto de agotar el espacio incluso si el directorio personal es a una partición diferente.
- Ahora se pueden componer mosaicos con las esquinas de las ventanas combinando los atajos de mosaico izquierda/derecha/arriba/abajo. Por ejemplo, pulsando Meta+flecha arriba y después la flecha izquierda para hacer el mosaico de una ventana a la esquina superior izquierda.
- Las páginas de Configuración de Inicio automático, Bluetooth, y Gestión de usuarios se han rediseñado según los estándares modernos de interfaz de usuario y se han reescrito desde cero.
- Notificaciones de monitorización y fallo de discos S.M.A.R.T

Y muchas más pequeñas mejoras que hará las delicias de los usuarios de este entorno de trabajo.
Más información: KDE.org
Pruébalo y reporta errores

Todas las tareas dentro del mundo del Software Libre son importantes: desarrollar, traducir, empaquetar, diseñar, promocionar, etc. Pero hay una que se suele pasar por alto y de la que solo nos acordamos cuando las cosas no nos funcionan como debería: buscar errores.
Desde el blog te animo a que tú seas una de las personas responsables del éxito del nuevo lanzamiento de Plasma 5.20 de la Comunidad KDE. Para ello debes participar en la tarea de buscar y reportar errores, algo básico para que los desarrolladores los solucionen para que el despegue del escritorio esté bien pulido. Debéis pensar que en muchas ocasiones los errores existen porque no le han aparecido al grupo de desarrolladores ya que no se han dado las circunstancias para que lo hagan.
Para ello debes instalarte esta beta y comunicar los errores que salgan en bugs.kde.org, tal y como expliqué en su día en esta entrada del blog.
Digest of YaST Development Sprint 108
In our previous post we reported we were working in some mid-term goals in the areas of AutoYaST and storage management. This time we have more news to share about both, together with some other small YaST improvements.
- Several enhancements in the new MenuBar widget, including better handling and rendering of the hotkey shortcuts and improved keyboard navigation in text mode.
- More steps to add a menu bar to the Partitioner. Check this mail thread to know more about the status and the whole decision making process.
- New helpers to improve the experience of using Embedded Ruby in an AutoYaST profile (introduced in the previous post). Check the documentation of the new helpers for details.
- Huge speed up of the AutoYaST step for “Configuring Software Selections” by moving some filtering operations from Ruby to libzypp. Now the process is almost instant even when using the OSS repository that contains more than 60.000 packages!
- A new log of the packages upgraded via the self-update feature of the installer.
The next SLE and Leap releases are starting to shape and we are already working in new features for them (that you could of course preview in Tumbleweed, as usual). So stay tuned for more news in two weeks!
Tumbleweed Snapshots bring updated Inkscape, Node.js, KDE Applications
Four openSUSE Tumbleweed snapshots were released since the last article.
KDE’s Applications 20.08.1, Node.js, iproute2 and inkscape were updated in the snapshots throughout the week.
The 20200915 snapshot is trending stable at a rating of 97, according to the Tumbleweed snapshot reviewer. Many YaST packages were updated in this snapshot. The 4.3.19 yast2-network package forces a read of the current virtualization network configuration in case it’s not present. The Chinese pinyin character input package libpinyin updated to 2.4.91, which improved auto correction.
Inkscape 1.0.1 made its update in snapshot 20200914; the open source vector graphics editor added an experimental Scribus PDF export extension. The Scribus export is available as one of the many export formats in the ‘Save as’ and ‘Save a Copy’ dialogs. Selectors and the CSS dialogue are also available in the package under the object menu. Support was added for MultiPath TCP netlink interface in the 5.8.0 update of iproute2. Several libqt5 packages were updated to 5.15.1. Important behavior changes were pointed out in the libqt5-qtbase changelog where QSharedPointer objects call custom deleters even when the pointer being tracked is null. The 14.9.0 nodejs14 package upgraded dependencies and fixed compilation on AArch64 with GNU Compiler Collection 10. A major utilities update for random number generation in the kernel was made with ng-tools from version 5 to version 6.10; one of the changes was the conversion of all entropy sources to use OpenSSL instead of gcrypt, which eliminates the need for the gcrypt library. Object-oriented programming language vala updated to version 0.48.10 made improvements and added a TraverseVisitor for traversing the tree with a callback. Other updated packages in the snapshot were rredis 6.0.8, rubygem-rails-6.0 6.0.3.3, xlockmore 5.65, which removed some buffer GCC warnings, and virtualbox 6.1.14, which fixed regression in HDA emulation introduced in 6.1.0. The snapshot is trending at a stable rating of 93.
Applications 20.08.1 arrived in both snapshot 20200910 and snapshot 20200909. Among the changes to the Applications packages were a change to the image viewer Gwenview to sort properly. Video application Kdenlive fixed some broken configurations and fixed the shift click for multiple selections broken in Bin. Document viewer Okular improved the code against corrupted configurations and stored builtin annotations in a new config key.
Snapshot 20200910 brought an update for secure communications; GnuTLS 3.6.15 enabled TLS 1.3 and explicitly disabled TLS 1.2 with “-VERS-TLS1.2”. Utility rsyslog updated from version 8.39.0 to 8.2008.0. The changes were too many to list. One listed in the project’s changelog of the current version states “systemd service file removed from project. This was done as distros nowadays have very different service files and it no longer is useful to provide a “generic” (sic) example.” Dependency management package yarn 1.22.5 made a change so that headers won’t be printed when calling yarn init with the -2 flag. XFS debugger tool xfsprogs 5.8.0 improved reporting and messages and fixed the -D vs -R handling. The snapshot recorded a 99 rating.
Also recording a stable 99 rating was snapshot 20200909. The snapshot brought Common Vulnerabilities and Exposures fixes with the Mozilla Thunderbird 68.12.0 update. Crashes to gnome-music will be avoided when an online account is unavailable in the 3.36.5 version. Another fix in the music player is the selection of an album no longer randomly deselects other albums. The Linux Kernel was also updated to version 5.8.7 in the snapshot.
Incluso la CIA difundía el uso del editor #Vim
Wikileaks filtró algunas de las herramientas que difundían de hacking que difundían en la CIA, entre ellas el editor #Vim

Hoy en el blog no traigo ni tutorial sobre Vim, ni escribiré sobre un complemento o algún truco sobre este editor de texto. Hoy veremos que hasta la CIA enumeraba a Vim junto con otros software como herramientas a utilizar.
Este artículo es una nueva entrega del curso “improVIMsado” que desde hace meses vengo publicando en mi blog sobre el editor Vim y que puedes seguir en estos enlaces:
- https://victorhckinthefreeworld.com/tag/vim/
- https://victorhck.gitlab.io/comandos_vim/articulos.html
Hace unos años Wikileaks entre los documentos que filtraba sobre la CIA, se encontraban uno con nombre en clave “Vault 7” que enumeraba una serie de herramientas de hacking para utilizar.
Entre las herraminetas enumeradas podemos encontrar software bien conocido como: make, Sublime, Git, Docker o el editor Vim.
En el documento compartían información, manuales de comandos, etc sobre este editor de texto. Para algunos un motivo más para no utilizar este editor de texto. Para otros una simple curiosidad.
Y como tal me ha parecido a mí, por eso he querido compartir este corto artículo un poco “offtopic” sobre Vim…

OpenExpo Virtual Experience en Compilando Podcast #49
No sé como se me pasó este episodio de Compilando Podcast, supongo que sería por el maremagnum de final de curso . Así que os presento el episodio 49 titulado «OpenExpo Virtual Experience econ Philippe Lardy» donde se habla del evento que, por motivos que todos sabemos (COVID19) se celebró online.
OpenExpo Virtual Experience en Compilando Podcast #49
En palabras del gran Paco Estrada que sirven de introducción del episodio 49 de Compilando Podcast:

«OpenExpo Europe, es la mayor cita con la innovación en abierto, el open source y el software libre en el sur de Europa. Cada año conocemos las novedades y los pormenores de este evento en Compilando Podcast .
Debido a la pandemia del coronavirus, la edición presencial del 2020 tuvo que suspenderse para este año y por ello se ha reinventando.
OpenExpo, ha querido seguir siendo fiel a su cita y se ha reconvertido para ofrecer una muy atractiva experiencia virtual entre los días 17 Y 21 de Junio y en horario de 15:45 a 20:30 CET.
En esta edición de Compilando Podcast , hablamos con su CEO Philippe Lardy, sobre lo que supone esta primera edición bajo formato vitural online y las ventajas que puede aportarnos, pues no sólo se trata de una colección de webinars, sino que la plataforma para el encuentro facilita la realización de contactos, charlas y networking entre los asistentes. [..]»
Como siempre os invito a escuchar el podcast completo y compartirlo con vuestro entorno cercano y en vuestras redes sociales.
Más información: OpenExpo Virtual Experience con Philippe Lardy
¿Qué es Compilando Podcast?
Dentro del mundo de los audios de Software Libre, que los hay muchos y de calidad, destaca uno por la profesionalidad de la voz que lo lleva, el gran Paco Estrada, y por el mimo con el que está hecho. No es por nada que ganó el Open Awards’18 al mejor medio, un reconocimiento al trabajo realizado por la promoción .
A modo de resumen, Compilando Podcast es un proyecto personal de su locutor Paco Estrada que aúna sus pasiones y que además, nos ofrece una voz prodigiosa y una dicción perfecta.
Más información: Compilando Podcast
Build multi-architecture container images using Kubernetes
Recently I’ve added some Raspberry Pi 4 nodes to the Kubernetes cluster I’m running at home.
The overall support of ARM inside of the container ecosystem improved a lot
over the last years with more container images made available for the
armv7 and the arm64 architectures.
But what about my own container images? I’m running some homemade containerized applications on top of this cluster and I would like to have them scheduled both on the x64_64 nodes and on the ARM ones.
There are many ways to build ARM container images. You can go from something as simple, and tedious, as performing manual builds on a real/emulated ARM machines or you can do something more structured like using this GitHub Action, relying on something like the Open Build Service,…
My personal desire was to leverage my mixed Kubernetes cluster and perform the image building right on top of it.
Implementing this design has been a great learning experience, something IMHO worth to be shared with others. The journey has been too long to fit into a single blog post; I’ll split my story into multiple posts.
Our journey begins with the challenge of building a container image from within a container.
Image building
The most known way to build a container image is by using docker build.
I didn’t want to use docker to build my images because the build process
will take place right on top of Kubernetes, meaning the build will happen in a
containerized way.
Some people are using docker as the container runtime of their Kubernetes
clusters and are leveraging that to mount the docker socket inside of some
of their containers. Once the docker socket is mounted, the containerized
application has full access to the docker daemon that is running on the host.
From there it’s game over the container can perform actions such as building
new images.
I’m a strong opponent of this approach because it’s highly insecure. Moreover I’m not using docker as container runtime and I guess many people will stop doing that in the near future once dockershim gets deprecated. Translated: the majority of the future Kubernetes cluster will either have containerd, CRI-O or something similar instead of docker - hence bye bye to the docker socket hack.
There are however many other ways to build containers that are not based on
docker build.
If you do a quick internet search about containerized image building you will definitely find kaniko. kaniko does exactly what I want: it performs containerized builds without using the docker daemon. There are also many examples covering image building on top of Kubernetes with kaniko. Unfortunately, at the time of writing, kaniko supports only the x86_64 architecture.
Our chances are not over yet because there’s another container building tool that can help us: buildah.
Buildah is part of the “libpod ecosystem”, which includes projects such as podman, skopeo and CRI-O. All these tools are available for multiple architectures: x86_64, aarch64 (aka ARM64), s390x and ppc64le.
Running buildah containerized
Buildah can build container images starting from a Dockerfile or in a
more interactive way. All of that without requiring any privileged daemon
running on your system.
During the last years the buildah developers spent quite some efforts to support the use case of “containerized buildah”. This is just the most recent blog post that discusses this scenario in depth.
Upstream has even a Dockerfile that can be used to create a buildah container
image. This can be found here.
I took this Dockerfile, made some minor adjustments and uploaded it
to this project
on the Open Build Service. As a result I got a multi architecture container
image that can be pulled from registry.opensuse.org/home/flavio_castelli/containers/containers/buildahimage:latest.
The storage driver
As some container veterans probably know, there are several types of storage drivers that can be used by container engines.
In case you’re not familiar with this topic you can read these great documentation pages from Docker:
Note well: despite being written for the docker container engine, this applies also to podman, buildah, CRI-O and containerd.
The most portable and performant storage driver is the overlay one.
This is the one we want to use when running buildah containerized.
The overlay driver can be used in safe way even inside of a container by
leveraging fuse-overlay; this
is described by the buildah blog post I linked above.
However, using the overlay storage driver inside of a container requires
Fuse to be enabled on the host and, most important of all, it requires the
/dev/fuse device to be accessible by the container.
The share operation cannot be done by simply mounting /dev/fuse as a volume
because there are some extra “low level” steps that must be done (like properly
instructing the cgroup device hierarchy).
These extra steps are automatically handled by docker and podman via the
--device flag of the run command:
$ podman run --rm -ti --device /dev/fuse buildahimage bashThis problem will need to be solved in a different way when buildah is run on top of Kubernetes.
Kubernetes device plugin
Special host devices can be shared with containers running inside of a Kubernetes POD by using a recent feature called Kubernetes device plugins.
Quoting the upstream documentation:
Kubernetes provides a device plugin framework that you can use to advertise system hardware resources to the Kubelet .
Instead of customizing the code for Kubernetes itself, vendors can implement a device plugin that you deploy either manually or as a DaemonSet . The targeted devices include GPUs, high-performance NICs, FPGAs, InfiniBand adapters, and other similar computing resources that may require vendor specific initialization and setup.
This Kubernetes feature is commonly used to allow containerized machine learning workloads to access the GPU cards available on the host.
Luckily someone wrote a Kubernetes device plugin that exposes /dev/fuse to
Kubernetes-managed containers:
fuse-device-plugin.
I’ve forked the project, made
some minor fixes to its Dockerfile and created a GitHub action to build
the container image for amd64, armv7 and amd64 (a PR is coming soon).
The images are available on the Docker Hub as: flavio/fuse-device-plugin.
The fuse-device-plugin has to be deployed as a Kubernetes DaemonSet via this yaml file:
apiVersion: apps/v1
kind: DaemonSet
metadata:
name: fuse-device-plugin-daemonset
namespace: kube-system
spec:
selector:
matchLabels:
name: fuse-device-plugin-ds
template:
metadata:
labels:
name: fuse-device-plugin-ds
spec:
hostNetwork: true
containers:
- image: flavio/fuse-device-plugin:latest
name: fuse-device-plugin-ctr
securityContext:
allowPrivilegeEscalation: false
capabilities:
drop: ["ALL"]
volumeMounts:
- name: device-plugin
mountPath: /var/lib/kubelet/device-plugins
volumes:
- name: device-plugin
hostPath:
path: /var/lib/kubelet/device-pluginsThis is basically this file,
with the flavio/fuse-device-plugin image being used instead of the
original one (which is built only for x86_64).
Once the DaemonSet PODs are running on all the nodes of the cluster, we can see
the Fuse device being exposed as an allocatable resource identified by the
github.com/fuse key:
$ kubectl get nodes -o=jsonpath=$'{range .items[*]}{.metadata.name}: {.status.allocatable}\n{end}'
jam-2: map[cpu:4 ephemeral-storage:224277137028 github.com/fuse:5k memory:3883332Ki pods:110]
jam-1: map[cpu:4 ephemeral-storage:111984762997 github.com/fuse:5k memory:3883332Ki pods:110]
jolly: map[cpu:4 ephemeral-storage:170873316014 github.com/fuse:5k gpu.intel.com/i915:1 hugepages-1Gi:0 hugepages-2Mi:0 memory:16208280Ki pods:110]The Fuse device can then be made available to a container by specifying a resource limit:
apiVersion: v1
kind: Pod
metadata:
name: fuse-example
spec:
containers:
- name: main
image: alpine
command: ["ls", "-l", "/dev"]
resources:
limits:
github.com/fuse: 1If you look at the logs of this POD you will see something like that:
$ kubectl logs fuse-example
total 0
lrwxrwxrwx 1 root root 11 Sep 15 08:31 core -> /proc/kcore
lrwxrwxrwx 1 root root 13 Sep 15 08:31 fd -> /proc/self/fd
crw-rw-rw- 1 root root 1, 7 Sep 15 08:31 full
crw-rw-rw- 1 root root 10, 229 Sep 15 08:31 fuse
drwxrwxrwt 2 root root 40 Sep 15 08:31 mqueue
crw-rw-rw- 1 root root 1, 3 Sep 15 08:31 null
lrwxrwxrwx 1 root root 8 Sep 15 08:31 ptmx -> pts/ptmx
drwxr-xr-x 2 root root 0 Sep 15 08:31 pts
crw-rw-rw- 1 root root 1, 8 Sep 15 08:31 random
drwxrwxrwt 2 root root 40 Sep 15 08:31 shm
lrwxrwxrwx 1 root root 15 Sep 15 08:31 stderr -> /proc/self/fd/2
lrwxrwxrwx 1 root root 15 Sep 15 08:31 stdin -> /proc/self/fd/0
lrwxrwxrwx 1 root root 15 Sep 15 08:31 stdout -> /proc/self/fd/1
-rw-rw-rw- 1 root root 0 Sep 15 08:31 termination-log
crw-rw-rw- 1 root root 5, 0 Sep 15 08:31 tty
crw-rw-rw- 1 root root 1, 9 Sep 15 08:31 urandom
crw-rw-rw- 1 root root 1, 5 Sep 15 08:31 zeroNow that this problem is solved we can move to the next one. 😉
Obtaining the source code of our image
The source code of the “container image to be built” must be made available to the containerized buildah.
As many people do, I keep all my container definitions versioned inside of Git repositories. I had to find a way to clone the Git repository holding the definition of the “container image to be built” inside of the container running buildah.
I decided to settle for this POD layout:
- The main container of the POD is going to be the one running buildah.
- The POD will have a Kubernetes init container
that will
git clonethe source code of the “container image to be built” before the main container is started.
The contents produced by the git clone must be placed into a
directory that can be accessed later on by the main container.
I decided to use a Kubernetes volume of type emptyDir
to create a shared storage between the init and the main containers.
The emptyDir volume is just perfect: it doesn’t need any fancy Kubernetes
Storage Class and it will automatically vanish once the build is done.
To checkout the Git repository I decided to settle on the official Kubernetes git-sync container.
Quoting its documentation:
git-sync is a simple command that pulls a git repository into a local directory. It is a perfect “sidecar” container in Kubernetes - it can periodically pull files down from a repository so that an application can consume them.
git-sync can pull one time, or on a regular interval. It can pull from the HEAD of a branch, from a git tag, or from a specific git hash. It will only re-pull if the target of the run has changed in the upstream repository. When it re-pulls, it updates the destination directory atomically. In order to do this, it uses a git worktree in a subdirectory of the –root and flips a symlink.
git-sync can pull over HTTP(S) (with authentication or not) or SSH.
This is just what I was looking for.
I will start git-sync with the following parameters:
-
--one-time: this is needed to make git-sync exit once the checkout is done; otherwise it will keep running forever and it will periodically look for new commits inside of the repository. I don’t need that, plus this would cause the main container to wait indefinitely for the init container to exit. -
--depth 1: this is done to limit the checkout to the latest commit. I’m not interested in the history of the repository. This will make the checkout faster and use less bandwidth and disk space. -
--repo <my-repo: the repo I want to checkout. -
--branch <my-branch>: the branch to checkout.
The git-sync container image was already built for multiple architectures, but unfortunately it turned out the non x86_64 images were broken. The issue has been recently solved with the v3.1.7.
While waiting for the issue to be fixed I just rebuilt the container image on the Open Build Service. This is no longer needed, everybody can just use the official image.
Trying the first build
It’s now time to perform a simple test run. We will define a simple Kubernetes POD that will:
- Checkout the source code of a simple container image
- Build the container iamge using
buildah
This is the POD definition:
apiVersion: v1
kind: Pod
metadata:
name: builder-amd64
spec:
nodeSelector:
kubernetes.io/arch: "amd64"
initContainers:
- name: git-sync
image: k8s.gcr.io/git-sync/git-sync:v3.1.7
args: [
"--one-time",
"--depth", "1",
"--dest", "checkout",
"--repo", "https://github.com/flavio/guestbook-go.git",
"--branch", "master"]
volumeMounts:
- name: code
mountPath: /tmp/git
volumes:
- name: code
emptyDir:
medium: Memory
containers:
- name: main
image: registry.opensuse.org/home/flavio_castelli/containers/containers/buildahimage:latest
command: ["/bin/sh"]
args: ["-c", "cd code; cd $(readlink checkout); buildah bud -t guestbook ."]
volumeMounts:
- name: code
mountPath: /code
resources:
limits:
github.com/fuse: 1Let’s break it down into pieces.
Determine image architecture
The POD uses a Kubernetes node selector to ensure the build happens on a node with the x86_64 architecture. By doing that we will know the architecture of the final image.
Checkout the source code
As said earlier, the Git repository is checked out using an init container:
initContainers:
- name: git-sync
image: k8s.gcr.io/git-sync/git-sync:v3.1.7
args: [
"--one-time",
"--depth", "1",
"--dest", "checkout",
"--repo", "https://github.com/flavio/guestbook-go.git",
"--branch", "master"]
volumeMounts:
- name: code
mountPath: /tmp/gitThe Git repository and the branch are currently hard-coded into the POD definition, this is going to be fixed later on. Right now that’s good enough to see if things are working (spoiler alert: they won’t 😅).
The git-sync container will run before the main container and it will write
the source code of the “container image to be built” inside of a Kubernetes
volume named code.
This is how the volume will look like after git-sync has ran:
$ ls -lh <root of the volume>
drwxr-xr-x 9 65533 65533 300 Sep 15 09:41 .git
lrwxrwxrwx 1 65533 65533 44 Sep 15 09:41 checkout -> rev-155a69b7f81d5b010c5468a2edfbe9228b758d64
drwxr-xr-x 6 65533 65533 280 Sep 15 09:41 rev-155a69b7f81d5b010c5468a2edfbe9228b758d64The source code is stored under the rev-<git commit ID> directory. There’s
a symlink named checkout that points to it. As you will see later, this will
lead to a small twist.
Shared volume
The source code of our application is stored inside of a Kubernetes volume of
type emptyDir:
volumes:
- name: code
emptyDir:
medium: MemoryI’ve also instructed Kubernetes to store the volume in memory. Behind the scene Kubelet will use tmpfs to do that.
The buildah container
The POD will have just one container running inside of it. This is called main
and its only purpose is to run buildah.
This is the definition of the container:
containers:
- name: main
image: registry.opensuse.org/home/flavio_castelli/containers/containers/buildahimage:latest
command: ["/bin/sh"]
args: ["-c", "cd /code; cd $(readlink checkout); buildah bud -t guestbook ."]
volumeMounts:
- name: code
mountPath: /code
resources:
limits:
github.com/fuse: 1As expected the container is mounting the code Kubenetes volume too. Moreover,
the container is requesting one resource of type github.com/fuse; as explained
above this is needed to make /dev/fuse available inside of the container.
The container executes a simple bash script. The oneliner can be expanded to that:
cd /code
cd $(readlink checkout)
buildah bud -t guestbook .There’s one interesting detail in there. As you can see I’m not “cd-ing” straight
into /code/checkout, instead I’m moving into /code and then resolving
the actual target of the checkout symlink.
We can’t move straight into /code/checkout because that would give us an
error:
builder:/ # cd /code/checkout
bash: cd: /code/checkout: Permission deniedThis happens because /proc/sys/fs/protected_symlinks is turned on by default.
As you can read here, this
is a way to protect from specific type of exploits. Not even root inside of the
container can jump straight into /code/checkout, this is why I’m doing this
workaround.
One last note, as you have probably noticed, buildah is just building the container image, it’s not pushing it to any registry. We don’t care about that right now.
An unexpected problem
Our journey is not over yet, there’s one last challenge ahead of us.
Before digging into the issue, let me provide some background. My local cluster was initially made by one x86_64 node running openSUSE Leap 15.2 and by two ARM64 nodes running the beta ARM64 build of Rasperry Pi OS (formerly known as raspbian).
I used the POD definition shown above to define two PODs:
-
builder-amd64: thenodeSelectorconstraint targets theamd64architecture -
builder-arm64: thenodeSelectorconstraint targets thearm64architecture
That lead to an interesting finding: the builds on ARM64 nodes worked fine, while all the builds on the x86_64 node failed.
The failure was always the same and happened straight at the beginning of the process:
$ kubectl logs -f builder-amd64
mount /var/lib/containers/storage/overlay:/var/lib/containers/storage/overlay, flags: 0x1000: permission denied
level=error msg="exit status 125"To me, that immediately smelled like a security feature blocking buildah.
Finding the offending security check
I needed something faster then kubectl to iterate over this problem.
Luckily I was able to reproduce the same error while running buildah locally
using podman:
$ sudo podman run \
--rm \
--device /dev/fuse \
-v <path-to-container-image-sources>:/code \
registry.opensuse.org/home/flavio_castelli/containers/containers/buildahimage:latest \
/bin/sh -c "cd /code; buildah bud -t foo ."I was pretty sure the failure happened due to some tight security check. To prove my theory I ran the same container in privileged mode:
$ sudo podman run \
--rm \
--device /dev/fuse \
--privileged \
-v <path-to-container-image-sources>:/code \
registry.opensuse.org/home/flavio_castelli/containers/containers/buildahimage:latest \
/bin/sh -c "cd /code; buildah bud -t foo ."The build completed successfully. Running a container in privileged mode is bad and makes me hurt, it’s not a long term solution but at least that proved the build failure was definitely caused by some security constraint.
The next step was to identify the security measure at the origin of the failure. That could be either something related with seccomp or AppArmor. I immediately ruled out SELinux as the root cause because it’s not used on openSUSE by default.
I then ran the container again, but this time I instructed podman to not apply any kind of seccomp profile; I basically disabled seccomp for my containerized workload.
This can be done by using the unconfined mode for seccomp:
$ sudo podman run \
--rm \
--device /dev/fuse \
-v <path-to-container-image-sources>:/code \
--security-opt=seccomp=unconfined \
registry.opensuse.org/home/flavio_castelli/containers/containers/buildahimage:latest \
/bin/sh -c "cd /code; buildah bud -t foo ."The build failed again with the same error. That meant seccomp was not causing the failure. AppArmor was left as the main suspect.
Next, I just run the container but I instructed podman to not apply any kind of AppArmor profile; again, I basically disabled AppArmor for my containerized workload.
This can be done by using the unconfined mode for AppArmor:
$ sudo podman run \
--rm \
--device /dev/fuse \
-v <path-to-container-image-sources>:/code \
--security-opt=apparmor=unconfined \
registry.opensuse.org/home/flavio_castelli/containers/containers/buildahimage:latest \
/bin/sh -c "cd /code; buildah bud -t foo ."This time the build completed successfully. Hence the issue was caused by the default AppArmor profile.
Create an AppArmor profile for buildah
All the container engines (docker, podman, CRI-O, containerd) have an AppArmor profile that is applied to all the containerized workloads by default.
The containerized Buildah is probably doing something that is not allowed by this generic profile. I just had to identify the offending operation and create a new tailor-made AppArmor profile for buildah.
As a first step I had to obtain the default AppArmor profile. This is not as easy as it might seem. The profile is generated at runtime by all the container engines and is loaded into the kernel. Unfortunately there’s no way to dump the information stored into the kernel and have a human-readable AppArmor profile.
After some digging into the source code of podman and some reading on docker’s GitHub issues, I produced a quick PR that allowed me to print the default AppArmor profile on to the stdout.
This is the default AppArmor profile used by podman:
#include <tunables/global>
profile default flags=(attach_disconnected,mediate_deleted) {
#include <abstractions/base>
network,
capability,
file,
umount,
# Allow signals from privileged profiles and from within the same profile
signal (receive) peer=unconfined,
signal (send,receive) peer=default,
deny @{PROC}/* w, # deny write for all files directly in /proc (not in a subdir)
# deny write to files not in /proc/<number>/** or /proc/sys/**
deny @{PROC}/{[^1-9],[^1-9][^0-9],[^1-9s][^0-9y][^0-9s],[^1-9][^0-9][^0-9][^0-9]*}/** w,
deny @{PROC}/sys/[^k]** w, # deny /proc/sys except /proc/sys/k* (effectively /proc/sys/kernel)
deny @{PROC}/sys/kernel/{?,??,[^s][^h][^m]**} w, # deny everything except shm* in /proc/sys/kernel/
deny @{PROC}/sysrq-trigger rwklx,
deny @{PROC}/kcore rwklx,
deny mount,
deny /sys/[^f]*/** wklx,
deny /sys/f[^s]*/** wklx,
deny /sys/fs/[^c]*/** wklx,
deny /sys/fs/c[^g]*/** wklx,
deny /sys/fs/cg[^r]*/** wklx,
deny /sys/firmware/** rwklx,
deny /sys/kernel/security/** rwklx,
# suppress ptrace denials when using using 'ps' inside a container
ptrace (trace,read) peer=default,
}
A small parenthesis, this AppArmor profile is the same generated by all the other container engines. Some poor folks keep this file in sync manually, but there’s a discussion upstream to better organize things.
Back to the build failure caused by AppArmor… I saved the default profile into
a text file named containerized_buildah and I changed this line
profile default flags=(attach_disconnected,mediate_deleted) {
to look like that:
profile containerized_buildah flags=(attach_disconnected,mediate_deleted,complain) {
This changes the name of the profile and, most important of all, changes the policy mode
to be of type complain instead of enforcement.
Quoting the AppArmor man page:
- enforcement - Profiles loaded in enforcement mode will result in enforcement of the policy defined in the profile as well as reporting policy violation attempts to syslogd.
- complain - Profiles loaded in “complain” mode will not enforce policy. Instead, it will report policy violation attempts. This mode is convenient for developing profiles.
I then loaded the policy by doing:
$ sudo apparmor_parser -r containerized_buildahInvoking the aa-status command reports a list of all the modules loaded,
their policy mode and all the processes confined by AppArmor.
$ sudo aa-status
...
2 profiles are in complain mode.
containerized_buildah
...One last operation had to done before I could start to debug the containerized buildah: turn off “audit quieting”. Again, straight from AppArmor’s man page:
Turn off deny audit quieting
By default, operations that trigger “deny” rules are not logged. This is called deny audit quieting.
To turn off deny audit quieting, run:
echo -n noquiet >/sys/module/apparmor/parameters/audit
Before starting the container, I opened a new terminal to execute this process:
# tail -f /var/log/audit/audit.log | tee apparmor-build.logOn systems where auditd is running (like mine), all the AppArmor logs are sent
to /var/log/audit/audit.log. This command allowed me to keep an eye open on
the live stream of audit logs and save them into a smaller file named
apparmor-build.log.
Finally, I started the container using the custom AppArmor profile shown above:
$ sudo podman run \
--rm \
--device /dev/fuse \
-v <path-to-container-image-sources>:/code \
--security-opt=apparmor=containerized_buildah \
registry.opensuse.org/home/flavio_castelli/containers/containers/buildahimage:latest \
/bin/sh -c "cd /code; buildah bud -t foo ."The build completed successfully. Grepping for ALLOWED inside of the audit file
returned a stream of entries like the following ones:
type=AVC msg=audit(1600172410.567:622): apparmor="ALLOWED" operation="mount" info="failed mntpnt match" error=-13 profile="containerized_buildah" name="/tmp/containers.o5iLtx" pid=25607 comm="exe" srcname="/usr/bin/buildah" flags="rw, bind"
type=AVC msg=audit(1600172410.567:623): apparmor="ALLOWED" operation="mount" info="failed mntpnt match" error=-13 profile="containerized_buildah" name="/tmp/containers.o5iLtx" pid=25607 comm="exe" flags="ro, remount, bind"
type=AVC msg=audit(1600172423.511:624): apparmor="ALLOWED" operation="mount" info="failed mntpnt match" error=-13 profile="containerized_buildah" name="/" pid=25629 comm="exe" flags="rw, rprivate"
...
As you can see all these entries are about mount operations, with mount
being invoked with quite an assortment of flags.
The default AppArmor profile explicitly denies mount operations:
...
deny mount,
...
All I had to do was to change the containerized_buildah AppArmor profile to
that:
#include <tunables/global>
profile containerized_buildah flags=(attach_disconnected,mediate_deleted) {
#include <abstractions/base>
network,
capability,
file,
umount,
mount,
# Allow signals from privileged profiles and from within the same profile
signal (receive) peer=unconfined,
signal (send,receive) peer=default,
deny @{PROC}/* w, # deny write for all files directly in /proc (not in a subdir)
# deny write to files not in /proc/<number>/** or /proc/sys/**
deny @{PROC}/{[^1-9],[^1-9][^0-9],[^1-9s][^0-9y][^0-9s],[^1-9][^0-9][^0-9][^0-9]*}/** w,
deny @{PROC}/sys/[^k]** w, # deny /proc/sys except /proc/sys/k* (effectively /proc/sys/kernel)
deny @{PROC}/sys/kernel/{?,??,[^s][^h][^m]**} w, # deny everything except shm* in /proc/sys/kernel/
deny @{PROC}/sysrq-trigger rwklx,
deny @{PROC}/kcore rwklx,
deny /sys/[^f]*/** wklx,
deny /sys/f[^s]*/** wklx,
deny /sys/fs/[^c]*/** wklx,
deny /sys/fs/c[^g]*/** wklx,
deny /sys/fs/cg[^r]*/** wklx,
deny /sys/firmware/** rwklx,
deny /sys/kernel/security/** rwklx,
# suppress ptrace denials when using using 'ps' inside a container
ptrace (trace,read) peer=default,
}
The profile is now back to enforcement mode and, most important of all, it
allows any kind of mount invocation.
I tried to be more granular and allow only the mount flags
actually used by buildah, but the list was too long, there were too many
combinations and that seemed pretty fragile. The last thing I want to happen is
to have AppArmor break buildah in the future if a slightly different mount
operation is done.
Reloading the AppArmor profile via sudo apparmor_parser -r containerized_buildah
and restarting the build proved that the profile was doing its job also in
enforcement mode: the build successfully completed. 🎉🎉🎉
But the journey over yet, not quite…
Why AppArmor is blocking only x86_64 builds?
Once I figured out the root cause of x86_64 builds there was one last mystery to be solved: why the ARM64 builds worked just fine? Why didn’t AppArmor cause any issue over there?
The answer was quite simple (and a bit shocking to me): it turned out the Raspberry Pi OS (formerly known as raspbian) ships a kernel that doesn’t have AppArmor enabled. I never realized that!
I didn’t find the idea of running containers without any form of Mandatory Access Control particularly thrilling. Hence I decided to change the operating system run on my Raspberry Pi nodes.
I initially picked Raspberry Pi OS because I wanted to have my Raspberry Pi 4 boot straight from an external USB disk instead of the internal memory card. At the time of writing, this feature requires a bleeding edge firmware and all the documentation points at Raspberry Pi OS. I just wanted to stick with what the community was using to reduce my chances of failure…
However, if you need AppArmor support, you’re left with two options: openSUSE and Ubuntu.
I installed openSUSE Leap 15.2 for aarch64 (aka ARM64) on one of my Raspberry Pi 4. The process of getting it to boot from USB was pretty straightforward. I added the node back into the Kubernetes cluster, forced some workloads to move on top of it and monitored its behaviour. Everything was great, I was ready to put openSUSE on my 2nd Raspberry Pi 4 when I noticed something strange: my room was quieter than the usual…
My Raspberry Pis are powered using the official PoE HAT. I love this hat, but I hate its built-in fan because it’s notoriously loud (yes, you can tune its thresholds, but it’s still damn noisy when it kicks in).
Well, my room was suddenly quieter because the fan of the PoE HAT was not spinning at all. That lead the CPU temperature to reach more than 85 °C 😱
It turns out the PoE HAT needs a driver which is not part of the mainstream kernel and unfortunately nobody added it to the openSUSE kernel yet. That means openSUSE doesn’t see and doesn’t even turn on the PoE HAT fan (not even at full speed).
I filed a enhancement bug report against openSUSE Tumbleweed to get the PoE HAT driver added to our kernel and moved over to Ubuntu. Unfortunately that was a blocking issue for me. What a pity 😢
On the other hand, the kernel of Ubuntu Server supports both the PoE HAT fan and AppArmor. After some testing I switched all my Raspberry Pi nodes to run Ubuntu 20.04 Server.
To prove my mental sanity, I ran the builder-arm64 POD against the Ubuntu
nodes using the default AppArmor profile. The build failed on ARM64 in the same
way as it did on x86_64. What a relief 😅.
Kubernetes and AppArmor profiles
At this point I’ve a tailor-made AppArmor profile for buildah, plus all the nodes of my cluster have AppArmor support. It’s time to put all the pieces together!
The previous POD definition has to be extended to ensure the main container running buildah is using the tailor-made AppArmor profile instead of the default one.
Kubernetes’ AppArmor support is a bit primitive, but effective. The only requirement, when using custom profiles, is to ensure the profile is already known by the AppArmor system on each node of the cluster.
This can be done in an easy way: just copy the profile under
/etc/apparmor.d and perform a systemct reload apparmor. This has to be done
once, at the next boot the AppArmor service will automatically load all
the profiles found inside of /etc/apparmor.d.
This is how the final POD definition looks like:
apiVersion: v1
kind: Pod
metadata:
name: builder-amd64
annotations:
container.apparmor.security.beta.kubernetes.io/main: localhost/containerized_buildah
spec:
nodeSelector:
kubernetes.io/arch: "amd64"
containers:
- name: main
image: registry.opensuse.org/home/flavio_castelli/containers/containers/buildahimage:latest
command: ["/bin/sh"]
args: ["-c", "cd code; cd $(readlink checkout); buildah bud -t guestbook ."]
volumeMounts:
- name: code
mountPath: /code
resources:
limits:
github.com/fuse: 1
initContainers:
- name: git-sync
image: k8s.gcr.io/git-sync/git-sync:v3.1.7
args: [
"--one-time",
"--depth", "1",
"--dest", "checkout",
"--repo", "https://github.com/flavio/guestbook-go.git",
"--branch", "master"]
volumeMounts:
- name: code
mountPath: /tmp/git
volumes:
- name: code
emptyDir:
medium: MemoryThis time the build will work fine also inside of Kubernetes, regardless of the node architecture! 🥳
What’s next?
First of all, congratulations for having made up to this point. It has been quite a long journey, I hope you enjoyed it.
The next step consists of taking this foundation (a Kubernetes POD that can run buildah to build new container images) and find a way to orchestrate that.
What I’ll show you in the next blog post is how to create a workflow that, given a GitHub repository with a Dockerfile, builds two container images (amd64 and arm64), pushes both of them to a container registry and then creates a multi-architecture manifest referencing them.
As always feedback is welcome, see you soon!