 Member
Show a dialog with Kdialog (part 3)

Highlights of YaST Development Sprint 91
The Introduction
The last two weeks of the year, and also the first one of the new year, are vacation season in many parts of the world and YaSTland is not an exception. But before we enter hibernation mode, let’s take a look to the most important features and bugfixes we implemented in the last sprint of 2019. That includes:
- bringing back to life some sections of the Software Manager,
- implementing system upgrade with the new SLE media types,
- making the installation in Raspberry Pi and IBM Z System even better,
- improving usability of encryption,
- reducing the footprint of the Snapper plugin for ZYpp,
- as always, many other small improvements and fixes.
Restored Some Package Views: Recommended, Suggested, etc.
Let’s start with a redemption story. Some time ago we implemented feature fate#326485 which requested dropping the “Package Groups” view from the package manager UI. That was quite an easy task.
However, a few weeks later we got a bug report that the lists of recommended, suggested, etc… packages couldn’t be displayed anymore. It turned out that, in the Qt package manager front-end, the removed “Package Groups” view not only used to display the static group data from the packages but it also contained some special computed package lists like orphaned, suggested or recommended packages. So these lists were lost as a collateral damage of removing the “Package Groups” view.
The ncurses package manager was not affected by the same problem because, in that front-end, those views are grouped in a separate “Package Classification” section. So the task for this sprint was to somehow revive the lists in Qt and make them again available to the users.
We partly reverted the Package Groups removal and restored displaying those special package groups. To make it consistent we also use the “Package Classification” name for the view, like in the ncurses package manager.

On the other hand, the ncurses front-end was missing some lists like the “Multiversion Packages” and “All Packages”. To take consistency another step further, we added these missing lists and did some small cleanup and fixes so now both the Qt and the ncurses package managers should offer the same functionality and should look similar.

User-friendly Encryption Device Names
And talking about bug reports that trigger some usability revamp, some users had pointed that, when the system is booting and prompts for the password of an encrypted device, it’s not always that easy to identify which exact device it is referring to:

The root of the problem is that when YaST creates an encryption device (during the installation by means of the storage proposal, or manually with the Expert Partitioner), the device mapper name for the new encrypted device is generated from the udev id of the underlying device (e.g., cr_ccw-0XAF5E-part2).
We decided to improve the encryption naming generation in YaST for Tumbleweed and future releases of Leap and SLE. From now on, the name will be based on the mount point of the device. For example, if an encrypted device is going to be mounted at root, its device mapper name would be cr_root. In general, when the encrypted device is mounted, the device mapper name would be cr_mount_point (e.g., cr_home_linux for an encrypted device mounted at /home/linux).

Note that udev-based names might still be used for some scenarios. For example, when the device is not mounted or for an indirectly used encrypted device (e.g., an encrypted LVM Physical Volume).
And related to the identification of encryption devices, we have also added more information about the device when the encryption devices are activated during the installation process. Providing the password for the correct device was very difficult because the user needed to know the UUID of the encryption device. Now on, the activation popup also informs about the kernel name of the underlying device, making much easier to identify it.

Because names matter… which leads us to the next topic.
How does it Feel to Run a Mainframe?
As you may know, (open)SUSE runs in a vast range of hardware, including powerful mainframes like the IBM Z family. One of the strengths of our beloved distributions is that, despite the differences in hardware and scope, the installation and usage experience is very similar in all the supported systems.
Consistency and ease of use are good, but when you drive a luxury car you want to see the brand’s badge on top of the hood. So in future versions of the installer, the model of the machine will be displayed when installing in an IBM Z system. See the right-top corner of the following screenshot.

The text-based installer also has been modified to include the same banner in a similar place.

But in the same way that (open)SUSE enables you to install and use Linux in a mainframe “just like in any other computer”, we also target to do the same in the other extreme of the hardware spectrum.
Better Support for Raspberry Pi in the Partitioning Proposal
One year ago we announced that openSUSE Leap 15.1 and SLE-15-SP1 would be the first Linux distributions that could be installed in Raspberry Pi devices following the standard installation procedure, instead of deploying a Raspberry-specific pre-built image. The only prerequisite was the existence in the target SD card (or disk) of a partition containing the Raspberry Pi boot code.
But we are now able to go one step further for SLE-15-SP2 (and Leap 15.2). Thanks to the technologies included in those upcoming releases, (open)SUSE will not longer need a separate partition with the boot code in all cases. Now the installer can make a reasonable installation proposal in all situations, even if the target storage device doesn’t contain a booting partition in advance. See, for example, what the installer suggests by default for installing a fully standard SLE-15-SP2 Beta1 in a 32 GiB SD card that contained initially a GPT partition table (tip: GPT partition tables cannot be used to boot in a Raspberry Pi device… and the installer knows it).

With that, the installation of the standard SLE-15-SP2 Beta1 (the
aarch64 version, of course) in a Raspberry Pi 3 or 4 is as easy as
“next”, “next”, “next”… with the only exception of a couple of packages
that must be manually selected for installation (raspberrypi-* and
u-boot-rpi3). Hopefully, future beta images of both SLE and openSUSE
Leap 15.2 will select those packages automatically when installing in a
Pi, which will make the (open)SUSE experience in those devices basically
identical to any other computer.
SLE Upgrade with the New Media Types
And talking about the standard installation images of the upcoming SLE-15-SP2, we explained in our previous blog post that those versions of SUSE Linux Enterprise (SLE) and all its associated products will be distributed in two new kinds of media – Full and Online. The Full Media contains many repositories and the system can be installed without network connectivity. The Online Media is similar to the openSUSE’s net installer, it contains no repository and it must download everything from the network. The big difference with openSUSE is that SLE systems need to be registered in order to have access to remote repositories.
But apart from installation, those two new media types can also be used to upgrade an existing system… at least after all the improvements implemented during the latest sprint.
In the case of the Online Media, if the system is registered the upgrade process will switch all repositories to point to their corresponding versions at the SUSE Customer Center (SCC) and will get the new software from there. If the system is not registered, the upgrade process is cancelled and the user is advised to either register the system or use the Full Media.
The Full Media can be used to upgrade any system, registered or not, but the process is different in each case. For a non-registered system, the repositories will be switched to the ones included in the media and the system will be upgraded from there. For registered systems the process is the same that with the Online Media, so the software will be fetched from the remote repositories at the SUSE Customer Center.
Last but not least, we also made sure the process with both medias works with an AutoYaST upgrade (yes, you can also use AutoYaST to perform an unattended upgrade, in addition to the better known unattended installation). For a registered system, we simplified the procedure as much as possible and it only needs access to SCC and an empty AutoYaST profile. For non-registered systems it is a little bit more complex because the profile must specify which repositories from the media should be used for the upgrade. But other than that, the process works quite smooth.
And, of course, we used the opportunity to improve the unit test coverage of the code and to improve the documentation, including the profiles we used for testing.
The Snapper Plugin for ZYpp Becomes More Compact and Future-proof
Snapper lets you make filesystem snapshots. It has a companion,
snapper-zypp-plugin, a plugin for ZYpp that makes snapshots
automatically during commits. See the “zypp” descriptions in this
listing:
# snapper list

  # | Type   |Pre # | Date                     | User | Used Space | Cleanup  | Description  | Userdata
----+--------+------+--------------------------+------+------------+----------+--------------+-------------
  0 | single |      |                          | root |            |          | current      |
[...]
824 | pre    |      | Tue Dec 17 10:00:27 2019 | root |  16.00 KiB | number   | zypp(zypper) | important=no
826 | post   |  824 | Tue Dec 17 10:02:19 2019 | root |  16.00 KiB | number   |              | important=no
827 | single |      | Tue Dec 17 11:00:01 2019 | root |  16.00 KiB | timeline | timeline     |
828 | single |      | Tue Dec 17 11:00:01 2019 | root |  16.00 KiB | timeline | timeline     |
To make our enterprise products supportable for a looong time, we have rewritten this plugin to C++, starting with snapper-0.8.7. (The original Python implementation is not dead, it is resting in old Git commits.)
As a result, Python regular expressions are no longer supported in
the /etc/snapper/zypp.conf file. POSIX extended regular
expressions work instead, which should work sufficiently well for
the purpose of package name matching. Shell patterns continue working unchanged.
Happy New Year!
During the following three weeks, the YaST team will interrupt the usual sprint-based development pace. That also means, almost for sure, that we will not publish any blog post about the development of YaST until mid January of 2020. So we want to take this opportunity to wish you a happy new year full of joy and Free Software.
See you soon and make sure to start the year with a lot of fun!

 Futureboy
Noodlings 9 | Smoking a Turkey not my Linux Powered Lights

openSUSEはnmapからどう見えるか
セキュリティ的な観点からサーバの情報を調べるツールとしてnmapがあります。nmapを使うと、そのサーバがどのような種類かを外部から調べることができます。そこで、 nmapからopenSUSEサーバはどのように見えるかを簡単に調べてみました。
nmapはOSやディストリビューションごとにバージョンが異なります。できるだけ最新の方がよいので、openSUSE 15.1/15.0に含まれているものを使用しました。バージョンはどちらも7.70 です。
openSUSE 15.0から15.1に対してテストした結果は以下の通りです。
# nmap -O 172.31.255.189
Starting Nmap 7.70 ( https://nmap.org ) at 2019-12-14 16:42 JST
Nmap scan report for 172.31.255.189
Host is up (0.00051s latency).
(略)
Device type: general purpose
Running: Linux 3.X|4.X
OS CPE: cpe:/o:linux:linux_kernel:3 cpe:/o:linux:linux_kernel:4
OS details: Linux 3.2 – 4.9
意外とおおざっぱな結果しか出ませんね。15.1から15.0へも同じ結果でした。
では、ほかのディストリビューションではどうでしょうか。手元ですぐに試せるものを試してみたところ、
CentOS 7.4
OS details: Linux 3.10 – 4.11, Linux 3.2 – 4.9
Windows 10
Running (JUST GUESSING): Microsoft Windows XP|7|2008 (87%)
Windows 8.1
Running: Microsoft Windows 2008|8.1|7|Phone|Vista
Windows Server 2012R2
という感じになりました。やはり以外とおおざっぱです。
ということで、 nmapで調べると、どの系統のOSか、という所くらいまでは分かる、という事がわかりました。

Εγκατάσταση FreeOffice 2018 στο openSUSE

Το FreeOffice είναι μια εντελώς δωρεάν και πλήρως εξοπλισμένη σουίτα γραφείου με επεξεργαστή κειμένου, υπολογιστικό φύλλο και λογισμικό παρουσίασης τόσο για προσωπική όσο και για εμπορική χρήση και μια εξαιρετική εναλλακτική λύση του Microsoft Office, επεξεργάζεται όλες τις μορφές αρχείων όπως DOCX, PPTX, XLS, PPT , DOC. Υποστηρίζει επίσης μορφή LibreOffice OpenDocument (ODT) και διατίθεται για Linux, Windows και Mac.
Εδώ θα δούμε πώς να εγκαταστήσετε την πιο πρόσφατη έκδοση του FreeOffice 2018 στο openSUSE Linux (ισχύει και για Fedora).
ΕΓΚΑΤΑΣΤΑΣΗ
Για να εγκαταστήσετε το FreeOffice, απλά επισκεφθείτε την σελίδα λήψεων και κατεβάστε το αρχείο RPM για την αρχιτεκτονική σας.
Αφού κατεβάσετε το πακέτο εγκατάστασης του FreeOffice, προχωρήστε να το εγκαταστήσετε στις αντίστοιχες διανομές Linux όπως εξηγείται παρακάτω.
Προτού προχωρήσουμε περαιτέρω στην εγκατάσταση της σουίτας FreeOffice στο openSUSE, θα πρέπει να κατεβάσετε το δημόσιο κλειδί GPG και να το εισαγάγετε.
Στη συνέχεια, εγκαταστήστε το πακέτο RPM χρησιμοποιώντας την ακόλουθη εντολή.
Για να ενεργοποιήσετε τις αυτόματες ενημερώσεις, εκτελέστε την ακόλουθη εντολή.
Εάν δεν χρησιμοποιείτε αυτόματες ενημερώσεις στο σύστημά σας, μπορείτε απλά να χρησιμοποιήσετε το zypper για την αυτόματη ενημέρωση του FreeOffice 2018 στην τελευταία διαθέσιμη αναθεώρηση.
Τέλος, μπορείτε να χρησιμοποιήσετε το Ελληνικό Λεξικό. Μπορείτε να το κατεβάσετε από εδώ.
Αν ψάχνετε για ένα υποκατάστατο του Mircosoft Office και ταυτόχρονα μια δωρεάν έκδοση, τότε το FreeOffice είναι μία από τις καλύτερες σουίτες γραφείου.
Cross Distro Developers Camp 2019 秋 行ってきました
この記事はopenSUSE Advent Calendar 2019の17日目です。
前回にCross Distro Developers Campの春の合宿のレポートを書きましたが、今回は秋の合宿です。11/16(土)、17(日)に行われた開発合宿をレポートします。
Cross Distro Developers Campとは
日本語入力など、ディストロに関係せず解決するべき課題を共有・解決していくための有志の集まりです。前回にも紹介文を書いていますので、そちらもぜひお読み下さい。今回の参加は、Debian、Ubuntu、openSUSEのメンバーの方達でした。あと、LibreOfficeからも参加して頂きました。
秋の合宿
9月に日程は決まっていたのですが、趣味でやっているキックボクシングの試合などで私がちょっと疲れてしまっていて、肝心の場所探しなどは10月になってから慌ててやりました。(みなさん申し訳なかったです)
千葉や熱海の方に開発合宿プラン有りの評判の宿がいくつかあったのですが、日程がタイトだったためどこも予約でいっぱい。都内のホテルフクラシア晴海なども検討したのですが、結局、真鶴のペンションshiosaiさんにお世話になることにしました。開発合宿用の設備(ホワイトボード、wifi、プロジェクター)などを貸してくれることと、食事が美味しいということ、お値段も良心的な所などで決めました。チェックイン・チェックアウトの時間を調整して頂けたこともポイント高かったです。
ペンションshiosai
私はLibreOfficeのnaruogaさんの車に家の近くから乗せて頂いたのですが、最寄りの駅(真鶴)からペンションshiosaiまではちょっと距離があった様子です。丘の中で起伏もある感じでした。そのかわり、海を見下ろせる景色はすごく良かったです。
部屋は6人ぐらいの大きめの和室と、3人のベッドありの洋室をとって頂きました。 和室はそのまま開発合宿に使用して良いとのことで、ずっとここで作業を行い、食事になったらテーブルを並べて食事をして、夜になったら布団を敷いて寝る、みたいな感じでした。
露天風呂もあって、男性は午後から夕方までの利用だったのですが、温泉合宿な感じは充分でました。まぁペンションですので前回のマホロバマインズ三浦のようなリゾートホテルといったイメージではないのですが、男性の開発合宿や、家族旅行などでしたら愉しめると思います。今回の合宿の時も、ご高齢の方達が料理を愉しんだりしていらっしゃいました。
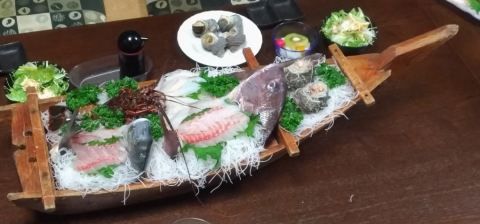
舟盛りが一つ12kだったのですが、電話予約で6kにしてくださるとのことでしたので、二つ頼みました。8人でしたので、1人2kいかないぐらいですね。この他にもさらにお刺身が出たり、ステーキも出たり、で、量、質、ともに満足な食事でした。さすが予約時に自信たっぷりに「うちは料理がいいですよー」とおっしゃっていただけのことはあります。
土曜日の昼11時にチェックインして、日曜日の16時まで使わせて頂いて、1人14kな予算感でした。真鶴までの交通費や日曜日の昼などもあるのでこの限りではないのですが、納得のお値段でした。
作業
私は前回同様、今回もGeekoMagazineの執筆をさせて頂きました。合宿の時期がGeekoMagazine執筆締め切り前になりがちなので、どうしても原稿作業になってしまう模様。お陰で、難航必死の執筆が、第一校があがるまで進みました。
他の方はDebianのneologdのパッケージングや、Cross Distro Developers Campのサイト作成、橋本雅彦さん作のかな漢字変換エンジンの試用など、色々と作業されてました。
夜に共通話題についての意見交換も行いました。前から議題になっているインプットメソッドの問題や、フォントに関する現状などがトピックになりました。
今回サイトが作成されましたので、ここで出たトピックの取りまとめなど、情報発信も積極的に行っていきたいと思います。(なかなかコンテンツを作成できず、すみません・・・)
また、OSC 2020 Tokyo/Springで、ディストロ横断でセッションを持ったら面白いんじゃないか、という話になり、現在、実現に向けて準備していますので、来年2/21(金)、22(土)のOSC 2020 Tokyo/Springを楽しみにしていて下さい。場所は駒沢大学、アクセスも良好かと思いますので皆さんの参加をお待ちしています。内容は、各ディストロがどうやって開発してるか、開発するにはどんな方法があるか、といった話になりそうです。
次回の合宿は
次回は2020年2月を予定しています。これは蕪さんの温泉合宿にあいのりさせてもらう予定です。
また、その前に1月11日(土)に、もくもく会を開催いたします。ディストロに興味のある方、実際に開発している方、参加歓迎ですので検討してみてください。
さて、Advent Calendar、明日はribbonさんによるnmapの記事です。お楽しみに〜
openSUSE と Android スマートフォンをつないで USB テザリング
openSUSE Advent Calender の 16日目です。今日は小ネタです。
スマートフォンを通してインターネットに接続するテザリングをするとき、一般的には Wi-Fi を使ってスマートフォンと PC を接続することが多いのではないかと思います。
実はUSBケーブルで接続してテザリングをすることもできます。充電・電源供給しながら使用することができるので、長時間使うときには便利です。
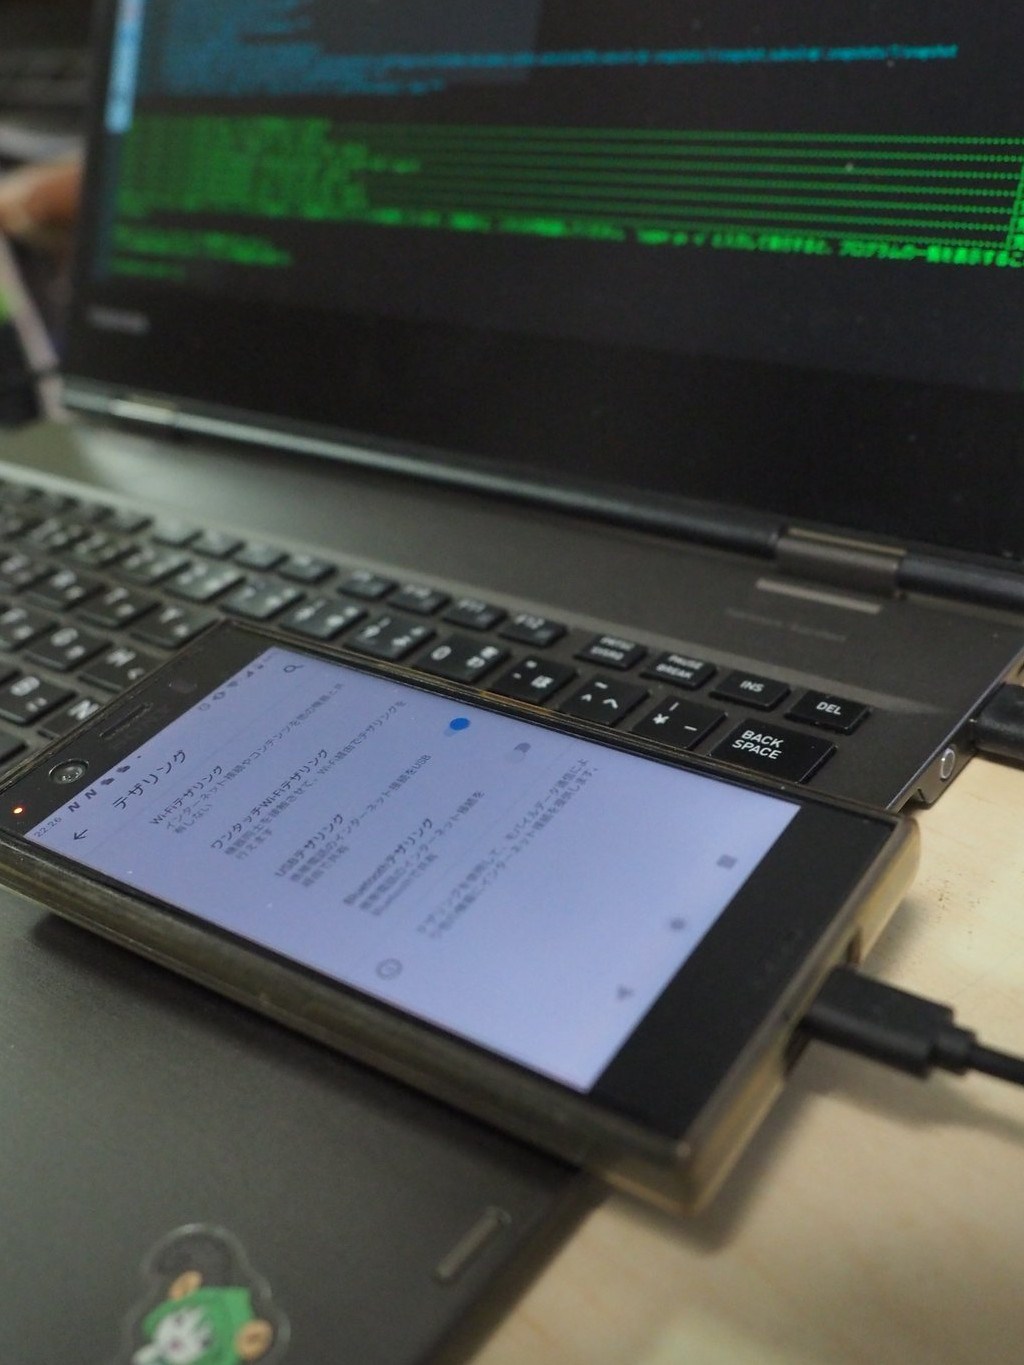
Android のスマートフォンであれば、どの機種でも簡単にできます。USB ケーブルで接続し、スマートフォン側のネットワークの設定で USB テザリングを有効にすれば、特にパッケージ等のインストールをすることなくつながります。
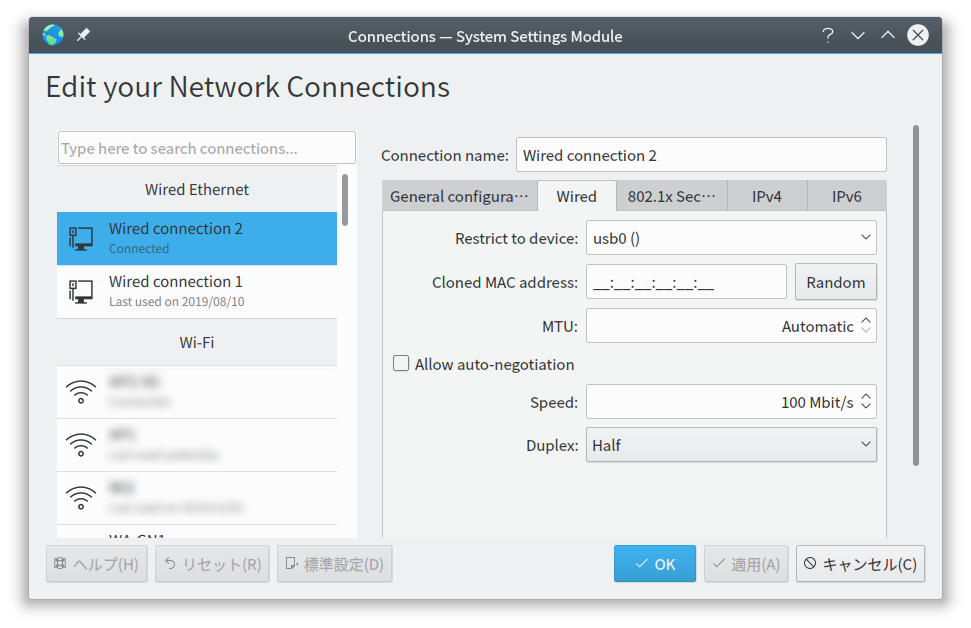
Network Manager では、1番目に Type-C で接続した有線LANアダプタがあるため、スマートフォンは「Wired connection 2」として設定されました。

MySQL Workbench 安裝與連接 Azure DB with openSUSE Leap 15.1 小記
- 看起來就是跟大家一樣用 8.0.x 版本, 6.3 版本之後應該是會淘汰


- 安裝 java:package 提供的 4.7.2 套件, 使用單鍵安裝方式
- 沒有裝 libantlr4-runtime4_7_2 等等就會被告知相依性問題

- 點擊單鍵安裝, 他就是一個 .ymp 檔案, 下載之後打開就可以進行套件與套件庫安裝


- Hostname 使用 Azure 上面的伺服器名稱
- Username 使用 Azure 上面的 伺服器管理員登入


Data Recovery from IDE (PATA) Drive
openSUSE Tumbleweed – Review of the week 2019/50
Dear Tumbleweed users and hackers,
Another week has passed – and we’re almost at the end of the year. During the last week we have released 4 snapshots for Tumbleweed (1206, 1207, 1210 and 1211) containing those noteworthy changes:
- gpg 2.2.18
- libvirt 5.10.0
- linux-glibc-devel 5.4
- Mozilla Thunderbird 68.3.0
- bluez 5.52
- libxml 2.9.10
- createrepo_c 0.15.4: beware: it is very strict and blocks any snapshot if there is a package with non-UTF8 chars or ASCII < 32 (except 9, 10 and 13) in a changelog. Double check your .changes files before submitting.
- GNOME 3.34.2
- KDE Plasma 5.17.4
Thins that are currently being worked on and will be reaching you sooner or later:
- KDE Applications 19.12.0 (Snapshot 1213+)
- Qt 5.14.0
- Linux kernel 5.4.1
- Python 3.8
- RPM 4.15.0
- Rust 1.39.0: Still breaks the build of Firefox and Thunderbird
This is the last week before a lot of people will disappear on Christmas break all around. A lot of people – but not all! Tumbleweed will keep on rolling also during the next weeks.