
 Member
Happy Towel Day! - or: How to DoS an open source project
Happy Towel Day!
I know I'm a bit late for the people living in germany, but it's still early enough for those living on the other side of the planet ;-) - especially for the other AppArmor developers!
Yesterday and today, I sent a flood of patches to the AppArmor mailinglist. You can easily see this as a (productive) DoS attack because AppArmor has a policy that every patch must be reviewed within a week...
Including some patches from the last days that didn't get a review yet, I have the answer - 42 patches pending for the AppArmor utils :-)
The biggest patches move the handling of change_profile and rlimit rules into classes and add tests for them. Another set of patches starts to unify the code of aa-logprof and aa-mergeprof (and fixes some bugs while doing that). The patch flood also contains some small bugfix and cleanup patches.
I'm quite sure the other developers will need some time to review all those patches *g*
If you are interested what exactly I changed, have a look at the AppArmor mailinglist archive and check my mails with the [patch] prefix.
For those who are more interested in statistics, here's the diffstat of my patch flood:
 /aa-mergeprof                         |  517 +++++++++++++---------------------
 /apparmor/aa.py                       |  363 +++++++++--------------
 /apparmor/regex.py                    |    7
 /apparmor/rule/__init__.py            |   41 ++
 /apparmor/rule/capability.py          |   11
 /apparmor/rule/change_profile.py      |   19 +
 /apparmor/severity.py                 |   13
 /apparmor/tools.py                    |   11
 /test/minitools_test.py               |   11
 /test/test-aa.py                      |   29 +
 /test/test-baserule.py                |    5
 /test/test-capability.py              |   32 ++
 /test/test-change_profile.py          |   18 +
 /test/test-severity.py                |   25 -
 utils/aa-audit                        |    1
 utils/aa-cleanprof                    |    1
 utils/aa-complain                     |    1
 utils/aa-disable                      |    1
 utils/aa-enforce                      |    1
 utils/aa-mergeprof                    |   50 ++-
 utils/apparmor/aa.py                  |   34 --
 utils/apparmor/regex.py               |   10
 utils/apparmor/rule/__init__.py       |    6
 utils/apparmor/rule/capability.py     |   14
 utils/apparmor/rule/change_profile.py |  173 +++++++++++
 utils/apparmor/rule/network.py        |   16 +
 utils/apparmor/rule/rlimit.py         |  265 +++++++++++++++++
 utils/apparmor/severity.py            |    4
 utils/apparmor/tools.py               |    7
 utils/test/common_test.py             |   22 +
 utils/test/minitools_test.py          |   25 -
 utils/test/test-aa.py                 |   55 +++
 utils/test/test-baserule.py           |    4
 utils/test/test-capability.py         |   46 ---
 utils/test/test-change_profile.py     |  443 +++++++++++++++++++++++++++++
 utils/test/test-example.py            |    4
 utils/test/test-network.py            |   17 +
 utils/test/test-rlimit.py             |  468 ++++++++++++++++++++++++++++++
 utils/test/test-severity.py           |  201 ++++---------
 39 files changed, 2183 insertions(+), 788 deletions(-)

 Diamond_gr
Install ddclient on your openSUSE Raspberry Pi
1. First of all, install the program.
2. Create the confing file
with the following content
timeout=10
syslog=no # log update msgs to syslog
#mail=root # mail all msgs to root
#mail-failure=root # mail failed update msgs to root
pid=/var/run/ddclient.pid # record PID in file.
ssl=yes # use ssl-support. Works with
# ssl-library
use=if, if=eth0
server=freedns.afraid.org
protocol=freedns
login=login_name
password=the_password
somedomain.mooo.com
Change the ones that are in bold letters.
3. Start the service
Reboot
Upgrade your openSUSE Raspberry Pi from 13.1 to 13.2

We've seen how to create an SD card. I used the 13.1 version. The wiki page https://en.opensuse.org/HCL:Raspberry_Pi is not very clear (to me) about resize partitions. So I tried to upgrade the version 13.1. Here what I did.
1. Check if the update repository already exists and is enabled.
You should have the following enabled
If not, then add it
2. Refresh and update your system
3. Remove all third party/OBS repos you no longer need.
# Remove with
$ zypper rr (alias or number)
4. Change all remaining repo URLs to the new version of the distribution (needs to be run as root).
5. Change the repos.
6. Refresh new repositories (you might be asked to accept new gpg key)
If you haven't removed third party/OBS repositories you may encounter some errors as these repositories may not exist yet or they may have different unguessable URL. It is always recommended to remove them and add their newer version after upgrade.
7. Upgrade
Now you have to wait. Reboot at the end, just to be sure that everything went smooth.
Run copy.com on your openSUSE Raspberry Pi
The cloud service I prefer is always ownCloud.
Here I used http://www.copy.com. It provides 15GB of disk but you can increase it.
First of all download the file
Then extract it
This will create a folder called “copy,” and in it there will be three sub-folders: “armv6h,” “x86,” and “x86_64.” The first one contains the Copy client binaries for the Raspberry Pi, the second contains the Copy client for 32-bit Linux on a PC, and the third the same client but for 64-bit Linux PCs.
$ cd armv6h
Now there are 2 ways of using copy. The CopyCmd tool and CopyConsole.
CopyCmd
List of the directories
Upload all content of local /home/user/directory/ to remote /directory
CopyConsole
The CopyConsole tool keeps a folder on your Raspberry Pi synchronized with the data on Copy.com.
The sync app runs in the background and is started like this:
This will sync the local /home/user/directory to copy.com. If you delete something from there, it'll delete from local folder as well.
Remeber to run this command everytime you restart your pi. It's better to run it manually because there is username and password that are personal (unless you created an account just for your raspberry pi).
Make your openSUSE Raspberry Pi a seedbox
Here I will show you how to setup Transmission, vftpd and suggestions for Android programs.
First of all, download and create the openSUSE SD card (resize your SD card to full size or you can mount the extra size as extra partition. Since it's not something important, then you can use full size of your SD card).
Then setup the dynamic dns service (see previous posts).
Finally set a static IP (to use it with port forward of your router).
First install transmission:
Create 2 folders for incomplete torrents and completed torrents:
Configure proper permissions for transmission:
$ chgrp transmission /torrents/complete
$ chmod 770 /torrents/incomplete
$ chmod 777 /torrents/complete
Now edit transmission settings.json file using:
$ rm /var/lib/transmission/.config/transmission/settings.json
and
$ nano /var/lib/transmission/.config/transmission/settings.json
Here is the content of your file:
"alt-speed-down": 50,
"alt-speed-enabled": false,
"alt-speed-time-begin": 540,
"alt-speed-time-day": 127,
"alt-speed-time-enabled": false,
"alt-speed-time-end": 1020,
"alt-speed-up": 50,
"bind-address-ipv4": "0.0.0.0",
"bind-address-ipv6": "::",
"blocklist-enabled": false,
"blocklist-url": "http://www.example.com/blocklist",
"cache-size-mb": 4,
"dht-enabled": false,
"download-dir": "/torrents/complete",
"download-limit": 100,
"download-limit-enabled": 0,
"download-queue-enabled": true,
"download-queue-size": 5,
"encryption": 1,
"idle-seeding-limit": 30,
"idle-seeding-limit-enabled": false,
"incomplete-dir": "/torrents/incomplete",
"incomplete-dir-enabled": true,
"lpd-enabled": false,
"max-peers-global": 200,
"message-level": 2,
"peer-congestion-algorithm": "",
"peer-limit-global": 91,
"peer-limit-per-torrent": 150,
"peer-port": 51413,
"peer-port-random-high": 65535,
"peer-port-random-low": 49152,
"peer-port-random-on-start": false,
"peer-socket-tos": "default",
"pex-enabled": false,
"port-forwarding-enabled": true,
"preallocation": 1,
"prefetch-enabled": 1,
"queue-stalled-enabled": true,
"queue-stalled-minutes": 30,
"ratio-limit": 2,
"ratio-limit-enabled": false,
"rename-partial-files": true,
"rpc-authentication-required": true,
"rpc-bind-address": "0.0.0.0",
"rpc-enabled": true,
"rpc-password": "{2dc2c41724aab07ccc301e97f56360cb35f8ba1fGVVrdHDX",
"rpc-port": 9091,
"rpc-url": "/transmission/",
"rpc-username": "transmission",
"rpc-whitelist": "*.*.*.*",
"rpc-whitelist-enabled": false,
"scrape-paused-torrents-enabled": true,
"script-torrent-done-enabled": false,
"script-torrent-done-filename": "",
"seed-queue-enabled": false,
"seed-queue-size": 10,
"speed-limit-down": 250,
"speed-limit-down-enabled": true,
"speed-limit-up": 0,
"speed-limit-up-enabled": true,
"start-added-torrents": true,
"trash-original-torrent-files": false,
"umask": 18,
"upload-limit": 100,
"upload-limit-enabled": 0,
"upload-slots-per-torrent": 14,
"utp-enabled": true
}
Username: transmission
Password: transmission
Port: 9091
Start and enable the service.
$ systemctl enable transmission-daemon
You're done. All you have to do is to open your browser to http://RASPI.IP.ADDRESS:9091/ and use the login/password (default for above config transmission/transmission)
Let's say that the file is i your pi disk. You're not at home. How can you check it? Maybe the easiest way is to setup an FTP server. Maybe the best program is vsftpd. You can install it:
Create a folder for ftp users (if it's not there).
Create a group called ftp-users.
Create a sample user called seedbox with home directory /srv/ftp/, and assign the user to ftp-users group.
Set password for the new user.
Now you should change few things:
And uncomment:
write_enable=YES
Start the service and you're done:
$ systemctl enable vsftpd
Personally I use the program filezilla but you can also use the Firefox addon FireFTP.
OK, you installed torrent server. How can you access the downloaded files from your computer? Well it's easy. Just install SAMBA. For that reason, I followed the tutorial here.
First of all, install SAMBA.
Then all you have to do is to change SAMBA configuration file.
$ nano /etc/samba/smb.cnf
Just add the following lines:
comment = Public Shares
path = /torrents/complete
writeable = Yes
only guest = Yes
create mask = 0777
directory mask = 0777
browseable = Yes
public = yes
You should restart SAMBA or you can reboot your Pi.
$ systemctl enable smb nmb
Now you can access your Pi from Nautilus (check here how to do that).
If you want to use it via android phone/tablet, you can use the program Remote Transmission
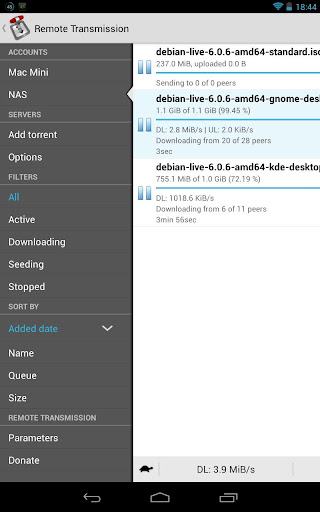
More applications are Transdrone and TorrentToise.
Set static IP on your openSUSE Raspberry Pi
In openSUSE is easier. Everything can be done under YaST.
1. Open YaST and go to Network Devices>Network Settings.

2. Then choose Statically Assigned IP Address (move with tab button and click on space button). Give the static IP you want (IP address needs to be in the same range as the router's) and as Subnet Mask, 255.255.255.0. Press Next (press enter).

3. You'll see an overview of the ethernet card.

4. Go to Hostname/DNS and add Google's DNS servers (optional).

5. Next, go to Routing and add your router ip (usually 192.168.1.1).

Now press OK, reboot and try to login again with SSH.

GIF animados
De vez en cuando grabo algún vídeo ó secuencia de fotos del que me gusta extraer fotogramas y crear/componer un GIF animado, muchos los he ido colgando por aquí. Un GIF animado es una pieza gráfica especial, singular, a medio camino entre la fotografía y el vídeo, sin la perfección y nitidez de una ni la toda la información visual/sonora del otro pero con un espacio propio dentro del cual funciona mejor y supera a ambos en simpleza y capacidad visual.
Llevaba tiempo queriendo integrarlos en el blog. Como galería independiente me parecía algo excesivo así es que finalmente he optado por modificar el código que gestiona la galería de Fotografías (alojadas en Flickr) para que integre ahora además los GIFS animados que alojados en Picasaweb. En adelante, la galería de fotos estará un poco más animada.

Un GIF es un formato de archivo de imagen reducido a 256 colores que contiene uno o varios fotogramas. Estos fotogramas son interpretados de forma nativa por cualquier navegador web y reproducidos de forma cíclica (normalmente, no tiene porqué ser así) sin necesidad de aplicaciones extras como pueden necesitar los archivos de vídeo.
Para realizar un GIF animado hay cienes y cienes de herramientas. En GNU/Linux podéis hacer un GIF animado directamente desde un vídeo con FFMPEG o MENCODER, pero para hacer un buen GIF animado, cíclico y optimizado en color y peso lo mejor es crearlos a partir de una pila de imágenes con IMAGEMAGICK.

Crear GIF animado desde consola
En una carpeta temporal vuelca las imágenes que componen los fotogramas. Si sólo tienes el vídeo puedes extraer los fotogramas con MPLAYER haciendo lo siguiente:mplayer -vf screenshot mipelicula.avi
Durante la reproducción pulsa «s» para tomar un fotograma instantaneo o pulsa «MAYUSCULAS+s» para comenzar a generar fotogramas a cada frame hasta que vuelvas a pulsar «MAYUSCULAS+s». (cuidadito! con dejar pulsado «MAYUSCULAS+s» con un vídeo de 1:30 horas porque producirás varios cientos de miles de PNG en un plis-plas).
Una vez tengas los fotogramas que compondrán el GIF animado ayudate de cualquier visor de imágenes ( yo uso VIEWNIOR ) y visualiza los frames extraidos para ir eliminado los primeros y últimos hasta conseguir una secuencia que cicle correctamente, es decir, que el último fotograma y el primero sean tan parecidos que den fluidez a la secuencia. Si por ejemplo con mplayer extrajiste una serie de fotogramas del shot00001.png -> shot0124.png, después de ir eliminado fotogramas te podría quedar una secuencia de 50 imágenes dek shot0010.png -> shot0060.png.
Ahora puedes convertir esta secuencia de 50 pngs en un GIF haciendoconvert -fuzz 5% -delay 1x12 shot*png -resize 720 -layers OptimizeTransparency secuencia.gif
Con delay 1×12 (mostrar cada frame 1/12 de segundo) controlas la velocidad de reproducción del GIF. Fuzz 5% indica cuanto color se puede perder en la comparación (cuanto más alto, menos calidad, menos peso del archivo). Resize reescala la imagen resultante (a más tamaño, más peso). OptimizeTransparency calcula y elimina aquellas partes de que repiten entre fotogramas y por lo tanto se puede optimizar.
Trucos
Si no queréis borrar fotogramas podéis hacer pruebas con segmentos de la secuencia de archivos haciendoconvert -fuzz 5% -delay 1x12 shot00{12..24}.png -resize 720 -layers OptimizeTransparency secuencia.gif
Esto produciría un GIF a partir de los fotogramas shot0012.png hasta el shot0024.png ignorando el resto.
Si tenéis muchos fotogramas y os sale un GIF muy lento y pesado probad a usar 1 fotograma de cada 2 haciendoconvert -fuzz 5% -delay 1x12 shot*[24680].png -resize 720 -layers OptimizeTransparency secuencia.gif
Si tenéis una animación que os gusta pero no es cíclica podéis hacer una animación tipo ping-pong (como la del zorro) haciendo convert -fuzz 5% -delay 1x12 shot00[12..24].png shot00[24..12].png -resize 720 -layers OptimizeTransparency secuencia.gif
Incluso si lo que tenéis es una secuencia de fotogramas en los que la cámara se ha movido, podéis estabilizarlos y entonces generar el GIF, lo expliqué en el apunte: Crear un gif animado estabilizando una imagen
inadyn and openSUSE Raspberry Pi
Fortunately, there's not only this service but other services too. Just for reference, here are some (not only free):
http://www.dyndns.org
http://freedns.afraid.org
http://www.zoneedit.com
http://www.no-ip.com
http://www.easydns.com
http://www.tzo.com
http://www.3322.org
http://www.dnsomatic.com
http://www.tunnelbroker.net
http://dns.he.net/
http://www.dynsip.org
http://www.sitelutions.com
http://www.dnsexit.com
http://www.changeip.com
http://www.zerigo.com
http://www.dhis.org
https://nsupdate.info
http://duckdns.org
https://www.loopia.com
https://www.namecheap.com
https://domains.google.com
https://www.ovh.com
https://www.dtdns.com
http://giradns.com
Let's see one of them https://freedns.afraid.org. After you register, go to Dynamic DNS link (on the left top box-for members).
Add your host with type A and subdomain and domain what you like as host.
Now there's going to be a list of your host names. Right click on the Direct Link and copy the link. You should keep the alpha-numeric key. The address will be something like http://freedns.afraid.org/dynamic/update.php?[alpha-numeric-key]
Now it's time to install the client. I've found it from https://github.com/troglobit/inadyn.
1. First of all, install the needed programs to build the service.
2. Then
cd inadyn
3. Download the program from ftp://troglobit.com/inadyn/
and decompress it
4. Go to the directory
5. Compile and install
make install
6. Create the confing file
with the following content
--password PASSWORD
--update_period 3600
--forced_update_period 14400
--alias HOSTNAME,alphanumeric key
--background
--dyndns_system default@freedns.afraid.org
--syslog
The bold words are the ones you should change. Remember the alphanumeric key is the one you got from right click on the Direct Link.
7. Start the client. Create the service file.
8. Add the following content.
Description=inadyn Dynamic DNS Update Client
After=network.target
[Service]
Type=forking
ExecStart=/usr/local/sbin/inadyn
[Install]
WantedBy=multi-user.target
9. Start the service
and enable the service
10. Reboot and check if the service is running.
you should get results something like:
no-ip and openSUSE Raspberry Pi
Next step is to be sure that we can have access from outside our house (since most of the times, Raspberry Pi is located at home).
To do that we use Dynamic DNS services. A free service (so far) is No-IP. Most of the routers support it. You can use your router's service. But what if you want 2 different host names on the same IP? Let's say you have different ARM boards on the same router or you have a server etc.
1. First of all, install the needed programs to build the service (same as I did with ZNC)
2. Then
cd noip
3. Download the program
and decompress it
4. Go to the directory
5. Compile and install
make install
While it install’s the software you will prompted to enter the username & password. Once that is done it will ask you teh refresh interval … leave it.. to have the default value. You are required to answer some more questions … just ans NO an d you should be good to go.
6. Start the client
To check if the service is running, use the command:
and the results should be like
Process 1516, started as noip2, (version 2.1.9)
Using configuration from /usr/local/etc/no-ip2.conf
Last IP Address set EXTERNAL IP
Account USERNAME
configured for:
host HOSTNAME
Updating every 30 minutes via /dev/eth0 with NAT enabled.
Auto start the client on reboot
But what if you reboot? You want to start the client everytime you reboot. This can be done with systemd.
1. Create the service file.
2. Add the following content.
Description=No-IP Dynamic DNS Update Client
After=network.target
[Service]
Type=forking
ExecStart=/usr/local/bin/noip2
[Install]
WantedBy=multi-user.target
3. Start the service
and enable the service
Create an openSUSE SD card for your Raspberry Pi B and B+
Here we'll see how to create an SD card with openSUSE. There are plenty of information at the wiki page https://en.opensuse.org/HCL:Raspberry_Pi
. I'll collect the information I need for projects I'll write next.
I used 13.1 as distro because it's easier for me to resize the SD card.
1. Download the image (openSUSE-13.1-ARM-JeOS-raspberrypi.armv7l.raw.xz) from here:
http://download.opensuse.org/repositories/devel:/ARM:/13.1:/Contrib:/RaspberryPi/images/
decompress the image.
2. Find the device name of your card
usually it's going to be /dev/mmcblk0.
and create the card (as root)
3. Since I didn't use a monitor (HDMI or DVI), I had to do some extra steps before boot my raspberry pi.
a. Delete the file /var/lib/YaST2/reconfig_system to start headless.
b. Resize the ext4 partition with Gparted.
4. When boot the Raspberry Pi, use the following
ssh root@IP
password: linux
Now the first command will be
and then update