
Tao-makefile-ui
Who those, who won’t use terminal to compile program I’ve created tao-makefile-ui.
Tao-makefile-ui is a simple tool, which aims allow to go through each step of compiling program in graphical user interface. Program will run autogen.sh, configure and make. It allows to select make target and save targets list to file. It also allows to change variables of Makefile.
There’s package for OpenSUSE. You can watch the video demonstrating tao-makefile-ui here
Thanks!
 Member
 Freespacer
openSUSE – proprietären Grafik-Treiber AMD Catalyst 15.9 als RPM installieren
AMD Catalyst 15.9 (fglrx 15.201.1151) wurde veröffentlicht und unterstützt Grafikkarten ab Radeon HD 5000 und höher. Das Skript makerpm-amd-15.9.sh steht ab sofort zum Download zur Verfügung und unterstützt openSUSE 11.4, 12.1, 12.2, 12.3, 13.1, 13.2 und Tumbleweed sowie bis Kernel 4.2 (offiziell nur bis Kernel 3.19).
Wichtiger Hinweis: Die erste Beta-Version von openSUSE Leap (zukünftige openSUSE 42.1) wurde vor wenigen Tagen veröffentlicht. Jedoch wurde der AMD Treiber noch nicht an die neue Version angepasst. Dazu werde ich mich in den nächsten Tagen näher beschäftigen und ein weiteres Update bereitstellen.
Ein weiterer Hinweis: Nach einigen Experimenten mit dem GNOME Desktopmanager konnte ich ihn nicht zum Laufen bringen. Da scheint tatsächlich etwas im Argen zu sein. Hierzu werde ich die AMD Entwickler kontaktieren. Als Workaround empfehle ich für GNOME einen anderen Desktopmanager wie z.B. lightdm bis das Problem behoben ist.
[UPDATE 09.11.2015]
Das Packaging Script wurde aktualisiert. Es wird ab sofort openSUSE Leap 42.1 und Kernel 4.3 unterstützt. Have a lot of fun! 
[/UPDATE 09.11.2015]
Gelöste Probleme:
- [425910] Driver installation sometimes fails on Ubuntu 14.04.3
- [424450] Company of Heroes® 2 – Game crashes while running the performance test
- [424794] Middle-earth
 : Shadow of Mordor – Corruption observed in game
 - [424882] DIRT® Showdown – Corruption observed in game
- [425234] DIRT® Showdown – Game crashes after the loading screen
- [424802] DOTA 2 – Application hang observed while exiting the game
- [424255] AMD Catalyst Installer removing EGL links resulting in Xserver/Xorg load failure
- [423471] Unable to switch desktop mode after installing AMD Catalyst driver
- [423735] Renaming Counter-Strike: GO and other Steam game binary improves performance
 : Shadow of Mordor – Corruption observed in game
Bekanntes Problem:
- [419960]: Vari-Bright on some configurations is not decreasing brightness as expected
Link: AMD Catalyst 15.9 Release Notes
Folgende Steam-Spiele habe ich getestet und laufen mit diesem Treiber (Fettdruck = Neu):
- A Bird Story
- A Virus Named TOM
- AaaaaAAaaaAAAaa…
- Age of Wonders III
- AI War: Fleet Command
- Amnesia: The Dark Descent
- Anomaly 2
- Anomaly Defenders
- Anomaly Korea
- Antichamber
- Aquaria
- Avadon: The Black Fortress
- Awesomenauts
- Bastion
- Battle Group 2
- Beatbuddy: Tale of the Guardians
- BIT.TRIP Presents… Runner 2: Future Legend of Rhythm
- Borderlands 2
- Breach & Clear
- Bridge Constructor
- Bridge Constructor Playground
- Broken Sword: Director’s Cut
- Broken Sword 2 – the Smoking Mirror: Remastered
- Broken Sword 5 – the Serpent’s Curse
- Brütal Legend
- Cave Story+
- Cities in Motion 2
- Cities: Skylines
- Closure
- Cogs
- Costume Quest
- Counter-Strike: Global Offensive
- Creeper World III: Arc Eternal
- Crusader Kings II
- Cubemen
- Cubemen 2
- Darwinia
- DeadCore
- Defcon
- Defense Grid 2
- Distance
- Duke Nukem 3D: Megaton Edition
- Dungeon Defenders
- Dust: An Elysian Tail
- Dustforce
- Eets Munchies
- Euro Trucker Simulator
- Europa Universalis IV
- FEZ
- From The Depths
- Frozen Synapse
- FTL: Faster Than Light
- Galcon Fusion
- Galcon Legends
- Game Dev Tycoon
- Gemini Rue
- Gratuitous Space Battles
- Guacamelee! Gold Edition
- Half-Life 2: Deathmatch
- Half-Life 2: Lost Coast
- Halfway
- Hero Academy
- HOARD
- Hotline Miami
- Ironclad Tactics Deluxe
- Ittle Dew
- Jack Lumber
- Jagged Alliance – Back in Action
- Joe Danger 2: The Movie
- Kerbal Space Program
- Killing Floor
- Kinetic Void
- Kingdom Rush
- Knights of Pen and Paper +1 Edition
- Legend of Grimrock
- LIMBO
- Little Inferno
- LUFTRAUSERS
- Lux Delux
- Mark of the Ninja
- Metro: Last Light Redux
- Mini Metro
- Monaco: What’s Yours Is Mine
- Monstrum
- Multiwinia
- Natural Selection 2
- Nihilumbra
- Nightside
- Not The Robots
- Nuclear Dawn
- Organ Trail: Director’s Cut
- Painkiller Hell & Damnation
- Planet Explorers
- Portal
- Portal 2
- Postal 2
- Prison Architect
- Project Zomboid
- Psychonauts
- Puddle
- Ravensword: Shadowlands
- Rising World
- Rochard
- Rocketbirds: Hardboiled Chicken
- Sanctum 2
- Savage Lands
- Savant – Ascent
- Serious Sam 3: BFE
- Shadow Warrior Classic Redux
- Shadowrun Returns
- Shank 2
- Shatter
- Sid Meier’s Civilization® V
- Sir, You Are Being Hunted
- Skulls of the Shogun
- Small World 2
- Snapshot
- Solar 2
- Solar Flux
- Space Hulk
- Space Pirates and Zombies
- Spec Ops: The Line
- Splice
- Starmade
- Stealth Bastard Deluxe
- Strike Suit Zero
- Superbrothers: Sword & Sworcery EP
- Surgeon Simulator 2013
- Survivor Squad
- Syder Arcade
- Symphony
- Tetrobot and Co.
- The Bard’s Tale
- The Book of Unwritten Tales
- The Book of Unwritten Tales: The Critter Chronicles
- The Bridge
- The Last Federation
- The Raven – Legacy of a Master Thief
- The Shivah
- The Swapper
- The Witcher 2: Assassins of Kings Enhanced Edition
- Thomas Was Alone
- Ticket to Ride
- Titan Attacks
- Toast Time
- To the Moon
- Toki Tori 2+
- Torchlight II
- Train Fever
- Transistor
- Trine 2: Complete Story
- Tropico 5
- Unity of Command: Stalingrad Campaign + DLC
- Uplink
- VVVVVV
- Waking Mars
- Wargame: Airland Battle
- Wargame: European Escalation
- Wargame: Red Dragon
- Wizorb
- Worms Reloaded
- XCOM: Enemy Unknown
- X-Plane 10 Global (64-bit)
- Zen Bound 2
Eine kleine Bitte habe ich: Wenn irgendwelche Probleme mit dem Treiber auftauchen, scheut euch nicht mir zu berichten (Ich nehme deutsche und englische Bugreports gerne entgegen). Ich werde versuchen, soweit es mir möglich ist, den gemeldeten Fehler zu reproduzieren. Zusammen mit den nötigen System-Informationen werde ich mich direkt an die richtige Stelle bei AMD wenden, um den Bug in der nächsten Treiber-Version beheben zu lassen. Danke schön. 
Für Benutzer älterer AMD Grafikkarten (Radeon HD Serie 2000 – 4000) wird dringend die Installation dieses Treibers abgeraten. openSUSE bringt bereits für ältere Grafikkarten den freien Radeon-Treiber mit. Um regelmäßig Verbesserungen am freien Radeon-Treiber zu erhalten, ist die Installation eines neuen Kernel unumgänglich.
Downloads:
- Skript: makerpm-amd-15.9.sh
- SHA1: makerpm-amd-15.9.sh.sha1
Installationsanleitung:
http://de.opensuse.org/SDB:AMD/ATI-Grafiktreiber#Installation_via_makerpm-amd-Skript
Installation guide (English):
http://en.opensuse.org/SDB:AMD_fglrx#Building_the_rpm_yourself
Über das makerpm-amd-Skript
Das Skript makerpm-amd-15.9.sh ist sehr mächtig, robust und läuft vollautomatisch. Der AMD-Installer wird automatisch heruntergeladen, falls er nicht schon im Verzeichnis liegt. Zudem wird geprüft, ob die Grafikkarte vom Treiber unterstützt wird. Auf Wunsch wird nach dem Bau des RPM-Packages der fglrx-Treiber installiert.
Folgende Argumente können dem Skript übergeben werden:
| -b | Nur das RPM-Package bauen (Standard) |
| -c <type> | Nur X-Server konfigurieren. Monitor-Typ: single = 1 Monitor, dual = 2 Monitore (Wichtig: Nur ausführen, wenn es Probleme mit der Standardkonfiguration des X-Servers auftreten) |
| -d | Nur den AMD-Installer downloaden |
| -i | Das RPM-Package bauen und installieren bzw. updaten |
| -igf/–install-gdm-fix | installiert einen Fix, um den Treiber mit dem GNOME Desktopmanager (gdm) läuffähig zu machen |
| -kms <yes|no> | Kernel-Mode-Setting (KMS) aktivieren oder deaktivieren |
| -nohw | Hardware-Erkennung explizit ausschalten. (z.B. beim Bau in einer VM) |
| -old2ddriver <yes|no> | den alten 2D-Treiber aktivieren oder deaktivieren |
| -r|–report | erstellt ein Report und speichert diese in eine Datei namens amd-report.txt |
| -u|–uninstall | entfernt AMD Catalyst restlos vom System. Zuerst wird das fglrx-Package (falls vorhanden) vom System deinstalliert. Danach werden vorhandene AMD-Dateien und -Verzeichnisse entfernt. Hinweis: Falls das Rebuild-Skript installiert wurde, wird es ebenfalls entfernt und das Initskript /etc/init.d/xdm wiederhergestellt. |
| -ugf/–uninstall-gdm-fix | entfernt den Fix, dass den Treiber mit dem GNOME Desktopmanager (gdm) läuffähig macht |
| -ur|–uploadreport | wie Option –report nur zusätzlich wird der Report auf einem NoPaste-Service sprunge.us hochgeladen und gibt bei Erfolg den Link zurück. |
| -h | Die Hilfe anzeigen lassen |
| -V | Version des Skript anzeigen |
Hilfe, es funktioniert nicht!
Bitte haltet folgende Regel ein:
- Bei der Eingabe der Befehle auf mögliche Tippfehler überprüfen.
- Möglicherweise ist die Lösung für das Problem im Wiki vorhanden.
- In Kommentaren lesen, ob eine Lösung zu einem Problem bereits existiert.
Wenn keines der o.g. Regel greift, dann könnt ihr mit eurem Anliegen an mich wenden. Damit ich euch helfen kann, müsst ihr erst vorarbeiten. Bitte ladet euch das Skript makerpm-amd-15.9.sh herunter und erstellt einen Report von eurem System in der Konsole:
su -c 'sh makerpm-amd-15.9.sh -ur'
Das Skript lädt das Report auf sprunge.us hoch und gibt anschließend einen Link aus. Diesen Link postet ihr in eurem Kommentar zusammen mit einer Beschreibung zu eurem Problem an mich. Ich werde mir euren Report anschauen und Hilfestellung geben, wo evtl. das Problem liegen könnte.
Feedbacks sind wie immer willkommen. 
Ставим Popcorn-Time в OpenSUSE

Любопытно, но готового пакета с Popcorn-Time для OpenSUSE не нашлось во всей OBS. В сети имеется установочный скрипт, который по идее должен ставить приложение, но скрипт, увы, устарел и больше не работает. Если вы хотите поставить Popcorn-Time вручную, то это сделать совсем не сложно. Но гораздо удобнее всё же воспользоваться обновлённым скриптом, который я сделал. Скрипт протестирован на OpenSUSE 13.2 64 bit.
openSUSE Leap Beta est là !
Les développeurs openSUSE viennent de sortir la Beta de la future version Leap 42.1 qui fourni un nouveau look.
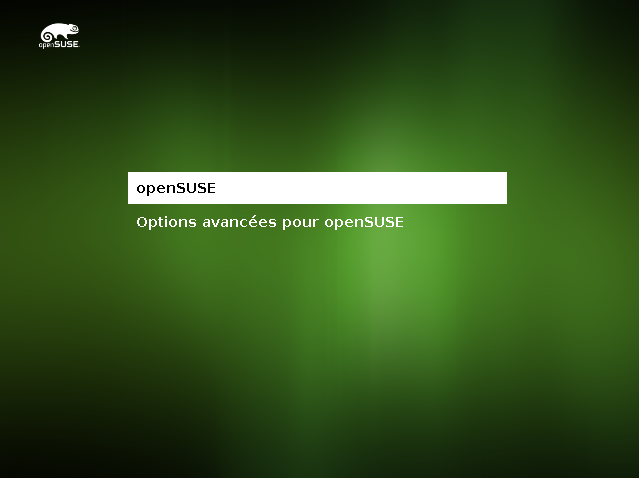
Pour cette version classique (avec sorties régulières) Grub a été complété de Plymouth qui propose une démarrage plus visuel aux utilisateurs installant et utilisant Leap sur leur ordinateur ou via une machine virtuelle.

Le nouveau fond d’écran est spécifique à la verison Leap et openSUSE Tumbleweed aura sa propre image par défaut afin de les distinguer facilement.
Les utilisateurs souhaitant un système GNU/Linux stable sur le long terme peuvent attendre de Leap l’utilisation la branche la plus avancée du noyau Linux 4.1 avec un support à long terme qui fourni une amélioration significative pour les architectures ARM.
Si vous voulez tester cette Beta vous pouvez la télécharger et l’installer sur votre ordinateur ou sur une machine virtuelle telle que virtualbox.
La version finale sortira le 4 novembre pendant la SUSECon d’Amsterdam.
Cette version Leap Beta est retournée sur XDM 1.1.10 plutôt que sur la 1.1.11, qui est utilisée sur Tumbleweed et sur la 13.2.
Le KDE Plasma Framwork a été mis à jour de 5.12.0 vers 5.13.0 et beaucoup de paquets ont été ajoutés. Il y a environ 7 200 paquets dans cette Beta..
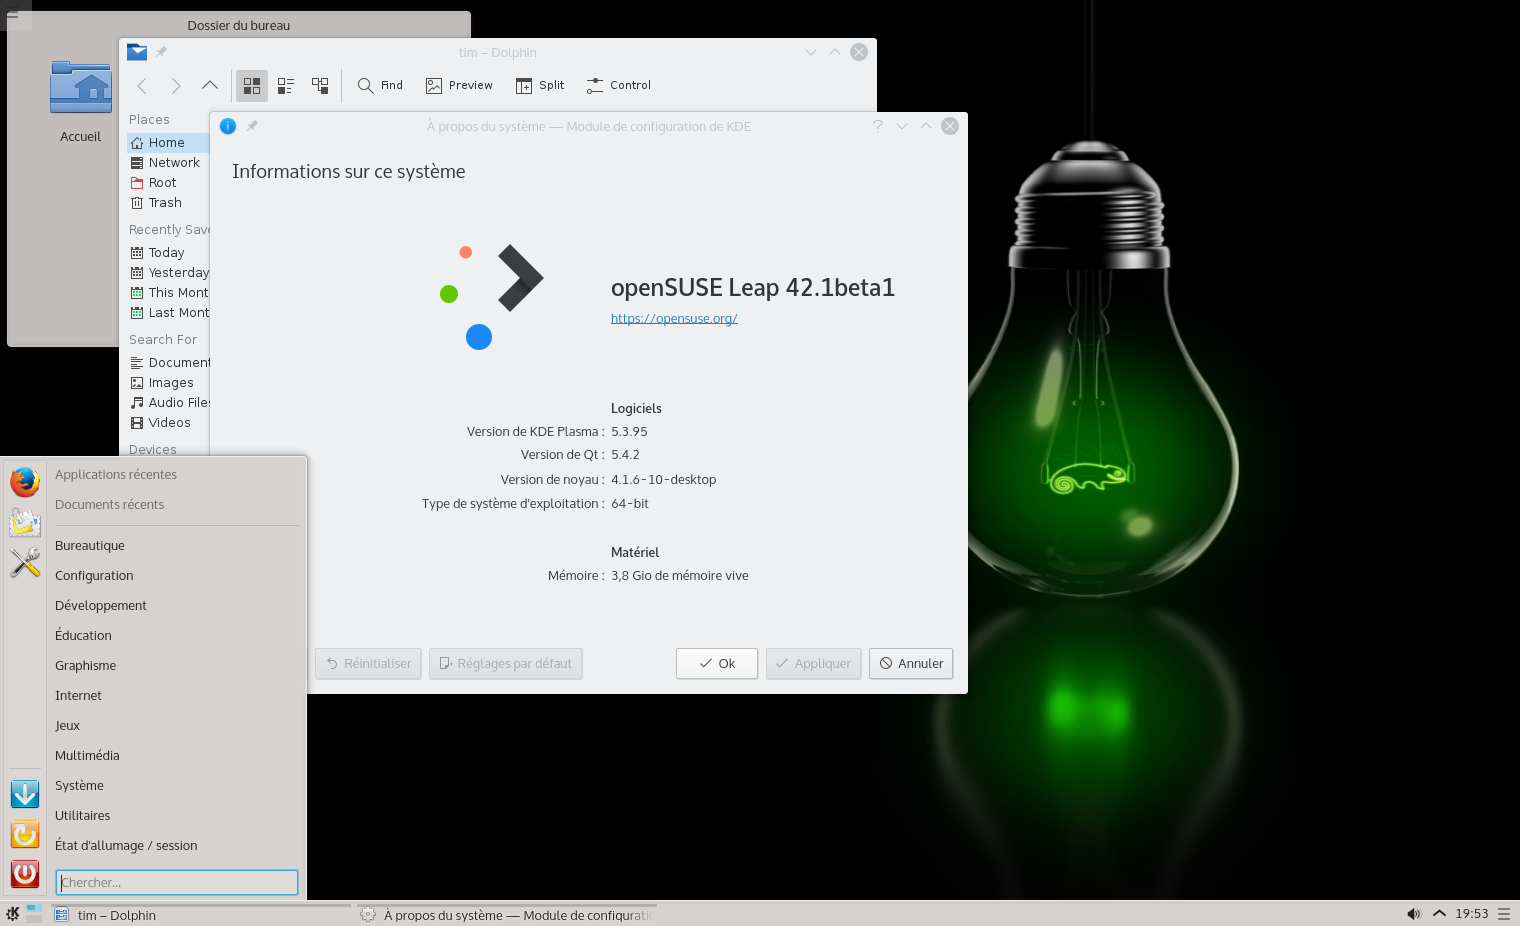
Pour rappel Leap est développé à partir du code source de SUSE Linux Enterprise et assemblé par des développeurs de logiciels Libres et Open Sources pour fournir une distribution totalement différente.
Sources :
L’annonce officielle [en] : https://news.opensuse.org/2015/09/24/opensuse-releases-leap-beta/
L’annonce sur Alionet [fr] : https://www.alionet.org/content.php?702-Sortie-d-openSUSE-Leap-42-1-Beta-!

How to create an openSUSE Banana Pi M1 image with MATE Desktop

I won a Banana Pi from ownCloud. So I tried to install openSUSE.
There are 3 options:
1. According to the wiki page, you can download the image they provide but there's no kernel support for Mali400MP2 GPU (who knows if it's fixed by now). No Mali mean no GUI. The link to image is http://download.opensuse.org/ports/armv7hl/tumbleweed/images/.
2. Download the image from http://www.lemaker.org. The GUI used is XFCE.
3. Do it the hard way, build it yourself. I would like to install MATE. I know, I could use the lemaker image.
I followed the page HowTo Build Banana Pi Image.
This post has 2 sections. The first is how to create the SD card and the next one is how to install MATE.
Create the SD card.
1. Create a folder where you're going to work (download the nessesary files).
cd WORKSPACE
2. I'll skip the steps 1-5 from the Build it yourself page. You can download the file:
BananaPi_hwpack.tar.xz
Download also the rootfs openSUSE image file.
openSUSE-Tumbleweed-ARM-JeOS.armv7-rootfs.armv7l-Current.tbz
3. Create the folder with the ROOTFS_DIR
4. Decompress the file to ROOTFS_DIR
openSUSE-Tumbleweed-ARM-JeOS.armv7-rootfs.armv7l-Current.tbz
5. Now work with the file BananaPi_hwpack.tar.xz. Decompress the file.
6. Copy related files to the directory ROOTFS_DIR
cp kernel/uImage ROOTFS_DIR/boot
Create the file:
with the following content
fatload mmc 0 0x48000000 uImage; if fatload mmc 0 0x43100000 uInitrd; \
then bootm 0x48000000 0x43100000; else bootm 0x48000000; fi
uenvcmd=run mmcboot
bootargs=console=ttyS0,115200 console=tty0 \
disp.screen0_output_mode=EDID:1280x720p60 \
hdmi.audio=EDID:0 root=/dev/mmcblk0p1
Copy the rootfs folder:
7. Now prepare the SD. Format the sdcard (assume the sdcard mounted at /dev/sdb. You can find it with the command cat /proc/partitions)
sudo dd if=/dev/zero of=/dev/sdb bs=1k count=1024
sudo dd if=bootloader/u-boot-sunxi-with-spl.bin of=/dev/sdb bs=1024 seek=8
Create partition (you can do it using gparted too)
* Delete partitions: o
* List partitions: p
* Create new partitions: n
* Primary partitions: p
* Partition number: 1
* Press ENTER twice to use the total size of the card
* Write the partition table: w
Format the parititon
8. Copy ROOTFS_DIR into sdcard
sudo mount /dev/sdb1 mnt
sudo cp -a ROOTFS_DIR/* mnt
sudo sync
sudo umount mnt
Now boot the card. The default username/password are:
Password: linux
Unfortunately ssh didn't work. I logged in and changed few things.
First of all I edited the file sshd_conf
And found:
Port 22
PasswordAthentication yes
PermitRootlogin yes
Then I used the command
Rebooted and all set.
You can download the image from openSUSE-Tumbleweed-BananaPi-headless-20150927.tar.xz
copy it at least 2GB sd card and resize it.
Install MATE Desktop
The first thing you have to do is to update (zypper up).
The easiest way is to open YaST and go to Software Management.
Then filter by Patterns.
Click to install MATE Desktop Environment and MATE Base system.
After everything is installed, make MATE-session as default window manager
Find the line:
DEFAULT_WM = "kde-plasma"
and change it to
DEFAULT_WM = "mate-session"
Then reboot. Login and type startx

184 Qt Libraries

Inqlude is based on a collection of manifests. If you like to add or update a library, simply submit a pull request there. The inqlude tool is used to manage the manifests, it generates the web site, but you can also use it to validate manifests, or download libraries. There also is inqlude-client, which is a C++ client for retrieving sources of libraries via the data on the Inqlude web site. It's pretty handy, if you want to integrate some library into your project.
If you want to get a brief introduction into Inqlude, you might want to watch my award winning lightning talk from Qt Dev Days 2013: "News from Inqlude, the Qt library archive". It still provides a pretty accurate explanation of what Inqlude is about and how it works.
A big part of the libraries which are collected on Inqlude are coming from KDE as part of KDE Frameworks. We just released KDE Frameworks 5.14. It's 60 Qt addon libraries which represent the state of the art of Linux desktop development and more.
Inqlude as well as KDE Frameworks are a community effort. Incidentally they both started at a developer sprint at Randa. Getting community people together for intense hacking and discussions is a tremendously powerful catalyst in the free software world. Randa exemplifies how this is done. The initial ideas for Inqlude were created there and last year it enabled me to release the first alpha version of Inqlude. These events are important for the free software world. You can help to make them happen by donating. Do this now. It's very much appreciated.

One more recent change was the addition of a manifest for all libraries part of the Inqlude archive. This is a JSON file aggregating all latest individual manifests. It makes it very easy for tools who don't need to deal with the history of releases to get everything in one go. The inqlude client uses it, and it's a straight-forward choice for integration with other tools which would like to benefit from the data available through Inqlude.
At the last Qt contributors summit we had some very good discussions about more integration. Integration with the Qt installer would allow to get third party library the same way you get Qt itself, or integration with Qt Creator would allow to find and use third party libraries for specific purposes natively in the environment you use to develop your application. One topic which came up was a classification of libraries to provide some information about stability, active development, and support. We will need to look into that, if there are some automatic indications we can offer for activity, or what else we can do to help people to find suitable libraries for their projects.
It's quite intriguing to follow what is going on in the Qt world. As an application developer there is a lot of good stuff to choose from. Inqlude intends to help with that. The web site is there and will continue to be updated and there also are a number of ideas and plans how to improve Inqlude to serve this purpose. Stay tuned. Or get involved. You are very welcome.

SSH Schlüssel beim KDE-Login entsperren

Deploying Limba packages: Ideas & current status
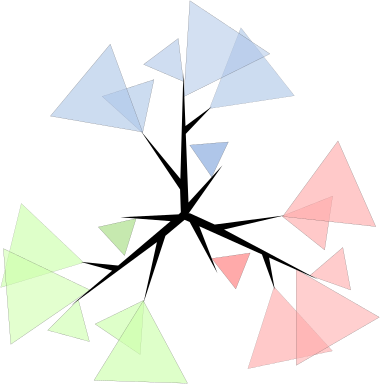 The Limba project does not only have the goal to allow developers to deploy their applications directly on multiple Linux distributions while reducing duplication of shared resources, it should also make it easy for developers to build software for Limba.
Limba is worth nothing without good tooling to make it fun to use. That’s why I am working on that too, and I want to share some ideas of how things could work in future and which services I would like to have running. I will also show what is working today already (and that’s quite something!). This time I look at things from a developer’s perspective (since the last posts on Limba were more end-user centric). If you read on, you will also find a nice video of the developer workflow 
1. Creating metadata and building the software
To make building Limba packages as simple as possible, Limba reuses already existing metadata, like AppStream metadata to find information about the software you want to create your package for.
To ensure upstreams can build their software in a clean environment, Limba makes using one as simple as possible: The limba-build CLI tool creates a clean chroot environment quickly by using an environment created by debootstrap (or a comparable tool suitable for the Linux distribution), and then using OverlayFS to have all changes to the environment done during the build process land in a separate directory.
To define build instructions, limba-build uses the same YAML format TravisCI uses as well for continuous integration. So there is a chance this data is already present as well (if not, it’s trivial to write).
In case upstream projects don’t want to use these tools, e.g. because they have well-working CI already, then all commands needed to build a Limba package can be called individually as well (ideally, building a Limba package is just one call to lipkgen).
I am currently planning “DeveloperIPK” packages containing resources needed to develop against another Limba package. With that in place and integrated with the automatic build-environment creation, upstream developers can be sure the application they just built is built against the right libraries as present in the package they depend on. The build tool could even fetch the build-dependencies automatically from a central repository.
2. Uploading the software to a repository
While everyone can set up their own Limba repository, and the limba-build repo command will help with that, there are lots of benefits in having a central place where upstream developers can upload their software to.
I am currently developing a service like that, called “LimbaHub”. LimbaHub will contain different repositories distributors can make available to their users by default, e.g. there will be one with only free software, and one for proprietary software. It will also later allow upstreams to create private repositories, e.g. for beta-releases.
3. Security in LimbaHub
Every Limba package is signed with they key of its creator anyway, so in order to get a package into LimbaHub, one needs to get their OpenPGP key accepted by the service first.
Additionally, the Hub service works with a per-package permission system. This means I can e.g. allow the Mozilla release team members to upload a package with the component-ID “org.mozilla.firefox.desktop” or even allow those user(s) to “own” the whole org.mozilla.* namespace.
This should prevent people hijacking other people’s uploads accidentally or on purpose.
4. QA with LimbaHub
LimbaHub should also act as guardian over ABI stability and general quality of the software. We could for example warn upstreams that they broke ABI without declaring that in the package information, or even reject the package then. We could validate .desktop files and AppStream metadata, or even check if a package was built using hardening flags.
This should help both developers to improve their software as well as users who benefit from that effort. In case something really bad gets submitted to LimbaHub, we always have the ability to remove the package from the repositories as a last resort (which might trigger Limba to issue a warning for the user that he won’t receive updates anymore).
What works
Limba, LimbaHub and the tools around it are developing nicely, so far no big issues have been encountered yet.
That’s why I made a video showing how Limba and LimbaHub work together at time:
Still, there is a lot of room for improvement – Limba has not yet received enough testing, and LimbaHub is merely a proof-of-concept at time. Also, lots of high-priority features are not yet implemented.
LimbaHub and Limba need help!
At time I am developing LimbaHub and Limba alone with only occasional contributions from others (which are amazing and highly welcomed!). So, if you like Python and Flask, and want to help developing LimbaHub, please contact me – the LimbaHub software could benefit from a more experienced Python web developer than I am (and maybe having a designer look over the frontend later makes sense as well). If you are not afraid of C and GLib, and like to chase bugs or play with building Limba packages, consider helping Limba development 
Criando entradas no Menu do lançador de aplicativos
Aqui vai uma dica legal pra você que instalou por exemplo, um software pelo PlayOnLinux, mas que então percebeu que não foi criado um atalho no Menu de aplicativos.
Calma…é bem simples resolver essa questão…
1- Clique com o botão direito em cima do ícone do Menu de aplicativos e selecione Editar Aplicativos.
2- Na janela que abrirá escolha o submenu desejado, neste caso, por exemplo vamos criar as entradas para o Microsoft Office no Submenu Suíte de Escritório.
3- Clique em novo Submenu na barra superior e escreva Microsoft Office
4- Clique em Novo item na barra superior
O PlayonLinux costuma criar atalhos na Área de Trabalho, então..
5- Clique com o botão direito do mouse em cima do atalho, no caso foi o Excel e, depois em Propriedade
6- Na janela que abriu, copie o conteúdo que está na caixa comando
 7- Volte no editor do Menu de Aplicativos e cole o que você copiou na caixa de Comando
 8- Na Caixa nome digite o nome do Aplicativo.
9- Para deixar o menu bacana, você inserir ícones, que por padrão o PlauonLinux utiliza a pasta ful_size, qua fica oculta na pasta do usuário. Você localizá-la asim: /home/SEU USUÁRIO/.PlayOnLinux/icones/full_size/
10- Eu costumo utilizar esta pasta para guardar os ícones dos aplicativos que eu for utilizar através de ma instalação feita com o PlayOnLinux.
Um abraço