
 Member
 anaumov
Qt Developer Days 2010

Today I got a email about registration for “Qt Developer Days 2010”. This conference will be in Munich (October 11-13) and in San Francisco (November 1-3). I think this is the biggest and best Qt-event. Last time there was more than 700 people. It’s very interesting for me as the KDE developer, but it’s not free like FOSDEM or openSUSE Conference 
For example, 3 days in Munich cost 499€ (if you pay befor 15th september and 699€ if you pay after). Ok, I know that Qt/Nokia makes very good coffee, but anyway this event is very costly for students like me 
I will wait for the openSUSE Conference and meet the Qt/KDE hackers there.
ru meeting 5 июня в 18:00 (МСК)
Топики выдвинутые к обсуждению:
1. отчёт по выполненным задачам, поставленным на прошлой встрече
2. openSUSE Conference 2010
3. feeds с блогов участников русского сообщества openSUSE для http://planetsuse.org/ru/
4. перевод официальной документации для openSUSE 11.3
5. feedback oб официальном форуме
6. русские сообщества openSUSE на open-suse.ru, linuxforum.ru и unixforum.org
7. старт вычитывания и коррекции ошибок и опечаток libzypp и процесса инсталяции
Приглашаю всех не равнодушных к проекту openSUSE
openGarrobito 0.4.5
Greetings!
This time I come to announce the departure of openGarrobito FULL 0.4.5 and openGarobito LITE edition 04.3
That brings improvements:
1. Support for Broadcom wireless card brand (now supports more wireless cards because of the new module broadcom-sta)
2. The LITE version is made from scratch to weigh less and reached a 4 GB USB)
3. Update to KDE 4.4.3
4. All software has been updated to May 11, 2010
5. With driver for ATI graphics cards, osea brings fglrx, nvidia cards are still in process, I hope soon;)
There are few things that were corrected, but making major changes jejeje
http://ecentro.uca.edu.ni/~novell/

AcetoneISO2 and LXDE
I am sure that most of you know and like acetoneiso2, a nice tool to menage isos and lots of other things. Latest release, 2.2.1 support only kde, gnome and xfce as DE and allow to open their file managers to browse files and mounted stuffs…
So, you know, FLOSS is our world.. i took the code, and improved it, just a trivial change, but really nice. I added LXDE/PcmanFM support, as you can see from the picture:
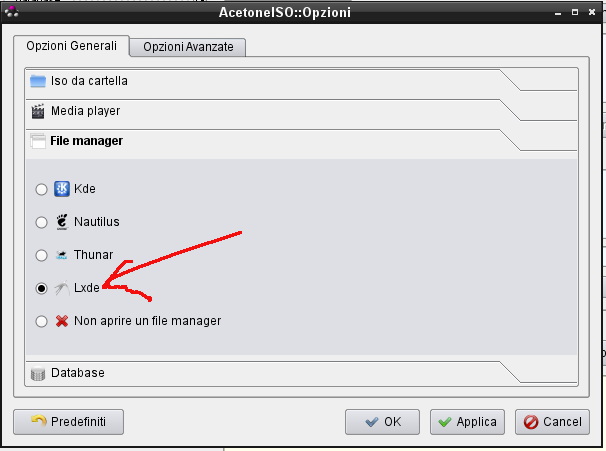
Now you can have acetoneiso2 run pcmanfm too.
The patched package is already into Packman repository and a submit-request (#41069) has been submitted to KDE:KDE4:Community repository, so hopefully, it would be available even there quite soon.
So people.. enjoy it 
Andrea
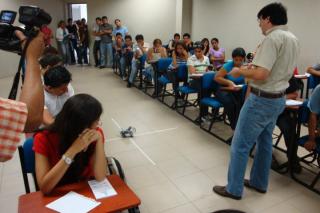
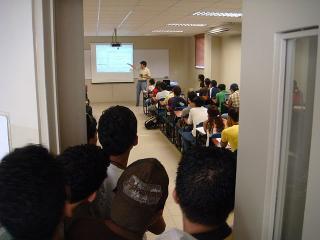
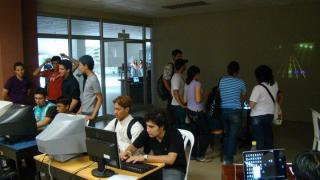
FLISOL 2010 GYE – Some Late Numbers and Experiences
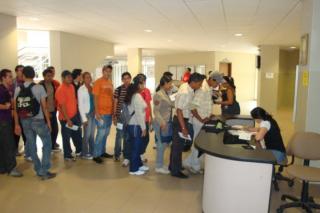
I know, I know… it is a bit late ( more than a month ) since FLISOL took place in Guayaquil-Ecuador this year… but a lot a time consuming activities have stopped me from reporting some results. Even though more than a month have passed, I think I should let you know what happened.
Compared to previous years, the event of this year was relatively smaller. An approximate of 200 people assisted, from which for the ~80% it was their first time that assisted to FLISOL, 50% of visitors had not used or heard about FLOSS before, ~13% were below 18 years old and ~75% were between 18-35 years old.

There are 3 things that I would like to point from this year’s event:
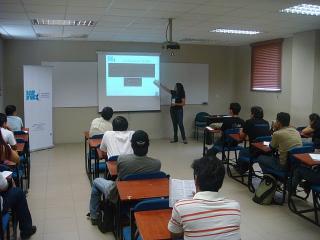
- Most of the event was organized by the new members from Kokoa ( ESPOL’s Free Software Community ), who I send my congratulations since it was a very good start. They were just newbies and took the challenge of organizing the biggest FLOSS event in town. As an old Kokoa kore member I know how difficult can be to organize FLISOL, and I can say those guys did a good job.
- One of the rooms that caught most of the attention of the visitors was the gaming room. It mostly attracted the young visitors from different genres. I think that gnu/linux is a niche that has started to be exploited in the gaming area. Personally I have tried some games since the very first time I had openSUSE (SuSE Linux back then) installed and I have seen how good known titles and good quality indie games are coming to gnu/linux. I think that with openSUSE GameStore , some gamers and developers from the openSUSE community we can try to promote our lovely green as a good platform for gaming.
- Last but not least, I would like to say thanks to Jarflex, ESPOL’s Digital Culture Club, Ecuagamers and all the people who contributed to make this event possible.


Summarizing, this year it was seen a collaboration between different groups and enterprises somehow related to FLOSS that , locally, was not seen before. This might be a further step of what was started in 2007 when we tried to take FLISOL from a FLOSS installation festival for FLOSS enthusiast to a FLOSS event that will catch the attention of people of different ages with different interests.
Until the next post people of the openSUSEsphere…
jaom7
PS.1: Some pictures by: @sarahjessi, Kmeng, @_abejamaya , Jarflex and Ecuagamers
PS.2: If you are interested or have some ideas related to openSUSE gaming [site] please write a comment or contact me.

How to run a single rails unit test
This post explains how to execute a single unit test (or even a single test method) instead of running the complete unit test suite.
In order to run the unit tests of your rails application, basically you have these official possibilities:
-
rake test: runs all unit, functional and integration tests. -
rake test:units: runs all the unit tests. -
rake test:functionals: runs all the functional tests. -
rake test:integration: runs all the integration tests. Each one of these commands requires some time and they are not the best solution while developing a new feature or fixing a bug. In this circumstance we just want to have a quick feedback from the unit test of the code we are editing.
Waiting for all the unit/functional tests to complete decreases our productivity, what we need is to execute just a single unit test. Fortunately there are different solutions for this problem, let’s go through them.
The easy approach: use your favorite IDE
Most of the IDE supporting ruby allow you to run a single unit test. If you are using Netbeans running a single unit test is really easy:
- make sure the editor if showing the file you want to test or the file containing its unit tests
- Hit Ctrl+Shift+F6 or click on the following menu entry: Debug->Debug Test File Two new windows will be opened: one will contain the output produced by your unit test, the other one will show the results of the unit test.
As you will notice the summary window contains also some useful information like the:
- hyper links to the exact location of the code that produced the error/failure.
- execution time required by each one of the test methods. As you will experience it will be like “compiling” your ruby code.
From the console
If you are not using Netbeans you can always rely on some command line tools.
No additional tools
These “tricks” don’t require additional gems, hence they will work out of the box.
The first solution is to call this rake task:
rake test TEST=path_to_test_file
So the final command should look like
rake test TEST=test/unit/invitation_test.rb
Unfortunately on my machine this command repeats the same test three times, I hope you won’t have the same weird behavior also on your systems…
Alternatively you can use the following command:
ruby -I"lib:test" path_to_test_file"
It’s even possible to call a specific test method of your testcase:
ruby -I"lib:test" path_to_test_file -n name_of_the_method"
So calling:
ruby -I"lib:test" test/unit/invitation_test.rb - test_should_create_invitation
will execute only _InvitationTest::test_should_createinvitation.
It’s also possible to execute only the test methods matching a regular expression. Look at this example:
ruby -I"lib:test" test/unit/invitation_test.rb
-n /.*between.*/
This command will execute only the test methods matching the /.between./ regexp.
Using the single_test gem
If you want to avoid the awful syntax showed in the previous paragraph there’s a gem that can help you, it’s called single_test.
The github page contains a nice documentation, but let’s go through the most common use cases.
You can install the gem as a rails plugin:
script/plugin install git://github.com/grosser/single_test.git
single_test will add new rake tasks to your rails project, but won’t override the original ones.
Suppose we want to execute the unit test of user.rb, just type the following command:
rake test:user
If you want to execute the functional test of User just call:
rake test:user_c
Appending _”c” to the class name will automatically execute its functional test (if it exists).
It’s still possible to execute a specif test method:
rake test:user_c:_test_name_
So calling:
rake test:user_c:test_update_user
Will execute the _test_updateuser method written inside of _test/functional/user_controllertest.rb.
It’s still possible to use regexp:
rake test:invitation:.*between.*
This syntax is equivalent to ruby -I"lib:test" test/unit/invitation_test.rb
-n /.*between.*/.
Possible issues
When a single unit test is run all the usual database initialization tasks are not performed. If your code is relying on newly created migrations you will surely have lots of errors. This is happening because the new migrations have not been applied to the test database.
In order to fix these errors just execute:
rake db:test:prepare
before running your unit test.
openSUSE at FLISoL Chile
As you already know, the Festival Latinoamericano de Instalacion de Software Libre event will be held this Saturday here in Chile.
In La Serena we are starting around 9 am at Universidad de La Serena campus Isabel Bongard, with plenty of fun talks and room for installations, I am more than ready to install our awesome green! =). By the way, I will be creating an ISO with SUSE Studio so everyone can grab it on USB devices.
Some talk topics we are presenting: KVM, Free Knowledge, Linux beyond the Desktop, and Contributing to openSUSE without having to be a developer.
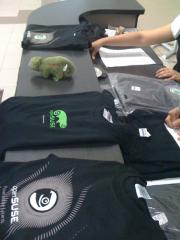
I would like to thank Andreas and everyone at Novell who has been supporting the Ambassadors Program, shipping DVDs, Geekos, T-shirts that the audience really appreciates and do make a difference.
Обновление openSUSE 11.2 до 11.3 M7
Несколько тестовых прогонов на виртуалке позволили выявить несколько подводных камней, на которые можно наткнуться при выполнении обновления "живой" системы. О них я расскажу по ходу дела.
На моей openSUSE подключено много дополнительных репозиториев: это конечно же разные репозитории, позволяющие воспроизводить multimedia-файлы. К ним относятся Packman, libdvdcss и Videolan. Поскольку этих репозиториев под openSUSE 11.3 нет - я их оставил нетронутыми. Интересно было посмотреть - будут ли проблемы с зависимостями при обновлении.
Зато я отключил следующие репозитории:
- Mozilla - в котором всегда есть сборка последнего Firefox;
- OpenOffice - назначение аналогично;
- Virtualization - последние версии kvm и qemu.
Затем я просто перебил номер версии openSUSE с 11.2 на 11.3 в файлах репозиториев OSS (opensource ПО), Non-OSS и Updates. Затем выполнил команду zypper ref , чтобы обновить информацию о репозиториях.
Теперь об обещанном подводном камне. В процессе обновления, при изменении файлов в /etc/sysconfig , zypper вызывает SuSEconfig, для генерации разных системных файлов в /etc . В то же время в процессе обновления в системе меняются некоторые утилиты, которые вызываются из SuSEconfig'a, что иногда вызывает его временную неработоспособность. Эта "неработоспособность" приводит к тому, что процесс обновлений прерывается и не факт, что его затем можно будет продолжить корректно. Возможно, что к релизу этот баг подправят. Но пока работает именно так, как я описал. К счастью, SuSEconfig можно отключить. Делается это редактированием файла /etc/sysconfig/suseconfig. Достаточно в этом файле изменить значение переменной ENABLE_SUSECONFIG="yes" на ENABLE_SUSECONFIG="no" . После этого SuSEconfig работать больше не будет. На обновленной системе его затем будет необходимо включить обратно.
Затем, рекомендуется изменить в файле /etc/zypp/zypp.conf (если не сделали этого раньше) параметр commit.download.mode в значение DownloadInAdvance. Это заставит zypper выполнить обновление после предварительного выкачивания всех пакетов.
Последний шаг перед обновлением - это убедиться, что у вас на жестком диске достаточно места, для всех выкачиваемых пакетов. У меня объем скачивания составил 1,4Gb. Пакеты скачиваются в каталог /var/cache/zypp.
Ну а теперь просто выполняем обновление командой zypper dup . Перед выполнением обновления он предложит вам разрешить конфликты между пакетами. У меня это почему-то были пакеты, связанные с NetworkManager. Я предпочел удалить все эти пакеты. Их потом можно поставить из обновленной системы. Затем, zypper выкачивает необходимые пакеты и начинает выполнять обновление. У меня весь процесс обновления (без учета времени выкачивания пакетов) занял около 40 минут (Core 2 Duo 2,1 GHz). Достаточно быстро! По окончании процесса можно убедиться в том, что мы действительно обновили систему:
host13:/etc/X11 # cat /etc/SuSE-release
openSUSE 11.3 Milestone 7 (x86_64)
VERSION = 11.3
После завершения обновления включаем обратно SuSEconfig и запускаем его из командной строки: SuSEconfig (обратите внимание, что буква 'u' маленькая). После того, как он отработал, я решил перестраховаться и запустил еще раз mkinitrd - это скрипт, выполняющий пересборку initrd (образа, критичного для загрузки системы). Также желательно запустить zypper ve для дополнительной проверки системы на целостность зависимостей.
Если вывод этих команд не содержал информации об ошибках, вводим reboot и перезагружаем систему. После удачной (я надеюсь!) загрузки мы попадаем в обновленную систему. В последнем Milestone разработчики openSUSE потихоньку начинают внедрять новое оформление. Новые обои по умолчанию видно на этом скриншоте:

Примерно такая же картинка в графическом меню grub и в GDM.
Система вроде бы пока работает достаточно стабильно. Замеченые пока ошибки:
1. Иногда при загрузке системы разрешение внезапно устанавливается в 640х480 . У меня подозрение, что это пока KMS подглючивает.
2. Немного косячит неправильно настроенный PolicyKit - система постоянно спрашивает root'овый пароль для перезагрузки, монтирования флешек и перехода в спящий режим. Насколько я разобрался - причины кроются в том, что из системы убрана поддержка HAL, а новые политики пока не написаны.
3. При выходе из спящего режима включается на полную вентилятор процессора.
Все эти ошибки терпимые и до релиза вполне можно жить.
После обновления haldaemon остается работать в системе и его необходимо принудительно отключить:
host13:/etc/X11 # chkconfig haldaemon off
Х-сервер теперь собран с поддержкой udev вместо HAL:
host13:~ # ldd $(which X)
linux-vdso.so.1 => (0x00007fff401ff000)
libudev.so.0 => /lib64/libudev.so.0 (0x00000036e8600000)
libcrypto.so.1.0.0 => /usr/lib64/libcrypto.so.1.0.0 (0x00000036d2800000)
libdl.so.2 => /lib64/libdl.so.2 (0x00000036d4600000)
libpciaccess.so.0 => /usr/lib64/libpciaccess.so.0 (0x00000036d3000000)
libXfont.so.1 => /usr/lib64/libXfont.so.1 (0x00000036d5200000)
libXau.so.6 => /usr/lib64/libXau.so.6 (0x00000036d6200000)
libpixman-1.so.0 => /usr/lib64/libpixman-1.so.0 (0x00000036dee00000)
libXdmcp.so.6 => /usr/lib64/libXdmcp.so.6 (0x00000036da200000)
libm.so.6 => /lib64/libm.so.6 (0x00000036d3e00000)
librt.so.1 => /lib64/librt.so.1 (0x00000036d4e00000)
libc.so.6 => /lib64/libc.so.6 (0x00000036d3a00000)
libz.so.1 => /lib64/libz.so.1 (0x00000036d4a00000)
/lib64/ld-linux-x86-64.so.2 (0x00000036d2400000)
libfreetype.so.6 => /usr/lib64/libfreetype.so.6 (0x00000036d7600000)
libfontenc.so.1 => /usr/lib64/libfontenc.so.1 (0x00000036d3400000)
libpthread.so.0 => /lib64/libpthread.so.0 (0x00000036d4200000)
Теперь для его настроек используется каталог /etc/X11/xorg.conf.d:
host13:~ # ls /etc/X11
.qtrc.lock Xmodmap.remote fs proxymngr rstart xdm xim.d xorg.conf.d
Xmodmap Xresources lbxproxy qtrc x11perfcomp xim xinit xs
host13:~# ls /etc/X11/xorg.conf.d/
10-evdev.conf 20-synaptics.conf 50-device.conf 50-screen.conf 90-keytable.conf
11-mouse.conf 20-wacom.conf 50-monitor.conf 50-vmmouse.conf
В данном каталоге лежат файлы, настраивающие отдельные аспекты настройки Х-сервера. Вот, например, файл для evdev:
host13:~ # cat /etc/X11/xorg.conf.d/10-evdev.conf
#
# Catch-all evdev loader for udev-based systems
# We don't simply match on any device since that also adds accelerometers
# and other devices that we don't really want to use. The list below
# matches everything but joysticks.
Section "InputClass"
Identifier "evdev pointer catchall"
MatchIsPointer "on"
MatchDevicePath "/dev/input/event*"
Driver "evdev"
EndSection
Section "InputClass"
Identifier "evdev keyboard catchall"
MatchIsKeyboard "on"
MatchDevicePath "/dev/input/event*"
Driver "evdev"
EndSection
Section "InputClass"
Identifier "evdev touchpad catchall"
MatchIsTouchpad "on"
MatchDevicePath "/dev/input/event*"
Driver "evdev"
EndSection
Section "InputClass"
Identifier "evdev tablet catchall"
MatchIsTablet "on"
MatchDevicePath "/dev/input/event*"
Driver "evdev"
EndSection
Section "InputClass"
Identifier "evdev touchscreen catchall"
MatchIsTouchscreen "on"
MatchDevicePath "/dev/input/event*"
Driver "evdev"
EndSection
В общем и целом все пока нравится, вроде все работает.

RAnsrID - Redundant Array of Non-Striped Really Independent Disks
The whole thing is implemented as a network block device (nbd), and will be presented (in an early, but at least already partially working state) on LinuxTag 2010 in Berlin.
Note that this is not a direct competitor to a standard RAID solution - in fact, I propose using a RAID 1 for the journal it needs (e.g. use the system disk - you're already using a RAID there, right?). For a comparison table check the project page.
Source will be available soon, I've not decided which git hoster to use yet. I don't think it's reasonable to put this on freedesktop, because is relation to freedesktop to close to nothing. I might change my mind, though
 .
.
Управление пакетами в (open)SUSE с помощью zypper

- «родной» формат репозиториев yast;
- репозитории yum (rpm repo-md);
- iso-образы репозиториев (да-да, не нужно их распаковывать!) ;
- локальный каталог с rpm-пакетами;
- то, что писать уже практически не обязательно - разные сетевые источники репозиториев — http, ftp, nfs.
Oб остальных интересностях я расскажу по ходу дела.
- DownloadOnly — опция, которая легко заменяется ключом --dry-run, т. е. выкачивание всех пакетов необходимых для обновления без их установки.
- DownloadInAdvance — сначала выкачать все пакеты, требующие обновления, затем начать процесс их установки.
- DownloadInHeaps — опция аналогичная представленной выше, но в данном случае закачка и установка пакетов выполняется «порциями», не нарушающими целостность системы. Примерно также ведет себя пакетный менеджер в Mandriva.
- DownloadAsNeeded — традиционное поведение. Закачка и установка осуществляется по одному пакету.
Еще примеры:
Обновить метаданные репозитория можно командой zypper ref и это необходимо делать всякий раз перед выполнением обновления (либо включить autorefresh для всех репозиториев - см.ниже).
В первой колонке приведен порядковый номер репозитория, во второй и третьей его название и описание. Четвертая и пятая колонки показывают включен ли данный репозиторий и включено ли его автообновление (autorefresh). Если последняя возможность включена, то при каждом своем запуске zypper будет проверять нужно ли обновление метаданных репозитория и, если нужно, выполнять его. В противном случае, вам нужно будет делать это собственноручно командой zypper ref (refresh).
- собственно, пакеты (и если ничего не указывать специально, то имеются в виду именно они);
- патчи (patch) (репозитории могут содержать просто патчи, а не пакеты с обновлениями);
- шаблоны (pattern) - группы пакетов, устанавливающие ту или иную функциональность;
- продукты (product) - совсем редко встречающийся зверь - это группы пакетов для работы того или иного продукта;
- пакет с исходниками (srcpackage) - это обычный src.rpm.
Тип пакета указывается опцией -t . Например, получить список доступных шаблонов можно командой zypper patterns. И поставить тот, что нужен, командой: