
openSUSE Leap "15.2" Enters Release Candidate Phase
The openSUSE community, contributors and release engineers for the project have entered into the release candidate phase today after the Build “665.2” snapshot was released for the upcoming openSUSE Leap “15.2” version.
In an email to the openSUSE Factory mailing list, Leap release manager Lubos Kocman recommended Beta and RC users using the “zypper dup” command in the terminal prior switching to the General Availability (GA).
The release candidate signals the package freeze for software that will make it into the distribution. Among some of the packages that are expected in the release are KDE’s Plasma “5.18” Long-Term-Support version, GNOME “3.34” and Xfce “4.14”. New package for Artificial Intelligence and data scientist will be in the release. The release will also contain the tiling Wayland compositor Sway, which is a drop-in replacement for the i3 window manager for X”11”. The DNF package manager has been rebased to version “4.2.19”, which brings many fixes and improvements. In addition, a lightweight C implementation of DNF called “Micro DNF” is now included. Pagure, which provides an easy, customizable, lightweight solution for setting up your own full-featured Git repository server, has been updated to version “5.10.0”. A list of some of the packages in Leap “15.2” can be found on the openSUSE Wiki.
During the development stage of Leap versions, contributors, packagers and the release team use a rolling development method that are categorized into phases rather than a single milestone release; snapshots are released with minor version software updates once passing automated testing until the final release of the Gold Master (GM). At that point, the GM becomes available to the public (GA expected on July “2”) and the distribution shifts from a rolling development method into a supported release where it receives maintenance and security updates until its End of Life (EOL). The EOL of openSUSE Leap “15.1” is six months after the release of Leap “15.2”, so users of “15.1” will need to update by the beginning of “2021”.
Kocman listed the following important dates related to the release: June “22”: Translation deadline for packages June “23”: Final package submission deadline June “23”: Translation deadline for infrastructure June “25”: Gold Master followed by a public release the next week on Thursday, July 2.
KDE Applications, Wireshark, IceWM update in Tumbleweed
The last week has produced a total of three openSUSE Tumbleweed snapshots bringing the total amount of snapshots for the month to 18.
All 18 snapshots have recorded a stable rating above 91, according to the Tumbleweed snapshot reviewer. With 14 of them, recording a rating of 99 and the last two snapshots trending at a 99 rating.
The most recent 202000526 snapshot provided the 3.2.4 release of Wireshark. The new version fixed a Common Vulnerabilities and Exposures where it was possible to make Wireshark crash by injecting a malformed packet onto the wire or by convincing someone to read a malformed packet trace file. Linux Kernel 5.6.14 re-established support for RTL8401 chip version. DNS server and client utilities package bind 9.16.3 fixed to security problems and added engine support for OpenSSL Edwards-curve Digital Signature Algorithm implementation. Document viewer evince 3.36.1 updated translations, fixed an incorrect markup in the Czech User Interface and updated the French help image. SSL VPN client package openconnect 8.10 installed a bash completion script and fixed a potential buffer overflow with security communications library GnuTLS. GNOME’s 0.30.10 image organizer shotwell, which was the subject of a recently settled a patient lawsuit, modified web publishing authentication to comply with Google’s requirements.
Snapshot 202000523 updated the rest of KDE ‘s Applications 20.04.1 stack. Among the fixes highlighted for the release are having kio-fish only store passwords in KWallet if the user asked for it, Kdenlive video editor had many stability updates, and fixes were made to the JuK music player that sometimes crashed. DNS resolver package unbound 1.10.1 offered up two security fixes for CVE 2020-12662 and 2020-12663. Perl Compatible Regular Expressions (pcre2) updated to version 10.35 and the Ruby code style checking tool rubygem-rubocop had multiple community contributions in the recent update to version 0.83.0, which added new features, support and fixes.
Application 20.04.1 began updating in Tumbleweed’s 202000523 snapshot where the file manager Dolphin received a crash fix if no Konsole is installed. The ImageMagick package fixed a black line bug when converting gif images in the snapshot. There was added filesystem UUID support in the erofs-utils 1.1 package update. The package for the window manager for the X Window System, icewm, updated to version 1.6.5 and fix for positioning of splash window on multi-head displays. IceWM also provided fixes and updates for both the configure and the cmake build. The Mail Transport Agent, postfix, updated to 3.5.2; the release fixed a bug introduced in postfix 2.2 where a Transport Layer Security (TLS) error for a database client caused a false ‘lost connection’ error for an Simple Mail Transfer Protocol (SMTP) over a TLS session in the same Postfix process. Python3 3.8.3 fix possible memory leak and improved error reporting and sudo 1.9.0 updated the default TLS listener to only be enabled when either the TLS certificate file is explicitly specified in sudo_logsrvd.conf or the default TLS certificate file exists in the file system.

 Member
 federico1
Looking for candidates for the 2020 GNOME Foundation elections
I forgot to write this a few days ago; I hope it is not too late.
The GNOME Foundation's elections for the Board are coming up, and we are looking for candidates. Of the 7 directors, we are replacing 4, and the 3 remaining positions remain for another year. You could be one of those four.
I would like it very much if there were candidates and directors that fall outside the box of "white male programmer"; it is unfortunate that for the current Board we ended up with all dudes. GNOME has a Code of Conduct to make it a good place to be.
Allan Day wrote a review of the Board's activies for the last year. We are moving from a model where the Board does a little bit of everything, to one with a more strategic role — now that the Foundation has full-time employees, they take care of most of the executive work.
The call-for-candidates is open until May 29, so hurry up!

Welcome PDF Quirk
How often have you scanned a letter, a certificate or whatever and looked for the right way to call $UTILITY to convert it to a PDF that can be shared via internet?
For this very common use case I could not find a tool to make that really easy for the Linux desktop. Given my mission to help making the Linux desktop more common in the small business world (do you know Kraft?) I spent some time starting this little project.
Please welcome PDF Quirk, the desktop app to easily create PDFs out of images from storage or directly from the scanner!
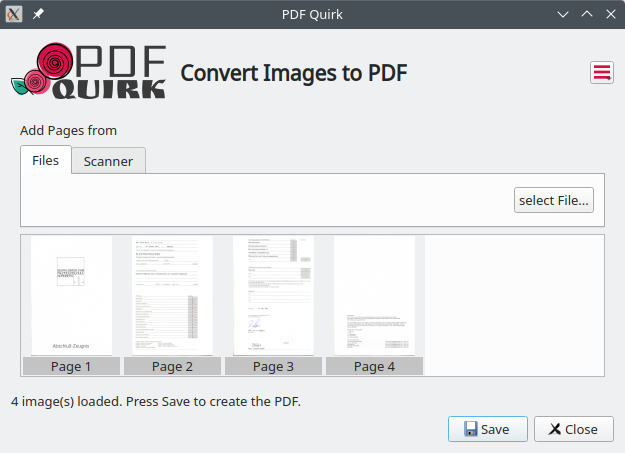
It is just what this screenshot shows: A one page app to pick images from either the harddisk or from a scanner if configured, and save it right away to a multi page PDF file. The only option is to have either monochrome or color scan. No further scan chi-chi, just nice PDFs within seconds.
Of course I did not want to spend too much time and reinvent the wheel. PDF Quirk uses ImageMagicks convert utility and the command line scan client scanimage of the SANE Project in the background. Both are welknown standard commands on Linux, and serve well for this purpose.
Maybe you find PDF Quirk useful and wanna try it. You find it on Github, or packages on the openSUSE Buildservice.
Contributions and comments are very welcome. It is a fun little project!

Looking for exceptions with awk
Sometimes you just need to search using awk or want to use plain bash to search for an exception in a log file, it’s hard to go into google, stack overflow, duck duck go, or any other place to do a search, and find nothing, or at least a solution that fits your needs.
In my case, I wanted to know where a package was generating a conflict for a friend, and ended up scratching my head, because I didn’t want to write yet another domain specific function to use on the test framework of openQA, and I’m very stubborn, I ended up with the following solution
journalctl -k | awk 'BEGIN {print "Error - ",NR; group=0}
/ACPI BIOS Error \(bug\)/,/ACPI Error: AE_NOT_FOUND/{ print group"|",
	$0; if ($0 ~ /ACPI Error: AE_NOT_FOUND,/ ){ print "EOL"; group++ };
}'
This is short for:
- Define
$START_PATTERN as /ACPI BIOS Error \(bug\)/,and$END_PATTERN as /ACPI Error: AE_NOT_FOUND/ - Look for
$START_PATTERN - Look for
$END_PATTERN - If you find
$END_PATTERNadd anEOLmarker (that is not needed, since the group variable will be incremented)
And there you go: How to search for exceptions in logs, of course it could be more complicated, because you can have nested cases and whatnot, but for now, this does exactly what I need:
EOL
10| May 20 12:38:36 deimos kernel: ACPI BIOS Error (bug): Could not resolve symbol [\_SB.PCI0.LPCB.HEC.CHRG], AE_NOT_FOUND (20200110/psargs-330)
10| May 20 12:38:36 deimos kernel: ACPI Error: Aborting method \PNOT due to previous error (AE_NOT_FOUND) (20200110/psparse-529)
10| May 20 12:38:36 deimos kernel: ACPI Error: Aborting method \_SB.AC._PSR due to previous error (AE_NOT_FOUND) (20200110/psparse-529)
10| May 20 12:38:36 deimos kernel: ACPI Error: AE_NOT_FOUND, Error reading AC Adapter state (20200110/ac-115)
EOL
11| May 20 12:39:12 deimos kernel: ACPI BIOS Error (bug): Could not resolve symbol [\_SB.PCI0.LPCB.HEC.CHRG], AE_NOT_FOUND (20200110/psargs-330)
11| May 20 12:39:12 deimos kernel: ACPI Error: Aborting method \PNOT due to previous error (AE_NOT_FOUND) (20200110/psparse-529)
11| May 20 12:39:12 deimos kernel: ACPI Error: Aborting method \_SB.AC._PSR due to previous error (AE_NOT_FOUND) (20200110/psparse-529)
11| May 20 12:39:12 deimos kernel: ACPI Error: AE_NOT_FOUND, Error reading AC Adapter state (20200110/ac-115)
EOL
12| May 20 13:37:41 deimos kernel: ACPI BIOS Error (bug): Could not resolve symbol [\_SB.PCI0.LPCB.HEC.CHRG], AE_NOT_FOUND (20200110/psargs-330)
12| May 20 13:37:41 deimos kernel: ACPI Error: Aborting method \PNOT due to previous error (AE_NOT_FOUND) (20200110/psparse-529)
12| May 20 13:37:41 deimos kernel: ACPI Error: Aborting method \_SB.AC._PSR due to previous error (AE_NOT_FOUND) (20200110/psparse-529)
12| May 20 13:37:41 deimos kernel: ACPI Error: AE_NOT_FOUND, Error reading AC Adapter state (20200110/ac-115)
EOL
So I could later write some code that looks per string, separates the string using the pipe | discards the group id, and adds that record to an array
of arrays or hashes: [ {group: id, errors: [error string .. error string] ]
openSUSE Talks at SUSECON Digital
SUSECON Digital 2020 starts today and it is free to register and participate in SUSE’s premier annual event. This year features more than 190 sessions and hands-on training from experts.
There are less than a handful of openSUSE related talks. The first openSUSE related talk is about openSUSE Kubic and takes place on May 20 at 14:00 UTC. In the presentation, attendees will receive an update about the last year of openSUSE Kubic development and see a demonstration on deploying Kubernetes with Kubic-control on a Raspberry Pi 4 cluster. Attendees will see how to install new nodes with YOMI, which is the new Salt-based auto installer that was integrated into Kubic.
The next talk is about open-source licenses. The talk will focus on the legal review app used by SUSE lawyers and the openSUSE Community. The app called Cavil was developed as an open source application to verify the use of licenses in open source software that help lawyers to evaluate risk related to software solutions. The talk scheduled for June 3 at 13:00 UTC will explain the ease of use for the lawyers and how the model significantly increases the throughput of the ecosystem.
The last openSUSE related talks centers on openSUSE Leap and SUSE Linux Enterprise. The talk will take place on June 10 at 13:30 UTC. Attendees will learn about the relationship between openSUSE Leap and SUSE Linux Enterprise 15, how it is developed and maintained and how to migrate instances of Leap to SLE.
The event as a whole is a great opportunity for people who are familiar with open-source and openSUSE. People who just want to learn more about the technology free of cost also have a great opportunity to experience the openness of SUSE and the event.
Cloud based workers for openQA
Cloud based workers for openQA
For those who do not know openQA, this is an automated test tool for operating systems and the engine at the heart of openSUSE’s automated testing initiative. It’s implemented mainly in Perl and uses QEMU, by default, for starting and controlling the virtual machines and OpenCV for fuzzy image matching. The general architecture is split in 2:
- One openQA server, aka openQA web UI
- Multiple openQA workers, which run the tests
If you want to know more about openQA, please check the documentation.
openQA workers, which run the tests, are generally on the same network as the openQA web UI server which is fine most of the time, but if some additionnal hardware must be added, they must be sent physically and only few people can take care of it, which can be problematic. One solution to this problem is to use cloud based machines, which are by definition on a separate network and accessible through Internet.
The good news is openQA supports such setups by using a local cache service on the worker. This service downloads the assets (ISO, HDD images, etc.) on demand through the openQA API via HTTPS, instead of using the legacy NFS mount method. Tests and needles are already in git repositories so they can be fetched from the remote git repositories directly instead of using them from the NFS share.
First tests have been done on local workers connected to openqa.opensuse.org (o3 for short), where NFS share has been replaced by the cache service. But this was still on the same network.
Then, more tests have been performed with additionnal aarch64 workers on:
- Public cloud: An AWS EC2 A1 bare metal instance which runs qemu/kvm based tests
- Remote machines:
- Marvell ThunderX2 and SolidRun HoneyComb LX2K which also runs qemu/kvm based tests
- A Softiron Overdrive 1000 which runs a generalhw backend to perform tests on real hardware, currently a Raspberry Pi 2 and two Raspberry Pi 3 (B and B+)
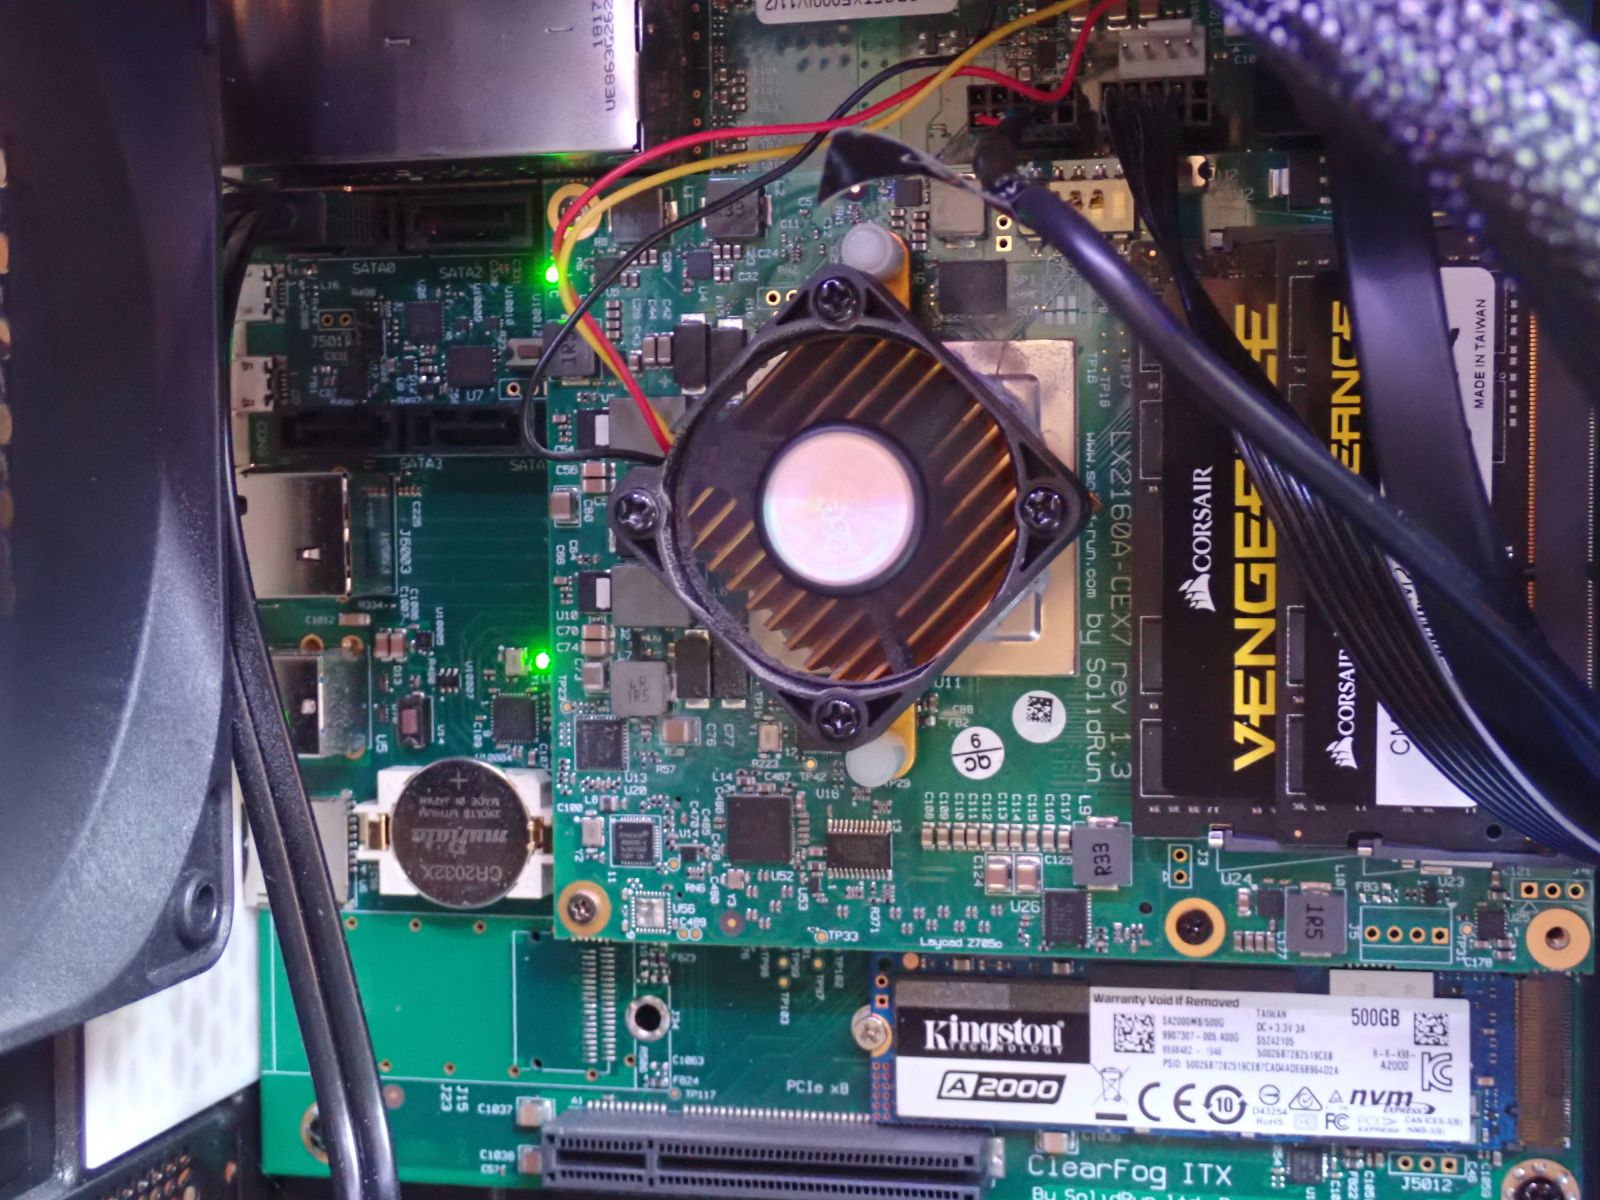
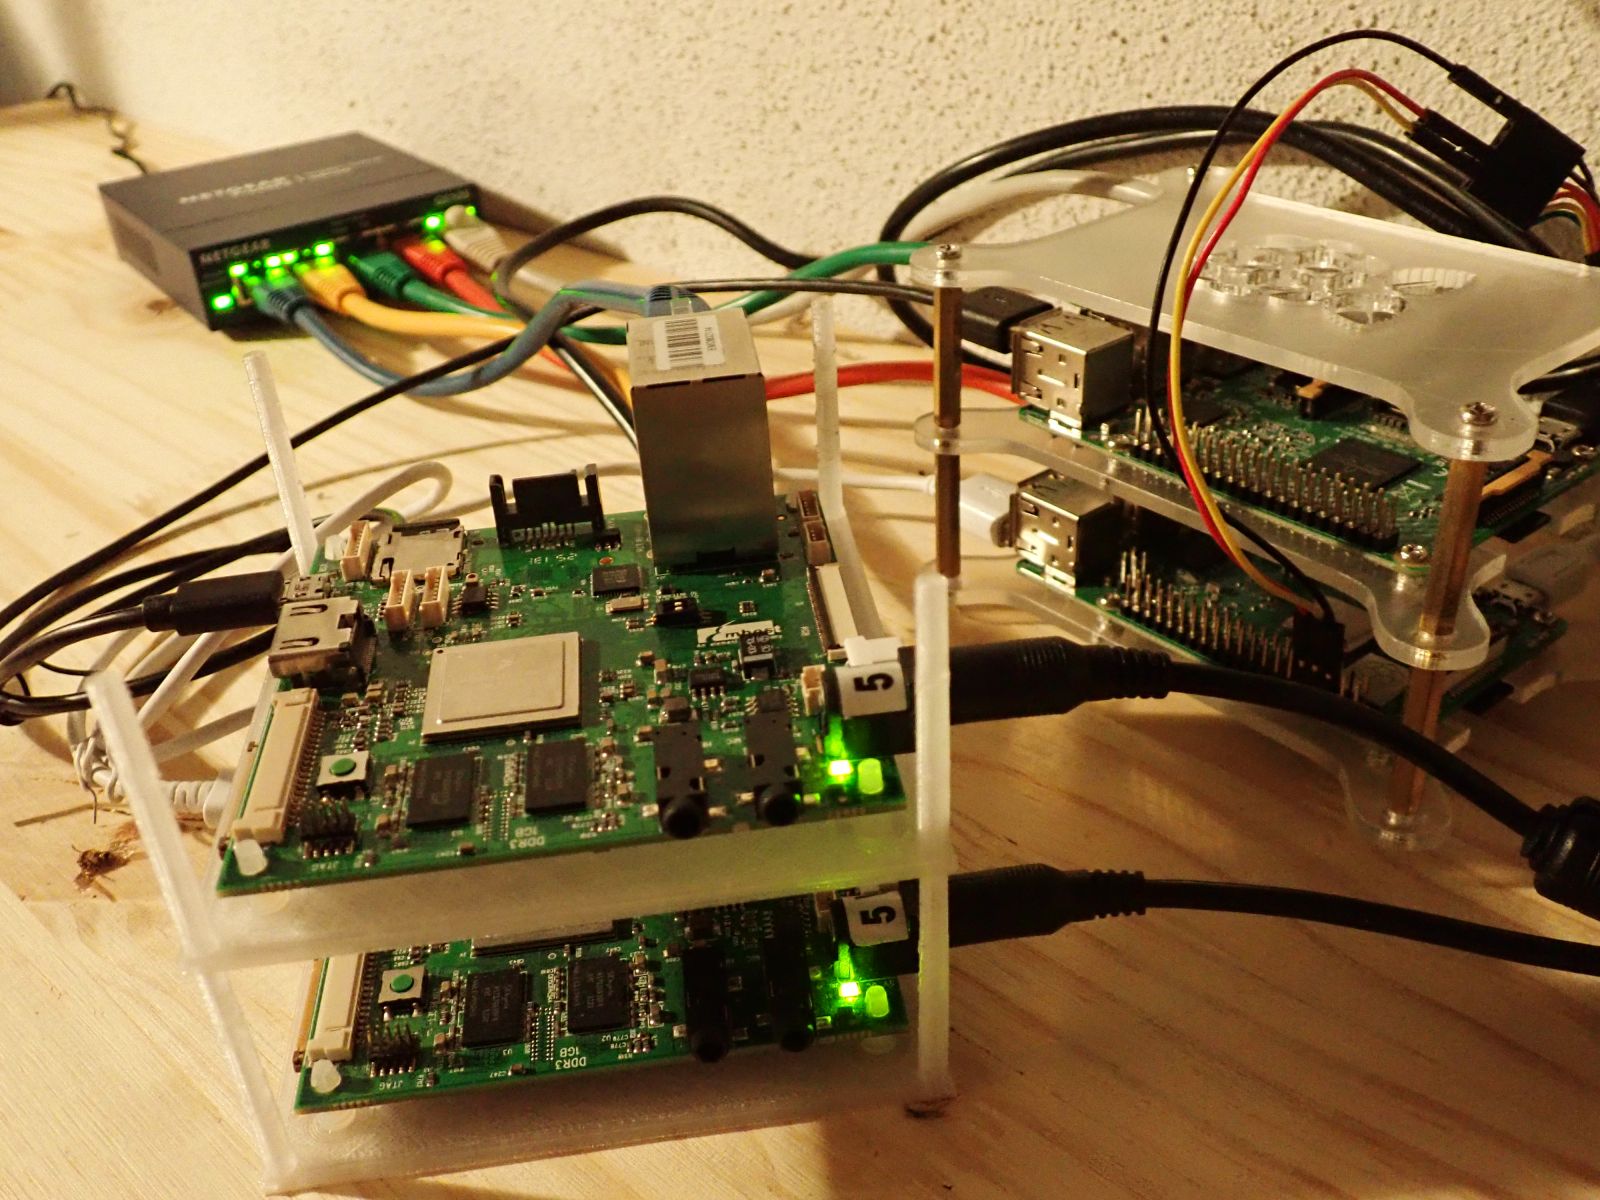
The only caveat is the developer mode which requires the worker to be reachable from the openQA web UI server at specific ports, so here, reachable on the Internet. Unfortunately, this is not the case with current aarch64 remote workers.
For qemu based tests KVM enabled systems are highly recommended otherwise you will get very poor performances with runtimes about 10x slower compared to KVM enabled systems. So, you need to use bare metal instances or nested virtualization when available.
Now, we will detail specific configurations to setup a remote cloud worker which has access only to the openQA API.
Setup
Install required software on the worker
As any other openQA worker, you need to install some packages.
You likely want to use the latest version of openQA and thus use the binaries from devel:openQA and devel:openQA:Leap:15.1 projects (adjust the URL, if you do not use Leap 15.1):
sudo zypper ar -f https://download.opensuse.org/repositories/devel:/openQA/openSUSE_Leap_15.1/devel:openQA.repo
sudo zypper ar -f https://download.opensuse.org/repositories/devel:/openQA:/Leap:/15.1/openSUSE_Leap_15.1/devel:openQA:Leap:15.1.repo
If you use SLE15-SP1, you need to enable the matching repositories and also PackageHub:
sudo zypper ar -f https://download.opensuse.org/repositories/devel:/openQA/SLE_15_SP1/devel:openQA.repo
sudo zypper ar -f https://download.opensuse.org/repositories/devel:/openQA:/SLE-15/SLE_15_SP1/devel:openQA:SLE-15.repo
sudo SUSEConnect -p PackageHub/15.1/aarch64
Now, you can install required packages:
sudo zypper install openQA-worker os-autoinst-distri-opensuse-deps
Get API keys from openQA web UI host
Create a new set of API keys from openQA web UI or ask someone with admin permissions to create a set for you.
Setup worker to use API keys and cache
With a remote worker, you cannot NFS mount /var/lib/openqa/cache from the openQA server as only the openQA API is reachable. Instead, you must use the cache service as described below.
Update /etc/openqa/workers.ini with:
[global]
HOST = http://openqa.opensuse.org http://myotheropenqa.org
CACHEDIRECTORY = /var/lib/openqa/cache
CACHELIMIT = 50 # GB, default is 50.
CACHEWORKERS = 5 # Number of parallel cache minion workers, defaults to 5
Update /etc/openqa/client.conf with the key generated from web UI:
[openqa.opensuse.org]
key = 0123456789ABCDEF
secret = FEDCBA9876543210
Start and enable the Cache Service:
sudo systemctl enable --now openqa-worker-cacheservice
Enable and start the Cache Worker:
sudo systemctl enable --now openqa-worker-cacheservice-minion
Synchronize tests and needles
Tests and needles are not part of the cache services, but are hold in GIT repositories, so you need to setup an auto-update of those repos. Currently, the easiest way is to use the fetchneedles script from openQA package to fetch Git repos and create a cron job to update it often enough (say, every minute).
Install required package and run the fetch script a first time.
sudo zypper in --no-recommends openQA system-user-wwwrun
sudo /usr/share/openqa/script/fetchneedles
Also, if you plan to run MicroOS tests:
cd /var/lib/openqa/share/tests
sudo ln -s opensuse microos
cd /var/lib/openqa/share/tests/opensuse/products/microos
sudo ln -s ../opensuse/needles/
Now, add a cron job to fetch tests and needles every minute /etc/cron.d/fetchneedles:
-*/1 * * * * geekotest env updateall=1 /usr/share/openqa/script/fetchneedles
And restart the service:
sudo systemctl restart cron
Enjoy your remote worker
Now you can (re)start your worker(s):
sudo systemctl enable --now openqa-worker@1
And, your remote worker should be registered on the openQA server. Check the /admin/workers page from the openQA web UI. Enjoy!
Have a lot of fun!

Petition for the re-election of the openSUSE Board
Back in March, openSUSE member Pierre Böckmann wrote to the project mailing list calling for a non-confidence vote following recent events . Technically that means he was calling for a re-election of the current elected board.
The board election rules state:
If 20 per cent or more of the openSUSE members require a new board, an election will be held for the complete elected Board seats.
The openSUSE Election Committee was tasked to find our whether 20% of the community are actually calling for the re-election.
We have at our disposal the Helios voting platform which we can use to register an "answer" from community members. Instead of running a vote with several answer options, we consulted among Election Officials, and agreed that there will be only one answer to select, which will represent a virtual signature, similar to like signing an electronic petition. That will allow us to effectively measure whether 20% of the community are petitioning for a re-election of the openSUSE Board.
I sent an email to the project mailing list, on behalf on the Election Committee, explaining this process and called for comments by community members. If you are reading this post and would like to share your views about the procedure, then the deadline for comments submission is 20 May 2020 23h59 CET.
Remaining openSUSE Services to Switch to New Authentication System
Dear Community
On Monday 18 May 2020 at 07:00 UTC, we will switch over all remaining openSUSE services to the new authentication system. At the same time, the openSUSE forums will also move to the new setup in Nürnberg.
Important:
The change of our authentication system will require you to set a new password for your user account.
If you have already changed your password for the bugzilla or OBS migration, no action - besides using your new password is needed.
For more details about the changes to the authentication system, its migration status and the re-registration verification, please go to https://idp-portal-info.suse.com.

openSUSE Tumbleweed – Review of the week 2020/20
Dear Tumbleweed users and hackers,
This week we had some trickier changes entering our beloved distro, which might even have causes some (minor) problems for you while running zypper dup. It’s about how we package symlinks in our RPMs. So far, brp-check-suse converted the symlinks to absolute ones, then rpm warned about that fact. No way of pleasing the packager, right? The brp policy has been updated and symlinks are now all converted to relative ones (almost all – things to /dev stay absolute, e.g. /dev/null). This has some advantages when inspecting chroots or other layouts that could be mounted somewhere else. The issues seen were that not everything got rebuilt in the same go, which resulted in zypper complaining about file conflicts. The error was save to be ignored, but annoying. In total, we have released 5 snapshots this week (0507, 0508, 0509,0511 and 0513) containing these changes:
- Absolute->Relative symlink changes, as described
- Mozilla Firefox 76.0
- Linux kernel 5.6.11
- KDE Plasma 5.18.5
- KDE Frameworks 5.70.0
- NetworkManager 1.24.0
- Libvirt 6.3.0
- GCC 10.1 (still not the default compiler)
The staging projects are still filled up with these major changes:
- Inkscape 1.0
- TeXLive 2020
- RPM change: %{_libexecdir} is being changed to /usr/libexec. This exposes quite a lot of packages that abuse %{_libexecdir} and fail to build
- Qt 5.15.0 (currently release candidate is staged)
- Guile 3.0.2: breaks gnutls’ test suite, but it passes when built with gcc10
- GCC 10 as the default compiler