
 Member
 Victorhck
Mostrar el tiempo de wttr.in en tu escritorio con Conky
Veamos cómo hacer que Conky nos muestre el pronóstico del tiempo que ofrece wttr.in en nuestro escritorio

Conky es un viejo conocido de los diferentes escritorios dentro del mundo GNU/Linux. Es un monitor del sistema gráfico que podemos configurar de múltiples formas para que nos muestre diferente información de nuestro sistema.
En esta ocasión no haremos que nos muestre información de nuestro equipo, si no el pronóstico metereológico que ofrece wttr.in y que lo mostraremos en nuestro escritorio.
¿Escribiendo sobre conky en 2025? ¿No está ya muy desfasado eso de utilizar Conky en el escritorio en GNU/Linux? Bueno, como el blog es mío, escribo sobre lo que quiero y esto es algo con lo que he estado jugando unos días y quise compartirlo, quizás encuentras alguna cosa interesante, nunca se sabe…
El desarrollo de Conky sigue estando activo, así que será porque bastante gente lo utiliza en sus sistemas. En este caso no monitorizaremos datos de nuestro equipo para que nos los muestre en el escritorio, en este caso quiero mostrar cómo hacer que Conky muestre la previsión metereológica que ofrece la web wttr.in.
Esta web también es una conocida para los usuarios de GNU/Linux, ya que podemos ejecutar un comando que nos haga que la previsión metereológica se muestre en nuestro terminal. Simplemente escribe en una terminal el siguiente comando:
curl es.wttr.in/Madrid
Sustituyendo Madrid por la localidad que quieras saber en tu caso y obtendrás un pronóstico del día actual, de las próximas horas y los próximos días ¿no es genial?
Vale, en este caso, no mostraremos tanta información, si no solo la información del día actual y mostrando menos texto que no nos interesa. Así que si echas un vistazo a la ayuda de su web, verás que lo que yo quiero es algo así:
curl es.wttr.in/Madrid?0FQ
Añadimos las opciones detrás del símbolo ? de 0FQ para que muestre solo el día actual y no muestre información que no nos interesa. Ahora esto es lo que queremos que nos muestre Conky.
Pero haremos que en vez de formato texto nos lo ofrezca en una imagen .png la guardaremos en /tmp y con Imagemagick convertiremos el fondo negro que nos da la imagen en uno transparente.
Para ello en Conky deberemos hacerlo de la siguiente manera:
conky.text = [[
${texeci 300 curl es.wttr.in/Madrid_0FQ_lang=es.png -so /tmp/img.png && magick /tmp/img.png -transparent black /tmp/transparent.png
}
${image /tmp/transparent.png -p 0,0 -n}
]];
Todo esto integrado en un archivo llamado .conkyrc en tu /home. Te dejo el archivo completo:
conky.config = {
    background = true,
    update_interval = 60,
    double_buffer = true,
    no_buffers = true,
    text_buffer_size = 2048,
    override_utf8_locale = true,
    use_xft = true,
    font = 'NotoSansMNerdFontMono_Light:size=10',
    xftalpha = 0.8,
    alignment = 'bottom_left',
    gap_x = 30,
    gap_y = 40,
    minimum_width = 850,
    maximum_width = 850,
    minimum_height = 150,

    own_window = true,
    own_window_type = 'normal',
    own_window_transparent = true,
    own_window_argb_visual = true,
    own_window_argb_value = 0,
    own_window_hints = 'undecorated,below,sticky,skip_taskbar,skip_pager',

    draw_shades = false,
    draw_outline = false,
    draw_borders = false,
    draw_graph_borders = true,
    default_color = 'FFFFFF',
    color1 = 'FF815a',
    color2 = '8c81ff',
    use_xft = true,
    xftalpha = 0.2,
};

conky.text = [[
${texeci 300 curl es.wttr.in/Madrid_0FQ_lang=es.png -so /tmp/img.png && magick /tmp/img.png -transparent black /tmp/transparent.png
}
${image /tmp/transparent.png -p 0,0 -n}
]];
Esto lo mostrará en la esquina inferior izquierda, tal como se muestra en la captura que abre este artículo. Jugando con las opciones de alignment a top o right podrás hacer que se muestre en otras zonas de tu escritorio.
En la opción de font pon alguna que tengas instalada en tu equipo, aunque realmente en este caso no es necesario, porque vamos a mostrar una imagen.
Espero que te haya resultado útil de alguna forma este artículo, no olvides compartir tus comentarios en el blog, eso siempre se agradece! 
Enlaces de interés
Patrocinadores plata de Akademy-es 2025 de Málaga OpenSouthCode Edition II #akademyes
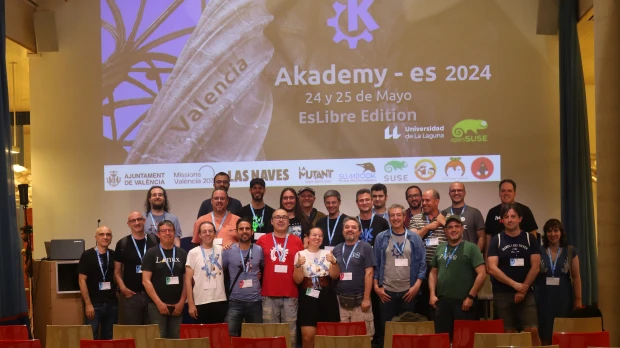
Todo evento supone siempre unos gastos, y una presencial también. El 20 y 21 de junio, es decir, en menos de un mes se va a celebrar en Málaga la esperada Akademy-es 2025, el encuentro organizado por KDE España para todos los simpatizantes del proyecto. Es hora de hablar de patrocinadores de Akademy-es 2025 de Málaga OpenSouthCode Edition II, la demostración de que las empresas tienen un papel importante en el desarrollo del Sofware Libre.
Patrocinadores plata de Akademy-es 2025 de Málaga OpenSouthCode Edition II #akademyes
Como sabrán los lector del blog en apenas un mes se va a celebrar Akademy-es 2025 de Málaga como una track de OpenSouthCode de forma presencial, el evento más importante para los desarrolladores y simpatizantes de KDE, organizado por KDE España.
Desde KDE Blog quiero animar a patrocinar este evento ya que cualquier organización que lo haga recibirá visibilidad no solo en España, sino a nivel mundial en el campo del Software Libre, ya que muchos de los integrantes de la Comunidad tienen fuertes vínculos con países de todo el mundo. Recordemos que muchos de los integrantes de KDE España son miembros de KDE e.V., la fundación internacional que auspicia el proyecto.
El evento tiene presentaciones de primer nivel de temas relativos a las nuevas tecnologías, incluyendo aplicaciones de escritorio, aplicaciones móviles, desarrollo de software y multimedia. La comunidad KDE ha presentado innovaciones en todos estos campos a lo largo de su historia. Como patrocinador, su organización tendrá la oportunidad de participar en este entorno creativo y ser conocida por los asistentes.
Además, las discusiones técnicas no son el único objetivo de Akademy-es. El evento es también una oportunidad de networking y de conocer gente. Los eventos sociales son también muy importantes, ya que fomentan la creación del ambiente de cordialidad dentro de la comunidad KDE que permite la aparición de nuevas ideas; así que si lo desea puede también patrocinar un evento social.
De momento ya tenemos algunos patrocinadores de Akademy-es 2025 confirmados, se trata de openSUSE y la Universidad de La Laguna.
Esto, evidentemente, se merece una pequeña reseña en el blog.
 Patrocinador: Slimbook
 Patrocinador: Slimbook
Una vez más, Slimbook se une a la comunidad KDE en Akademy-es, reafirmando su compromiso con la tecnología libre y abierta. Como Patron del proyecto KDE, participa activamente en este punto de encuentro anual para compartir conocimientos, fortalecer lazos con desarrolladores y usuarios, y descubrir nuevas ideas dentro del ecosistema del software libre.
La marca española diseña, ensambla y comercializa equipos informáticos (portátiles, sobremesa y estaciones de trabajo) optimizados para sistemas GNU/Linux. Con el objetivo de ofrecer soluciones potentes, elegantes y personalizables que respondan a las necesidades reales de quienes apuestan por el Software Libre.
Desde el inicio, colabora estrechamente con comunidades como KDE, Fedora o Manjaro, trabajando para que los equipos estén alineados con los últimos avances. En Akademy-es estaremos presentes para seguir apoyando la divulgación de estas tecnologías, conectar con la comunidad, tanto con caras conocidas como con nuevas incorporaciones, y continuar aprendiendo e innovando junto a quienes comparten nuestra visión.
 Patrocinador: Vant
En VANT apostamos por GNU/Linux y por el software libre, porque es la base de nuestro proyecto.
Nuestro denominador común es el uso de Linux en nuestros ordenadores.
No somos desarrolladores. No somos sysadmins. Estamos especializados en hardware de PC y por eso fabricamos ordenadores. Y somos usuarios de Linux. Convencidos.
Desde 2011, ensamblamos la gama más completa de ordenadores portátiles y sobremesa linuxeros en España.
La entrada Patrocinadores plata de Akademy-es 2025 de Málaga OpenSouthCode Edition II #akademyes se publicó primero en KDE Blog.

Tumbleweed Monthly Update - May 2025
May ended with a large update for openSUSE’s rolling release. While that snapshot addressed several Common Vulnerabilities and Exposures, more security fixes were introduced throughout the month.
May introduced qemu 10.0 with improved virtualization performance, KDE Plasma 6.3.5 with polished usability fixes, and GStreamer 1.26.1 with smoother media playback across desktop and embedded devices. Security took center stage with OpenSSL 3.5.0’s post-quantum cryptography support and kernel updates, which addresses speculative execution vulnerabilities. Whether you’re a developer, sysadmin, or daily desktop user, May’s snapshots deliver meaningful enhancements for a trusted Tumbleweed experience.
As always, be sure to roll back using snapper if any issues arise.
For more details on the change logs for the month, visit the openSUSE Factory mailing list.
New Features and Enhancements
qemu 10.0: This is a major leap forward for virtualization on openSUSE Tumbleweed and will benefit desktop users, developers and server admins alike. This update allows for better I/O performance for virtual machines by spreading work across multiple threads though the added multiqueue support to virtio-scsi. The Intel GPU passthrough (VFIO) is now better supported and helps users build more capable desktop virtual machines or development environments with hardware acceleration. Developers and embedded enthusiasts will be happy to know the update now supports new arm, LoongArch, RISC-V, HPPA boards and CPU features. Notable improvements include ARM’s EL2 timer emulation and support for new RISC-V extensions like smrnmi and supm. The QEMU Machine Protocol (QMP) documentation has been revamped for easier automation and scripting. This version also fixes build issues with GCC 15 and improves test reliability for openSUSE packaging. Be sure to check the deprecated features, especially for those running 32-bit hosts.
KDE Plasma 6.3.5: Plasma’s KWin window manager has bug fixes targeting crashes, rendering issues, HDR brightness control, tablet input reliability, and smoother screen dimming behavior. Discover improves how update information displays. The “Still Looking” indicator bug has been resolved for a smoother package search experience. Notification bubbles are now better padded and positioned. The weather widget now respects default units, the notes applet won’t misbehave with layout sizes, and task manager grouping visuals are more predictable. Dolphin won’t accidentally misplace interface elements, Plasma Vaults avoid build errors, and color scheme integrations in apps and applets use the correct styling for a more cohesive look.
GStreamer 1.26.1: This release improves media playback reliability, especially for streaming, subtitles, and camera input. If you use apps like GNOME Videos, OBS, or PipeWire-based systems, this update means fewer crashes and smoother performance. Notable fixes improve subtitle handling in H.264/H.265, A/V sync for V4L2 decoding, stability in WebRTC calls, better Matroska and MP4 support, and more accurate frame-rate detection. Developers also get better plugin loading on Windows and improved compatibility with newer Python and GObject versions. This update boosts multimedia experience across desktops, browsers, and embedded devices.
gimp 3.0.4: The update resolves a clipboard bug that caused pasted content to appear padded and ensures smoother behavior when monitors are disconnected or changed; this speeds up startup for users with large font libraries. Non-destructive filter workflows see improvements with better undo tracking and fewer visual artifacts. KDE Wayland users benefit from corrected icon rendering, and .ICO file support is fixed with a patch for the ZDI-CAN-26752 bug. Two now-upstreamed patches were dropped, keeping the package clean and current.
gnome-music 48.0: This update brings better compatibility with modern Python environments by dropping legacy specific workarounds and improving GLib integration. While not a feature-heavy update, it fixes backend issues related to introspection and ensures smoother startup and stability on current openSUSE Tumbleweed systems.
OpenSSL 3.5.0: This major update strengthens cryptographic security and modernizes TLS support for openSUSE Tumbleweed users. The default encryption for tools like req, cms, and smime now uses the stronger aes-256-cbc cipher instead of the outdated 3DES. TLS configuration is improved with support for post-quantum cryptography (PQC) key exchange methods like ML-KEM, which gives users a future-proof option that’s also faster than older methods. The release introduces QUIC server support (used in HTTP/3), which matters for developers building low-latency or streaming applications. Day-to-day, this improves system-wide crypto performance, enhances compatibility with modern web protocols, and strengthens encryption defaults. Users of secure tools like cURL, Git, or anything using OpenSSL-backed TLS benefit from better security and reduced CPU load on newer hardware.
KDE Gear 25.04.1: This update brings a focused wave of polish and stability, smoothing out workflows across key apps like Dolphin, Kdenlive and KDE Connect. File management is cleaner with improved theming and context menus in Dolphin, while Kdenlive benefits from a long list of crash fixes, layout refinements, and a less aggressive autosave. KDE Connect also fixes media crashes and improves navigation.
KDE Frameworks 6.14.0: This release improves system integration, accessibility, and app behavior across the KDE stack. Developers benefit from safer file handling in KArchive, drag-and-drop enhancements in KIO, improved high-contrast theme support in KColorScheme, and smoother Wayland clipboard operations in KGuiAddons. Kirigami receives layout fixes and scrolling improvements, while KWallet introduced support for KeePassXC password manager as a backend. Syntax highlighting gains new language definitions, including ACPI and RISC-V updates.
Key Package Updates
GTK4 4.18.5: This release improves overall desktop stability and responsiveness for Tumbleweed users. It resolves several crashes and bugs that could affect file chooser dialogs, accessibility tools, and input methods like XCompose, which provide important fixes for anyone using multilingual input or screen readers. A major performance issue related to Cairo blur rendering has been addressed, which benefits applications using shadows, transitions, or transparency. This update also smooths out behavior in apps like Epiphany and those built with gtkmm. The changes result in fewer surprises and smoother experiences across GNOME apps and custom GTK-based tools.
kernel-source 6.14.6 and 6.14.5: The 6.14.6 update includes protections against CVE-2024-28956, a newly identified speculative execution vulnerability affecting modern Intel CPUs. It introduces the ITS (Indirect Target Selection) mitigation mechanism and ensures safer handling of return and branch instructions during context switches. Several branch predictor hardening improvements were added and are important for embedded devices and containers using ARM64 hardware. A long-standing bug with some HP laptop mute LEDs is also resolved. The 6.14.5 release brings another round of bug fixes and driver updates that enhance system stability and compatibility on the rolling release. This update resolves edge-case crashes, memory leaks, and device compatibility issues across key subsystems like networking (MLX5, ENETC), Bluetooth, and CPU frequency scaling. Graphics users benefit from Intel Xe driver tuning and DRM fixes that improve performance and power management, while media hardware support continues to expand with updates for newer camera sensors. Filesystem integrity also improves with Btrfs and ceph fixes, which helps prevent data corruption in low-level edge scenarios.
curl 8.14.0: This release addresses two vulnerabilities affecting QUIC certificate verification with wolfSSL have been patched, ensuring proper validation and pinning (CVE-2025-4947, CVE-2025-5025). The release also adds support for OpenSSL + ngtcp2 QUIC combinations and introduces new TLS options like CURLOPT_SSL_SIGNATURE_ALGORITHMS. MQTT connections now send pings at upkeep intervals, and users can disable auto-pong replies for WebSockets. This update reinforces both curl’s stability and its evolving network protocol support.
AppStream 1.0.5: This brings improvements that help software centers and package managers like GNOME Software or Discover show richer and more accurate metadata to users. This update enhances how screenshots, icons and descriptions are validated and interpreted, helping app developers ensure their software listings look polished and follow consistent standards. Tumbleweed users should see better visual consistency in software listings, fewer glitches in app stores, and improved metadata quality across repositories.
fwupd 2.0.9: This library improves firmware update reliability and broadens hardware compatibility is a meaningful upgrade for users who rely on secure and seamless firmware management in openSUSE rolling release. Key improvements include better support for updating the UEFI Key Exchange Key (KEK) and signature database (db), now allowing multiple certificates to be installed at once, which are essential for maintaining secure boot integrity. For developers or advanced users, the fwupdtool now includes more verbose JSON output and better Redfish handling, while hidden or backup devices are properly excluded from updates. These changes boost system stability, expand device coverage, and make managing firmware updates more dependable across desktops and servers.
gpg2 2.5.6: This version fixes a regression introduced in the previous version that misclassified signatures from revoked or expired keys as “missing,” which confused users reviewing signed files or emails. Another important fix prevents potential crashes (double free) when running in no signature cache mode. Some new features include support for left-anchored substring filters (helpful when scripting key listings), the --quick-tsign-key command for efficiently creating trust signatures, and a new User-Id option during key generation to streamline custom workflows. There’s also better smart card support, with improvements to certificate selection and card detection, especially for P15 cards.
sqlite 3.49.2: This software package addresses a rare memory error triggered by the NOT NULL optimization introduced in version 3.40.0, which ensures safer query execution. Fixes were also applied to DISTINCT queries using views and edge cases involving UNIQUE constraints with IN operators, which are issues that could lead to incorrect query results in complex schemas. Users relying on the generate_series() function will see better stability, and minor build improvements enhance portability.
thunar 4.20.3: The file manager now receives a warning before permanently deleting files, adding a crucial layer of protection. The file manager handles user-defined custom actions (UCAs) more reliably, especially when submenus are involved, thanks to fixes for several memory leaks and submenu bugs. On Wayland, popup menus now behave correctly and no longer stay open unexpectedly. The update also fixes crashes related to the list view and properties dialog, improves file handling on exFAT file systems, and enhances statusbar updates during searches.
PipeWire 1.4.4: This update restores compatibility with older 1.2-style MIDI and addresses regressions that impacted tools like mpv. The update also enhances integration with libcamera, ensuring smoother video and multimedia processing in GStreamer. Users working with MIDI devices benefit from improved UMP and ALSA sequencer support, including better handling of SysEx and program changes. NetJACK2 networking is now more reliable with refined driver/manager roles and error management.
Bug Fixes and Security Updates
Several key security vulnerabilities were addressed this month. Common Vulnerabilities and Exposures this month are:
Security Updates
- CVE-2025-32914: An out-of-bounds read vulnerability allows malicious HTTP clients to trigger memory access errors, potentially leading to crashes.
- CVE-2025-32907: Fixed excessive memory use from repeated HTTP range requests causing partial resource exhaustion.
- CVE-2025-46421: Fixed leak of Authorization headers on HTTP redirects, preventing credential exposure to third-party hosts.
-
CVE-2025-4969: Buffer overflow in curl’s
dynbufAPI could lead to data corruption or crash. -
CVE-2025-4476: In curl, improperly handled credentials in
setoptmay leak across requests. -
CVE-2025-4948:
CURLOPT_SSL_VERIFYPEERbypass possible in curl when reusing connections with wolfSSL.
-
CVE-2025-23394: Fixed potential privilege escalation in
cyradmdue to improper shell escaping when invoking subshell commands.
Mozilla Firefox 138.0:
- CVE-2025-2817: Fixed privilege escalation in Firefox Updater allowing SYSTEM-level operations.
- CVE-2025-4082: Fixed memory corruption in WebGL shader attributes on macOS.
-
CVE-2025-4083: Fixed process isolation bypass via
javascript:links in cross-origin frames. - CVE-2025-4085: Resolved potential information leakage and privilege escalation via UITour actor.
- CVE-2025-4086: Obscured file extension in download prompt via crafted filenames.
- CVE-2025-4087: Fixed unsafe attribute access during XPath parsing.
- CVE-2025-4088: Prevented CSRF via Storage Access API redirects.
- CVE-2025-4089: Fixed local code execution risk in “copy as cURL” developer tool.
- CVE-2025-4090: Fixed library path leakage in Firefox for Android via log output.
- CVE-2025-4091: Memory safety bugs fixed in Firefox 138, Thunderbird 138, and ESR versions.
- CVE-2025-4092: Additional memory safety fixes in Firefox 138 and Thunderbird 138. More fixes made for version 138.0.1 and 138.0.4
curl 8.14.0:
- CVE-2025-4947: Fixed an improper Certificate Validation in libcurl (QUIC with IP Address).
- CVE-2025-5025): Addressed a missing Certificate Pinning in libcurl (QUIC with wolfSSL).
-
CVE-2025-3416: A use-after-free vulnerability in OpenSSL’s handling of the
propertiesargument in certain functions could lead to undefined behavior or incorrect property parsing, potentially causing OpenSSL to treat the input as an empty string.
gpg2 2.5.6:
- CVE-2025-30258: Fixed a verification denial-of-service (DoS) vulnerability in GnuPG versions prior to 2.5.5.
kernel-source 6.14.6:
- CVE-2024-28956: Addressed multiple vulnerabilities related to Indirect Target Selection (ITS) on x86, including improper branch prediction behavior and missing mitigations for RSB stuffing.
**iputils:
-
CVE-2025-47268: Fixed an integer overflow in
pingthat could lead to a denial of service when handling crafted ICMP Echo Reply packets.
open-vm-tools 12.5.2:
- CVE-2025-22247: Resolved an insecure file handling flaw that allowed local attackers on a guest VM to tamper with files, potentially leading to privilege escalation.
nbdkit 1.42.3:
- CVE-2025-47712: Addressed a vulnerability allowing low-privileged users to cause partial denial-of-service via resource exhaustion.
- CVE-2025-47711: Fixed improper input handling that could allow denial-of-service through resource exhaustion or instability.
- CVE-2024-7383: Fixed an issue where TLS connections failed to properly verify NBD server certificates, allowing potential man-in-the-middle attacks.
webkit2gtk3 2.48.2:
- CVE-2025-24223: Fixed a memory corruption issue in WebKit when processing maliciously crafted web content.
- CVE-2025-31204: Resolved a memory corruption vulnerability in WebKit triggered by malicious web content.
- CVE-2025-31205: Addressed a cross-origin data exfiltration flaw in WebKit due to improper security checks.
- CVE-2025-31215: Resolved a vulnerability in WebKit where processing malicious web content could cause unexpected process crashes.
- CVE-2025-4382: Fixed an issue where GRUB’s TPM-based auto-decryption could leave LUKS disks decrypted in memory after a filesystem failure. An attacker with physical access could exploit this to access unencrypted data by forcing GRUB into rescue mode.
mozjs128 128.10.1:
- CVE-2025-4920: Fixed an out-of-bounds access when resolving Promise objects in Firefox.
- CVE-2025-4921: Fixed an out-of-bounds access during optimization of linear sums in Firefox.
-
CVE-2025-4575: Fixed an issue in OpenSSL 3.5 where the
-addrejectoption inopenssl x509mistakenly marked certificates as trusted instead of rejected.
postgresql17 17.5:
- CVE-2025-4207: Fixed a buffer over-read vulnerability in PostgreSQL’s GB18030 encoding check, which could result in denial-of-service.
- CVE-2025-4516: Fixed a use-after-free vulnerability in CPython that could lead to memory corruption.
Users are advised to update to the latest versions to mitigate these vulnerabilities.
Conclusion
May’s Tumbleweed updates highlight the strength of Tumbleweed to bring together performance improvements, UI polish and critical security updates. QEMU 10 expands hardware support and accelerates virtual machines, while OpenSSL 3.5 modernizes encryption defaults, which deliver noticeable improvements for everyday Linux use. The introduction this month of post-quantum cryptography (PQC) in OpenSSL 3.5 is a major advancement. KDE Gear 25.04.1 brought stability to essential apps like Dolphin and Kdenlive, ensuring workflows remain smooth and intuitive. Thunar also saw meaningful improvements, including safer file deletion and better Wayland behavior. Multimedia users saw benefits from GStreamer and GTK enhancements. AppStream 1.0.5 enhanced how package managers and software centers display app metadata, resulting in cleaner, more informative listings. Updates to SQLite 3.49.2 and gpg2 2.5.6 resolved edge-case bugs that could affect scripts, key management, or database reliability. These rolling release updates make a difference and show that Tumbleweed continues to deliver consistent new software updates every month for developers and power users.
Slowroll Arrivals
Please note that these updates also apply to Slowroll and arrive between an average of 5 to 10 days after being released in Tumbleweed snapshot. This monthly approach has been consistent for many months, ensuring stability and timely enhancements for users. Updated packages for Slowroll are regularly published in emails on openSUSE Factory mailing list.
Contributing to openSUSE Tumbleweed
Stay updated with the latest snapshots by subscribing to the openSUSE Factory mailing list. For those Tumbleweed users who want to contribute or want to engage with detailed technological discussions, subscribe to the openSUSE Factory mailing list . The openSUSE team encourages users to continue participating through bug reports, feature suggestions and discussions.
Your contributions and feedback make openSUSE Tumbleweed better with every update. Whether reporting bugs, suggesting features, or participating in community discussions, your involvement is highly valued.
openSUSE の Proxmox LXC コンテナで ping を使う方法
openSUSE の Proxmox LXC コンテナで、一般ユーザで ping を使うと、
ping: socktype: SOCK_RAW
ping: socket: Operation not permitted
ping: => missing cap_net_raw+p capability or setuid?となって、動きません。しかしこれは、https://blog.ssrf.in/post/ping-does-not-require-cap-net-raw-capability/ に書いてあるように、カーネルパラメータを調整することで、通常通り使えるようになります。実際に、
# sysctl -w net.ipv4.ping_group_range="0 65534"
と入力してみたら正しく動くようになりました。
なお、/usr/bin/ping にケーパビリティの設定を
setcap cap_net_raw+p /bin/ping
ですることでも解決します。これは https://hanaokaiwa.hatenablog.jp/entry/2024/06/17/120533 に情報がありました。
Estabilizando Plasma 6.4 – Esta semana en Plasma
Es increíble el trabajo de promoción que está realizando Nate en su blog, dese hace más del tiempo que puedo recordar. Cada semana hace un resumen de las novedades más destacadas, pero no en forma de telegrama, sino de artículo completo. Su cita semanal no falla y voy a intentar hacer algo que es simple pero requiere constancia. Traducir sus artículos al castellano utilizando los magníficos traductores lo cual hará que: la gente que no domine el inglés esté al día y que yo me entere bien de todo. Bienvenidos pues al primero de la serie «Esta semana en Plasma» que lleva por título «Estabilizando Plasma 6.4». Espero que os guste y, sobre todo, que pueda mantener el ritmo de publicación de Nate Graham.
Estabilizando Plasma 6.4 – Esta semana en Plasma
Nota: artículo original en Blogs KDE. Traducción realizada utilizando deepl.com. Esta entrada está llena de novedades para Plasma 6.4. Mis comentarios están entre corchetes.
¡Bienvenido a un nuevo número de «Esta semana en Plasma»! Cada semana cubrimos lo más destacado de lo que está sucediendo en el mundo de KDE Plasma y sus aplicaciones asociadas como Discover, System Monitor, y más.
Esta semana hemos lanzado una segunda versión beta de Plasma 6.4 y hemos trabajado mucho para pulirla y prepararla para su lanzamiento general en unas dos semanas. Estamos recibiendo una buena respuesta de los probadores de la versión beta, que están enviando muchos informes de errores. Son muy valiosos y les estamos dando prioridad.
Mejoras notables en la interfaz de usuario
Plasma 6.4
Gestionado más tipos de dispositivos en el widget Bluetooth para que sea más preciso a la hora de identificar el tipo de dispositivo. (Kai Uwe Broulik, enlace) [Con el aumento de los mismos es bueno que tengamos más información de lo que se conecta a nuestro sistema].
El asistente de emparejamiento Bluetooth ahora muestra los dispositivos con nombres reales en la parte superior para que puedas encontrarlos más fácilmente. (Albert Astals Cid, enlace) [Relacionado con el anterior, ¡bien por Albert!]
Se ha mejorado la navegación por teclado en las columnas de resultados de búsqueda en el menú de aplicaciones de Kicker. (Christoph Wolk, enlace)
Los widgets Diccionario y Navegador web ahora utilizan iconos simbólicos en el panel, para que coincidan con lo que hacen ahora otros widgets. (Christoph Wolk, enlace 1, enlace 2) [La importancia de dar coherencia a todo].

Se han introducido numerosas mejoras funcionales y visuales en el widget Quince rompecabezas. (Christoph Wolk, enlace 1, enlace 2, enlace 3, enlace 4, enlace 5, enlace 6) [Porque todo no es trabajo].
Plasma 6.5
Ahora puedes avanzar al siguiente fondo de pantalla en una presentación utilizando un atajo de teclado, si asignas uno a la nueva acción global que hemos creado para este fin. (Kai Uwe Broulik, enlace)
Los efectos Lupa y Zoom de KWin comparten ahora sus ajustes iniciales de nivel de zoom y factor de zoom. (Ritchie Frodomar, enlace)
La página de complementos del calendario del widget Reloj digital se ha renovado visualmente y ahora tiene un aspecto mucho más agradable. (Christoph Wolk, enlace 1, enlace 2, y enlace 3)

Plasma ahora te advierte de que mantener activa la opción «Subir volumen máximo» durante periodos prolongados dañará los altavoces del dispositivo, y te avisa de que está diseñada sólo para un uso temporal para subir el volumen de medios silenciosos. (Nate Graham, enlace) [Las advertencia de seguridad son importantes].
La página Legacy X11 App Support de Ajustes del Sistema es ahora más clara sobre para qué usar sus ajustes, y cuáles son las consecuencias de seguridad de hacerlo. (Nate Graham, enlace)
El menú que aparece al hacer clic en el pequeño icono de la aplicación en la barra de título de una ventana se llama ahora «Menú de ventana» en todas partes. (John Veness, enlace 1 y enlace 2) [Siendo precisos con la información que ofrecemos].
Corrección de errores importantes
Plasma 6.3.6
Se ha corregido un fallo aleatorio de KWin. (Vlad Zahorodnii, enlace)
Corregido un fallo común en el subsistema de gestión de energía Powerdevil. (Vlad Zahorodnii, enlace)
La configuración de Legacy X11 App Support ahora se aplica con precisión sin importar la distribución del teclado que estés utilizando. (Vlad Zahorodnii, enlace)
El atajo de teclado en el menú contextual del escritorio para el elemento de menú «Iniciar KRunner» (si lo has habilitado manualmente) vuelve a mostrarse correctamente. (Kai Uwe Broulik, enlace)
Se ha corregido un fallo visual muy sutil en la animación de cambio de botón de radio. (Kai Uwe Broulik, enlace)
El widget de energía y batería ya no te obliga a instalar power-profiles-daemon cuando ya está instalado pero tu hardware simplemente no lo soporta. (Nate Graham, enlace)
Plasma 6.4.0
Se han corregido varios errores por los que arrastrar y soltar widgets en paneles o en el escritorio sólo funcionaba una vez hasta que se reiniciaba Plasma, o podía hacer que Plasma se bloqueara, o por los que los widgets soltados en un panel podían solaparse. (Marco Martin,enlace 1,enlace 2,enlace 3, andenlace 4)
Se ha corregido un caso en el que Plasma o los Ajustes del sistema podían bloquearse al eliminar determinadas ubicaciones de la lista de ubicaciones del complemento del fondo de pantalla de presentación de diapositivas. (Marco Martin, enlace)
Se ha corregido un problema extremadamente extraño y sutil en Spectacle que provocaba que se capturara el contenido de la pantalla equivocada cuando se utilizaban determinadas disposiciones multipantalla con determinados factores de escala fraccionaria. (Noah Davis, enlace)
Se ha corregido un caso en el que un widget de sensor de monitor de sistema recién configurado no guardaba su estado después de reiniciar el sistema. (Arjen Hiemstra, enlace)
El widget Bluetooth ya no muestra brevemente el estado como «Desconectando» durante un momento mientras se conecta realmente a un dispositivo. (Kai Uwe Broulik, enlace)
Al hacer clic en el tema global activo en la página de temas globales de la configuración del sistema, ya no aparece un cuadro de diálogo que indica que el tema está roto. (David Edmundson, enlace)
Instalar o desinstalar una aplicación mientras el lanzador de aplicaciones de Kickoff está abierto ya no hace que desaparezca de la página visible hasta que te alejes de ella y vuelvas a hacerlo. Esto es útil cuando lo tienes anclado abierto y estás desinstalando aplicaciones innecesarias que encuentras allí una a una. (Christoph Wolk, enlace)
Corregido el ancho de la columna principal en el menú de aplicaciones de Kicker para que vuelva a su ancho normal después de borrar el texto del campo de búsqueda, y el texto ridículamente largo ahora se elide en lugar de cortarse. (Christoph Wolk, enlace 1 y enlace 2)
Se ha corregido un error en el menú de la aplicación Kicker que provocaba que los submenús se mostraran con un tamaño incorrecto al cambiar a ellos inmediatamente después de ver un submenú más pequeño con sus propios submenús. (Christoph Wolk, enlace)
Corregido un error que provocaba que los fondos de las cabeceras de las pocas páginas de Ajustes del Sistema que quedaban escritas en QtWidgets no cambiasen correctamente después de cambiar de esquema de color hasta que se reiniciaba Ajustes del Sistema. (Marco Martin, enlace)
Corregido el orden de apilamiento de ventanas que a veces se desordenaba al usar el efecto «Deslizar hacia atrás». (David Edmundson, enlace)
Se ha corregido un error que impedía que los elementos de la ventana emergente de Firefox que muestra los archivos descargados recientemente se pudieran arrastrar como estaba previsto. (Vlad Zahorodnii, enlace)
Frameworks 6.15
Se ha corregido un error que provocaba el bloqueo de KWin cuando se cambiaba la disposición de la pantalla mientras estaba abierto el efecto Vista general. (Vlad Zahorodnii, enlace)
Se ha corregido un error que provocaba que las aplicaciones se bloquearan cuando intentaban acceder a las contraseñas si, de algún modo, tu monedero KWallet predeterminado tenía el nombre establecido en una cadena vacía. (Marco Martin, enlace)
Se ha corregido un error que provocaba que la aplicación KWalletManager se bloqueara si empezabas a crear un nuevo monedero, cambiabas de opinión en mitad del proceso y cerrabas el diálogo de creación del nuevo monedero. (Marco Martin, enlace)
Se ha solucionado un error de GTK que provocaba que algunos iconos de Breeze aparecieran como rectángulos blancos en aplicaciones GTK 3. (Mors Mortium, enlace)
En las ventanas «Obtener nuevo [cosa]», el botón para abrir la página de comentarios es ahora un botón real, no un enlace subrayado, que inducía a error. (John Veness, enlace)
Qt
Qt 6.8.4: Corregido uno de los fallos aleatorios más comunes en todo el software KDE basado en QtQuick. (Ulf Hermann, enlace)
Qt 6.10: Se ha corregido un error que provocaba que los menús contextuales de algunas aplicaciones se desplazaran y se mostraran en una ubicación incorrecta al utilizar una configuración multipantalla. (Vlad Zahorodnii, enlace)
Otra información de errores destacables:
- 3 bug Plasma de muy alta prioridad (igual que la semana pasada). Lista actual de errores
- 25 fallos de Plasma de 15 minutos (2 menos que la semana pasada). Lista actual de fallos
Novedades técnicas y de rendimiento
Plasma 6.5
Reducción del uso de memoria de Plasma manteniendo en memoria menos copias innecesarias del fondo de pantalla de cada pantalla. (David Edmundson, enlace)
Cambiar el tema de los iconos ya no provoca una actualización innecesaria de la caché de metadatos de la aplicación. (Nicolas Fella, enlace)
Qt 6.10
Se ha implementado la capacidad de hacer que los elementos acompañantes en las interfaces de usuario basadas en QtQuick se etiqueten unos a otros con el fin de que los lectores de pantalla digan cosas más sensatas cuando están enfocados. Una vez que esto esté disponible, podremos empezar a adoptarlo en todo el software de KDE. (Nicolas Fella, enlace) [Esta novedad me parece fundamental para mejorar la accesibilidad].
Cómo puedes ayudar
KDE se ha convertido en algo importante en el mundo, y tu tiempo y contribuciones nos han ayudado a conseguirlo. A medida que crecemos, necesitamos su apoyo para mantener KDE sostenible.
Puedes ayudar a KDE convirtiéndote en un miembro activo de la comunidad e involucrándote de alguna manera. Cada colaborador marca una gran diferencia en KDE – ¡no eres un número o un engranaje en una máquina!
Tampoco tienes que ser programador. Existen muchas otras oportunidades:
- Clasificar y confirmar informes de errores, tal vez incluso identificar su causa raíz.
- Contribuir al diseño de fondos de pantalla, iconos e interfaces de aplicaciones.
- Diseñar y mantener sitios web
- Traducir elementos de texto de la interfaz de usuario a su propio idioma.
- Promover KDE en su comunidad local
- …¡Y un montón de cosas más!
¡También puedes ayudarnos haciendo una donación! Cualquier contribución monetaria – por pequeña que sea – nos ayudará a cubrir los costes operativos, salarios, gastos de viaje de los colaboradores, y en general a mantener KDE llevando el Software Libre al mundo.
Para obtener una nueva característica de Plasma o una corrección de errores mencionada aquí, siéntase libre de enviar un commit a la solicitud de fusión correspondiente en invent.kde.org.
La entrada Estabilizando Plasma 6.4 – Esta semana en Plasma se publicó primero en KDE Blog.
El museo del Beat y el Pop en Santa Colomba de Somoza
En Santa Colomba de Somoza en la provincia de León en plena zona de la Maragatería, se encuentra el museo de la música Beat y Pop de los años 60.
El responsable, y promotor del proyecto no es otro que el incansable Álex Cooper, el que fuera líder del grupo Los Flechazos y responsable de las primeras ediciones del festival Mod Purple Weekend que se celebra en León.

La cita estaba clara, y el momento ideal para visitar el museo Fundación Club 45 fue la visita del mítico periodista musical Jesús Ordovás, que durante años presentara Diario Pop en Radio3. Programa del que fui asíduo y fiel oyente.
Casi de casualidad (¿existen realmente?) me enteré del evento en el que Jesús Ordovás visitaría el museo de la Fundación Club 45 en el pueblo de Santa Colomba de Somoza en la provincia de León.
Las actividades eran hacer una visita guida con él por el museo y después pincharía algunos de los temas que según su criterio más representativos del beat (adelanto: muchos no fueron extrictamente beat)
Así que el pasado sábado 24 de mayo de 2025, la excusa para visitar el museo pop era ineludible y allí que llegamos al pueblo. Nada más llegar aparcamos al lado del museo y nos dirigimos a la entrada y allí estaba Álex Cooper, evidentemente no esperándonos a nosotros, pero sí haciendo tiempo para otra visita que habría más tarde.
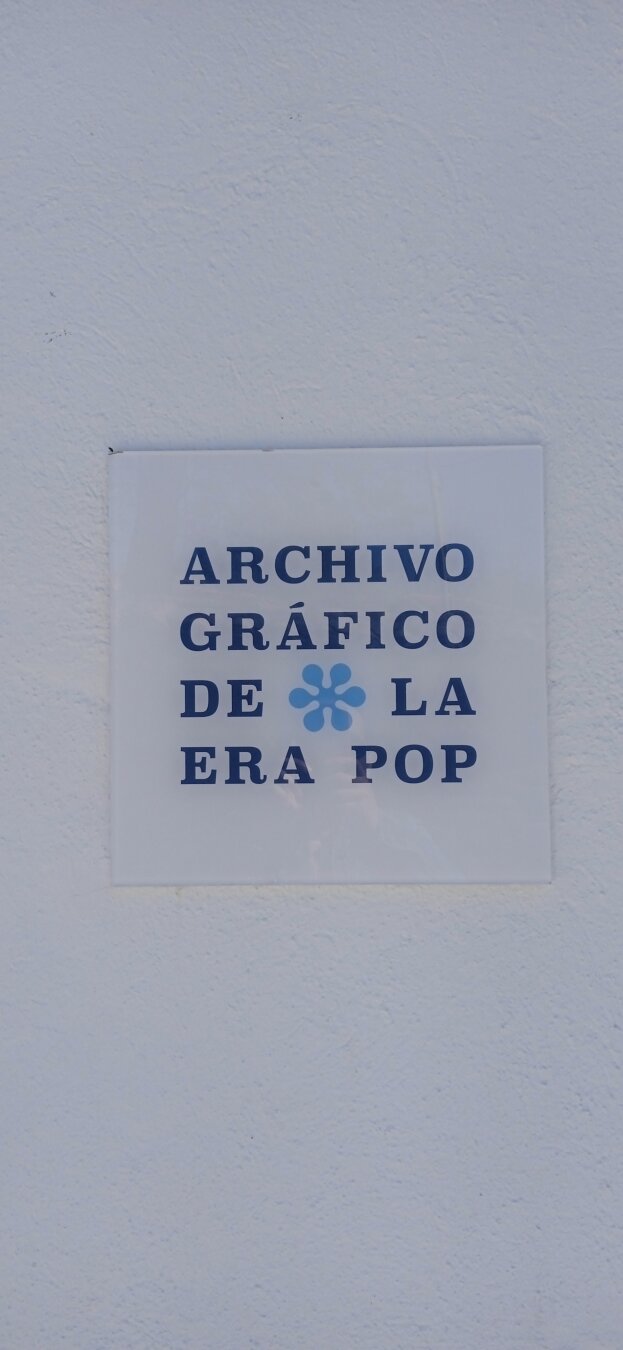
Después de una presentación, y explicarnos qué era aquello, nos adentramos en el propio museo que está en la antigua Casa de las maestras, que ha sufrido una gran remodelación para dar cabida a todo el material que allí se expone.
Singles, discos, fotografías, posters, entradas, carteles publicitarios, etc. La cantidad de material es casi abrumadora, pero está todo muy bien organizado y con muy buen gusto, siguiendo una temática y cronología. Textos cortos del propio Álex sirven de introducción al torrente de información gráfica que se puede disfrutar. Pura cultura Pop. Material producido en serie para el consumo y disfrute.
Desde los más conocidos, Beatles, Rolling Stones, Small Faces, Who, Them, Kinks, Salvajes, Brincos, y muchos más a otros grupos y solistas beat más desconocidos de caracter más local no solo del reino unido, si no también de otras partes de Europa (España incluida), o países más lejanos como Australia.
Un recorrido visual por el primer acontecimiento social global de masas para jóvenes, en el que la música era una parte fundamental, pero también lo fue la estética, el diseño o la moda. Cortes de pelo, ropa y calzado beat que todo joven de aquel movimiento quería lucir.
Se nota la pasión incombustible de Álex y el conocimiento que tiene de todo lo relacionado con esa época. Disfruta compartiendo anécdotas complementando con su conocimiento toda la historia de la música que se encuentra en el museo.
Y además de ese museo, también existe una parte de fondo de publicaciones de la época de revistas que se pueden consultar si tienes curiosidad.
Y empezó la actividad, de la mano de Ordovás y Áles volvimos a pasar por las salas, esta vez con anécdotas relacionadas con aquel tiempo y lugar. Durante el recorrido incluso leí una postal que allí se expone para todos los presentes, remitida por Ordovás a Álex hace ya un buen montón de años.
Disfruté un montón, no solo de poder saludar y estrechar la mano de Álex y conocer el museo, si no también por supuesto de poder charlar y saludar a Jesús Ordovás. Y además me llevé sendos autógrafos. Álex me firmó en una casette de Los Flechazos que compré allá por el lejano 1997 y Ordovás me firmó una de las postales que enviaba a quienes participábamos en sus encuestas anuales que era de 1995, ya ha llovido!
Terminada la visita, tocaba el tiempo para la música. Ordovás hizo una selección de temas en singles, que fue comentando y Álex fue pinchando, mientras disfrutábamos de una cerveza en el bar. Ordovás se explayó en anecdotas propias, en el significado de esas canciones en esa época y de su contexto. En esa selección pudimos disfrutar de 14+1 temas (no recuerdo todos los temas pinchados, qué rabia), pero los que recuerdo son estos:
- Françoise Hardy – Tous les garçons et les filles
- The Kinks – I’m not like anybody else
- The Byrds – Mr. Tambourine man
- The Four Tops – Reach out
- Los Salvajes – Es la edad
- Radio Futura – Enamorado de la moda juvenil
- Nacha Pop – Nadie puede parar
- Mamá
- Gabinete Caligari – Solo se vive una vez
- Burning – Mueve tus caderas
- y para terminar Viviendo en la era Pop (¿o Poch?) de Los Flechazos
El pueblo de Santa Colomba de Somoza donde Álex ha emplazado el museo Pop es muy tranquilo, se puede dar una vuelta disfrutando de un tempo relajado, y una sonoridad especial escuchando únicamente el rio y los pájaros. Hay un par de restaurantes en los que comer e incluso alojarse. Y desde ahí visitar otras zonas de la Maragatería con el Teleno al fondo.
Os animo a visitar el museo si tenéis oportunidad, echad un vistazo a la programación que organizan por si alguna os interesa, o simplemente por el simple hecho de visitar todo el material de esa época que se muestra.
Volví a disfrutar de un programa de radio de Ordovás, esta vez en directo. 30 años han pasado de aquellas tardes sintonizando el Diario Pop. Ya no somos los mismos, el mundo no es el mismo, la música no es la misma… pero fue un gusto revivir aquella época y disfrutar el museo, aunque hay que sacudirse la nostalgia y no dejar que su dulce color nos ciegue…
No puedo pensar en lo peor,
se acerca el momento de decir adiós.
Y no quiero olvidar tu color.

Episodio 45 de KDE Express: Cómo informar de un error para que Albert lo arregle
Me congratula presentaros el episodio 45 de KDE Express, titulado «Cómo informar de un error para que Albert lo arregle » donde David Marzal, y en esta ocasión con la ayuda de Albert Astals, de forma indirecta, sigue llevando en solitario estas más que interesantes píldoras. Un hurra por él… y por Albert.
Episodio 45 de KDE Express: Cómo informar de un error para que Albert lo arregle
Comenté hace ya bastante tiempo que había nacido KDE Express, un audio con noticias y la actualidad de la Comunidad KDE y del Software Libre con un formato breve (menos de 30 minutos) que complementan los que ya generaba la Comunidad de KDE España, aunque ahora estamos tomándonos un tiempo de respiro por diversos motivos, con sus ya veteranos Vídeo-Podcast que todavía podéis encontrar en Archive.org, Youtube, Ivoox, Spotify y Apple Podcast.
De esta forma, a lo largo de estos 45 episodios, promovidos principalmente por David Marzal, nos han contado un poco de todo: noticias, proyectos, eventos, etc., convirtiéndose (al menos para mi) uno de los podcast favoritos que me suelo encontrar en mi reproductor audio.
En palabras de David el nuevo episodio de KDE Express es un poco especial ya que sigue extrayendo valiosas píldoras de la última Akademy-es:

Este episodio es el audio sacado de la charla que Albert dio en la Akademy-es hace un año en valencia. Podéis verlo en https://tube.kockatoo.org/w/2bLob8KuYVUjqLLx7MPT4z, pero nos ha parecido que su contenido es apropiado para poder escucharse solo. Como son cortas os dejamos en la descripción más abajo las notas de la presentación y aquí un enlace al PDF.
Artículo original con todas las notas en https://kdeexpress.gitlab.io/45/
Ponente: Albert Astals Cid, Coordinador de traducciones de KDE
Malas prácticas
- No lo pongas solo en twitter/facebook/tiktok/mastodon
- No seas agresivo (SOIS UNOS PROGRAMADORES PESIMOS)
- No seas dramático (MI BUG ES EL BUG MÁS IMPORTANTE DEL MUNDO)
- No me «amenazes» (VOY A DEJAR DE USAR TU PROGRAMA)
- No me hagas trabajar de más
Buenas prácticas
- Usa el bug tracker correcto https://bugs.kde.org
- Si es un crash, que tenga símbolos
- Si es un error de funcionamiento, sé MUY PRECISO
- Si es un deseo piensalo dos vece
Recordar que estáis a tiempo de preparar el viaje para asistir a AkademyES 2025 en Málaga dentro de OSC: https://www.kde-espana.org/akademy-es-2025
Y, como siempre, os dejo aquí el listado de los episodios. ¡Disfrutad!
Por cierto, también podéis encontrarlos en Telegram: https://t.me/KDEexpress
La entrada Episodio 45 de KDE Express: Cómo informar de un error para que Albert lo arregle se publicó primero en KDE Blog.
Proxmox LXCコンテナでopenSUSEを入れたときには aaa_base-extras を入れてください
Proxmox には openSUSE のLXCコンテナイメージが用意されています。そのイメージを使って openSUSE をインストールしたときには、 aaa_base-extras パッケージを入れてください。そうしないと、既定で用意されているはずの bash の alias などが使えません。
最初、openSUSE LXC コンテナにログインしたとき、ll とかの alias コマンドが使えないのに気がつきました。.bashrc が未設定なのかなと思ったのですが、.bash にも .profile にも alias コマンドの定義がありません。/etc 配下のファイルも同じでした。実際に使える、openSUSE の環境で見てみても同じです。
調べた結果、/etc/profile.d/ 配下にalias 等の定義があったのでした。が、それらは aaa_base-extras でインストールされているのですね。LXC コンテナイメージには aaa_base-extras が入っていなかったために、alias 等の定義が抜けてしまったのでした。
普段特に気にせず使っている alias 定義のコマンド、実は親切にも openSUSE があらかじめ用意していた物だったというのに気がついた次第です。
#openSUSE Tumbleweed revisión de las semanas 21 y 22 de 2025
Tumbleweed es una distribución de GNU/Linux «Rolling Release» o de actualización contínua. Aquí puedes estar al tanto de las últimas novedades.

openSUSE Tumbleweed es la versión «rolling release» o de actualización continua de la distribución de GNU/Linux openSUSE.
Hagamos un repaso a las novedades que han llegado hasta los repositorios estas semanas.
Y recuerda que puedes estar al tanto de las nuevas publicaciones de snapshots en esta web:
El anuncio original lo puedes leer en el blog de Dominique Leuenberger, publicado bajo licencia CC-by-sa, en este este enlace:
Durante la semana 21 hubo un gran tiempo de inactividad en OBS/OpenQA debido a algunas fallos de almacenamiento en los servidores. Esto tardó más de lo previsto, por lo que se retrasaron las publicaciones de nuevas instantáneas. Todas las snapshots creadas durante ese tiempo se gestionaron, aunque más lentamente de lo habitual.
En resumen en estas dos semanas únicamente se han publicado 2 snapshots (0515 y 0522) y otra más (la 0527) que se está testeado en openQA en estos momentos.
Las actualizaciones más destacadas de estas dos semanas:
- SDL 3.2.14
- Ruby 3.4.4
- SQLite 3.49.2
- libguestfs 1.55.11
- python setuptools 78.1.1
- XEN 4.20.0_12
Pero tumbleweed no para de rodar y ya se están preparando muchas actualizaciones, entre ellas:
- Mesa 25.1.1
- Mozilla Firafox 138.0.4
- GNOME 48.2
- fwupd 2.0.10
- GIMP 3.0.4
- Linux glibc devel 6.15
- LLVM 20.1.5
- Pipewire 1.4.3
- PostgreSQL 17.5
- Linux kernel 6.15
Si quieres estar a la última con software actualizado y probado utiliza openSUSE Tumbleweed la opción rolling release de la distribución de GNU/Linux openSUSE.
Mantente actualizado y ya sabes: Have a lot of fun!!
Enlaces de interés
- ¿Por qué deberías utilizar openSUSE Tumbleweed?
- zypper dup en Tumbleweed hace todo el trabajo al actualizar
- ¿Cual es el mejor comando para actualizar Tumbleweed?
- ¿Qué es el test openQA?
- http://download.opensuse.org/tumbleweed/iso/
- https://es.opensuse.org/Portal:Tumbleweed
——————————–
Tumbleweed – Review of the weeks 2025/21 & 22
Dear Tumbleweed users and hackers,
I’m again spanning the review over two weeks. During Week 2025/21, there was a large downtime on OBS/openQA due to some storage failures. This took longer than anticipated, so we delayed checking in for new snapshots. All submissions created during that time were handled, albeit more slowly than usual.
This week looked better from an infra pov, but with a holiday on Thursday, things still went slow. In summary, we have published two snapshots (0515 and 0522) during this week, with 0527 currently being in QA (delayed due to Mesa vs wine issues detected during build) – but even with that out of the way, we can already say that snapshot won’t be published (nvidia firmware package issues, see https://bugzilla.opensuse.org/show_bug.cgi?id=1243843)
Let’s look at the bright side and see what the two published snapshots brought to your computers:
- SDL 3.2.14
- Ruby 3.4.4
- SQLite 3.49.2
- libguestfs 1.55.11
- python setuptools 78.1.1
- XEN 4.20.0_12
Things that are planned to be released with the next snapshots to come:
- Mesa 25.1.1
- Mozilla Firafox 138.0.4
- GNOME 48.2
- fwupd 2.0.10
- GIMP 3.0.4
- Linux glibc devel 6.15
- LLVM 20.1.5
- Pipewire 1.4.3
- PostgreSQL 17.5
- Linux kernel 6.15