
 Member
 baltolkien
Patrocinadores oro de Akademy-es 2025 de Málaga OpenSouthCode Edition II #akademyes
Todo evento supone siempre unos gastos, y una presencial también. El 20 y 21 de junio, es decir, en menos de un mes se va a celebrar en Málaga la esperada Akademy-es 2025, el encuentro organizado por KDE España para todos los simpatizantes del proyecto. Es hora de hablar de patrocinadores de Akademy-es 2025 de Málaga OpenSouthCode Edition II, la demostración de que las empresas tienen un papel importante en el desarrollo del Sofware Libre.
Patrocinadores oro de Akademy-es 2025 de Málaga OpenSouthCode Edition II #akademyes
Como sabrán los lector del blog en apenas un mes se va a celebrar Akademy-es 2025 de Málaga como una track de OpenSouthCode de forma presencial, el evento más importante para los desarrolladores y simpatizantes de KDE, organizado por KDE España.
Desde KDE Blog quiero animar a patrocinar este evento ya que cualquier organización que lo haga recibirá visibilidad no solo en España, sino a nivel mundial en el campo del Software Libre, ya que muchos de los integrantes de la Comunidad tienen fuertes vínculos con países de todo el mundo. Recordemos que muchos de los integrantes de KDE España son miembros de KDE e.V., la fundación internacional que auspicia el proyecto.
El evento tiene presentaciones de primer nivel de temas relativos a las nuevas tecnologías, incluyendo aplicaciones de escritorio, aplicaciones móviles, desarrollo de software y multimedia. La comunidad KDE ha presentado innovaciones en todos estos campos a lo largo de su historia. Como patrocinador, su organización tendrá la oportunidad de participar en este entorno creativo y ser conocida por los asistentes.
Además, las discusiones técnicas no son el único objetivo de Akademy-es. El evento es también una oportunidad de networking y de conocer gente. Los eventos sociales son también muy importantes, ya que fomentan la creación del ambiente de cordialidad dentro de la comunidad KDE que permite la aparición de nuevas ideas; así que si lo desea puede también patrocinar un evento social.
De momento ya tenemos algunos patrocinadores de Akademy-es 2025 confirmados, se trata de openSUSE y la Universidad de La Laguna.
Esto, evidentemente, se merece una pequeña reseña en el blog.
Patrocinador: openSUSE
El proyecto openSUSE, de sobre conocido por los lectores habituales del blog, es una comunidad mundial que promueve el uso de Linux en todas partes. openSUSE crea una de las mejores distribuciones de Linux del mundo, en la que se trabaja de forma conjunta, abierta, transparente y amistosa como parte de la comunidad mundial de software libre y de código abierto.
El proyecto está controlado por su comunidad y depende de las contribuciones de sus miembros, que trabajan como probadores, escritores, traductores, expertos en usabilidad, artistas y embajadores o desarrolladores. El proyecto abarca una amplia variedad de tecnologías, gentes con distintos niveles de experiencia, que hablan distintos idiomas y que tienen diferentes orígenes culturales.
Patrocinador: Universidad de La Laguna

La Universidad de La Laguna es una institución pública de educación superior e investigación ubicada en Tenerife.
Ofrece grados, másteres, doctorados, títulos propios y cursos online y semipresencial.
Destaca su amplio compromiso con el Software Libre.
La entrada Patrocinadores oro de Akademy-es 2025 de Málaga OpenSouthCode Edition II #akademyes se publicó primero en KDE Blog.
Releasing version 15
Agama 15 is out and it is time for a new blog post after our previous announcement of... wait... Agama 13? You may be wondering what happened to Agama 14. The answer is easy, we released it but we were too busy to write the corresponding blog post. So this will serve as an announcement for both versions.
Let's jump directly into the new features because there is a lot to cover.
Usability improvements related to localization
We will start with those features affecting directly the web user interface. And in that regard we have to mention the changes introduced in the internationalization area. Agama offers two different localization (l10n) configurations:
- One for the installer interface (language and keyboard layout).
- Another for the installed Linux distribution (language, keyboard layout, and timezone).
There are many good reasons for that distinction, but users of previous versions of Agama used to confuse these settings despite being configured at different places of the user interface. That should not be the case anymore thanks to the many usability improvements introduced by this pull request, which includes a detailed description of the changes with many screenshots.

Revamped Wi-Fi user interface
The network section of the web user interface also received many usability improvements, especially regarding the configuration of Wi-Fi connections. Once again, the individual changes are too many to be listed here but can be checked at the description of the corresponding pull request at Github.

Clarify options at the storage page
If there is another aspect of the configuration that can be as challenging as the network, that is the storage setup. We keep adding more options on every Agama release and sometimes that implies we must invest some time polishing small details to make the whole user interface more understandable.
In that regard, Agama 14 reorganized the contextual menus on the storage section to help users find the option they are looking for and understand the implications of each action.

Registration: extensions and certificates
And talking about adding new options to Agama, we also have to consider which of those options are available at the web interface and which ones are there only to be tweaked using the command line or a configuration file (eg. during unattended installation). The possibility of fine-tuning the registration process was an example of the latter... until now.
Agama 14 made it possible to use the web interface to register extensions. Those extensions allow to add more capabilities to SUSE Linux Enterprise right from the installation of the system.

But that is not the only news regarding registration. Agama 15 also added more options to deal with self-signed certificates for those SUSE customers using RMT (Repository Mirroring Tool) to manage subscriptions on their own internal network.

Management of certificate warnings and errors go beyond the visual interface and Agama 15 also offers several ways to handle the situation on unattended installations. In fact, the possibilities of unattended installations are dramatically expanded with these new releases of Agama. Starting with a special case.
Unattended configuration for iSCSI and DASD devices
We usually implement new features first in the configuration used for unattended installation (the profile, using AutoYaST jargon) and only later we decide whether the given feature must be available at the web interface and, if so, to what extent. But the case of iSCSI and DASD configuration was an exception. Due to their special nature, we first implemented interactive management for them, available already at the early versions of the Agama web interface. Users have had to wait until recent versions 14 and 15 to be able to configure iSCSI and DASD respectively using only a section of the Agama configuration.
We are in the process of improving the documentation for the Agama configuration, but meanwhile examples for both storage technologies can be found at Agama's examples directory.
Storage section: improved searches and software RAIDs
And talking about unattended installation and storage technologies, Agama 15 also represents a step forward in the way to select and combine the disks and partitions in the target system.
On the one hand, the search property that allows to match existing devices with definitions in the
configuration was improved to support filtering by name, size and partition number. On the other
hand, this Agama release includes the first fully functional implementation of the property
mdRaids that allows to create and reuse MD RAID devices.
The combination of those new features allows to create configurations like the following.
{


  "storage": {


    "drives": [


      {


        "search": {


          "condition": { "size": { "greater": "1 TiB" } },


          "max": 2


        },


        "partitions": [


          { "search": "*", "delete": true },


          {


            "size": "20 GiB",


            "alias": "parts-for-root"


          },


          {


            "size": { "min": "1 GiB" },


            "alias": "parts-for-home"


          }


        ]


      }


    ],


    "mdRaids": [


      {


        "devices": ["parts-for-root"],


        "level": "raid0",


        "filesystem": { "path": "/" }


      },


      {


        "devices": ["parts-for-home"],


        "level": "raid1",


        "name": "data",


        "encryption": {


          "luks2": { "password": "notsecret" }


        },


        "filesystem": { "path": "/home" }


      }


    ]


  }


}
Advanced boot loader configuration
Apart from the storage configuration, there are other aspects where users of unattended installation may have special requirements. One of those areas is the configuration of the boot loader.
The new Agama versions allow to setup an arbitrary timeout for the menu and also additional parameters to be passed to the kernel on every boot of the target system.
{


  "bootloader": {


    "timeout": 10,


    "extraKernelParams": "verbose"


  }


}
Creation of network bridges
The network section of the configuration was also expanded with the possibility to define bridge interfaces. As you can see in the following example, the syntax follows the same general principles than the previously existing support for network bonding.
{


  "network": {


    "connections": [


      {


        "id": "Bridge0",


        "method4": "manual",


        "interface": "br0",


        "addresses": ["192.168.1.100/24"],


        "gateway4": "192.168.1.1",


        "nameservers": ["192.168.1.1"],


        "bridge": {


          "ports": ["eth0", "eth1"],


          "stp": false


        }


      }


    ]


  }


}
But not all improvements in the unattended installation field correspond to new configuration options or sections. There are also other aspects of the experience we decided to enhance.
Relative URLs at the Agama configuration
As the most seasoned (open)SUSE users know, AutoYaST may be a bit singular when it comes to URLs.
One of the most creative AutoYaST tricks is the usage of an AutoYaST-specific schema relurl to
specify URLs that are relative to the location of the profile. Of course, specifying resources
relatively to the profile is useful in many scenarios, but for Agama we decided it could be done
better.
Instead of porting relurl, Agama 15 introduces the concept of URL reference, well known from
HTML and standardized at RFC3986. You can see
the difference between an absolute and a relative URL in the following example.
{


  "files": [


    {


      "destination": "/etc/issue.d/readme.issue",


      "url": "http://192.168.122.1/agama/issue-readme"


    },


    {


      "destination": "/etc/issue.d/agama.issue",


      "url": "./issue-sles"


    }


  ]


}
Improvements at the command-line interface
So far we described many improvements for both the web user interface and the unattended installation process. But as you know, the latter is not really any special mode at Agama, but just a way to trigger the installation in a way in which it still can be monitored and controlled using the mentioned web interface or Agama's command-line tools.
During this sprint we improved several aspect of those tools, especially regarding its ability to
interact with remote systems, and implemented a new command agama monitor that can be used to
connect to any ongoing installation and follow the process.

We must admit the previous screenshot corresponds to an improved version of the agama monitor
command which is not included at Agama 15. Because, of course, this release is just another step in
the long way to our Agama vision.
More to come
As you can see, we are already working on Agama 16 and beyond. You can check our plans at the public project roadmap and test the latest development version using the corresponding Live ISO images.
If you got questions or want to get involved, do not hesitate to contact us at the
Agama project at GitHub and our #yast channel at
Libera.chat. Have a lot of fun!
Novedades de las herramientas del sistema en KDE ⚙️ Gear 25.04
Este lanzamiento abril de la Comunidad KDE ha llegado con pocas grandes novedades en las aplicaciones pero sí en muchas. De esta forma he decidido crear un par de entradas recopilatorias de las mismas, empecé con las aplicaciones de ocio y sigo hoy con las novedades de las herramientas del sistema en KDE ⚙️ Gear 25.04. Pocas pero interesantes
Novedades de las herramientas del sistema en KDE ⚙️ Gear 25.04
Dentro del lanzamiento de KDE Gear 25.04 muchas aplicaciones han recibido impulso aunque sea con novedades puntuales. Es el ejemplo de las novedades de las herramientas del sistema en KDE ⚙️ Gear 25.04. Veámos que nos ofrecen:
Konqueror, el navegador web y de archivos de KDE, con 25 años de juventud, sigue recibiendo actualizaciones. Esta vez le ha tocado al diálogo Guardar como, que ahora recuerda dónde se descargó un archivo por última vez y mostrará dicha ubicación la próxima vez que seleccione la opción.

KRDC, la aplicación que permite ver y controlar una sesión de escritorio en otra máquina, ya sea en la misma red local o a través de internet, a más de 1000 kilómetros de distancia, ahora permite escalar el escritorio de la máquina remota para que que quepa dentro de la ventana de KRDC,. Además, añade compatibilidad para el campo de dominio durante el proceso de autenticación y ahora funciona con la nueva versión del protocolo FreeRDP.

KDE Connect, la aplicación que reduce la distancia entre el teléfono y la computadora, mejora la velocidad de transferencia de datos cuando se usa Bluetooth.

Más información: KDE Gear 25.04
Y, recuerda, todo este software es gratuito y sin publicidad en todos los sentidos: no te cuesta ni un euro y no se cobra en en forma de datos personales. No obstante, si quieres ayudar a su desarrollo siempre puedes participar en su campaña de recaudación de fondos.
La entrada Novedades de las herramientas del sistema en KDE ⚙️ Gear 25.04 se publicó primero en KDE Blog.
Feliz dia da toalha e do Orgulho NERD!

O Dia do Orgulho Nerd, ou Dia do Orgulho Geek é uma iniciativa que advoga o direito de toda pessoa ser um nerd ou um geek. Teve origem na Espanha (“dia del orgullo friki”, em espanhol).[1]
O dia do orgulho nerd é celebrado em 25 de maio desde 2006, comemorando a première do primeiro filme da série Star Wars, em 1977. O dia 25 de maio também é o Dia da Toalha, em homenagem ao escritor Douglas Adams.
Origens
Em 2006, este dia foi celebrado pela primeira vez em toda a Espanha e na internet, graças à publicidade dada por alguns meios, como:
- Salas, Javier. “Comecocos y mangas toman la calle: la revancha de los frikis“, Telecinco, 2006-5-26. Página visitada em 2006-05-26.
- Perez, Javier. “Orgullo friki“, El Mundo, 2006-5-26. Página visitada em 2005-05-26.
- Ramos, David. “25 de mayo: Día del Orgullo Friki“, 20minutos, 2006-5-25. Página visitada em 2005-05-25.
A maior concentração aconteceu em Madri, onde 300 Nerds demonstraram seu orgulho com um pacman humano.
Comemorações de 2007
Em 2007 a celebração contou com mais ajuda de instituições oficiais (como o Circo Price, de Madri) e teve comemoração mais ampla por toda a Espanha. Atividades oficiais foram anunciadas no Pilar de la Horadada, Cádiz, Huesca, Calaf, Huelva, e Valência. Houve uma campanha Doação de Sangue Nerd. Entre outros atos, foi exibido o filme Gritos no corredor.
2008: O dia do Orgulho Nerd chega à América
Em 2008, o Dia do Orgulho Nerd atravessou o Atlântico e foi comemorado oficialmente na América, onde foi divulgado por numerosos bloggers, unidos pelo lançamento do site GeekPrideDay. O matemático e autor John Derbyshire, vencedor do Prêmio Livro de Euler e blogger geek, anunciou[2] que apareceria na parada da Quinta Avenida, vestido de número 57, na ala dos números primos – o que fez alguns bloggers dizerem que iriam procurá-lo.
Direitos e deveres dos nerds
Foi criado um manifesto para celebrar o primeiro Dia do Orgulho Nerd, que incluía a seguinte lista de direitos e deveres dos nerds:[3]Direitos
- O direito de ser nerd.[3]
- O direito de não ter que sair de casa.[3]
- O direito a não ter um par e ser virgem.[3]
- O direito de não gostar de futebol ou de qualquer outro esporte.[3]
- O direito de se associar com outros nerds.[3]
- O direito de ter poucos (ou nenhum) amigo.[3]
- O direito de ter o tanto de amigos nerds que quiser.[3]
- O direito de não ter que estar “na moda”.[3]
- O direito ao sobrepeso (ou subpeso) e de ter problemas de visão.[3]
- O direito de expressar sua nerdice.[3]
- O direito de dominar o mundo.[3]
Deveres
- Ser nerd, não importa o quê.[3]
- Tentar ser mais nerd do que qualquer um.[3]
- Se há uma discussão sobre um assunto nerd, poder dar sua opinião.[3]
- Guardar todo e qualquer objeto nerd que tiver.[3]
- Fazer todo o possível para exibir seus objetos nerds como se fosse um “museu da nerdice”.[3]
- Não ser um nerd generalizado. Você deve se especializar em algo.[3]
- Assistir a qualquer filme nerd na noite de estréia e comprar qualquer livro nerd antes de todo mundo.[3]
- Esperar na fila em toda noite de estreia. Se puder ir fantasiado, ou pelo menos com uma camisa relacionada ao tema, melhor ainda.[3]
- Não perder seu tempo em nada que não seja relacionado à nerdice.[3]
- Tentar dominar o mundo.[3]


Programa de charlas de Akademy-es 2025 de Málaga OpenSouthCode Edition II #akademyes
Como ya sabréis este año se celebra Akademy-es 2025 se celebrará en de forma presencial en Málaga, dentro de la OpenSouthCode del 20 al 21 de junio, viernes y sábado. Ayer fue publicado el programa de charlas de Akademy-es 2025. Léelo y seguro que encuentras más de una razón para acompañarnos.
Programa de charlas de Akademy-es 2025 de Málaga OpenSouthCode Edition II #akademyes
El 20 y 21 de junio se va a celebrar Akademy-es 2025 de Málaga que se celebrará organizado por KDE España y de forma paralela a otro gran evento como es OpenSouthCode.
Este año volvemos a tener un gran programa de ponencias pero condensado es un solo día ya que se ha pensado que dado que estamos en un gran evento es una buena idea que los organizadores también nos mezclemos con el resto de asistentes.
En el programa de charlas, que pondré a continuación, podrás ver la diversidad de ponencias que hemos preparado, condensando a algunos de los grandes comunicadores de la Comunidad KDE y algunos artistas invitados de prestigio,
Y si no te lo crees simplemente échale un vistazo al programa.
Viernes 20 de junio
Jornada matinal
09:30 – 09:40 Ceremonia de apertura de Akademy-es
09:40 – 10:25 KDE Linux: La nueva distribución de KDE – Albert Astals Cid
10:30 – 11:15 Trucos y Secretos que no te cuentan cuando desarrollas videojuegos en Godot – Gabriel Galiana Jaime
11:30 – 12:15 KDE plasma y más software libre: El flujo de trabajo para ingenieros – Fernando Rosa
12:30 – 13:15 kiot: Integración de KDE Plasma en sistemas de «smart homes» – Ivan Gregori Jorques
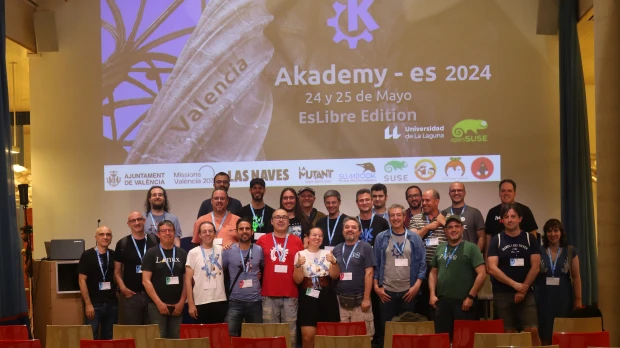
Foto de grupo
Jornada vespertina
15:30 – 15:50 ¿Qué es KDE España? – Junta de KDE España
15:55 – 16:20 Charlas relámpago
16:30 – 17:15 Tocando a la puerta del mal: ¿IA en KDE Plasma (y otros escritorios libres)? – Rubén Gómez Antolí

17:30 – 18:15 Okular: El visor de documentos multiplataforma – Albert Astals Cid
18:30 – 19:15 10 cosas que no sabías que podías hacer (o sí) en Plasma 6 – Baltasar Ortega
19:15 Ceremonia de clausura de Akademy-es
Nota: Las charlas y horarios pueden sufrir ligeras modificaciones dependiendo de la disponibilidad de los ponentes
La entrada Programa de charlas de Akademy-es 2025 de Málaga OpenSouthCode Edition II #akademyes se publicó primero en KDE Blog.
Libro «La ciudad y sus muros inciertos» de Haruki Murakami
Último libro hasta la fecha publicado por el escritor japonés y tercero del escritor que leo

Cuando empecé a leer el libro La ciudad y sus muros inciertos de Haruki Murakami, creí que era un libro que ya había leído de él, pero no. Trataré de escribir sobre el libro sin revelar nada que no tenga que revelar.
Este último libro del escritor japonés publicado en 2024, era una reinterpretación de un relato que publicó cuando empezaba su oficio de escritor y que revisitó en el libro El fin del mundo y un despiadado país de las maravillas que fue el que leí y que me confundía al encontrarme elementos coincidentes.
Una ciudad amurallada, un lector de sueños en un país en el que para entrar te despojan de tu sombra, unas manadas de rinocerontes que fallecen en el crudo invierno… todos estos elementos vuelven a aparecer en este último libro de Murakami.
De Murakami he leído la trilogía de 1Q84, y los dos libros que he mencionado antes. En todos el escritor explora mundos paralelos que se confunden con la realidad, donde los protagonistas son eminentementes personajes solitarios que van deambulando y viviendo a caballo de ambos mundos, uno real y otro imaginario, hasta que casi confunden cual es el que tiene sentido y cual no, si es que alguno lo tiene o si lo tienen ambos.
En este último libro, en el que revisita ese mundo que he mencionado antes, el protagonista por diversos motivos vuelve a internarse en ese país amurallado, donde no hay sorpresas y el tiempo discurre sin contratiempos en un tono gris y sus habitantes han tenido que desprenderse de sus sombras.
De nuevo el protagonista, igual que en la trilogía de 1Q84, es una persona solitaria, que de alguna manera se ve involucrado en toda esa confusión de mundos por un amor idílico de juventud. Un amor que no ha olvidado y que buscar recuperar en el tiempo. Busca reencuentros que a veces ocurren.
El realismo mágico de la literatura latinoamericana cruza océanos y se conjuga en la literatura que nos ofrece Murakami en este libro. Presencias etéreas que interactúan en la realidad, destinos quizás sellados que confirman las teorías deterministas, tonos de diversas melancolías escondidos en lugares que vamos explorando, encuentros, despedidas.
Me gustó el libro, aunque para mi gusto el final (por supuesto sin contar de qué va) me defraudó un poco, no me terminó de gustar ni convencer. La historia se iba desarrollando de manera interesante, pero como que la última parte fue algo abrupto… Para mi gusto. No me hagas caso y te animo a que si quieres lo leas y lo descubras por ti mismo y me digas si coincides conmigo o si a ti el final te ha gustado.
Fue un placer leerlo e incursionar de nuevo por la literatura de Murakami. Te animo que descubras al autor con cualquiera de los títulos publicados, los que he leído yo me han gustado todos mucho, seguro que algún otro título caerá. ¿Alguna recomendación?

Fondos de escritorio según la hora del día – Esta semana en Plasma
Es increíble el trabajo de promoción que está realizando Nate en su blog, dese hace más del tiempo que puedo recordar. Cada semana hace un resumen de las novedades más destacadas, pero no en forma de telegrama, sino de artículo completo. Su cita semanal no falla y voy a intentar hacer algo que es simple pero requiere constancia. Traducir sus artículos al castellano utilizando los magníficos traductores lo cual hará que: la gente que no domine el inglés esté al día y que yo me entere bien de todo. Bienvenidos pues al primero de la serie «Esta semana en Plasma» que lleva por título «Asistente de calibración HDR«. Espero que os guste y, sobre todo, que pueda mantener el ritmo de publicación de Nate Graham.
Fondos de escritorio según la hora del día – Esta semana en Plasma
Nota: artículo original en Blogs KDE. Traducción realizada utilizando deepl.com. Esta entrada está llena de novedades para Plasma 6.4. Mis comentarios están entre corchetes.
¡Bienvenido a un nuevo número de «Esta semana en Plasma»! Cada semana cubrimos lo más destacado de lo que está sucediendo en el mundo de KDE Plasma y sus aplicaciones asociadas como Discover, System Monitor, y más.
Esta semana nos hemos centrado en la corrección de errores en preparación para el lanzamiento de Plasma 6.4 en tres semanas. Pero también nos las hemos arreglado para incluir una gran característica en la próxima versión: ¡los fondos de pantalla según la hora del día! Plasma permite ahora cambiar automáticamente los fondos de pantalla compatibles entre sus versiones clara y oscura en función del ciclo día/noche, y también presenta algunos retoques visuales para que las previsualizaciones de estos fondos de pantalla dinámicos tengan mejor aspecto y se indiquen más claramente como dinámicos. De esto se ha encargado Vlad Zahorodnii; ¡muchas gracias, Vlad!
A este respecto, no os alarméis por el aumento del número de errores de alta y muy alta prioridad; estamos utilizando estas listas para guiar nuestros esfuerzos de corrección de errores durante el próximo mes, así que esperad que las cifras suban y bajen durante un tiempo.

Mejoras notables en la interfaz de usuario
Plasma 6.4
Discover ya no incluye fondos de pantalla y otros complementos en sus resultados de búsqueda, a menos que inicies la búsqueda en la página «Complementos». Esto debería hacer que la mayoría de los resultados de búsqueda sean mucho más relevantes. (Ismael Asensio, enlace) [Lo cierto es que abrumaban tantos resultados].
Se ha pulido visualmente el widget de volumen de audio, que puede resultar bastante complicado cuando hay varios dispositivos de audio.(Christoph Wolk, enlace 1, enlace 2, enlace 3, y enlace 4)
Plasma 6.5
Se han introducido importantes mejoras en la interfaz de usuario del widget de notas adhesivas para facilitar su uso en el panel: ahora se puede cambiar su tamaño para que sean mucho más pequeñas; cambiar el color de fondo desde el menú contextual; y cuando se elige el color de fondo «Transparente», el fondo de color de las notas adhesivas desaparece por completo, lo que reduce considerablemente los márgenes exteriores si se quiere ahorrar espacio. (Kai Uwe Broulik, enlace) [Esto me va a venir bien, ahora que empiezo a utilizarlas de forma continua].

Si eliges una fuente con el texto «Display» en su nombre como una de tus fuentes globales, la Configuración del sistema te advierte ahora de que no es una buena idea, porque estas fuentes no están pensadas para su visualización en pantallas digitales. (Nate Graham, enlace)
La primera vez que inicias Emoji Picker (que se inicia por defecto con el atajo de teclado Meta+.), ahora se abre en una página que muestra todo, en lugar de la página «Recientes» que, por supuesto, estaría vacía. (Kai Uwe Broulik, enlace) [Y que induce a confusión].
En el widget Redes, el botón «Hotspot» está ahora siempre visible, pero desactivado cuando no está disponible, y al pasar el ratón sobre él se indica por qué no se puede utilizar en ese momento y qué se puede hacer para cambiarlo. (Nate Graham, enlace)
Se han eliminado todos los efectos de depuración de la página Efectos de escritorio de la Configuración del sistema y se han trasladado a la ventana de depuración de KWin. ¿No sabes cómo acceder a ella? Busca «kwin debug» en Kickoff o KRunner. (Oliver Beard, enlace)
Se ha mejorado la accesibilidad y la navegación general con el teclado en el widget Volumen de audio, la página Flatpak en Ajustes del sistema y la página Actualizaciones en Descubrir. (Christoph Wolk, enlace 1, enlace 2, enlace 3, enlace 4, and enlace 5)
Frameworks 6.15
Al abrir la ventana «Opciones avanzadas» desde el cuadro de diálogo de propiedades de un elemento del escritorio Plasma, ya no se congela Plasma por completo hasta que se cierra. (Akseli Lahtinen, enlace)
Se ha mejorado la accesibilidad y la navegación mediante el teclado en toda la Configuración del sistema, especialmente en los temas relacionados con el paso del foco entre el contenido de la página y las barras laterales y los pies de página de la ventana. (Christoph Wolk, enlace)
Al navegar por las aplicaciones basadas en Kirigami y las páginas de Ajustes del sistema utilizando un lector de pantalla, ya no anunciará inútilmente «PANEL DE CAPAS CERO ELEMENTOS» todo el tiempo. (Christoph Wolk, enlace) [Mejorando la accesibilidad. ¡Bravo!].
Corrección de errores importantes
Plasma 6.3.6
Se ha corregido un caso en el que KWin podía bloquearse al desconectar varias pantallas conectadas a KVM. (Xaver Hugl, enlace)
Corregido un error que podía provocar que el Modo Edición por-widget no saliera correctamente. (Yu Wang, enlace)
Abrir la ventana «Añadir acción» desde el diálogo de configuración del portapapeles ya no congela Plasma completamente hasta que se cierra. (Nate Graham, enlace)
Ahora funciona la eliminación (no el borrado) de archivos desde los menús contextuales de las notificaciones de Plasma. (Kai Uwe Broulik, enlace)
Cambiar la configuración de tearing de pantalla ahora tiene efecto inmediato, en lugar de requerir un reinicio. (Xaver Hugl, enlace)
Se ha corregido un caso en el que se podían ver brevemente fallos gráficos en la pantalla después de iniciar sesión pero antes de que se cargara la pantalla de inicio o el escritorio de Plasma. (Xaver Hugl, enlace)
Cuando las aplicaciones que usan XWayland piden deliberadamente abrirse en una pantalla específica, la pantalla en la que se abren ahora coincide más fiablemente con la que querían. (Xaver Hugl y Vlad Zahorodnii, enlace 1 y enlace 2)
Plasma 6.4.0
Se ha corregido un problema poco frecuente pero grave que podía permitir saltarse la solicitud de contraseña de la pantalla de bloqueo y desbloquear sin contraseña en determinadas circunstancias. (Marco Martin, enlace)
Se ha corregido un caso en el que los Ajustes del sistema podían bloquearse justo después de cambiar la frecuencia de actualización de una pantalla. (David Edmundson, enlace)
Se ha corregido un caso en el que Plasma podía bloquearse al arrastrar celdas desde LibreOffice al escritorio. Ahora te permite crear un marco multimedia o una nota adhesiva a partir del contenido, como estaba previsto. (David Edmundson, enlace)
Se ha corregido un error que podía provocar que las aplicaciones WINE con decoraciones de ventana personalizadas se bloquearan al des-maximizar. (Rémi Bernon, enlace)
Ahora el diálogo «Control remoto solicitado» siempre te dirá qué está solicitando el control remoto; como mínimo, ahora te dará el ID técnico de la cosa que hace la solicitud si no puede mostrar un nombre bonito – en lugar de no mostrar nada. (Stephan Seitz, enlace)
Se han corregido varios casos en los que el uso de un selector de color para elegir un color de la pantalla podría devolver un resultado muy sutilmente incorrecto cuando se utilizan ciertas combinaciones de luz nocturna, perfiles ICC, HDR, color de 10 bits, o cualquier otra característica que cambie globalmente todos los colores de la pantalla. (Xaver Hugl, enlace)
Se ha corregido un error por el que las asas de redimensionamiento de un panel de longitud personalizada podían salirse de la pantalla cuando había otro panel en un borde de pantalla adyacente. (Marco Martin, enlace)
En los widgets de ayuda de la app Monitor de Sistema, la ordenación por velocidad de red ya no pone incorrectamente los procesos sin actividad de red en primer lugar, y ahora las velocidades de «lectura/escritura» se muestran correctamente una vez más (Arjen Hiemstra, enlace 1 y enlace 2)
El uso de la visualización de la «Tabla de Procesos» para los widgets en blanco del sensor del Monitor del Sistema ya no los hace pensar incorrectamente que necesitan configuración la próxima vez que reinicie Plasma o el sistema. (Christoph Wolk, enlace)
Se ha corregido un error que provocaba que los colores del tipo de gráfico «Barras horizontales» de los widgets de Monitor del sistema no se establecieran correctamente la primera vez que se añadía un widget que lo utilizaba a un panel o escritorio. (Christoph Wolk, enlace)
Se ha corregido una regresión que provocaba que la lista de tipos de archivo de un cuadro de diálogo de la página Aplicaciones predeterminadas de la Configuración del sistema se desbordara cuando era muy, muy, muy larga. (Nate Graham, enlace)
Las alturas de las filas en las vistas de tabla de Monitor de Sistema vuelven a ser perfectamente idénticas, después de que un problema de Qt provocara que dejara de ser así. (David Redondo, enlace)
Al hacer clic en el botón «Tema global» de la página Configuración rápida de Ajustes del sistema, después de que te lleve a la página Temas globales como pediste, también expande la barra lateral para mostrar todas las páginas secundarias, igual que si hubieras navegado hasta allí manualmente. (Marco Martin, enlace)
Las previsualizaciones en la vista de cuadrícula del fondo de pantalla ahora ajustan su relación de aspecto en tiempo real si la propia relación de aspecto de la pantalla cambia, por ejemplo, debido a un cambio en la rotación o la resolución. (Vlad Zahorodnii, enlace)
Frameworks 6.15
Se ha corregido una regresión en el nuevo código de sombreado de iconos Kirigami que provocaba que los iconos de la bandeja del sistema proporcionados por las aplicaciones parecieran a veces visualmente aplastados. (Vlad Zahorodnii, enlace)
Otra información de errores destacables:
- 3 bug Plasma de muy alta prioridad (4 teníamos la semana pasada). Lista actual de errores
- 27 fallos de Plasma de 15 minutos (22 más que la semana pasada). Lista actual de fallos
Novedades técnicas y de rendimiento
Plasma 6.3.6
Se ha corregido un problema de rendimiento en Plasma, Dolphin y cualquier otro sistema que muestre miniaturas de carpetas que podía causar un uso excesivo de E/S de disco al pasar el ratón por encima de una carpeta mostrando miniaturas de su contenido. (Akseli Lahtinen, enlace)
Plasma 6.4
Se ha hecho más rápida la aparición de la ventana emergente del portapapeles a la que se accede usando Meta+V. (Fushan Wen, enlace)
La elección de una resolución de pantalla que no era una de las resoluciones nativas de la pantalla ya no incurre en una fuerte penalización de rendimiento. (Xaver Hugl, enlace)
Plasma 6.5
Mejora masiva del rendimiento del desplazamiento en las vistas de cuadrícula del fondo de pantalla de Plasma. (Vlad Zahorodnii, enlace)
Qt 6.9.2
Se ha implementado el reciclaje de delegados para las vistas de cuadrícula de Qt, lo que ofrece la posibilidad de mejorar el rendimiento de las vistas de cuadrícula en Plasma y en las aplicaciones KDE basadas en QtQuick. (Vlad Zahorodnii, enlace)
Cómo puedes ayudar
KDE se ha convertido en algo importante en el mundo, y tu tiempo y contribuciones nos han ayudado a conseguirlo. A medida que crecemos, necesitamos su apoyo para mantener KDE sostenible.
Puedes ayudar a KDE convirtiéndote en un miembro activo de la comunidad e involucrándote de alguna manera. Cada colaborador marca una gran diferencia en KDE – ¡no eres un número o un engranaje en una máquina!
Tampoco tienes que ser programador. Existen muchas otras oportunidades:
- Clasificar y confirmar informes de errores, tal vez incluso identificar su causa raíz.
- Contribuir al diseño de fondos de pantalla, iconos e interfaces de aplicaciones.
- Diseñar y mantener sitios web
- Traducir elementos de texto de la interfaz de usuario a su propio idioma.
- Promover KDE en su comunidad local
- …¡Y un montón de cosas más!
¡También puedes ayudarnos haciendo una donación! Cualquier contribución monetaria – por pequeña que sea – nos ayudará a cubrir los costes operativos, salarios, gastos de viaje de los colaboradores, y en general a mantener KDE llevando el Software Libre al mundo.
Para obtener una nueva característica de Plasma o una corrección de errores mencionada aquí, siéntase libre de enviar un commit a la solicitud de fusión correspondiente en invent.kde.org.
La entrada Fondos de escritorio según la hora del día – Esta semana en Plasma se publicó primero en KDE Blog.
Novedades de las aplicaciones de ocio en KDE ⚙️ Gear 25.04
Este lanzamiento abril de la Comunidad KDE ha llegado con pocas grandes novedades en las aplicaciones pero sí en muchas. DE esta forma he decidido crear un par de entradas recopilatorias de las mismas, empezando hoy con las novedades de las aplicaciones de ocio en KDE ⚙️ Gear 25.04.
Novedades de las aplicaciones de ocio en KDE ⚙️ Gear 25.04
Dentro del lanzamiento de KDE Gear 25.04 muchas aplicaciones han recibido impulso aunque sea con novedades puntuales. Es el ejemplos de las novedades en las aplicaciones de ocio de KDE, es decir, aquellas que nos permiten disfrutar de nuestra afición favorita (libros, música, podcast, etc) en nuestro entorno de trabajo favorito. Veámos que nos ofrecen:
Arianna, un lector de libros electrónicos moderno y fácil de usar que nos ofrece un nuevo motor de presentación basado en foliate.js y hace que el lector de libros electrónicos sea más rápido y disponga de mejor compatibilidad con los idiomas que se escriben de derecha a izquierda.

Kasts, la aplicación que te conecta con sus pódcast favoritos, tanto en el escritorio como en el teléfono, posibilita la elección entre utilizar el modo móvil o el modo de escritorio. Además, el diálogo de configuración se comporta mejor en los dispositivos móviles.

Elisa, un sencillo reproductor de música local, reproducirá archivos automáticamente al abrirlos desde una aplicación distinta (por ejemplo, Dolphin).

Audiotube, la mejor forma de buscar y reproducir música en YouTube, presenta la posibilidad de mostrar letras sincronizadas proporcionadas por LRCLIB.

Más información: KDE Gear 25.04
Y, recuerda, todo este software es gratuito y sin publicidad en todos los sentidos: no te cuesta ni un euro y no se cobra en en forma de datos personales. No obstante, si quieres ayudar a su desarrollo siempre puedes participar en su campaña de recaudación de fondos.
La entrada Novedades de las aplicaciones de ocio en KDE ⚙️ Gear 25.04 se publicó primero en KDE Blog.

Building a Local Bugzilla RAG System
My goal was to build a local database that could:
- Ingest my ~4GB Bugzilla database
- Answer questions or give advice on new bugs based on historical ones
- Run offline on my openSUSE Tumbleweed machine, which is equipped with 64GB RAM and an AMD Ryzen 7 PRO 7840U
Naturally, my first idea was to build a standalone LLM like GPT. But fine-tuning an LLM on custom data is resource-intensive—a massive understatement. When I started to fine-tune an LLM on my laptop, I let the process run for a full week, and it reached only 1%. Using cloud-based services or investing in powerful new hardware were not options. Also, the problem with standalone LLMs is that they may hallucinate or generate inaccurate information, especially on domain-specific topics. The other disadvantage of using LLMs is that they are static; once trained, they don’t know anything that happened afterward.
Cómo crear un bocadillo tipo definición en eXeLearning – Vídeo
Hace ya casi tres años que presenté eXeLearning, un editor de recursos educativos e interactivos de código abierto que te permite llevar tu actividades a otro nivel a la vez que compartirlos sin ningún tipo de restricción en multitud de formatos. Lo cierto es que me interesa mucho esta aplicación y he empezado a aprender mucho sobre ella, y es mi deber pagarlo mediante promoción. Hoy os traigo cómo crear un bocadillo tipo definición en eXeLearning, un vídeo de Cedec_Intef .
Cómo crear un bocadillo tipo definición en eXeLearning – Vídeo
Seguimos con eXeLearning, y en esta ocasión con un vídeo de Cedec_Intef, que no es más que el Centro Nacional de Desarrollo Curricular en Sistemas no Propietarios (Cedec), un organismo público español que promueve la transformación digital y metodológica de las aulas que pone a disposición de los docentes recursos educativos abiertos (REA) del Proyecto EDIA, elaborados por docentes en activo con la herramienta de software libre eXeLearning.
Pues bien, en el vídeo que os presento hoy se explica en pocos pasos cómo crear un bocadillo tipo definición en eXeLearning, faciitando así la comprensión de textos o mejorando las explicaciones al alumnado.
¿Qué es EXeLearning?
Para los que no lo conozcan, eXeLearning es un editor de recursos educativos e interactivos de código abierto se caracteriza por:
- Permite crear contenidos educativos de una manera sencilla
- Descarga fácil y gratuita desde su web.
- Está disponible para todos los sistemas operativos.
- Nos pemite catalogar los contenidos y publicarlos en diferentes formatos:
- Sitio web navegable y adaptable a diferentes dispositivos (responsive design).
- Estándar educativo, para trabajar con Moodle y otros LMS.
- Página HTML única para imprimir cómodamente tu trabajo.
- ePub3 (libro electrónico), etc.
- Ofrece diferentes diseños a elegir desde el menú, además de la posibilidad de crear diseños propios.
Con eXelearnig se puede crear todo tipo de actividades entre las que destaco rellenar huecos, pregunta de elección múltiple, pregunta de selección múltiple, pregunta verdadero-falso, cuestionario SCORM o actividad desplegable.
Además, y este es uno de los principales usos que hago de esta aplicación, nos permite crear rúbricas de forma sencilla, así como incluir recursos realizados con otras aplicaciones. Por ejemplo, Jclic, Descartes, Scratch, Geogebra, Physlets…
La entrada Cómo crear un bocadillo tipo definición en eXeLearning – Vídeo se publicó primero en KDE Blog.