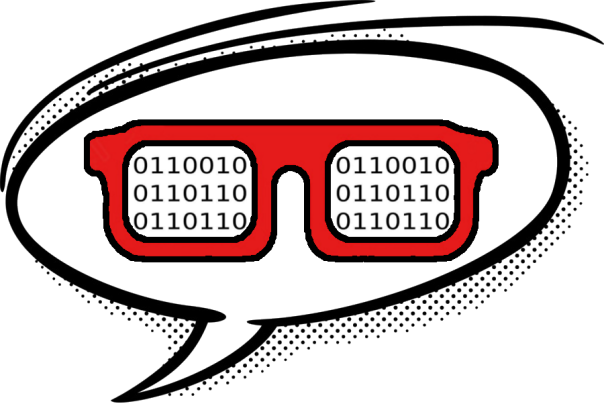
 cabelo
Recebemos papinha de IAs grátis, porque nós somos o produto.

Recentemente, testemunhamos uma revolução tecnológica onde assistentes de inteligência artificial (IA) são disponibilizados gratuitamente em nossos CELULARES. À primeira vista, essa parece ser uma grande vantagem, recebendo constantemente novos recursos sem custo aparente. Contudo, é fundamental lembrar o famoso ditado: “não existe almoço grátis.” Neste cenário, nós, os usuários, somos o verdadeiro produto. As empresas de tecnologia não estão simplesmente sendo generosas; elas têm um interesse econômico claro, utilizando nossos dados como moeda de troca.
As IAs que povoam nossos dispositivos aprendem incessantemente com nossas interações. Cada pergunta que fazemos, cada preferência que expressamos, e cada desaprovação que indicamos a uma imagem ou frase, são dados valiosos que alimentam esses sistemas. Os modelos de IA, especialmente os generativos probabilísticos, são desenhados para absorver e processar essa informação, refinando suas capacidades e, consequentemente, seu valor para as empresas que os controlam. Essa troca contínua de informações é o que permite que essas ferramentas se tornem cada vez mais integradas e indispensáveis em nossa vida cotidiana.
No entanto, a facilidade de uso desses assistentes vem com um preço oculto: a perda de controle sobre nossos próprios dados. Tudo o que submetemos a essas IAs online é enviado para a nuvem, e raramente temos qualquer poder sobre o destino final dessas informações. Desde preferências pessoais até comportamentos sutis, tudo pode ser coletado e analisado. Por exemplo, a aplicação de um simples algoritmo de biometria cognitiva pode revelar uma quantidade surpreendente de informações sobre os usuários. Imagine, então, o que grandes corporações de tecnologia, com seus recursos avançados, são capazes de inferir e acumular.
O problema se acentua com a dependência crescente dessas tecnologias. Ao integrar IAs em cada aspecto de nossas vidas, abrimos mão de uma parcela significativa de nossa privacidade. Esses dados, uma vez coletados e analisados, podem ser usados para influenciar desde nossas decisões de compra até nossas opiniões políticas, sem que tenhamos clara consciência de tal manipulação.
Para aqueles preocupados com a privacidade e o controle sobre seus próprios dados, uma solução seria optar por modelos de IA que funcionam offline e não requerem conexão constante com a internet. Esses modelos podem oferecer muitos dos benefícios das IAs conectadas, mas com uma maior garantia de que os dados pessoais não serão transmitidos para servidores remotos, mantendo-se, assim, sob o controle direto do usuário. Escolher usar tecnologias que respeitem nossa privacidade é um passo crucial para reivindicar nossa autonomia na era digital.

 Member
Connecting Virt-Manager to KVM Hosts Easily
Introduction to AI training with openSUSE
Introduction In my last posts I explained on how to run AI models on a openSUSE system using LocalAI. Now I’d like to introduce you to training AI with a small guide on creating a Low Ranking Adaption, also known as LoRA, and using it with LocalAI on your system. This way, you can leverage […]
The post Introduction to AI training with openSUSE appeared first on SUSE Communities.

Workshop Continues with GNOME Extensions
The openSUSE Project will live-stream Episode 10 of it Contribution Workshop series on Oct. 24 at 18:00 UTC on openSUSE’s YouTube and X platforms for a GNOME Extensions workshop.
The session will cover how to enhance and customize the GNOME desktop environment using powerful extensions that add functionality, streamline workflows and personalize the desktop experience.
GNOME Extensions are an excellent way for users to expand the capabilities of their GNOME environment and make desktop use more efficient and tailored to individual needs.
Episode 10: GNOME Extensions
- Date: Oct. 24
- Time: 18:00 UTC
- Where: openSUSE official YouTube & X channels
- Useful Links: GNOME Shell on GitLab, GNOME Extensions Website and GNOME Shell Integration Add-on for Firefox
These workshops offer a platform for learning and for contributors to ask questions and engage directly with developers, maintainers and experienced members of the openSUSE community.
Whether you’re new to open-source contributions or a seasoned developer, the openSUSE Contribution Workshops offer valuable learning opportunities to improve your skills, engage with the community, and contribute effectively to the openSUSE Project.
The espisdoes for the Contribution Workshop go over a variety of topics including package maintenance, infrastructure or understanding the overall project landscape. These following episodes are tailored to provide an overview and practical advice for open-source software development, use and contribution.
The following episodes were already released:
- Episode 1: openSUSE Contribution Workshop: Basic use of OBS osc using a version bump as an example
- Episode 2: openSUSE Contribution Workshop: From 0 to an rpm package packaging GNU Hello
- Episode 3: openSUSE Contribution Workshop: openSUSE Leap 15.6 Beta Bug Day
- Episode 4: openSUSE Contribution Workshop: Packaging Rust in Open Build Service
- Episode 5: Contributing to openSUSE Leap - Project Structure, Feature Tracking, Package Updates for SLES Packages
- Episode 6: Host Your Own openSUSE Mirror
- Episode 7: openSUSE Contribution Workshop: Custom Leap Micro image spin in a few minutes
- Episode 8: Testing and Breaking Builds - Offloading Repetitive Tasks to Computers
- Episode 9: Python packaging workshop for openSUSE
Note: The live stream was unavailable for openSUSE’s X platform.
(Image made with DALL-E)

Segunda actualización de Plasma 6.2
Me alegra compartir con todos vosotros la segunda actualización de Plasma 6.2, iniciando así una serie de revisión de software que le dotará de más estabilidad, mejores traducción y resolución de errores. Estas actualizaciones son 100% recomendables y casi obligatorias para cualquier usuario ya que lo único que hacen es mejorar la versión sin comprometer sus funcionalidades.
Segunda actualización de Plasma 6.2
No existe Software creado por la humanidad que no contenga errores. Es un hecho incontestable y cuya única solución son las actualizaciones. Es por ello que en el ciclo de desarrollo del software creado por la Comunidad KDE se incluye siempre las fechas de las mismas siguiendo una especie de serie de Fibonacci.
La Comunidad KDE ha publicado la primera actualización de Plasma 6.2, una versión que viene a subsanar los errores más graves del gran salto en cuanto a tecnología que fue Plasma 6 y Plasma 6.1.
Así que me congratula en presentar que ayer martes 23 de octubre de 2024, dos semanas después de liberar el código de Plasma 6.2 la Comunidad KDE presenta la segunda actualización de errores.
- KWin Backends/drm: dejar todas las salidas desactivadas por defecto, incluidos los cascos de RV.
- KWin Establecer WAYLAND_DISPLAY antes de iniciar el servidor wayland. Confirmar.
- Plasma Audio Volume Control: Corregir la visualización de texto para el dispositivo auto_null
Más información: KDE
Las novedades generales de Plasma 6.2
Aprovecho para realizar un listado de las novedades generales de Plasma 6.2:
- Opción para reasignar los botones del lápiz de la tableta de dibujo a distintos tipos de clics del ratón.
- Capacidad de anular aplicaciones que bloquean la suspensión o el bloqueo de la pantalla.
- Discover es compatible ahora con PostmarketOS.
- Se ha renovado la interfaz gráfica del módulo Accesibilidad de las Preferencias del sistema para mayor… ¡accesibilidad!
- Nueva experiencia de usuario para el modo de edición de Plasma, para hacer que su modalidad sea más obvia y visualmente más elegante.
- Previsión meteorológica: Pronóstico nocturno del proveedor meteorológico NOAA.
- Opción para desactivar el desplazamiento suave en las aplicaciones de KDE.
- Se ha mejorado la organización de la vista de cuadrícula expandida de la bandeja del sistema.
- Ahora se reproduce un sonido al conectar o desconectar una pantalla.
- Herramienta de recorte integrada cuando se selecciona el avatar del usuario.
La entrada Segunda actualización de Plasma 6.2 se publicó primero en KDE Blog.
3 Improvements For Collaboration on the Request Page
Akademy 2025 busca sede ¡anímate y presenta una candidatura!
Ha aparecido la noticia en diversas redes sociales y se puede descargar el pliego de condiciones desde la página web de KDE e.V., así que ya es público: la reunión internacional de desarrolladores y simpatizantes de KDE, Akademy 2025 busca sede y creo que si tienes un buen equipo de trabajo y ganas de reunir a lo mejor de la Comunidad KDE y del Software Libre en general esta es tu oportunidad.
Akademy 2025 busca sede ¡anímate y presenta una candidatura!
Ayer, lunes 21 de octubre apareció en la página de Diskuss de KDE , en el Planet de Telegram de la Comunidad y en la misma página web del evento que Akademy 2025 busca sede europea para celebrar su evento anual.
Los requisitos se pueden encontrar en el siguiente dossier alojado en la página oficial de KDE e.V., la fundación que se encarga de dirigir el barco del proyecto KDE.
En palabras del equipo Akademy:
Si quieres contribuir a KDE de forma significativa (más allá de la programación), esta es tu oportunidad: ¡ayúdanos a organizar Akademy 2025!
Estamos buscando anfitriones para Akademy 2025, que tendrá lugar en junio, julio, agosto o septiembre. Esta es tu oportunidad de llevar el mayor evento de KDE a tu ciudad. Descargue la guía de convocatoria de anfitriones y envíe su propuesta a akademy-proposals@kde.org antes del 1 de diciembre de 2024.
No dude en consultarnos cualquier duda o pregunta. Estamos aquí para ayudarle a organizar un evento de éxito y para ofrecerle cualquier consejo, orientación o ayuda que necesite. Trabajemos juntos para hacer de Akademy 2025 un evento para recordar.

A modo de resumen:
- El evento se celebrará en verano del hemisferio norte
- Se necesita un recinto para unas 200 personas con salas auxiliares para las conferencias en paralelo (para unas 150 personas)
- Las salas deben estar dotadas con proyectores, micrófonos, multitud de tomas de corriente y wifi o conexión de red (esto es deseable aunque no imprescindible).
- La sede debe contar buena comunicación con un aeropuerto, con un buen servicio de transporte público, alojamiento económico (tipo albergues o hostels) y comida también económica (aunque no necesariamente rápida).
- Además, para las sesiones de hacking se necesitan varias salas (de 6 a 10) para pequeños grupos de trabajo y una mayor para reuniones (para unas 300 personas)
Parece mucho, pero en realidad cualquier universidad que se precie debería poder ofrecer todas estas condiciones.
¿Qué es Akademy?
Para los que no lo sepan, Akademy es el evento de la Comunidad KDE que aúna en una gran conferencia todo tipo de simpatizantes de KDE como desarrolladores, diseñadores, usuarios, traductores, promotores. Allí se reunirán a lo largo de una semana para compartir charlas, cenas, ponencias, talleres y, en definitiva, para trabajar juntos.
Es una gran semana que sirve para unir más fuerte los lazos que unen nuestra Comunidad, así como para crear nuevos
La entrada Akademy 2025 busca sede ¡anímate y presenta una candidatura! se publicó primero en KDE Blog.
Mejoras en la interfaz de usuarios en Plasma 6.2
El pasado 8 de octubre fue lanzado Plasma 6.2, la nueva iteración del escritorio de la Comundidad KDE. Son muchas las mejoras que trae y ya casi todas están presentadas en el blog. Hoy toca hablar de la penúltima novedad, las mejoras en la interfaz de usuario en Plasma 6.2, una aplicación realmente imprescindible para los usuarios que llegan, no tanto para los veteranos que tenemos más experiencia instalando aplicaciones pero que mejora en todos los aspectos versión a versión.
Mejoras en la interfaz de usuarios en Plasma 6.2
Cuando la gente piensa en KDE suele pensar en el escritorio como si solo fuera eso pero, como hemos visto en estas útlimas entradas presentando las novedades de Plasma 6.2 el tema de que sea un escritorio que se interrelacióna con el usuario es solo una parte, importante pero no única.
Lo que es cierto es que después del salto a Plasma 6.2 los desarrolladores se han centrado en ir limando asperezas con lo que no hay apenas novedades relevantes, pero siempre se avanza en algún que otro aspecto.
En palabras de sus desarrolladores Plasma 6.2 nos aportan estas novedades principales.
En Plasma 6.2, hemos refinado el color de acento y la Bandeja del sistema, hemos trabajado en el Explorador de elementos gráficos y hemos unificado el aspecto de los diálogos y de las ventanas emergentes. Finalmente, hemos mejorado el Centro de bienvenida, los efectos de sonido y las acciones.
Muchos de estos cambios son sutiles, aunque proporcionarán una experiencia más fluida y más agradable.
Más información: KDE
Las novedades generales de Plasma 6.2
Aprovecho para realizar un listado de las novedades generales de Plasma 6.2:
- Opción para reasignar los botones del lápiz de la tableta de dibujo a distintos tipos de clics del ratón.
- Capacidad de anular aplicaciones que bloquean la suspensión o el bloqueo de la pantalla.
- Discover es compatible ahora con PostmarketOS.
- Se ha renovado la interfaz gráfica del módulo Accesibilidad de las Preferencias del sistema para mayor… ¡accesibilidad!
- Nueva experiencia de usuario para el modo de edición de Plasma, para hacer que su modalidad sea más obvia y visualmente más elegante.
- Previsión meteorológica: Pronóstico nocturno del proveedor meteorológico NOAA.
- Opción para desactivar el desplazamiento suave en las aplicaciones de KDE.
- Se ha mejorado la organización de la vista de cuadrícula expandida de la bandeja del sistema.
- Ahora se reproduce un sonido al conectar o desconectar una pantalla.
- Herramienta de recorte integrada cuando se selecciona el avatar del usuario.
- Más información: KDE
En los próximas entradas más detalles.
La entrada Mejoras en la interfaz de usuarios en Plasma 6.2 se publicó primero en KDE Blog.
Mejoras en la accesibilidad en Plasma 6.2
El pasado 8 de octubre fue lanzado Plasma 6.2, la nueva iteración del escritorio de la Comundidad KDE. Son muchas las mejoras que trae y voy a empezar a desgranarlas poco a poco en el blog. Hoy toca hablar de las mejoras en la accesibilidad en Plasma 6.2, un tema que lleva muchso años abordándose pero que por fin se están tomando en serio si queremos que el Software Libre sea para todos.
Mejoras en la accesibilidad en Plasma 6.2
La accesibilidad es una de esas cosas que no caes hasta que alguien te la explica muy bien. En mi caso, desde Akademy-es 2010 tengo constancia de esta problemática pero no fue hasta que conocí a un compañero en esto del Software Libre que le empecé a dar la importancia que realmente tenía.
Tanto es así que la Comunidad KDE ha decidido que, entre sus objetivos principales para los próximos dos años, uno sea la mejora de la accesibilidad a todo el software que producen. De esta forma en palabras de sus desarrolladores:
Como hemos hecho que la mejora de la accesibilidad sea un proyecto comunitario, hemos aumentado los modos de hacer que Plasma sea fácil de usar para todos.
En Plasma 6.2 hemos revisado la página de accesibilidad de las Preferencias del sistema y hemos añadido filtros de daltonismo. También hemos añadido compatibilidad total con la función de «teclas adhesivas» en Wayland.

Más información: KDE
Las novedades generales de Plasma 6.2
Aprovecho para realizar un listado de las novedades generales de Plasma 6.2:
- Opción para reasignar los botones del lápiz de la tableta de dibujo a distintos tipos de clics del ratón.
- Capacidad de anular aplicaciones que bloquean la suspensión o el bloqueo de la pantalla.
- Discover es compatible ahora con PostmarketOS.
- Se ha renovado la interfaz gráfica del módulo Accesibilidad de las Preferencias del sistema para mayor… ¡accesibilidad!
- Nueva experiencia de usuario para el modo de edición de Plasma, para hacer que su modalidad sea más obvia y visualmente más elegante.
- Previsión meteorológica: Pronóstico nocturno del proveedor meteorológico NOAA.
- Opción para desactivar el desplazamiento suave en las aplicaciones de KDE.
- Se ha mejorado la organización de la vista de cuadrícula expandida de la bandeja del sistema.
- Ahora se reproduce un sonido al conectar o desconectar una pantalla.
- Herramienta de recorte integrada cuando se selecciona el avatar del usuario.
- Más información: KDE
En los próximas entradas más detalles.
La entrada Mejoras en la accesibilidad en Plasma 6.2 se publicó primero en KDE Blog.