
 Member
Setting Default Output Folder Cups-PDF
Bismillaah,
Cups-PDF adalah software virtual printing dengan output file PDF (Portable Document Format). Default output foldernya ada di directory /var/spool/cups-pdf/<username>/. Untuk mengubah default foldernya, misalnya saya inginkan di folder /home/pdf-print maka hanya menambahkan satu baris di file cups konfigurasinya. berikut langkah-langkahnya.
- ketik di terminal
sudo nano /etc/cups/cups-pdf.conf - kemudian tambahkan
Output ${HOME}/pdf-printatau/home/<username>/pdf-printpada baris manapun.
Sederhana yah, Alhamdulillah. Semoga bermanfaat.
 Victorhck
Curso de Vim: cómo buscar y reemplazar un texto en múltiples archivos con #Vim
Aprenderemos cómo buscar y reemplazar una cadena de texto en varios archivos gracias al editor Vim

Imaginemos que tenemos una carpeta en nuestro equipo con varios archivos y en todos ellos queremos buscar un texto y reemplazarlo por otro. Por ejemplo el nombre de una variable en un código, un nombre de una función, un nombre de unos capítulos de nuestra novela, etc
Una opción sería abrir uno por uno todos esos archivos, buscar la cadena a modificar y cambiarlo. Pero como ya hemos aprendido muchas herramientas de la línea de comandos y vamos dominando el editor Vim, vamos a conjugar ambas habilidades y ahorrarnos tiempo y trabajo.
Este artículo es una nueva entrega del curso “improVIMsado” que desde hace meses vengo publicando en mi blog sobre el editor Vim y que puedes seguir en estos enlaces:
- https://victorhckinthefreeworld.com/tag/vim/
- https://victorhck.gitlab.io/comandos_vim/articulos.html
Y para aprender Vim (de la manera más inteligente) aquí tienes esta útil guía:
Este artículo es una adaptación del artículo en inglés escrito por Victoria Drake para la web freecodecamp y parte de la guía para aprender Vim de la manera más inteligente:
- https://www.freecodecamp.org/news/how-to-search-and-replace-across-multiple-files-in-vim/
- https://victorhck.gitbook.io/aprende-vim/cap21_operaciones_multiples_archivos
Tal como he planteado en el ejemplo, podremos buscar y reemplazar un texto presente en diferentes archivos gracias a comandos como find y grep de la terminal y Vim.
Vamos a imaginar que estamos en una carpeta con varios archivos en Python, y en todos ellos queremos encontrar la palabra «foo» abrir esos archivos con Vim y después sustituirla por «bar».
Primero vamos a buscar en la carpeta actual llamada Scripts todos los archivos de Python mediante:
find . -name '*.py'
Nos mostrará una lista de todos los archivos en esa carpeta que tienen dicha extensión. Ahora vamos a buscar en esos archivos cuales tienen la cadena «foo» y abrirlos con el editor Vim ejecutando el comando:
find -name "*py" | xargs grep -il 'foo' | xargs vim
Vim abrirá todos esos archivos encontrados en diferentes buffers, tienes más información sobre el tema en la guía para aprender Vim de la manera más inteligente.
Ahora en Vim, basta con ejecutar el comando de sustitución de una cadena por otra en Vim, pero diciéndole que lo haga en todos los buffers abiertos anteponiendo el comando :bufdo. Algo similar a esto:
:bufdo %s/foo/bar/gc
Al comando de sustitución (%s) de una cadena (foo) por otra (bar) le hemos añadido las opciones gc:
- g → para indicar que realice la sustitución de manera global en todo el archivo
- c → para que pregunte en cada cadena encontrada si debemos realizar el cambio o no
Acabada la tarea, podremos guardar todos los cambios de todos los archivos abiertos en los buffers, mediante:
:bufdo wq
Y de un plumazo gracias a Vim y a un par de comandos de la terminal habremos resuelto una tarea que podría convertirse en tediosa por el tiempo que puede llevar.
¿Te ha resultado útil? ¿Tienes una manera mejor de realizar esta tarea? Comparte tus ideas y sugerencias en los comentarios.

Working with JSON logs from sudo in syslog-ng
This weekend I am going to give a talk about sudo in the security track of FOSDEM. I will talk a few words about logging at each major point I mention, but I cannot go into too much detail there. So, consider this blog both as a teaser and an extension to my FOSDEM talk. You will learn how to work with JSON formatted logs in syslog-ng and also about new sudo features along the way. You will also learn about JSON logging in sudo, chroot support, logging sub-commands, and how to work with these logs in syslog-ng.
Read the rest of my blog at https://www.syslog-ng.com/community/b/blog/posts/working-with-json-logs-from-sudo-in-syslog-ng

syslog-ng logo
Manasarovar, la versión de iconos degradados de Kora
El número de temas de iconos para tu escritorio es casi infinito y un buen número de ellos han sido presentados en el blog. De hecho hace poco que os presenté Kora, un tema de iconos que destacaba por ser coloridos pero a la vez sobrios pero de todo puede aparecer una evolución. Este es el caso de Manasarovar, la versión de iconos degradados de Kora.
Manasarovar, la versión de iconos degradados de Kora
Me fascina la variedad que tenemos a nuestra disposición, tanto de forma, estilo o colores. Tenemos iconos clásicos, minimalistas, lineales, 3D, que simulan otros sistemas operativos, imaginativos, etc.
No obstante, siempre se puede conseguir un resultado diferente aplicando alguna transformación. Es lo que ha pensado y creado Tarma que nos presenta nuevo tema de iconos llamado Manasarovar, el cual está basado en Kora (ya hemos hablado de esta tema en el blog), que sigue destacando por su forma estilo elegante, colorido y perfecto para temas oscuros que ofrece bonitos degradados.

En esta ocasión, no hay muchas versiones de Manasarovar pero dejemos tiempo al diseñador para que siga creando, y si tenéis, prisa pedidla en los comentarios de la Store de KDE.

Y como siempre digo, si os gusta el pack de iconos podéis “pagarlo” de muchas formas en la página en continua evolución (mirad su nuevo aspecto) de KDE Store, que estoy seguro que el desarrollador lo agradecerá: puntúale positivamente, hazle un comentario en la página o realiza una donación. Ayudar al desarrollo del Software Libre también se hace simplemente dando las gracias, ayuda mucho más de lo que os podéis imaginar, recordad la campaña I love Free Software Day 2017 de la Free Software Foundation donde se nos recordaba esta forma tan sencilla de colaborar con el gran proyecto del Software Libre y que en el blog dedicamos un artículo.
Más información: KDE Store
syslog-ng relaunch
Balázs Scheidler, founder of the syslog-ng project, started a new blog where he details why and how he started to work on syslog-ng even more actively. He also asks for your feedback!
“syslog-ng has been around for decades: I started coding the first version of syslog-ng in September 1998, circa 24 years ago. The adoption of syslog-ng skyrocketed soon after that: people installed it in place of the traditional syslogd across the globe. It was packaged for Debian, Gentoo, SUSE and even commercial UNIXes. It became a default logging daemon in some of these Linux distributions. Commercial products started embedding it as a system component. Over the years however I feel that syslog-ng has become a trusted piece of infrastructure, few people really care about. I set out to change that.”
Read the rest of the blog at https://syslog-ng-future.blog/syslog-ng-relaunch/
syslog-ng logo
Publicada la versión 3.2.0 para el navegador Falkon de #KDE
Después de casi 2 años, se ha publicado una nueva actualización del navegador Falkon desarrollado por la comunidad KDE

En el principio fue Qupzilla y vio la comunidad de KDE que era bueno, así que cambió de nombre, y aquel primigenio navegador web que utiliza el motor QtWebEngine pasó a llamarse Falkon y a convertirse en un proyecto más bajo la comunidad de KDE.
Y en este final de enero de 2022 ha publicado su versión 3.2.0 que ya está disponible para descargar y muy pronto en los repositorios de las distribuciones de GNU/Linux.
El proyecto comenzó como algo personal por parte de un desarrollador, que quería aprender a desarrollar y se embarcó con este proyecto que al inicio se llamaba Qupzilla.
Con el tiempo, poco a poco, ese experimento de navegador web fue ganando en funcionalidades, en mejoras y pasó al amparo de la comunidad KDE para darle infraestructura, una plataforma de desarrollo y la oportunidad de que una de las comunidades más importantes de software libre le fuera dando más cariño.
A partir de la versión 3.0 publicada en 2018, le cambiaron el nombre por el actual Falkon y se publicaron unas cuantas nuevas versiones que hacían el proyecto cada vez mejor, ya como proyecto de KDE.
Pero desde hace casi 2 años, en concreto desde marzo del 2019, no se había visto una nueva publicación del navegador.
Por lo que muchas personas que el proyecto se había abandonado, pero echando un vistazo de vez en cuando por el repositorio de desarrollo veía que sí había movimientos. Y hoy ese esfuerzo colectivo ha dado sus frutos en la publicación de la versión 3.2.0 del navegador Falkon.
Esta nueva versión viene cargadita de nuevas funcionalidades, como así atestigua el registro de cambios que trae.
Así que si eras habitual de este navegador, ligero, multiplataforma escrito en C++, estás de enhorabuena. Puedes encontrarlo en muchas formas para descargar o actualizar.
Disponible via Flatpack, Snap y si eres como yo, que prefiere tirar de repositorios oficiales, pronto estará en los repositorios de las distribuciones GNU/Linux.
El halcón vuelve a planear sobre nuestras cabezas, nunca se había ido del todo, pero es bueno volverle a ver tan cerca. ¿Utilizas Falkon como navegador?
Enlaces de interés

Alpaca Clock and Weather – Plasmoides de KDE (190)
Siguen los plasmoides estilo reloj al blog que parecen que vuelven a estar de moda. Tras presentar a Time Keeper Evolution y Clear Clock hace poco, el widget de hoy (el número 190) de esta serie es Alpaca Clock and Weather, un minimalista y precioso
Alpaca Clock and Weather – Plasmoides de KDE (190)
Hoy sigo con los plasmoides para nuestro entorno de trabajo ya que la Comunidad KDE no para de ofrecernos variedad y calidad, y sigo con los de estilo reloj, aunque en esta ocasión nos ofrezca mucha más información.
De esta forma os presento Alpaca Clock and Weather, una creación de Eduardo Forca que nos ofrece un reloj con información meteorológica integrado elegante y funcional.

Sus opciones de configuración son simples pero nos permiten personalizar fuentes y colores, así como la localización utilizando OpenWeather.

Y como siempre digo, si os gusta el plasmoide podéis “pagarlo” de muchas formas en la mutante página de KDE Store, que estoy seguro que el desarrollador lo agradecerá: puntúale positivamente, hazle un comentario en la página o realiza una donación. Ayudar al desarrollo del Software Libre también se hace simplemente dando las gracias, ayuda mucho más de lo que os podéis imaginar, recordad la campaña I love Free Software Day de la Free Software Foundation donde se nos recordaba esta forma tan sencilla de colaborar con el gran proyecto del Software Libre y que en el blog dedicamos un artículo.
Más información: KDE Store
¿Qué son los plasmoides?
Para los no iniciados en el blog, quizás la palabra plasmoide le suene un poco rara pero no es mas que el nombre que reciben los widgets para el escritorio Plasma de KDE.
En otras palabras, los plasmoides no son más que pequeñas aplicaciones que puestas sobre el escritorio o sobre una de las barras de tareas del mismo aumentan las funcionalidades del mismo o simplemente lo decoran.
packagesの説明文書を訳しつつ、使えるものを探してみました(p編その1)
今回は rainbow を紹介します。
rainbow は コマンドの出力に色を付け、見やすくするツールです。たとえば、ping の結果に対して、IP アドレス部分に色を付けることができます。
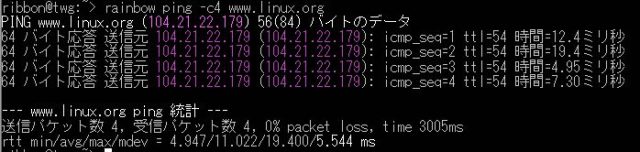
いくつかのプログラムについては、あらかじめ色を付けるパターンが用意されています。上記の例では、 ping の場合には、IPv4 アドレスに対してマゼンタで着色するように定義ファイルが用意されています。あらかじめ用意されているパターンについては rainbow の引数としてコマンドを指定できます。
そのほかに、個別のパターンを指定して色を付けることもできます。たとえば、IP アドレスに対して黄色を着色したい場合は、下記のようにします。
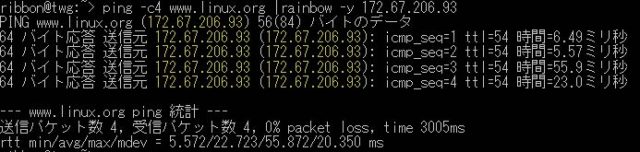
あらかじめ用意されているパターンは、df、env、ifconfig、jboss、mvn、tomcat、diff、host、java-stack-trace、md5sum、ping、traceroute があります。そのほかに、太字(bold)、網掛け(faint)、イタリック(italic)なども指定できます。
Supporting Sustainability
Many software teams struggle with ever growing cost of change, and technical debt that risks overwhelming them.
It’s always interesting to talk with folks and understand, how the system and incentives created this state.
Often I hear from software engineers that management doesn’t give them permission for (or doesn’t prioritise) work such as tidying, refactoring, testing, observability.
Blaming management in this way may be accurate in many situations (they are indeed probably accountable for the system that created this outcome). However, the problem with blame is that it tends to short-circuit further thinking. How could the system be improved with the influence and control you do have, perhaps with minimal authority.
But what about from the management side? I often hear from engineering and product managers that they’re unaware, or learn too late, that folks were accumulating debt. It becomes visible when teams are no longer able to achieve goals.
Management has a bad reputation in the tech community. I’ve been very fortunate to work almost exclusively with managers who genuinely care deeply about the people and teams they support; who want what’s best for them in the long term.
And yet, it’s still common, with the best of intentions, to create systems that result in unsustainable software development, and lots of technical debt.
How does this happen?
The risks are not very visible. If managers were given the option of twice as much this month, in exchange for nothing for the next 6 months, they probably wouldn’t take it (perverse incentives like annual bonuses notwithstanding). Would that it were so simple.
The decks are stacked against sustainability. It requires active effort from managers to combat the natural incentives.
Here’s three practical ways you can help as a manager.
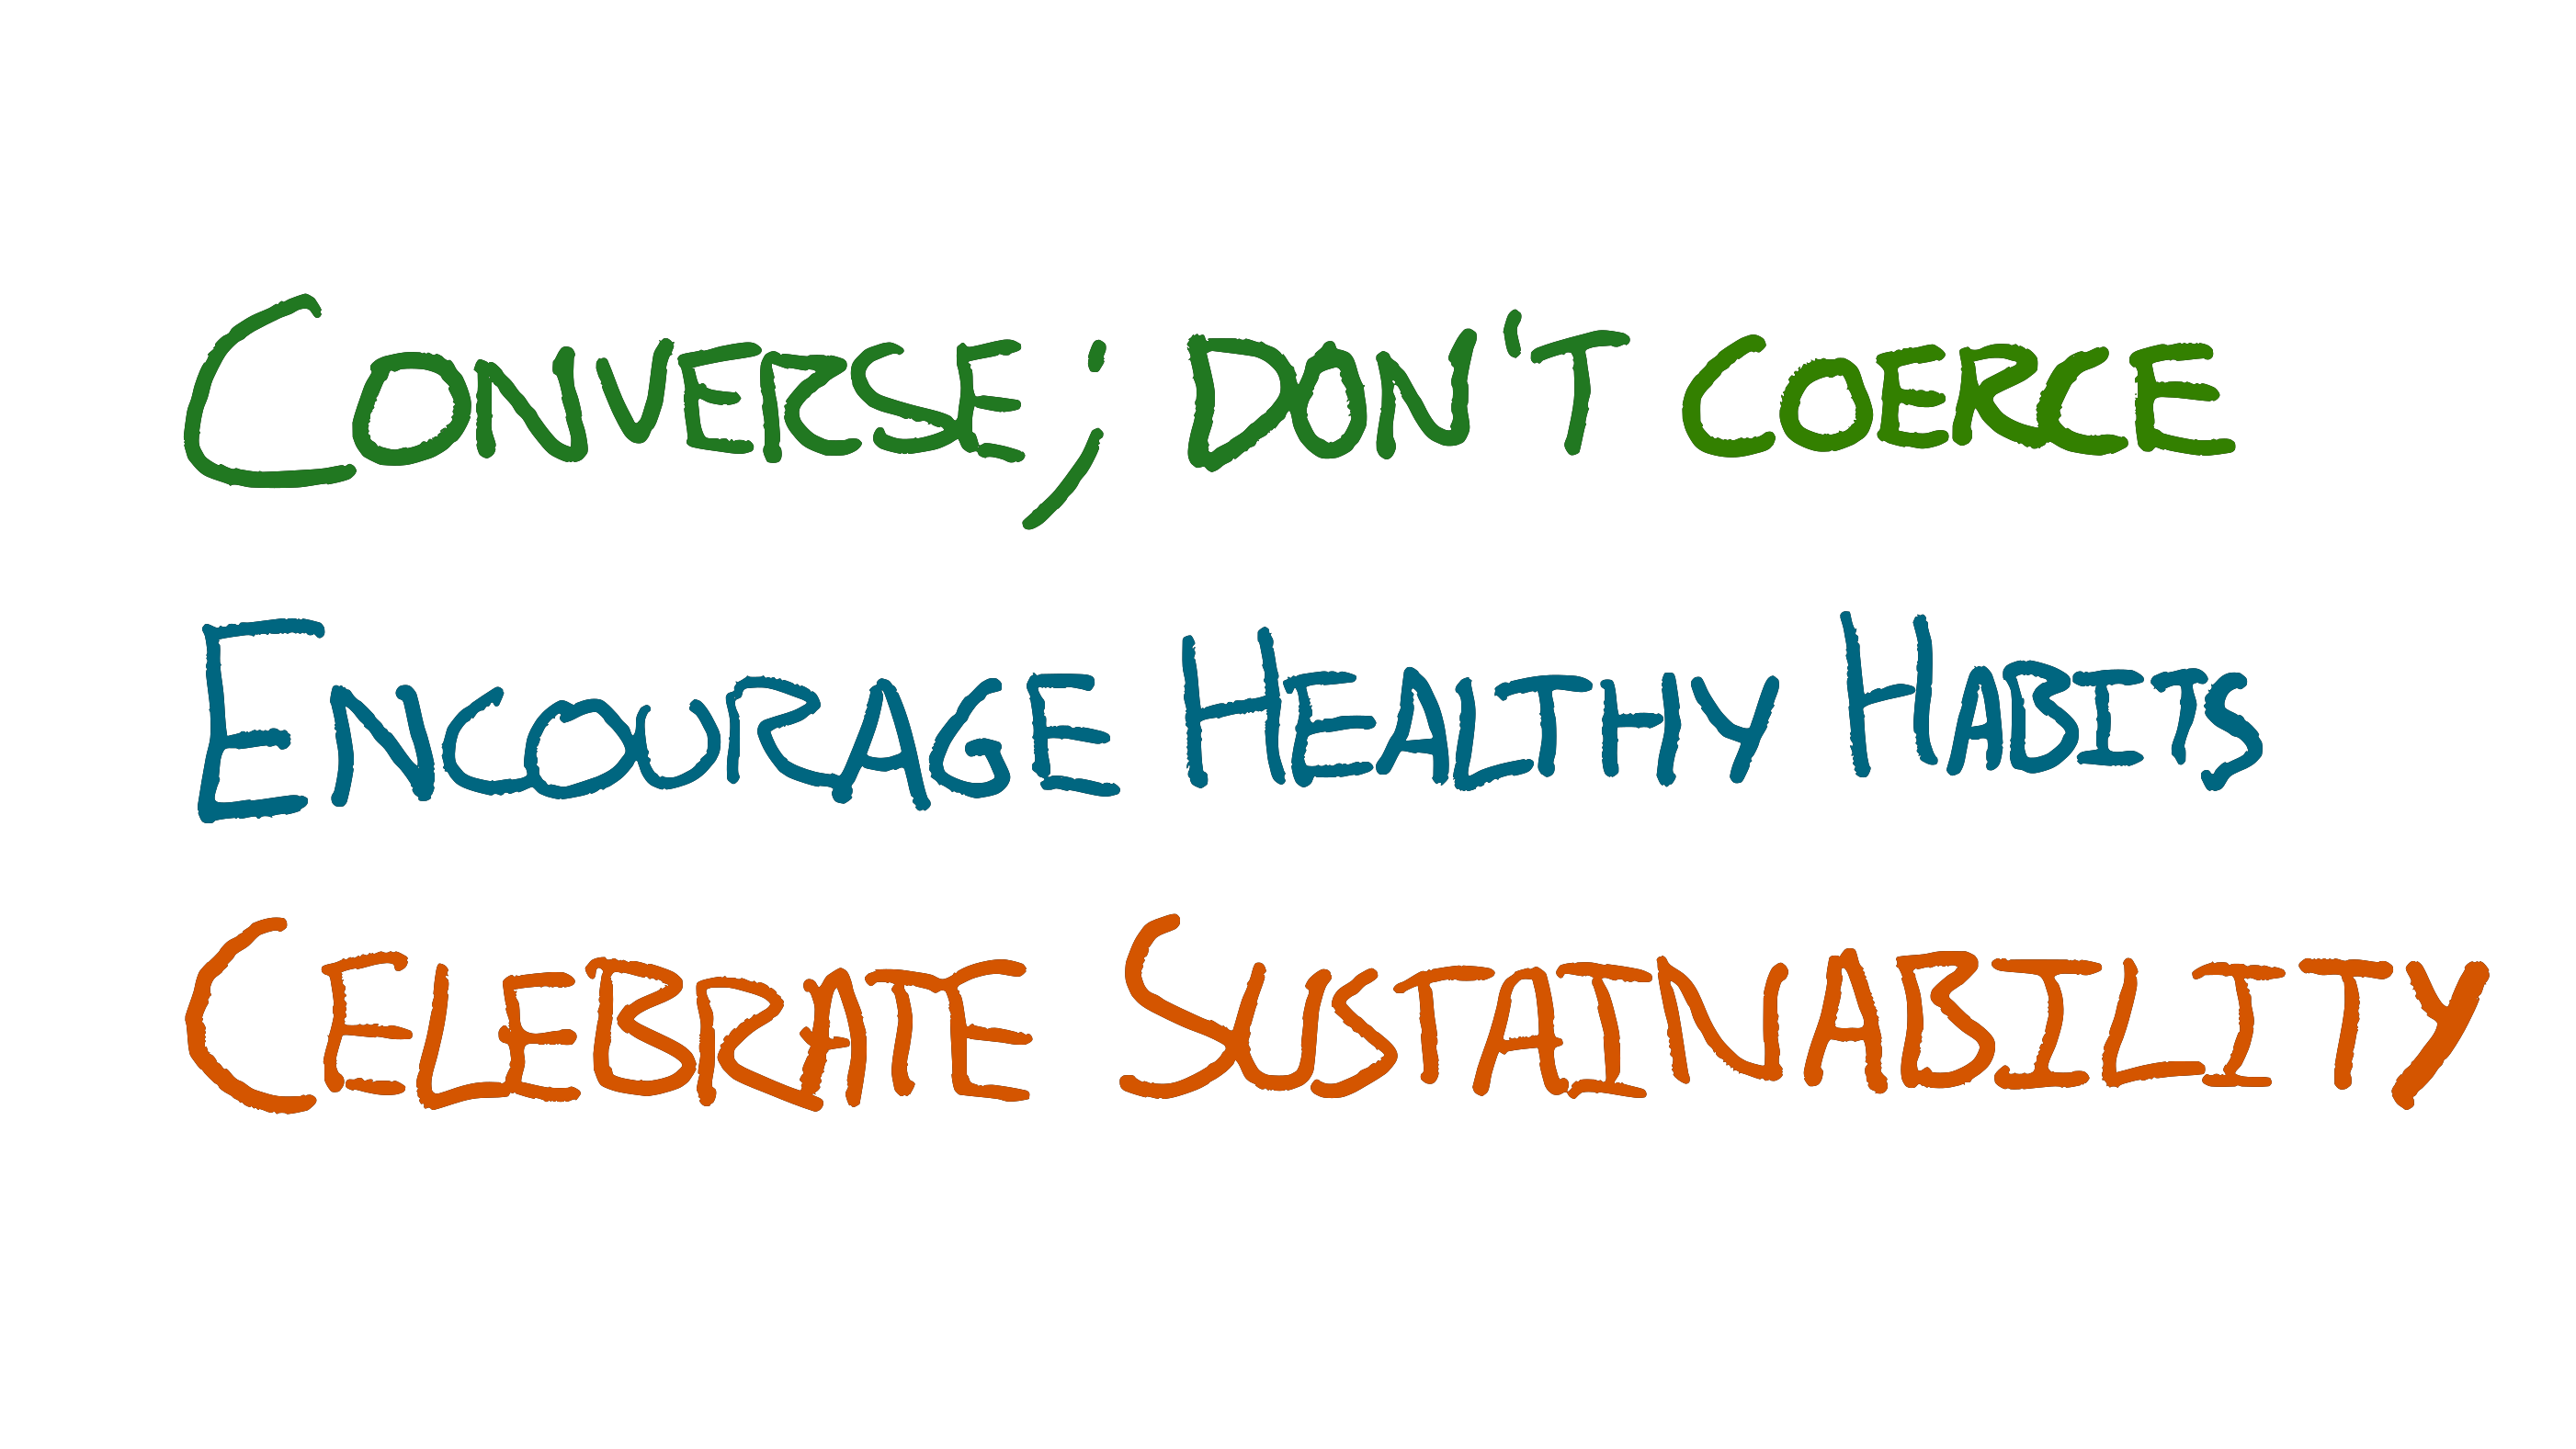
Converse; don’t Coerce
Get Curious
People will always want more than you’re able to achieve. Meaning we’re often starting from a position of saying no to lots of things that are very valuable; it’s faster to identify opportunities than it is to win them.
Most people don’t want to give bad news. Most people don’t want to hear bad news.
This sets us up for miscommunication.
<Manager> we need to do X this week
<Maker> Ok [unsaid: I’m going to risk a production outage by skipping testing]
If sufficient trust exists then it’s possible the risk will be vocalised, but the manager has not invited this feedback. Nor have they provided enough information for the maker to form their own opinion on the merits of the risk.
It’s an instruction. There’s no curiosity as to what the impact or tradeoffs are, which shuts off thinking.
It encourages risks. Some might infer an unsaid “…whatever it takes”. This could lead to taking risks such as skipping normal safety, or working long hours
It’s informationless. It’s a blanket “we need”. It doesn’t say what the value or tolerable costs are. The recipient has no information to make good judgements themselves with.
Things get a little better with even the slightest bit of curiosity.
<Manager> can we do X this week?
<Maker> I think so [unsaid: cutting corners]
* next week *
<Manager> can we do Y this week?
<Maker> I think so [unsaid: that means they’ve decided not to clean up the debt from X]
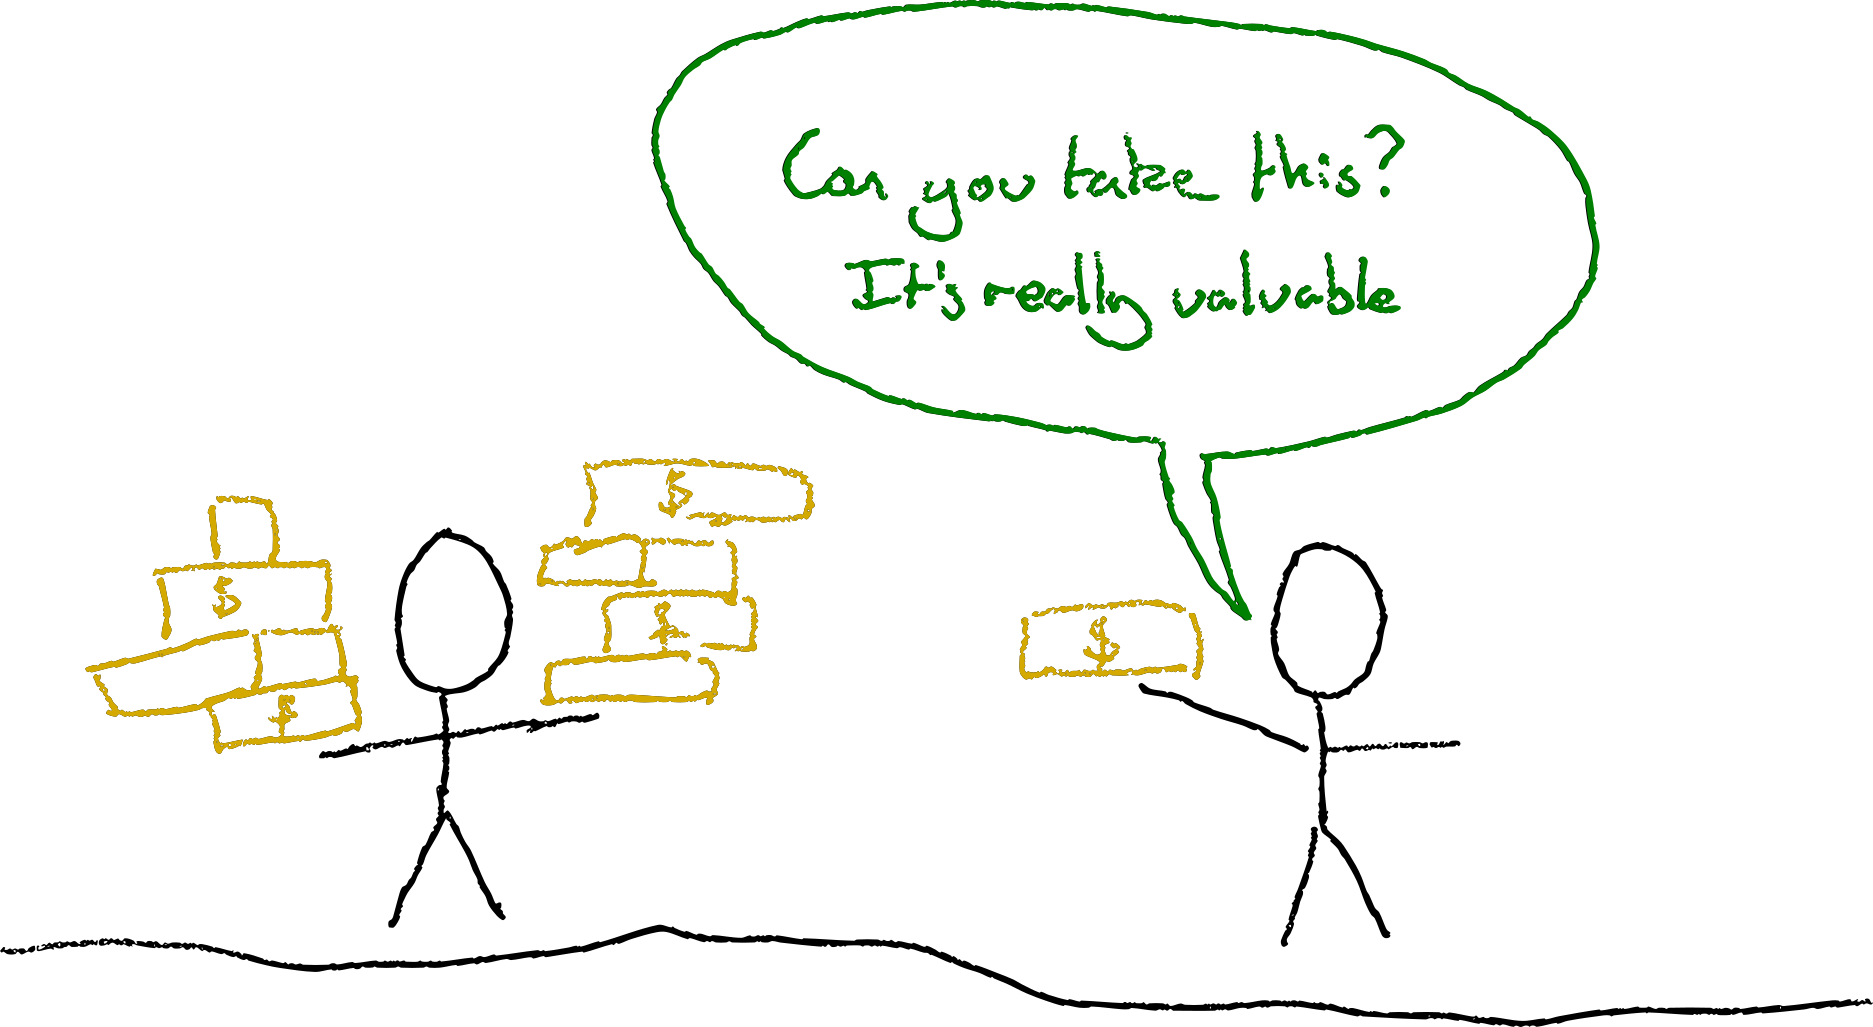
At least the manager is now making it clear that there’s some degree of choice, although the power dynamic might make the choice seem illusionary.
It’s a closed question. The manager’s likely to get yes or no answers. They’re not showing curiosity about the consequences of the team making X or Y happen.
The manager is still asking the team to do things. Having to ask a team to do something is often a sign of a bug in the organisation. An organisational smell.
What’s stopping the team self-organising to the most important work? What information were the team missing to help them spot that X&Y were more important? What skills or perspectives are they missing to be able to make the best choices?
Use Open Questions
Things improve further if we ask open questions:
<Manager> what would we drop if we tried to do X this week?
<Maker> well we were planning on implementing the actions from last week’s post mortem, if we postponed those we might be able to do X.
or
<Manager> on a scale of 1-5, how risky would it be to release X this week?
<Maker> Hmm, probably a 4, we’d not have any time to test or do a canary deployment so we’d lose our usual safety nets
Here the manager has asked open questions, and solicited information that might help make better decisions. Even if the manager then asks the maker to do the same thing, the risks have at least been taken more intentionally.
Prefer information over instructions
What if we didn’t ask the team to do X at all?
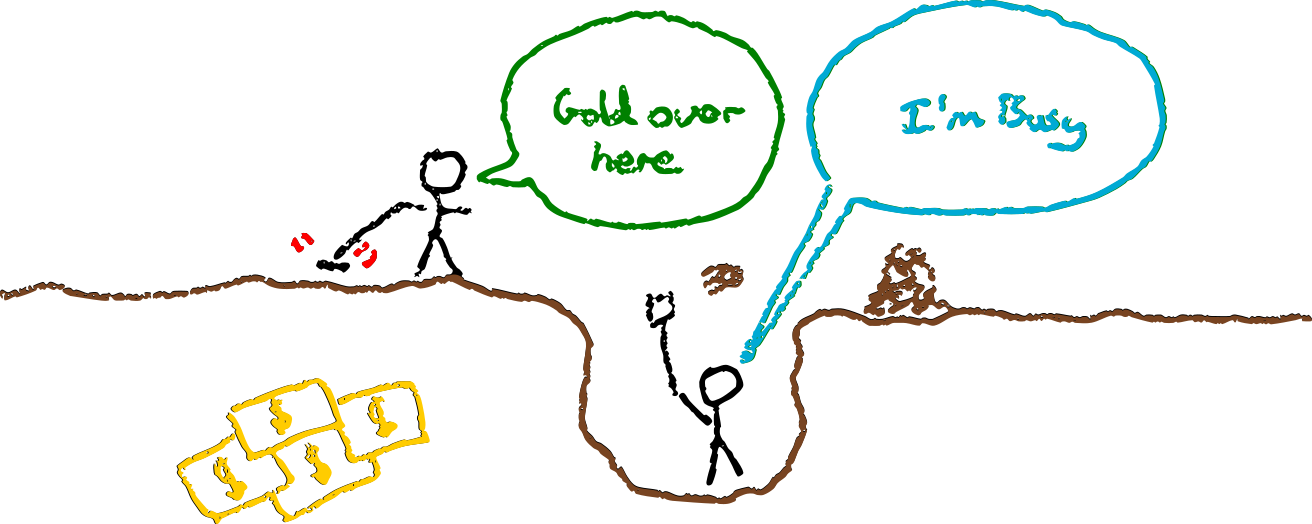
<Manager> I’ve learned that we could close a $n deal if we can ship X this week.
<Maker> Hey that’s more than the total cost savings from what we were working on, let’s do X instead.
or
<Manager> I’ve learned that we could close a $n deal if we can ship X this week.
<Maker> Hmm, but if we rush we risk breaking the service. Last time this cost us $10*n
However, this is somewhat optimistic. Even with all the information, people often have recency bias and eagerness to please. The power dynamic between manager and maker often exacerbates this.
Incentives conspire to eliminate slack time that would be used to keep development sustainable.
Combining Curiosity and Information
<Manager> I’ve learned that we could close a $n deal if we can ship X this week.
<Maker> Hmm, that sounds like a lot, I can get it done
<Manager> How risky is it on a scale of 1-5?
<Maker> Probably a 1, we’ve still got time to test it carefully.
<Manager> What things are we dropping that we’d otherwise be doing?
<Maker> Oh we were going to refactor Y as changes in that area are slow
<Manager> Oh I thought Y was done months ago
<Maker> We shipped it months ago but have since noticed the design trips us up and we never have time to fix it with all these urgent opportunities.
<Manager> How much time has it cost us?
<Maker> More than it takes to ship X just this month
Here the manager and maker have built a much richer understanding of the situation and tradeoffs. They are much better placed to make a decision than if the maker had simply been asked to ship X.
Encourage Healthy Habits
Team habits can help people escape the trap of needing permission from unsupportive or oblivious management. You will probably be unsupportive or oblivious at some point. Unintentionally coercing people is so easy.
You can counter this by encouraging your team to adopt habits that will resist your efforts to coerce them into doing the wrong thing.
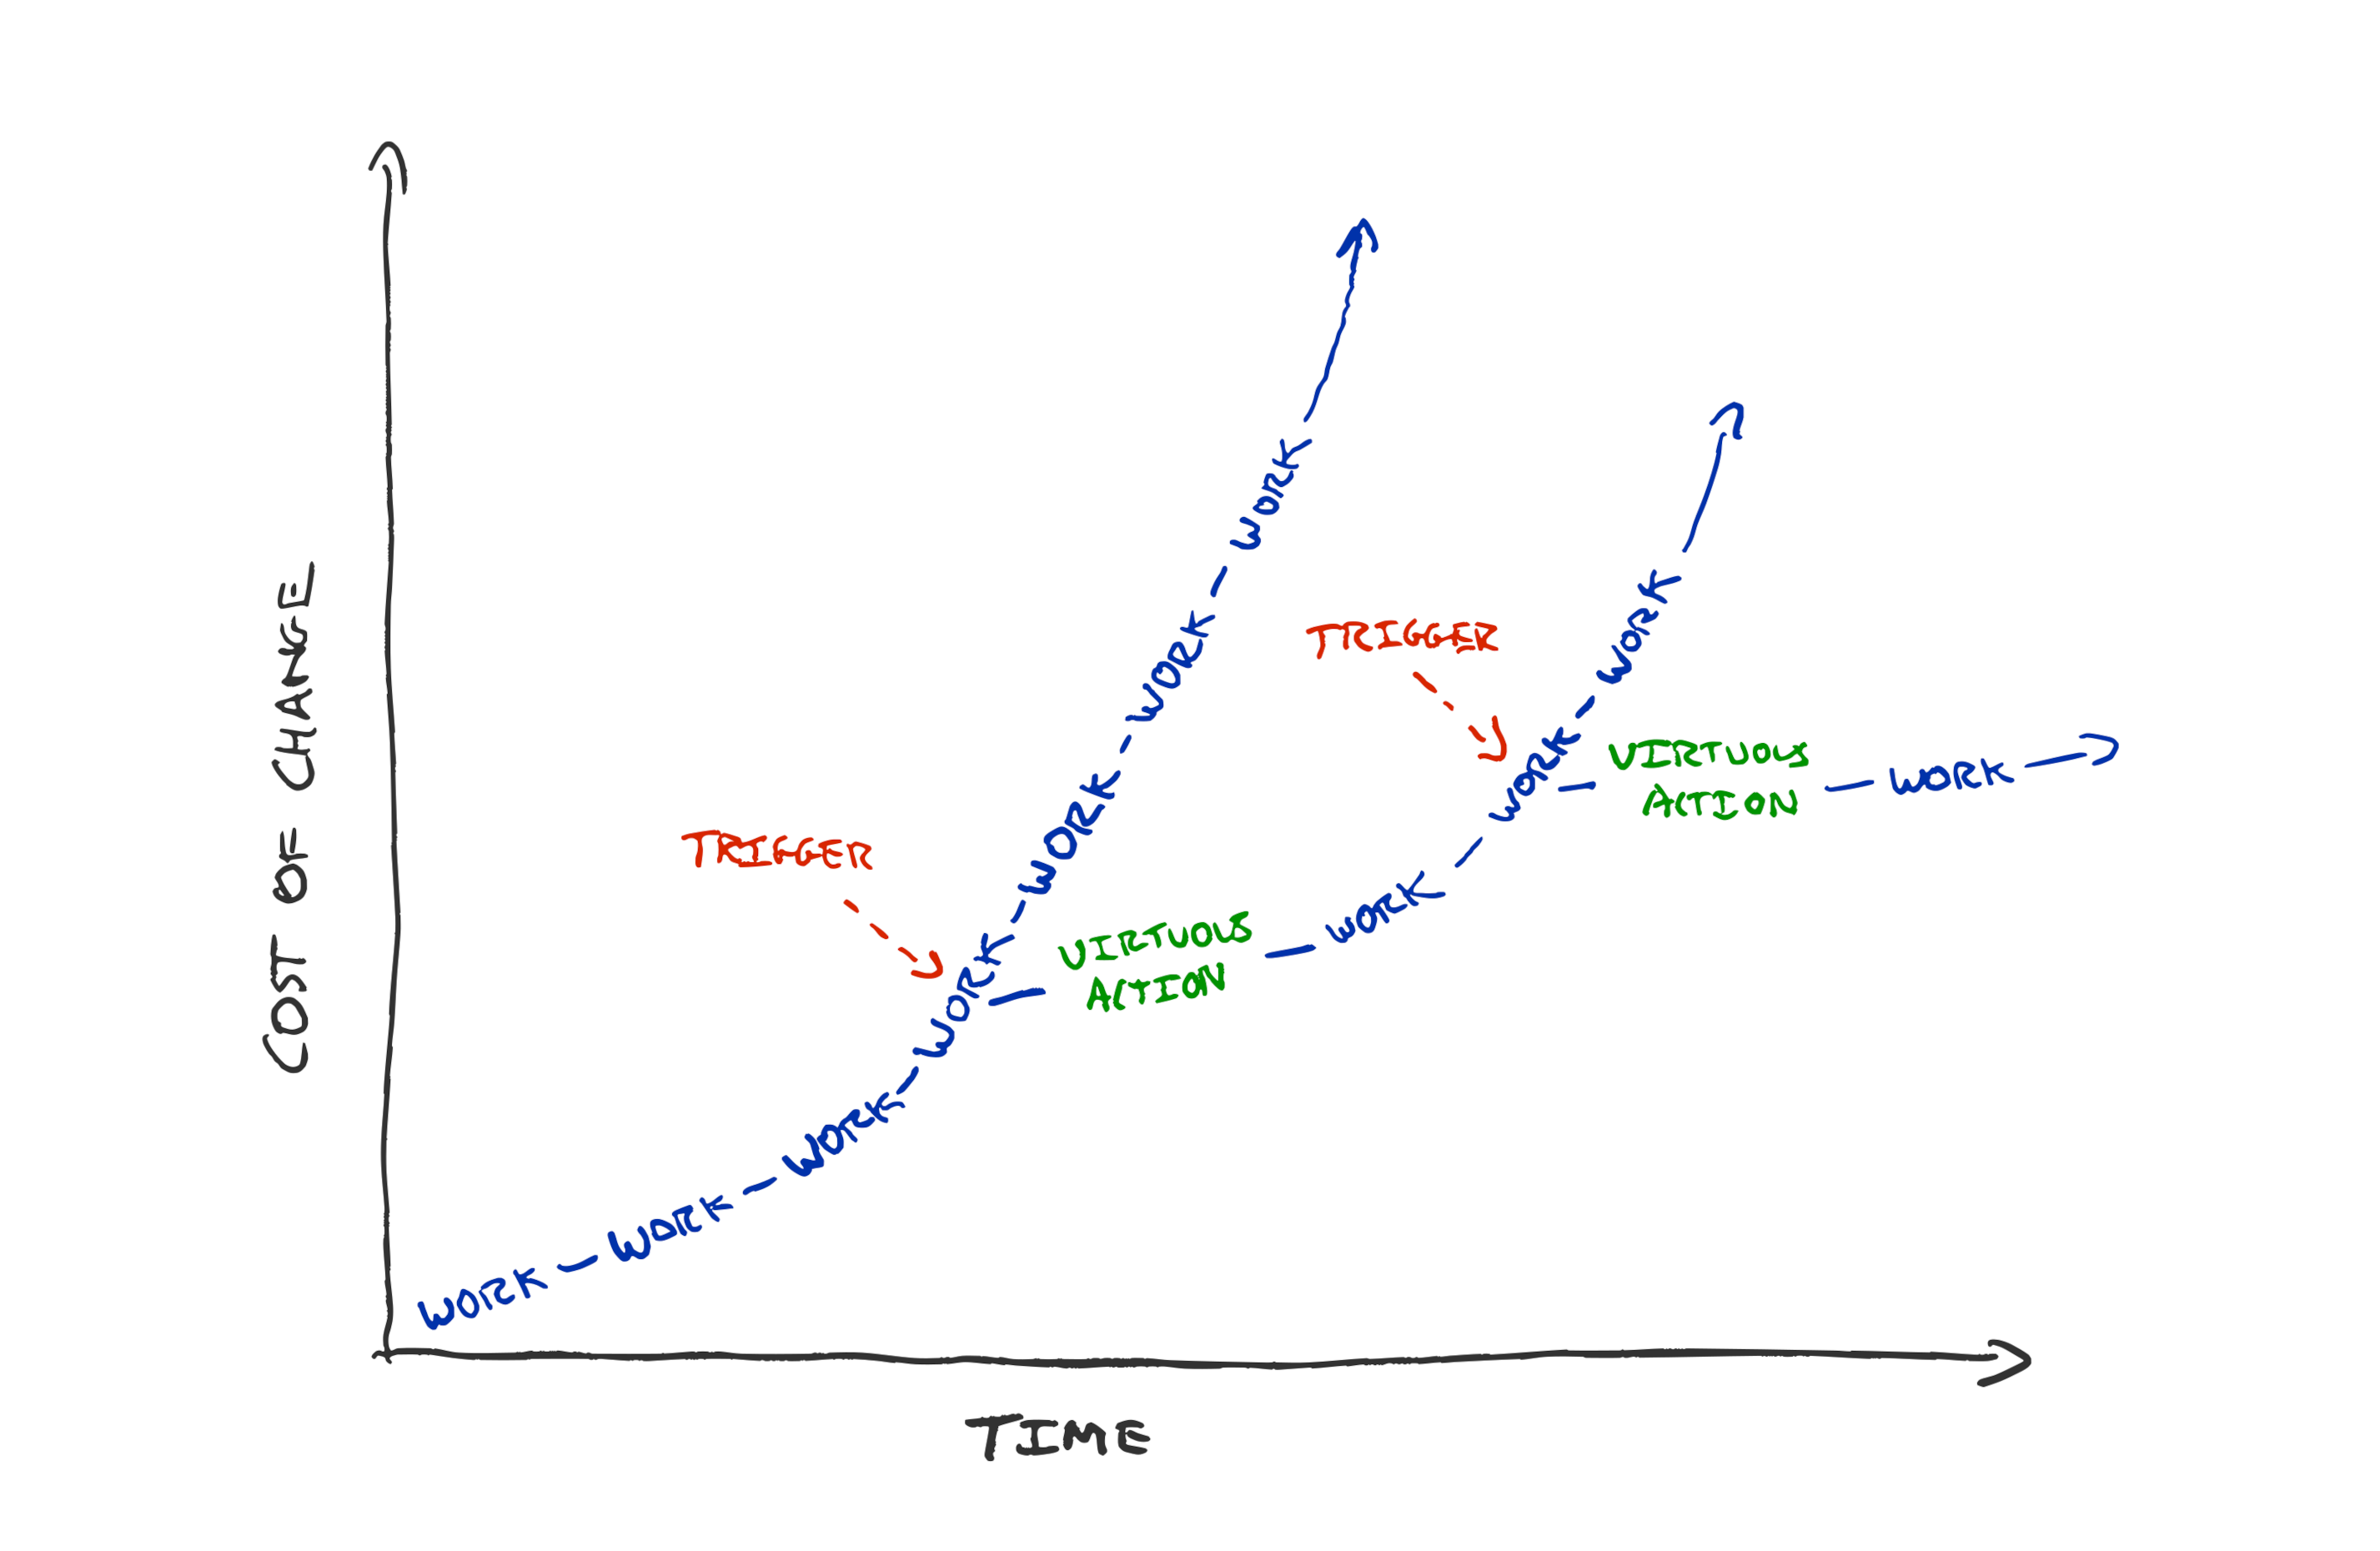
If your team practices TDD then you’d have to break a strong habit to encourage people to release a feature without tests.
If your team habitually drops everything to bring the build time down every time it creeps above 5 minutes, then they’re more likely to do the same even if you’ve asked them to deliver a feature.
If your team habitually prioritises work based on cost of delay, then they’ll likely ask you questions to find out the value before jumping on it. Even if you have omitted the information in your request.
Habits are hard to break. This can be a good thing. The right habits can add resistance to the forces that conspire to create creeping loss of sustainability.
Celebrate Sustainability
If you publicly appreciate internal improvements you will signal for more.
If your only questions about the work are inquiries about when it will be finished, you’ll incentivise unsustainable working.
If your promo process only recognises features and customer impact, you’ll discourage sustainability.
Do you celebrate with the team as much when they halve their deploy time, as when the ship that flagship feature?
Do you thank folks for taking extra days to refactor and clean up the code?
Do you ask “how much more could we simplify it?” or “when will we be done?”
Do you ask “what if tried doing less?” or “how can we do more?”
The post Supporting Sustainability appeared first on Benji's Blog.
Pondering Agile Principles
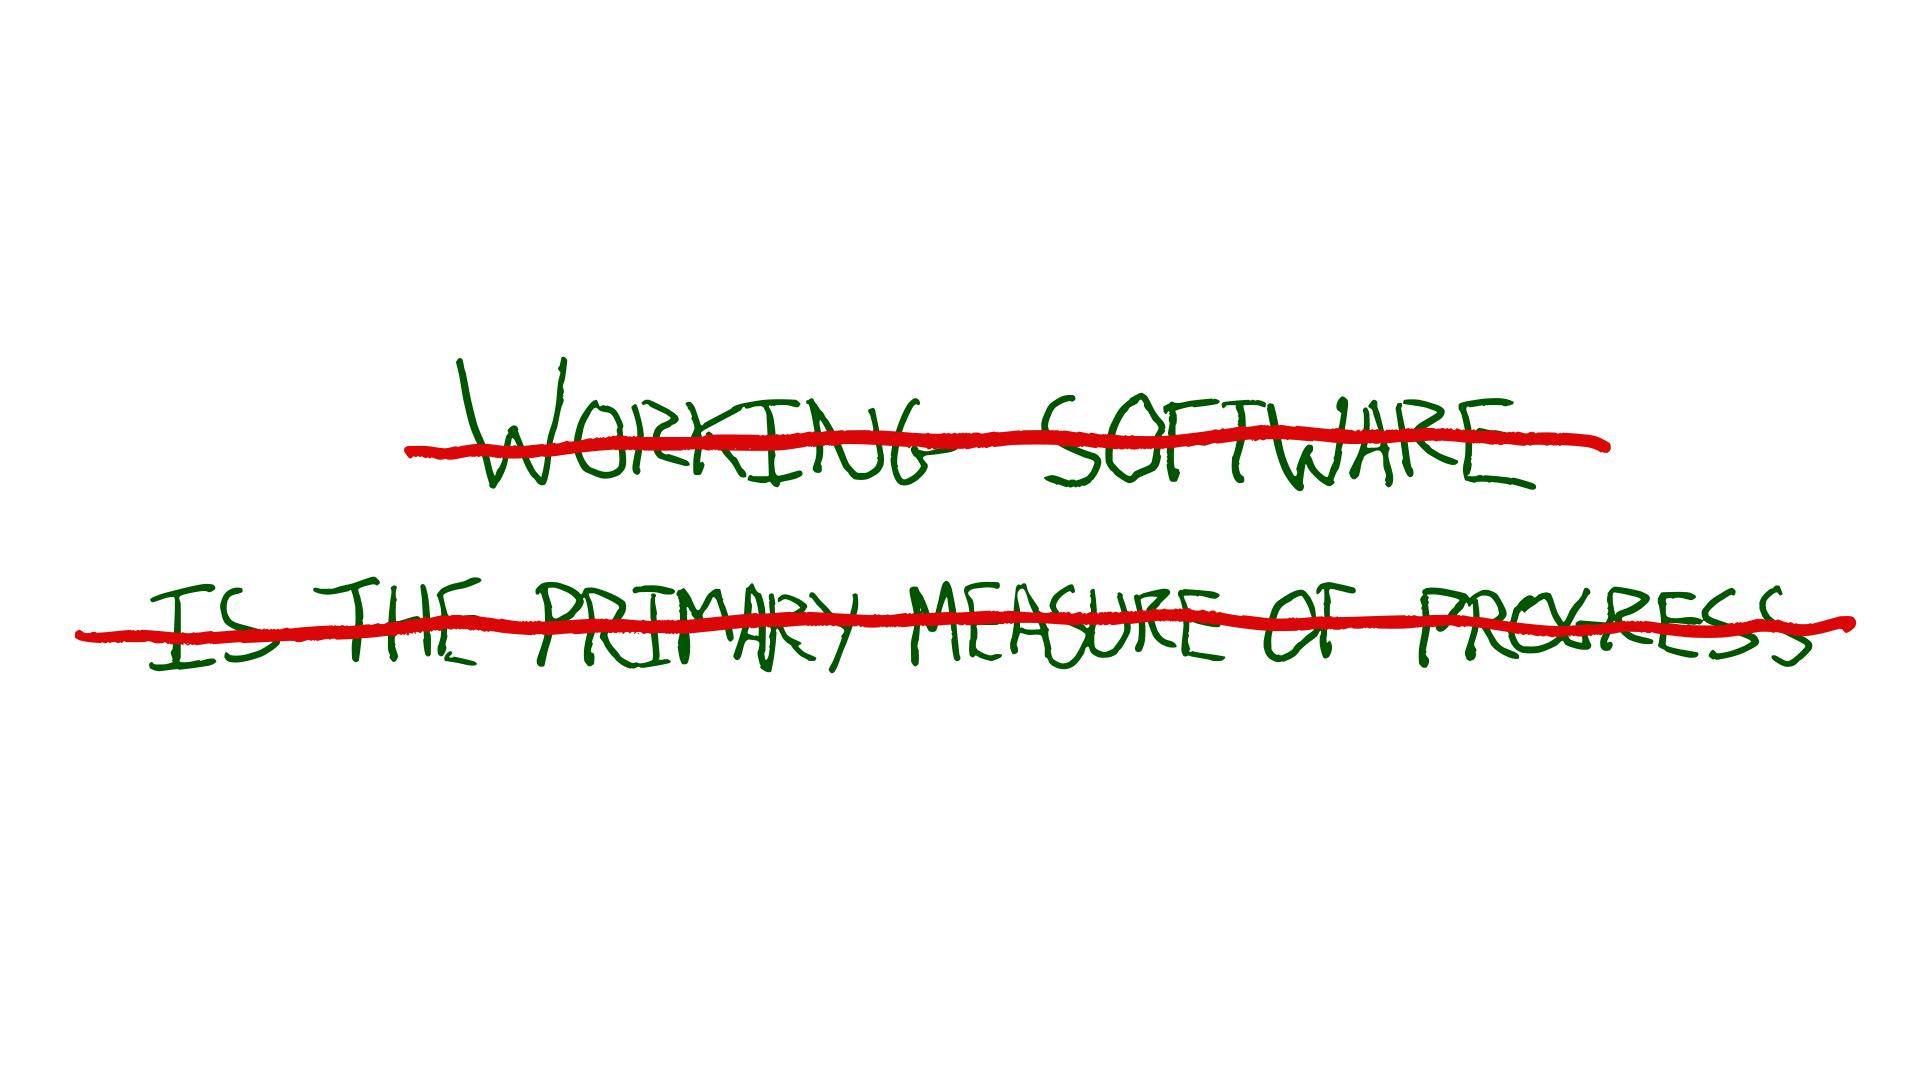
I’ve worked in and with teams who would identify as agile for many years. I’ve written about how I think the most interesting part of the agile manifesto is the “uncovering better ways” mindset.
With this in mind, I’ve been pondering how the principles in the agile manifesto have aged. Where do (and don’t) I share the same principles.
Given the “better ways” of developing software we’ve uncovered, can we “turn up the dials” on the principles as well as the ways of working?
Principles tend to stand the test of time better than specifics. The agile manifesto still reads as an aspirational document today, but I think there’s room for improvement.
Here’s my take on things I’d tweak in each principle; hopefully staying true to the values.
Bettering Ourselves

Building working software is a powerful tool to achieve our ends. However, I wouldn’t consider it the highest priority of a team. If we can achieve our goals without software (which can be a liability) that’s even better.
Moreover, if the software we’re asked to build is harmful for humanity, or counter to our organisational/personal values; avoiding that comes before satisfying the customer. The negative impact software can have on society is increasingly evident as more of our society is controlled by software.
“Bettering ourselves” (optimise for learning) is at the heart of agile to me. To borrow from Captain Picard, I’d state our highest priority as:
Our highest priority is to better ourselves, our organisation, and the rest of humanity. Continuous delivery of software is our tool to achieve this.
Learning we’re Wrong

We’re not passively waiting for requirements. We can take more ownership over our goals and understand customer needs ourselves. We’ve shifted from requirements to forming our own hypotheses of what customers need.
It’s not that requirements change, it’s our understanding that improves. We learn how we were wrong and adapt our goals in response.
We don’t need to build for a customer-proxy (stakeholder who wants the software). We’re can build products for people; they are our customers. By meeting customer needs, we build a competitive advantage for ourselves.
We welcome learning that we’re wrong, even late in development. Changing our software in response to what we learn helps us meet customer needs and gives us a competitive advantage.
Continuous Delivery
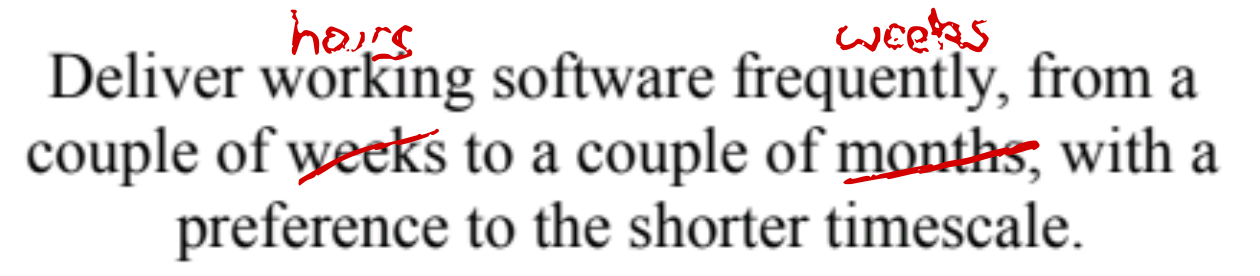
The only thing worth changing in the continuous delivery principle, is that our tooling and platforms are so much better now than 20 years ago. We can deliver considerably faster and smaller.
A team can feasibly ship multiple times a day—given a good continuous delivery pipeline, reliable & fast tests, production safety net from canary deploys, and production observability. We’re no longer having to burn CDs with software builds.
Deliver increments to working software frequently, from a couple of hours to a couple of weeks, with a preference to the shorter timescale.
All the Brilliant People
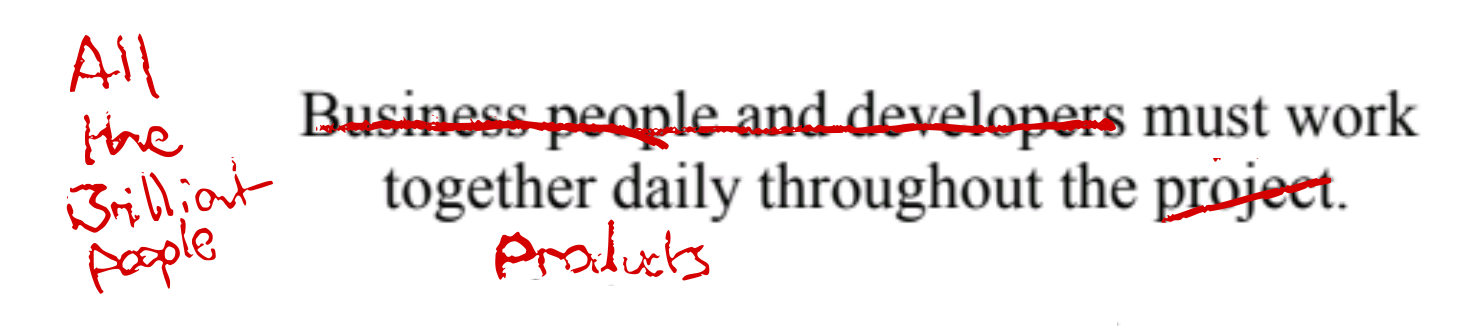
I’d replace project with product; due to the temporary-team fixed time/budget/requirements connotations of project.
I think longer lived product teams are more effective. I appreciate this won’t be for folks working in a project/consultancy context but I avoid those ;)
I’d also expand to “all the brilliant people” as per Woody Zuill’s description of mob programming. Get everyone needed to achieve the goals together into the team, collaborating together every day. Minimising dependencies and handoffs.
All the brilliant people work together daily on the product. Developers, businesspeople, customers, designers, testers, ux, data scientists …
Product Teams over Individuals on Projects
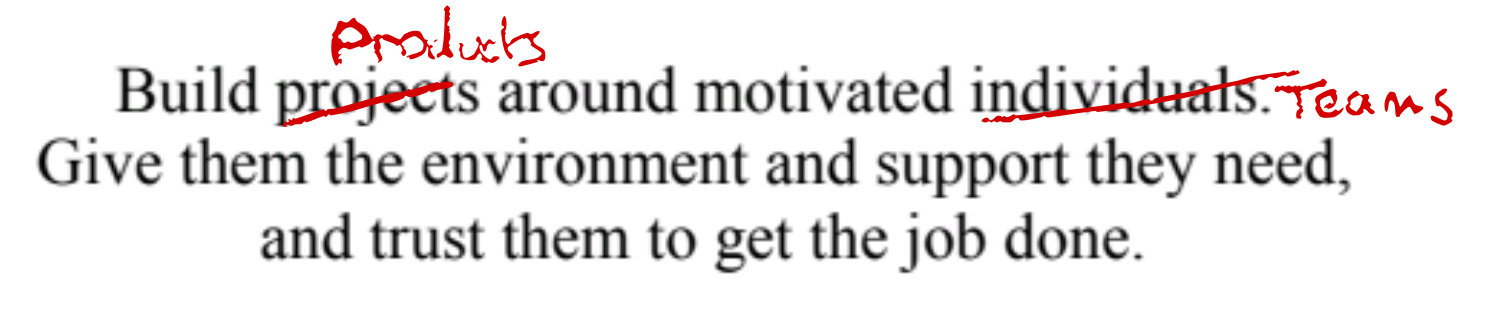
As per above, I prefer sustained investment in stable product teams over the project model.
Teams of motivated individuals build products. Give them the environment and support they need, and trust them to get the job done.
Communication Quality over Efficiency

This is the only principle I feel like I’m watering down rather than turning up.
I think face to face conversation is still the highest bandwidth communication method. However, face to face communication is not always feasible for practical & inclusion reasons. Reasons such as geographic location, neurodiversity, family commitments, carbon footprints, and global pandemics!
If face to face communication is infeasible then it’s not the most effective method of communication; even if it would be the highest bandwidth method.
I think the general principle is it’s better to trade off efficiency for quality of communication. Be willing to sacrifice time for better communication. You’ll save time in the long run. Prefer the highest bandwidth communication you can enable, even if it feels inefficient.
Prioritise communication quality over time efficiency. Learn the most effective method of conveying information to and within your team, for your context and each other’s individual needs.
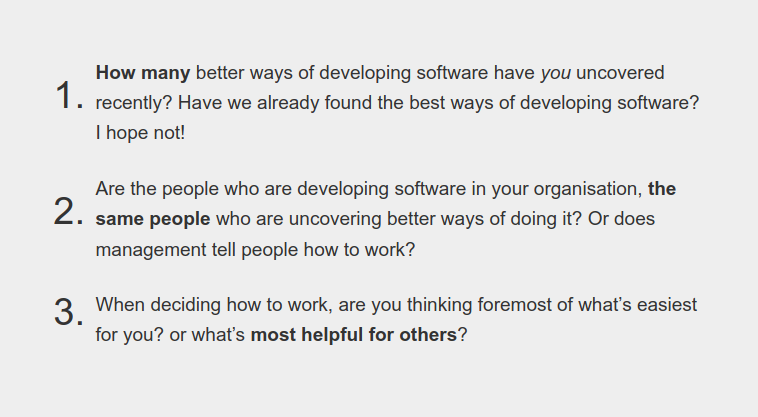
Results are the primary measure of progress

I don’t see working software as the primary measure of progress. We can ship oodles of working software every day and benefit nobody.
How are people’s lives enriched by our toil? How are our organisational goals furthered by our software? How is society better?
Have we achieved what we set out to? What have we learned from our experiments?
The less software needed the better!
The results of working software in production is the primary measure of progress. Get software into production early, starting with a walking skeleton.
Sustainability

I’d make the call for sustainbility more imperative. We don’t rely on static processes to keep development sustainable. It requires active effort and adaptation to combat the natural incentives in play.
We don’t go fast now at the expense of tomorrow. We strive to keep the cost of change curve low.

Prioritise sustainable development over speed. The sponsors, developers, and users should be able to maintain a constant pace indefinitely.
Technical Excellence

I find myself avoiding the words agile and agility since “agile” has become so semantically diffused it can create confusion.
Continuous attention to technical excellence and good design keeps cost of change low and lets us learn and adapt swiftly.
Simplicity

The principle of simplicity is timeless.
Diverse Teams

I’d add diversity to the description of teams that produce the best results. Self-organising teams with a monoculture are not going to produce the best ideas; there’ll be shared blind spots.
I think it can also be useful to expound on some of the things teams need to self-organise effectively.
The best architectures, requirements, and designs emerge from diverse teams that can self organise. Having the skills needed, clarity on their goals, with a high level of psychological safety.
Double-loop Learning

I’d just add adjusting goals, in addition to tuning team behaviours. The most effective teams benefit from double loop learning. Learning-through-doing that our goals are wrong, or our assumptions when choosing our goals were wrong.
At regular intervals, the team reflects on how to become more effective, then tunes and adjusts its behaviour accordingly, reviewing their goals based on what they have learned.
Your Team’s Principles
How do your principles differ? I’ve only thought about things I’d tweak from the manifesto principles above, not what I’d add. What would you add?
The post Pondering Agile Principles appeared first on Benji's Blog.