
 Member
Introduction to OpenPGP for secure communication during COVID19 Pandemic
Introduction to OpenPGP for secure communication during COVID19 Pandemic
In this article, I will talk a bit about OpenPGP, and how to use it for secure document exchange during the COVID19-Pandemic.
What is PGP?
PGP (“Pretty Good Privacy”) is an encryption program. It has the abilitie to sign, encrypt and decrypt files. Unlike other encryption protocols, it uses asymmetric key algorithms, instead of symmetric ones. In a nutshell, this means the following: Instead of using the same password (or key) for encrypting and decrypting files, PGP uses two different ones. One Key is called the private key, This key should stay in your hands, as it says, it’s private. It is used for decrypting stuff for you, and for signing documents. People who want to encrypt a file for you or verify a signature use your public key. You can send your public key to everyone, for example you could upload it to a keyserver.
How we could use this at school
During the actual events, I am required to do home schooling. I sign every document I send of, so my teachers could verify it was me who send it. I uploaded my public key to IServ, it is loacted in the group folder gym/OpenPGP-keys.
Getting started
First install a PGP Programm. For Linux, I prefer KDE Kleopatra, although you could also use gpg’s command line interface. On Microsoft Windows, we are going to use GPG4Win.
Microsoft Windows
- Visit this site.
- Hit the download button
- Select “$0” and click “Download”
- Save the file somewhere on your hard disk.
- Execute the downloaded file.
- Select “Yes” when Windows asks whether it should execute the file.
- Hit “OK” and “Next”.
- Leave the defaults and click “Next” once again, then click “Install”.
- The needed tools will be installed.
- Hit “Next” and “Finish”.
- If Kleopatra doesn’t launch, start it from the start menu.
- Congrats! Kleopatra is now installed and configured correctly.
GNU/Linux
On Linux, installation is pretty easy. Just install Kleopatra with you package manager and you should be good to go.
Generating your very own PGP Key
Now, it’s time to generate our PGP Key pair.
- Start Kleopatra
- Select “New Keypair”
- Enter your name and your E-Mail Address (most likely IServ).
- Leave the default settings and continue.
- Enter a password for your private PGP key. It will be use for signing and decrypting your documents, so keep it secret!
Importing a PGP Key
So you received a public key. What’s next? You are required to import it in order to use it.
- Download my public key from IServ.
- Open Kleopatra
- Go to File -> import (Ctrl + I)
- Select the downloaded key file
- If it asks you to verify the key, hit “Yes”, then “Verify”.
- Unlock your secret PGP key by entering your password.
- That’s it! The key is imported.
Verifying a signature on a document
Alright, so you received a document which is signed. First of all, let’s talk about signed Open Office documents.
Signed .odx files
If you use OpenOffice or LibreOffice, verification of documents is super easy. Just open a signed document and you will see a little blue bar on top of it, saying “This document is digitally signed and the signature is valid.”. You can click on “Show Signatures”, and it will display more detailled information about the signature. A list view will appear, telling you who signed the document at what exact time.
Verifying a file with a .sig or .gpg file
Normally, you will receive a .sig (or .gpg) file and another file, for example, you recieve KW17-History-Task.pdf and KW17-History-Task.pdf.sig If you do so, follow these steps:
- Download both files (e.g. the .pdf and the .pdf.sig)
- Now use your file manager, right-click the .sig file and select “Decrypt/Verify file” on windows or Actions -> “Decrypt/Verify file” on Linux using KDE Dolphin.
- You should see something like this:

- If you see something else, the signature may be invalid.

Note: Everything that works with a .sig file also works with a .gpg file
Further reading
- Kleopatra Application Page
- The Kleopatra Handbook
- The GNU Privacy Guard
- Pretty Good Privacy on Wikipedia
Sources
- Title Picture: The KDE Community - kde.org

 cabelo
Yolo4! o Novo estado da Arte em Detecção de Objetos
o YOLO é uma abordagens baseadas em Deep Learning para a detecção de objetos. Seu algoritmo é baseado em regressão, sendo assim o processamento é executada uma única vez sobre a imagem. E por consequência consegue fazer a detecção de objetos em tempo real ou quase real, dependendo de hardware e resolução das imagens.
O YOLO v4 foi lançado agora em abril de 2020, não pelo criador do YOLO. Pois em fevereiro de 2020, o autor anunciou que estava deixando o segmento de visão computacional em função do possível impacto negativo que o projeto traria para a humanidade.
Em testes, o YOLOv4 obteve uma velocidade em tempo real de ∼65 FPS no Tesla V100, superando os seus concorrente mais rápidos e precisos em termos de velocidade e precisão. O YOLOv4 é duas vezes mais rápido que o EfficientDet com desempenho similar. Além disso, em comparação sua versão anterior ( o YOLOv3) os FPS aumentaram 12%.

Mais informações aqui: https://github.com/AlexeyAB/darknet

Highlights of YaST Development Sprint 98
It’s time for another report from the YaST trenches. This time, apart from this blog post, we have several other reads for you in case you are interested on YaST development or on Linux technical details in general.
Today topics include:
- Some considerations about the usage of YaST
- A sneak peek at the future of AutoYaST, including a separate full blog post
- Some kind of UI design contest for the YaST Partitioner
- Better compatibility with LVM cache
- Interesting researchs about combining disks and about Unicode support for VFAT in Linux
- An impressive speedup of the partitioning proposal for SUSE Manager
- A summary of the enhancements for YaST and related projects in Leap 15.2
And what is even better, many of those topics include a call to action for our loyal users and contributors.
Looking towards the future
Let’s start with a technical but rather significant detail. During our latest
sprint we created a new SLE-15-SP2 branch in the YaST Git repositories,
meaning that now the master branch is open again for more innovative
features.

This is an important milestone from the development point of view, since it marks the point in which the team acknowledges 15.2 to be basically done and manifests the intention to focus in the mid and long term future. All the previous blog posts have been focused on describing features and fixes that will be present in the upcoming SUSE Enterprise Linux 15 SP2 and openSUSE Leap 15.2. From now on, you will read more about changes that go into openSUSE Tumbleweed and Leap 15.3 (also SLE-15-SP3, of course).
Getting some insights about the usage of YaST
In order to take decisions for the future, we would like to know how often the YaST modules are used and which ones are the most important for the users. But that is not easy because YaST does not collect any data, the only feedback we get are bug reports and feature requests.
During this sprint we tried to gather some data by collecting the bug and feature numbers from the change logs. We have not yet analyzed that data but it seems the more features we implement the more bug reports we get. :smiley: See this gist for the details and feel free to suggest any other system we could use to analyze the relevance of the different YaST modules and components.
Modernizing AutoYaST
Something we know for sure is that AutoYaST is critical for many users of SUSE Linux Enterprise and openSUSE. And, to be honest, our venerable unattended installer is showing its age. That’s why AutoYaST has a priority place in the mid-term goals of the YaST Team. The plan is to have an improved AutoYaST for SLE 15 SP3 and openSUSE Leap 15.3, although some fixes could be backported to SP2 and 15.2 if they are important enough.
During this sprint, we started gathering some feedback from our users and colleagues at SUSE. Additionally, we did some research about the current status of AutoYaST in order to identify those areas that are in need of more love. We have put all the conclusions together as a separate blog post. Check it if you are interested in what the future will bring for AutoYaST.
Now that we have started a new development sprint, there is an ongoing discussion that might be interesting for you about AutoYaST tooling. Please, check yast-devel, opensuse-autoinstall, or the opensuse-factory mailing lists and do not hesitate to participate. We would love to hear from you.
Expert Partioner: Leap 15.3 and Beyond
If you are not an AutoYaST user, don’t worry. There is still other area in which your input will be greatly appreciated by the YaST team. The interface of the YaST Partitioner has reached a point in which is really hard to deal with it and we need to find a way to move forward.

As a first step, we have created this document that explains the problem and we hope it can be used as a base to discuss the future of the Partitioner interface.
This is a very important topic for the future of YaST. All ideas are
welcome. Feel free to join the mail
thread, to create
pull requests for the document, to discuss the topic at the #yast IRC channel
at Freenode… whatever works for you.
Recognizing LVM Cache
We also decided this was the right time to introduce some relatively big changes in libstorage-ng (the library used by YaST to manage storage devices) aimed to improve the compatibility of YaST with some advanced LVM features.
For more than a year YaST has supported to setup and use bcache to speed up rotating disks by using a SSD as a cache. But that is not the only technology that can be used for that purpose. Some users prefer to use LVM cache instead of bcache since it has been around for a longer period of time and it offers some different features.
YaST cannot be used to setup an LVM cache system and we don’t plan to make that possible. Moreover, booting from LVM cache does not work in SLE or openSUSE as of this writing. But giving the user the freedom of choice has always been important for (open)SUSE and YaST.
To help customers using LVM cache, YaST can now recognize such setup and display it properly in the Expert Partitioner and many other parts of YaST. The following warning will not be longer displayed for LVM cache volumes in openSUSE Tumbleweed.

Instead, it will be possible to use those logical volumes normally for operations like mounting, formatting, etc. The ability to modify them will still be very restricted and it will not be possible to create new LVM cache volumes.
We plan to offer a similar limited level of support for other kind of advanced LVM volumes. Stay tuned for more news on this.
VFAT filesystem and Unicode
And talking about storage technologies, we also introduced a small change in the
management of VFAT file systems for future releases of SLE and Leap (after
15.2). For some time we have wanted to stop using iocharset=utf8 in favor of
utf8 when mounting a VFAT filesystem, as this is the recommendation in the
kernel documentation.
There was also this bug
that led to avoiding iocharset=utf8 for EFI system partitions (because
iocharset=utf8implies that filenames are case-sensitive).
We took the opportunity to do some experiments and even look at the source code
of the Linux kernel to find out what’s really going on. Why is utf8 so special
and what can go wrong?
If you ever wondered what these VFAT charset related options mean and whether VFAT filenames are really case-insensitive in Linux as they are in Windows, have a look at this document we have created.
Although SLE-15-SP2 and openSUSE Leap 15.2 will still use the traditional mount
options, the new approach (utf8 for all VFAT file systems) will land in
Tumbleweed in a matter of days, as usual.
And, since we were already in research mode regarding storage technologies, why to stop there?
Mixing block sizes in multi-device devices
As a result of a recent bug in libstorage-ng which was tracked down to a RAID device block size issue the YaST team spent some time researching the topic in general.
If you’ve ever wondered what happens when you combine disks with different block sizes into a RAID, LVM, BCACHE, or BTRFS, have a look at our document.
In most cases, YaST and libstorage-ng already manage the situation well enough. But we found that in some cases we will need special handling of some situations, specially to guide our users so they don’t slip through the pitfalls. But that’s another story… for upcoming development sprints.
Faster Partitioning Proposal for SUSE Manager
Not all changes and improvements done during this sprint are targeting the mid and long term. We also had time to introduce some improvements in the upcoming SLE 15 SP2. To be precise, in the corresponding version of SUSE Manager, the SUSE’s purpose-specific distribution to manage software-defined infrastructures.
Quite some time ago, we wrote this separate blog post to introduce some special features of the partitioning Guided Setup we have developed to allow SUSE Manager (and other products) to offer the users an experience tailored to their needs.

But we knew some of those features in our partitioning proposal had serious performance problems that affected the initial proposal, that is, the one the installer creates before the user has had any chance of to influence the result or to select the disks to use.
The SUSE Manager version for SLE 15 SP2 will finally introduce two system roles that use the new proposal (both indentified by the “multiple disk” label), so it was finally time to address those performance problems.
And we really improved the situation! If you want to know more, this pull request contains many details and the result of some benchmarks. Let’s simply say here that in some worst-case scenarios we managed to reduced the time needed to calculate the initial proposal… from several hours to half a second!
Summarizing what Leap 15.2 will bring
As our usual readers have had many opportunities to attest, the life of a YaST developer goes much further than simply coding. And with every openSUSE Leap release it’s time for us to take a look back to several months of work and, with our salesman hat on, summarize all the cool additions to YaST and its related projects.
In that regard, we have been helping the openSUSE marketing team to shape the release announcement for openSUSE Leap 15.2. You will have to wait to read such document in all its glory, but meanwhile you can check what we have added to the “Snapper”, “YaST” and “AutoYaST” sections of the Leap 15.2 Features Page. It’s a wiki, so feel free to add any important point we could have missed.
To Infinity and Beyond
A lot of interesting topics open up in front of the YaST Team. So it’s time for us to go back to the daily work. Meanwhile, enjoy all the reads and don’t hesitate to get involved taking part in the converstions, improving the wiki pages or in any other way.
Have a lot of fun!

Azure Dynamic Inventory with Ansible 小記
- Starting with Ansible 2.8, Ansible provides an Azure dynamic-inventory plug-in
- 我的做法是過濾 azure-cli 關鍵字
- 從輸出的 azure-cli-201x-xx-xx-xx-xx-xx 就可以知道建立的時間
- 比對輸出的第三欄位 AppId 與 ~/.azure/credentials 內的 client_id 就可以知道是那一個了
- --id 後面接 AppId
- sakanastudy 請換成自己的 Resource Group 名稱
- 這邊可以觀察到 有抓到 resource group 內的機器 test01
- 我的測試機不是用 key, 是用 password 方式, 所以我指定 -u 使用者, 以及 --ask-pass 來輸入密碼, 如果要這樣的方式, 機器要裝 sshpass 套件, 所以下次要來更新容器版本 :)
- 這邊覺得有可能會用到的是
- plain_host_names
- Keyed_groups
- 然後預設是針對所有的 resource group, 是因為使用 include_vm_resource_groups 才去指定特定的 resource group

Las novedades de Elisa de abril de 2020
Seguimos la serie sobre los cambios en las aplicaciones que han llegado este mes (bueno, en realidad el mes pasado). Una vez comentado las mejoras de Dolphin, Okular, KMail y Gwenview sigo con las novedades de Elisa de abril de 2020, uno de los reproductores de audio de la Comunidad KDE, que lucha por heredar el reinado de Amarok.
Las novedades de Elisa de abril de 2020
 Si se analiza bien, la última a actualización de Software de la Comunidad KDE ha cubierto casi todos los aspectos que busca un usuario en un entorno de trabajo: archivo, documentos, correo electrónico e imágenes.
Quedan un par de facetas que también han sido cubiertas, como es el caso del audio con Elisa, el reproductor de la Comunidad KDE que está evolucionando rápido para convertirse el sucesor de Amarok, el gran reproductor de audio que tristemente no continuó su desarrollo.
Para quienes no lo conozcan, Elisa es un reproductor de música desarrollado por la Comunidad KDE que se basa en la simplicidad y facilidad de uso. Su nacimiento fue la respuesta a la necesidad de crear un producto flexible para afrontar los diferentes entornos de trabajo y casos de uso por parte de los usuarios. Su desarrollo es lento pero seguro, afianzándose versión a versión en el ecosistema de aplicaciones KDE y mostrando una imagen moderna, clara y funcional.
De esta forma, la nueva versión de Elisa de abril de 2020 ofrece importantes novedades:
- Nueva vista «Reproduciendo ahora», que lo hace más atractivo para todos los usuarios.
- Acceso a la aplicación mediante la bandeja del sistema, con lo que se puede acceder a la lista de reproducción cuando lo desee.
- Nuevo «modo aleatorio visual» que facilita la organización de la música en las listas de reproducción y le muestra la próxima canción que se va escuchar

Más información: KDE
Herramientas para monitorear tu sistema #Linux desde la línea de comandos
Veamos algunas herramientas para monitorear el funcionamiento de tu sistema y los procesos y aplicaciones que se ejecutan en tu sistema GNU/Linux

Bashtop en mi openSUSE con i3wm (clic sobre la imagen para apliar)
En ocasiones tenemos que mirar en nuestro sistema qué aplicación está consumiendo más recursos de memoria, o simplemente saber qué procesos se están ejecutando dentro de nuestro sistema GNU/Linux.
Vamos a ver algunas herramientas disponibles para la línea de comandos. Cada una con sus pros y sus contras, que cada cual elija en función de sus necesidades o preferencias.
Todas estas herramientas ofrecen información de manera dinámica de lo que se está ejecutando en el sistema y ofrecen un resumen de esa información y una lista de tareas que se puede ordenar por consumo de CPU, por consumo de RAM, etc.
Además también ofrecen un resumen de otras informaciones del sistema, como el número de usuario registrados, el tiempo de sesión, etc.
Veamos una lista de las herramientas que conozco disponibles en GNU/Linux…
top
Es uno de las más veteranas y más conocidas, y puede ser que venga instalada en tu sistema de manera predeterminada. En mi opinión ofrece la información de una manera “muy espartana”, pero con muchas opciones disponibles, como siempre para sacarle todo el jugo lo mejor es echar un vistazo a su página man
htop
En lo personal prefiero esta opción y es una herramienta que utilizo mucho para ver qué está consumiendo más RAM y como medio para “matar” los procesos que no quiero que estén corriendo.
Presenta la información de una manera más ordenada y ofrece un pequeño gráfico de la CPU y de la RAM. Además tiene unos útiles accesos mediante las teclas de función a la hora de búsqueda, matar procesos y otras opciones.
bashtop
El más reciente que he conocido, y el más vistoso, tal como puedes ver en la captura que abre este artículo. Es un script de bash que muestra información de una manera muy elegante sobre el uso de la cpu, espacio en nuestro disco duro y los procesos del sistema.
atop
Aplicación escrita en C, nos ofrece a pantalla completa información diversa sobre nuestro sistema. Personalmente no la he probado así que no puedo más que informar de su existencia.
ytop
Otro monitor de sistemas y procesos esta vez escrito en Rust, con gráficos en tiempo real.
gtop
Es una aplicación escrita en JavaScript y disponible desde el gestor de paquetes npm. También nos ofrece información de manera visual de nuestro sistema y nuestro equipo, tal como podéis ver en la imagen inferior.
Para instalarla tenéis que instalar el gestor de paquetes npm en vuestro sistema y después para instalar gtop hay que ejecutar:
npm install gtop -g
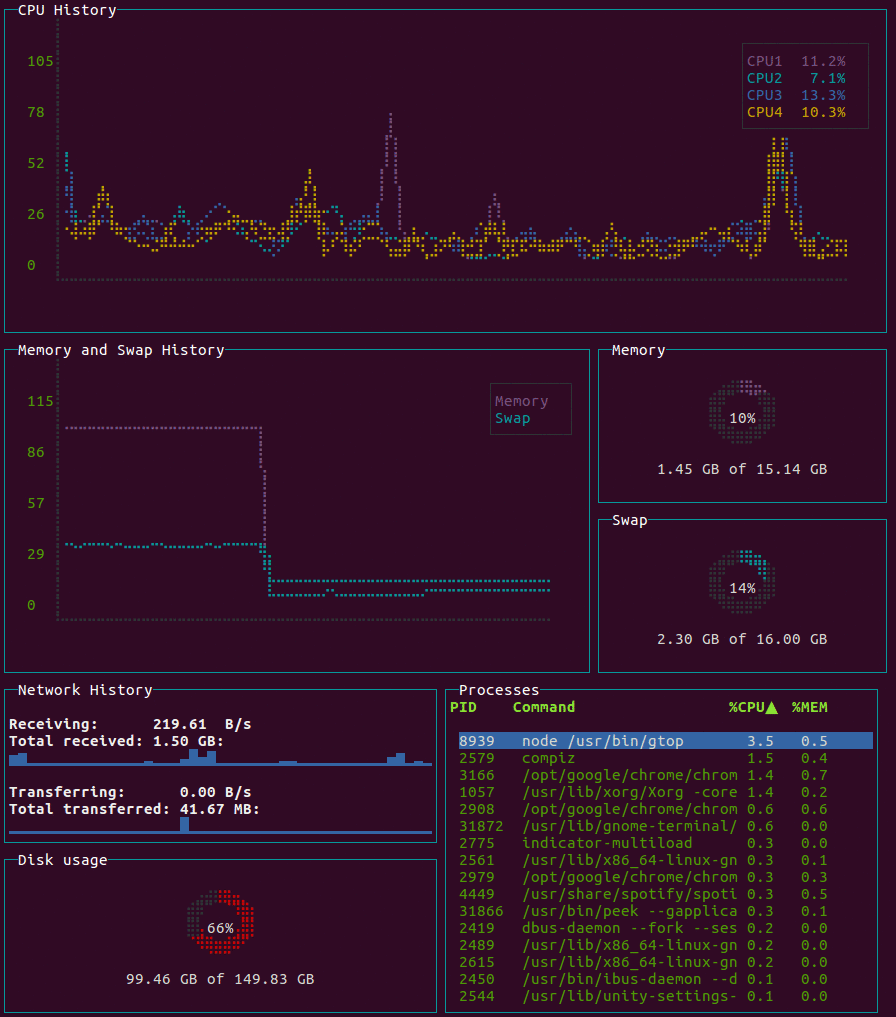
Hasta aquí las opciones que conozco y algunas que no he probado. Derivado de estas opciones hay herramientas específicas para monitorear nuestra red como iftop, u otras opciones específicas para otras tareas de nuestro equipo como iotop.
¿Conocías todas las opciones que te he traido? Si tu conoces y utilizas otras herramientas compártelas por los comentarios para completar el artículo con tus aportes.
Aportes de los lectores
nmon
Consiste en un único binario, que ejecutamos y el programa nos ofrece información sobre nuestro sistema: CPU, memoria, uso de discos, red, etc. También permite guardar los datos registrados en un archivo separado por comas para procesarlo o para almacenar los datos. (Aporte en un comentario del amigo Franja)
S-Tui
Un script de Python que también monitorea diferentes aspectos del sistema. Pero mejor podéis leer el artículo que escribió hace tiempo David en su blog ochobitshacenunbyte. (Aporte en un comentario del amigo Percaf_TI99)
- https://www.ochobitshacenunbyte.com/2019/02/13/s-tui-un-power-monitor-para-linux/
- https://github.com/amanusk/s-tui
Glances
También escrito en Python, este software multiplataforma incluye además de la interfaz de la consola una interfaz web. También permite el poder exportar los datos a diferentes formatos o incluso poder visualizarlos con Grafana. (Aporte en un comentario del amigo Taraak)
Netdata
Esta aplicación corre en sistemas GNU/Linux, FreeBSD o MacOS. Es rápido y eficiente y controla muchos aspectos del sistema sin sobrecargarlo. Puede ejecutarse de manera permanente en sistemas tanto físicos como virtuales, contenedores, dispositivos IoT.
Con un montón de recopilaciones de datos sin necesidad de configuraciones extras. Y una gran comunidad detrás de su desarrollo. Es capaz de guardar una base de datos y almacenarlos por días, semanas o meses. Mostrar unas útiles gráficas que se sincronizan y se ajustan a tus necesidades. (Aporte en un comentario del amigo Iyán)

Las novedades de Gwenview de abril de 2020
Seguimos la serie sobre los cambios en las aplicaciones que han llegado este mes (bueno, en realidad el mes pasado). Una vez comentado las mejoras de Dolphin, Okular y KMail, sigo con las novedades GWenview de abril de 2020, el visor de imágenes más simple de la Comunidad KDE, que aún teniendo ese título no se queda corto en cuanto a funcionalidades añadidas.
Las novedades de Gwenview de abril de 2020
 Creo que una de las aplicaciones que un escritorio debe ofrece a sus usuarios es un buen y rápido visor de imágenes. La Comunidad KDE ofrece un buen número de ellas, teniendo incluso un visor integrada en Dolphin, pero la que más utilizo, sin duda alguna, es Gwenview.
Esta pequeña pero potente aplicación abre de forma rápida y eficaz cualquier imagen de nuestro sistema, al tiempo que nos permite realizar acciones simples como el redimensionado o el recorte de imágenes de forma muy sencilla. Además, ofrece opciones de carrusel de imágenes, de visualización de varias imágenes de forma simultanea, de conexión con otras aplicaciones, reducción de ojos rojos, servicio de rotación o inversión de imágenes, integración con la barra de lugares de KDE, comapartición directa de imágenes con otros servicios como Telegram o Nextcloud, etc. Y eso que es la menor de la aplicaciones de imágenes de KDE, por debajo se ShowFoto o DigiKam. No está nada mal
De esta forma, la nueva versión de Gwenview de abril de 2020 ofrece pocas pero importantes novedades:
- Se ha solucionado el problema de bloqueo durante el inicio cuando el portapapeles del sistema contiene texto de KDE Connect, la aplicación que integra tu móvil con tu escritorio Plasma.
- Se ha corregido el acceso a lugares remotos (mediante Samba, por ejemplo) para importar o exportar fotos.
Un par de arreglos que hacen que Gwenview funcione un poco mejor.
Más información: KDE
Reducing jitter on Linux with task isolation
Last week I gave a talk at the first virtual adhoc.community meetup on the history of task isolation on Linux (slides, video). It was a quick 15-minute presentation, and I think it went well, but I really wanted to include some details of how you actually configure a modern Linux machine to run a workload without interruption. That’s kinda difficult to do in 15 minutes.
So that’s what this post is about.
I’m not going to cover how to use the latest task isolation mode patches because they’re still under discussion on the linux-kernel mailing list. Instead, I’m just going to talk about how to reduce OS jitter by isolating tasks using Linux v4.17+.
First, as the below chart shows, you really do need a recent Linux kernel if you’re going to run an isolated workload because years of work have gone into making the kernel leave your tasks alone when you ask.
 Linux task isolation features throughout the years
Each of these features is incremental and builds on top of the previous ones to quiesce a different part of the kernel. You need to use all of them.
Modern Linux does a pretty good job out of the box of allowing userspace tasks to run continuously once you pull the right options. Here’s my kernel command-line for isolating CPU 47:
isolcpus=nohz,domain,47 nohz_full=47 tsc=reliable mce=off
The first option, isolcpus, removes every CPU in
the list from the scheduler’s domains, meaning that the kernel will not
to do things like run the load balancer for them, and it also disables
the scheduler tick (that’s what the nohz flag is for). nohz_full=
disables the tick (yes, there’s some overlap of the in-kernel flags
which means you need both of these options) as well as offloading RCU
callbacks and other miscellaneous items.
On my machine, I needed the last two options to disable some additional timers and prevent them from firing while my task was running.
Once you’ve booted with these parameters (substitue your desired CPU
list for 47) you’ll need to setup a cpuset cgroup to run your task in
and make sure that no other tasks accidentally run on your dedicated
CPUs. cset is definitely my favourite
tool for doing this because it makes it so easy:
$ cset shield --kthread=on --cpu 47
cset: --> activating shielding:
cset: moving 34 tasks from root into system cpuset...
[==================================================]%
cset: kthread shield activated, moving 79 tasks into system cpuset...
[==================================================]%
cset: **> 56 tasks are not movable, impossible to move
cset: "system" cpuset of CPUSPEC(0-46) with 57 tasks running
cset: "user" cpuset of CPUSPEC(47) with 0 tasks running
Now all you need to do is add the PID of your task to the new user
cpuset and you’re good to go.
Verifying your workload is isolated
Of course, it’s all well and good me saying that these options isolate your tasks, but how can you know for sure? Fortunately, Linux’s tracing facilities make this super simple to verify and you can use ftrace to calculate when your workload is running in userspace by watching for when it’s not inside the kernel – in other words, by watching for when your workload returns from a system call, page fault, exception, or interrupt.
Say we want to run the following super-sophisticated workload without it entering the kernel:
while :; do :; doneHere’s a sequence of steps – assuming you’ve already setup the user
cpuset using cset – that enables ftrace, runs the workload for 30
seconds, and then dumps the kernel trace to a trace.txt
# Stop irqbalanced and remove CPU from IRQ affinity masks
systemctl stop irqbalance.service
for i in /proc/irq/*/smp_affinity; do
        bits=$(cat $i | sed -e 's/,//')
        not_bits=$(echo $((((16#$bits) & ~(1<<47)))) | \
		xargs printf %0.2x'\n' | \
		sed ':a;s/\B[0-9a-f]\{8\}\>/,&/;ta')
        echo $not_bits > $i
done

export tracing_dir="/sys/kernel/debug/tracing"

# Remove -rt task runtime limit
echo -1 > /proc/sys/kernel/sched_rt_runtime_us

# increase buffer size to 100MB to avoid dropped events
echo 100000 > ${tracing_dir}/per_cpu/cpu${cpu}/buffer_size_kb

# Set tracing cpumask to trace just CPU 47
echo 8000,00000000 > ${tracing_dir}/tracing_cpumask

echo function > ${tracing_dir}/current_tracer

echo 1 > ${tracing_dir}/tracing_on
timeout 30 cset shield --exec -- chrt -f 99 bash -c 'while :; do :; done'
echo 0 > ${tracing_dir}/tracing_on

cat ${tracing_dir}/per_cpu/cpu${cpu}/trace > trace.txt
# clear trace buffer
echo > ${tracing_dir}/trace
The contents of your trace.txt file should look something like this:
# tracer: function
#
# entries-in-buffer/entries-written: 102440/102440   #P:48
#
#                              _-----=> irqs-off
#                             / _----=> need-resched
#                            | / _---=> hardirq/softirq
#                            || / _--=> preempt-depth
#                            ||| /     delay
#           TASK-PID   CPU#  ||||    TIMESTAMP  FUNCTION
#              | |       |   ||||       |         |
          <idle>-0     [047] dN..   177.931485: sched_idle_set_state <-cpuidle_enter_state
          <idle>-0     [047] .N..   177.931487: cpuidle_reflect <-do_idle
          <idle>-0     [047] .N..   177.931487: menu_reflect <-do_idle
          <idle>-0     [047] .N..   177.931488: tick_nohz_idle_got_tick <-menu_reflect
          <idle>-0     [047] .N..   177.931488: rcu_idle_exit <-do_idle
          <idle>-0     [047] dN..   177.931488: rcu_eqs_exit.constprop.71 <-rcu_idle_exit
          <idle>-0     [047] dN..   177.931489: rcu_dynticks_eqs_exit <-rcu_eqs_exit.constprop.71
You want to make sure that the you didn’t lose any events by checking
that the entries-in-buffer/entries-written fields have the same
values. If they’re not the same you can further increase the buffer size
by writing to tracing/per_cpu/<cpu>/buffer_size_kb.
The key part of the trace file is the finish_task_switch tracepoint
which tells you when a context switch completed. You can use this
tracepoint to find when your bash process starts running and when it
finishes – hopefully after 30 seconds has elapsed – with a bit of awk
magic:
$ awk '/: finish_task_switch / {
        # Do not start counting until we see the bash task for the first time
        comm = substr($1, 0, index($1, "-")-1)
        if (comm == "bash") {
                counting = 1;
        }
}

{
        if (counting) {
                usecs = $4
                gsub(/\./,"",usecs)
                gsub(/\:/,"",usecs)
                msecs = usecs / 1000

                delta = msecs - last
                if (last && (delta > runtime)) {
                        runtime = delta
                }
                last = msecs
        }
}


BEGIN { runtime = -1 }

END { printf "Max uninterrupted exec: %.2fms\n", runtime }' < trace.txt
Max uninterrupted exec: 29877.67ms
I’ve successfully used this technique to verify that I can run a bash busy-loop for an hour without entering the kernel.

MicroOS - The OS that does "just one job"
The openSUSE Summit 2020 kicked off yesterday. Like many others this summit was a virtual one too. It ran on a platform managed by openSUSE fan and user P. Fitzgerald.
I was busy with work stuff and couldn't watch the presentations live. I hopped on and off on the platform. I didn't want to miss Richard's presentation about MicroOS yet I missed it. Luckily he was quick to record his session and upload it on YouTube. I got a chance to watch it afterwards. Surely, all other presentations will be available on openSUSE TV soon and I'll be able to catch-up.
If you didn't rush to watch Richard's presentation on YouTube right-away, here are a few hints that may encourage you to do so.
openSUSE container registry
I'm not going to tell you what MicroOS is, you got to watch the video to learn about that, but did you know that the openSUSE project had a containers registry available publicly at https://registry.opensuse.org ? You can add it to the /etc/containers/registries.conf file and Podman can now search & pull containers from it.
Tiny openSUSE containers
When deploying your application in a container you always look for the fattest container, right? Of course, no!
ish@coffee-bar:~$ podman pull registry.opensuse.org/opensuse/busybox
Trying to pull registry.opensuse.org/opensuse/busybox...
Getting image source signatures
Checking if image destination supports signatures
Copying blob b6fc9a391c78 [====>---------------------------------] 515.9KiB / 3.8MiB
ish@coffee-bar:~$ podman images
REPOSITORY TAG IMAGE ID CREATED SIZE
registry.opensuse.org/opensuse/busybox latest c19f82628d9f 44 hours ago 9.4 MBopenSUSE offers a small (Tumbleweed) busybox container that is just under 10 MB. Mini but mighty! 💪
How to keep a system patched & running?
If it's running you don't want to touch it, but, systems need security updates. Someone has to do the dirty-job. Who? Can a system update itself without breaking the applications that are running?

Health checks during boot-up
Have you ever had a system that fails to boot after an update? I had. MicroOS checks for errors during the boot phase and if a snapshot is faulty the system then boots up with the last known working snapshot. MicroOS does so without any manual intervention, so, automatic reboots are safe. 😀 🎉 🎊
Debugging your MicroOS container host
MicroOS is a lightweight system that doesn't come bundle with debugging tools (for obvious reasons). Once in a while though you need to troubleshoot things like network issues. There you go, you can spin a toolbox container and inspect the network interface on the host. 🛠️
I hope these are enough to convince you to watch the presentation and that openSUSE MicroOS becomes part of your servers infrastructure. 🐧
#openSUSE Tumbleweed revisión de la semana 18 de 2020
Tumbleweed es una distribución “Rolling Release” de actualización contínua. Aquí puedes estar al tanto de las últimas novedades.

openSUSE Tumbleweed es la versión “rolling release” o de actualización continua de la distribución de GNU/Linux openSUSE.
Hagamos un repaso a las novedades que han llegado hasta los repositorios estas semanas.
El anuncio original lo puedes leer en el blog de Dominique Leuenberger, publicado bajo licencia CC-by-sa, en este enlace:
Esta semana se han publicado menos snapshots, pero las que se han publicado han venido con cambios importantes y muy esperados.
Por ejemplo, se ha publicado GNOME 3.36.1 que también incluye un cambio menor en la fuente Cantarell. Y como el test automático openQA compara capturas de pantalla con unas de referencia, un cambio en una fuente tipográfica se traduce en un montón de desjustes que son necesarios confirmarlos.
Lo que lleva algo de tiempo, lo que ha resultado en que se han publicado solo 3 nuevas snapshots (0425, 0427 y 0428).
Que entre otros cambios, podemos destacar estos como los más importantes
- GNOME 3.36.1
- KDE Applications 20.04
- Linux kernel 5.6.6
- Mesa 20.0.5
- openSSL 1.1.1g
La lista parece corta pero GNOME y KDE Applications implican un buen número de aplicaciones actualizadas.
Y como es normal, hay muchas más cosas esperando para próximas actualizaciones, por ejemplo:
- Cambio de Ruby 2.6 a 2.7
- Linux kernel 5.6.8
- Qt 5.15.0
- TeXLive 2020
- Guile 3.0.2
- GCC 10 como compilador predeterminado
Si quieres estar a la última con software actualizado y probado utiliza openSUSE Tumbleweed la opción rolling release de la distribución de GNU/Linux openSUSE.
Mantente actualizado y ya sabes: Have a lot of fun!!
Enlaces de interés
-
-
- ¿Por qué deberías utilizar openSUSE Tumbleweed?
- zypper dup en Tumbleweed hace todo el trabajo al actualizar
- ¿Cual es el mejor comando para actualizar Tumbleweed?
- Comprueba la valoración de las “snapshots” de Tumbleweed
- ¿Qué es el test openQA?
- http://download.opensuse.org/tumbleweed/iso/
- https://es.opensuse.org/Portal:Tumbleweed
-

——————————–