
 Member
 federico1
Madrid GNOME+Rust Hackfest, part 2
Hacking on gnome-class continues apace!
Philippe updated our dependencies.
Alberto made the syntax for per-instance private structs more ergonomic, and then made that code nice and compact.
Martin improved our conversion from CamelCase to
snake_case for code generation.
Daniel added initial support for GObject properties. This is not finished yet, but the initial parser and code generation is done.
Guillaume turned gir, the binding generator in gtk-rs, from a binary into a library crate. This will let us have all the GObject Introspection information for parent classes at compilation time.
Antoni has been working on a tricky problem. GTK+ structs that have
bitfields do not get reconstructed correctly from the
GObject Introspection information — Rust does not handle C
bitfields yet. This has two implications.
First, we lose some of the original struct fields in the generated
bindings. Second, the sizes of the generated structs are not the
same as the original C structs, so g_type_register_static()
complains that one is trying to register an invalid class.
Yesterday we got as far as reading the amd64 and [ARM][arm] ABI manuals to see what the hell C compilers are supposed to do for laying out structs with bitfields. Most likely, we will have a temporary fix in gir's code generator so that it generates structs with the same layout as the C ones, with padding in place of the space for bitfields. Later we can remove this when rustc gets support for C bitfields.
I've been working on support for GObject interfaces. The basic parsing is done; I'm about to refactor the code generation so I can reuse the parts that fill vtables from classes.
Yesterday we went to the Madrid Rust Meetup, a regular meeting of rustaceans here. Martin talked about WebRender; I talked about refactoring C to port it to Rust, and then Alex talked about Rust's plans for 2018. Fun times.


[arm]:
Madrid GNOME+Rust Hackfest, part 1
I'm in Madrid since Monday, at the third GNOME+Rust hackfest! The OpenShine folks are kindly letting us use their offices, on the seventh floor of a building by the Cuatro Caminos roundabout.
I am very, very thankful that this time everyone seems to be working on developing gnome-class. It's a difficult project for me, and more brainpower is definitely welcome — all the indirection, type conversion, GObject obscurity, and procedural macro shenanigans definitely take a toll on oneself.
Gnome-class internals

I explained how gnome-class works to the rest of the hackfest attendees. I've been writing a document on gnome-class's internals, so the whiteboard was a whirlwind tour through it.
Error messages from the compiler
Antoni Boucher, the author of relm (a Rust crate to write GTK+ asynchronous widgets with an Elm-like model), explained to me how relm manages to present good error messages from the Rust compiler, when the user's code has mistakes. Right now this is in a very bad state in gnome-class: user errors within the invocation of the procedural macro get shown by the compiler as errors at the macro call, so you don't get line number information that is meaningful.
For a large part of the day we tried to refactor bits of gnome-class to do something similar. It is very slightly better now, but this really requires me to sit down calmly, at home, and to fully understand how relm does it and what changes are needed in the syn parser crate to make it easy to present good errors.
I think I'll continue this work at home, as there is a lot of source code to understand: the combinator parsers in syn, the error handling scheme in relm, and the peculiarities of gnome-class.
Further work during the hackfest
Other people working on gnome-class are adding support for GObject properties, inheritance from non-Rust classes, and improving the ergonomics of class-private structures.
I think I'll stop working on error messages for now, and focus instead on either supporting GTypeInterfaces, or completing support for type conversions for methods and signals.
Other happenings in Rust
Paolo Borelli has been porting RsvgState to Rust in librsvg. This is the big structure that holds all the CSS state for SVG elements. This is very meticulous work, and I'm thankful that Paolo is paying good attention to it. Soon we will have all the style machinery for librsvg in Rust, which will make it easier to use the selectors crate from Servo instead of libcroco, as the latter is unmaintained.
Food

Ah, Spanish food. We have been enjoying cheese, jamón, tortilla, pimientos, oxtail stews, natillas, café con leche...
Thanks
Thanks to OpenShine for hosting the hackfest, and to the GNOME Foundation for sponsoring my travel. And thanks for Alberto Ruiz for putting me up in his house!


BlankOn dalam Konferensi Libreoffice ID

Ini kali kedua konferensi, saya g ikut jadi pembicara. Sebelumnya PyConf ID di PENS 19 Desember silam, hanya cuma submit judul dan tidak lolos (dan memang berharap tidak lolos). Acara di PENS Desember silam termasuk perjalanan ajaib, karena kali pertama saya nyoba bawa sepeda lipat naik pesawat.
Konferensi LibreOffice kemaren saya semacam penyusup, karena sedikit bikin acara dalam acara. Agenda terselubungnya adalah mengumpulkan pengembang-pengembang BlankOn dalam satu lokasi. Semacam BlanKopdar.
Perjalanan ke timur. Rencana awal berangkat naik bus, tapi beberapa jam menjelang berangkat, tiba-tiba malah beli tiket kereta Jayakarta. Dan dapat kabar, kereta jalur selatan asal dan menuju Bandung mengalami terlambat. Karena ada kereta anjlok. Dan Pak Didiet sudah misuh-misuh dari sore.
Untuk penginapan di Surabaya, sebulan sebelumnya saya sudah memesan kamar dormitory di Anjani B&B tidak jauh dari PENS. Memesan 3 kamar dengan total 10 tempat tidur. 2 kamar dengan 4 kasur. 1 kamar untuk tim openSUSE.ID dan 2 kamar untuk BlankOn. Cukup murah.
Saya sampai Surabaya Jumat pagi jam 5, dan langsung ke homestay. Di homestay sudah ada Pak Slamet dan Pak Kuriyanto yang sudah sampai Surabaya sejak Kamis.
Hari Jumat 23 Maret 2018
Setelah mandi dan sarapan, terus langsung ke PENS. Ketemu Pak Edwin. Pak Noor Azam, Pak Eric dan Pak Franklin Weng. Juga ketemu beberapa pendekar yang sebelumnya belum pernah ketemu. Ada Pak Sofyan, Pak Kifli, Pak Syamsul, yang saya baru pertama ketemu. (Maafkan bila ada yg terlupa tidak disebut, keterbatasan memori)
Agenda Jumat adalah Workhop LibreOffice bareng Pak Andika. Break Solat jumat, kemudian dilanjutkan seremonial antara Panitia, Pembicara, Pihak Kampus dan Sponsor sekalian makan siang.

Setelah Ashar saya balik ke homestay lagi sekalian mengantar Pak Edwin. Sebelum balik, Pak Darian nitip, “Pak ntar malam ada undangan makan di Jenggala Resto”. Siap ndan. Pak Darian makin lemu, mungkin efek stress menjadi koordinator panitia lokal. Selama makan malam, banyak obrolan teknis dan non teknis. Beberapa merupakan temu kangen. Tidak tiap tahun bisa kopdar komunitas seperti ini.
Setelah selesai undangan makan malam, balik homestay. Kita mulai Hackathon di Homestay. Kita bagi tugas tiap-tiap orang, apa aja yang bisa dikerjakan.
BlanKopdar kali ini ada beberapa target yang ingin dikejar:
1. Tambal Paket, terutama terkait Sofware Center dan Appstream Data
2. Nutupin Tiket BlankOn Installer
3. Rilis Manokwari, sekalian mengundang Pak Fadlun buat Hackathon, sebagai kontributor Manokwari paling aktif saat ini.
4. Beberapa konfigurasi infra yang dibutuhkan
Dalam kenyataannya adalah zsync jahitan, install, debug, koding-koding, commit, rilis paket, masuk ke irgsh, jahit dan ulangi dari awal. Jam 1 pada mulai tepar, namun hasilnya produktif. Beberapa bug minor terdeteksi dan dapat ditambal.
Hari Pertama Konferensi, Sabtu 24 Maret 2018.
Tempat acara di Gedung Pasca Sarjana PENS lt. 6. Saya agak telat datang. Pak Slamet dan Tim sudah duluan untuk persiapan Stand Pameran. Saya baru jam 11 sampai PENS. Tak lama dapat telepon dari Pak Aftian. Ya salah satu target utama datang ke Surabaya ini memang untuk ketemu Pak Aftian sebagai supermen di Proyek BlankOn.
Saya banyak menghabiskan di Stand Pameran, ngadep laptop. Jam set 1 ketemu Pak Aftian. Sesi curhat dimulai, antara Pak Aftian, tim JK, Tim Riset dan saya. Membahas bagaimana appstream data bekerja. Paket ini paket wajib sebagai basisdata aplikasi yang bisa dipasang menggunakan GNOME Software Center. Kesulitannya adalah dokumentasi paket ini tidak sampai ke Pengembang Uluwatu. Diskusi berjalan lama dan Pak Herpiko sudah mendapat inspirasi. Siap-siap buat praktek.
Sebelum magrib saya balik homestay. Dan kata Panitia, ada undangan makan malam lagi di Ayam Bakar Primarasa. Kali ini tema obrolan di meja adalah proyek penerjemahan. Ada Pak Andika, Pak Kukuh, dan satu lagi Mbak dari Mozilla. Rencananya mau bikin Konferensi Translasi untuk memasukkan beberapa bahasa lokal ke LibC. Masih akan digodok dan semoga bukan wacana.
Balik ke homestay. Lanjut ke appstream-data bareng Pak Herpiko. Setelah coba-coba, jalan. dan paket yang ada direpo akan selesai diexport ke yml besok pagi. Pak Sofyan masih sibuk nambal BlankOn Installer. Saya tidur duluan.
Hari kedua konferensi, Minggu 25 Maret 2018.
Hari ini kepala masih penuh sama pertanyaan, Kapan rilis? Sudah ditodong pak haris ketika makan malam. Sayangnya tidak ada pemaket yang hadir di BlanKopdar dadakan ini. Ya sudah, belajar ngenter didampingi pak Aftian. Paket appstream-data Uluwatu harus sukses dimasak oleh irgsh.
Menjelang selesai acara akhirnya sukses masak di irgsh. Siap-siap jahit lagi. Saya pun balik ke homestay lagi. Sekalian nganter pak Edwin yang balik ke Jakarta penerbangan malam.
Saya termasuk lupa ngambil foto kegiatan. Baru sadar pas udah selesai, g ikut foto bareng :(. Sampai bertemu di Konferensi selanjutnya. Terimakasih untuk Panitia, Sponsor dan semua pihak atas undangan accara, kesempatan ngisi Stand Pameran dan tak lupa Jamuannya.

April, Uluwatu Rilis!
Estu, yg masih utik-utik jahitan RC4.

First Gem: jekyll-onebox
Initially, I wanted to blog about my travels. In the end, I refactored old code on my computer to publish eventually my first Ruby gem in the official repo at RubyGems. Welcome now jekyll-onebox on Github and RubyGems! :tada: :clap:
So if you use Jekyll for blogging, you can install this plugin and add HTML previews for links to popular websites very easily.
{% onebox https://github.com/rriemann/jekyll-onebox/blob/master/README.md %}
The previews are rendered using the gem onebox that powers link previews for Discourse forums.
Have fun with it and let me know if you encounter problems!
LibreOffice Conference Indonesia 2018
The Original Story Behind This Conference
Yes, Sokibi and Rania already write the story about how we starting the conference. It’s true but not complete one. The original one was before I have dinner with Sokibi and Rania. I have lunch with Kukuh and Moko in Soto Betawi Restourant near my house.

We’re thinking that in 2017 there’s no FOSS Conference in Indonesia. So we decide to organize conference about LibreOffice but small one (we can call it mini conference). But time flows, and we kick out “mini” and become normal conference.
The Document Foundation
Since Franklin Weng becoming board in TDF, he often pursuade me to joining TDF Membership. Well, I’m thinking that I less contribution on LibreOffice and little experience in that (except for personal/daily use). I have lot of experience in OpenOffice, an era before LibreOffice.
So, with organizing this conference, it’s my starting point to contribute to LibreOffice and of course I apply the membership and TDF will process my submission this month.
Start Organizing Conference
We start work in December 2017, preparing the proposal and choose which city and university for the venue. We asking two universities and good will comes from PENS (Politeknik Electronika Negeri Surabaya). We start working on Januari 4th, and prepare everything daily.
We have 9 members of organizer in first place, but then one member just gone away not active, so I kicked him out. Our member was come from different cities, luckly it’s still in one timezone. So we just have 8 powerfull members. In last week near the event, there’s about 25 students from university that joining us as local community organizer.
My main role is as coordinator and fundraiser. It’s easy but not easy. But I have good team members. In the event it’s self I was complicated busy, make sure everything work and run perfectly. But me and others are happy.
Honorable mention Rania, Moko, Kukuh, Joko, Darian, Ummul, and Tamara. The last one can’t attend the conference.
Day #-1
I arrived at Surabaya on Thursday, one day before workshop. I need to come early to make coordination with local organizer and pickup Franklin and Eric. Both of them are my old friends.
Mr. Ardi (lecturer from PENS who also local organizer) told me in telegram chat, that in Day#1, I need to have speech to open the conference with some professor. I bought batik shirt for this special moment. 
Day #0
This is workshop day. I visited the venue and meet Mr. Ardi. I see the workshop for couple minutes and then at lunch time, I have meeting with Franklin, Eric, Andika, Noor, Darian, Estu and Lecturer/Professor from PENS.
In that meeting we have introduce our self and have small discussion. The Director of PENS also open the conference, because on Day#1 he can’t attending it.
I stay in Rumah Kertajaya Hostel, same with Franklin, Eric and Italo. I choose this because Italo already book this place and I need to have better communication and coordination with them.
Day #1
This is my special day. It’s rare to see me use formal shirt, especially batik shirt. I have opening speech as coordinator of organizer.

I spent this day to meet other speaker, have small discussion and make sure everything works smoothly. Also must sign many documents related to sponsorship from government.

I’m not attending any class this day. Only for Keynote.
Day #2
This day, I use spiderman t-shirt. Hahaha. I wanna make this day little bit more relax. I attend one class, about LibreOffice for Writing Scientific Work in Arabic by Rizki Fauzi. Yes I able to read and type in Arabic.
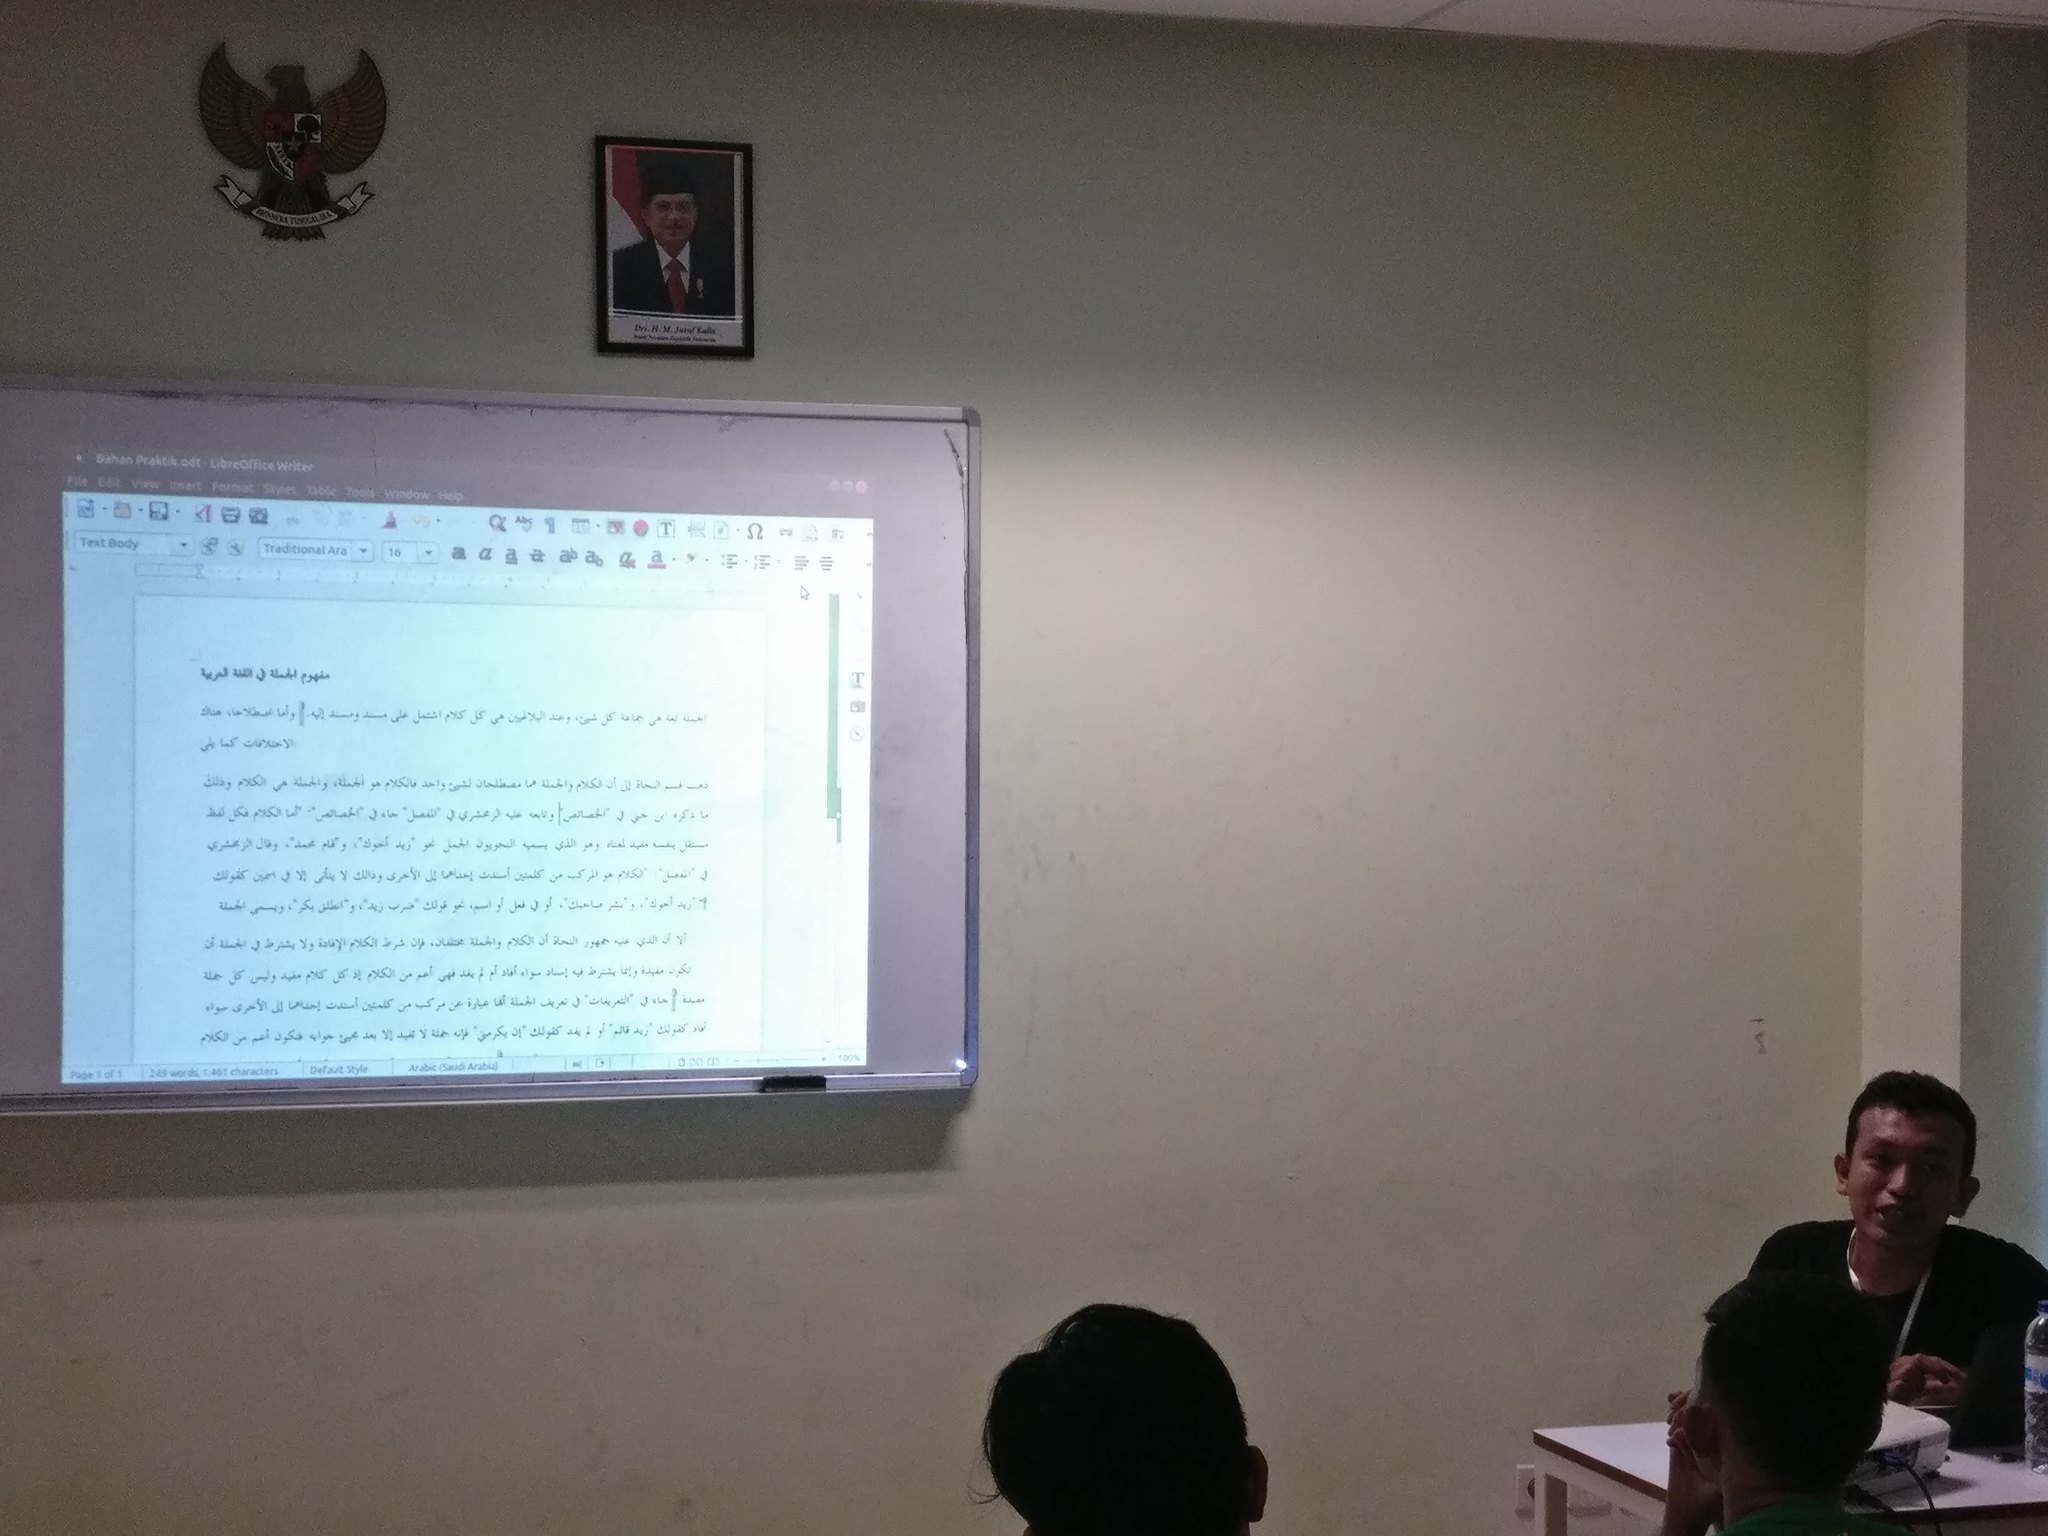
I also becoming moderator for Q&A with TDF before closing ceremony. Becoming moderator is not easy (it’s true) because Italo are person who love to tell his experience and good story teller. I can’t stop him many times.
The closing ceremony was cheerful, you can see it on LibreOffice Conference Indonesia 2018 group.

Day #3
Day #3 was city tour day. We have mini bus contain foreigner speaker, few local speaker and local organizer. We going to neighboor city of Surabaya, Mojokerto, which still have ancient Majapahit museum and temple.

We’re also going to Sampoerna Museum and Mirota Batik Store. Italo need to buy many of them.
Day #4
Me, Italo, Eric and Franklin have discussion session with PENS. It talk about curriculum and implementation in IT world.

In afternoon, Italo and Franklin become Guest Lecturer.

In evening, I also become Guest Lecturer. My class talking about Ridon.id.

Day #5
This day Franklin, Eric and Italo departed from Surabaya in the morning. In evening I also departed using night train.
Dinner
We actually have dinner sponsored by LibreOfficeID since Day #-1. Delicious dinner and have good stories from each other. Take a look at flickr if you want to see the picture.
Summary
Here my personal summaries about this conference:
- This conference is biggest FOSS conference in 2017 and 2018 in Indonesia
- Many people still doesn’t know about LibreOffice
- It’s quite difficult to get sponsorship from IT company
- Organizing conference outside JABODETABEK is different. Also the participant, many issues such as ticket price, transportation and hotel
- Collaboration with students are difficult in the beginning, but at the end, there’s few students are good and joining community
- Many student in PENS able to speak English. It’s opposite from last two conference (GNOME Asia and openSUSE Asia) in Indonesia
- Meet other/community members are good for your helth
- There’s a lot of chance to contribution and travel arround the world


Kraft Version 0.80 Released
I am happy to announce the release of the stable Kraft version 0.80 (Changelog).
Kraft is desktop software to manage documents like quotes and invoices in the small business. It focuses on ease of use through an intuitive GUI, a well choosen feature set and ensures privacy by keeping data local.
After more than a dozen years of life time, Kraft is now reaching a new level: It is now completely ported to Qt5 / KDE Frameworks 5 and with that, it is compatible with all modern Linux distributions again.
KDE Frameworks 5 and Qt5 are the best base for modern desktop software and Kraft integrates seamlessly into all Linux desktops. Kraft makes use of the great KDE PIM infrastructure with KAddressbook and Akonadi.
In addition to the port that lasted unexpectedly over 12 months, Kraft v. 0.80 got a whole bunch of improvements, just to name some examples:
More Flexible Addressbook Integration
As Akonadi is optional now, Kraft can be built without it. Even if it was built with, but Akonadi for whatever reason is not working properly, Kraft still runs smoothly. In that case it only lacks the convenience of address book integration.
The Address book access was also nicely abstracted so that other Addressbook backends can be implemented more easily.
GUI Improvements
Even though the functionality and GUI of Kraft was not changed dramatically compared to the last stable KDE 4 version, there were a few interesting changes in the user interface.
- A new, bigger side bar simplifies navigation.
- In the timeline view, a click on years and month in the treeview show summaries of the selected time span, ie. the number of documents with financial summaries per month or year.
- A filter allows to limit the view on the current week or month.
Reduction of dependencies
Kraft makes broad use of the core Qt5 libraries. The required KDE dependencies were reduced to a bare minimum. Akonadi libraries, which enable KDE PIM integration are now optional. The former dependency on heavyweight web browser components were completely removed and replaced by the far more simple richtext component of Qt.
These changes make it not only easier and more transparent to build Kraft but allow make a port to other platforms like MacOSX more easy in the future.
Under the Hood
A countless number of bugfixes and small improvements went in. Also updates to the newer C++ concepts where applicable make the rather mature code base more modern and better maintainable.
The Reportlab based PDF document creation script was updated and merged with a later version for example.
Deployment
Installing Kraft is still a bit complicated for unexperienced users, and distributions sometimes haven’t made a good job in the past to provide the latest version of Kraft.
To make it easier to test, there is an AppImage of Kraft 0.80 available that should be runable on most modern distributions. Just download a single file that can be started right away after having added the executable permissions.
Linux packages are already built for openSUSE (various versions) or Gentoo.
Kraft’s website will contain a lot more information.
Kraft Version 0.80 ist da!
Heute wurde Kraft Version 0.80 herausgegeben.
Nach mehr als zwölf Jahren Lebenszeit beginnt für Kraft heute eine neue Ära: Kraft ist jetzt auf Qt5/KDE Frameworks 5 portiert und damit wieder problemlos auf modernen Linux Distributionen lauffähig.
KDE Frameworks 5 und Qt5 sind die beste Basis für einen modernen Desktop, aber Kraft integriert gut mit allen verfügbaren Linux Desktop Systemen. Mit KDE kann Kraft das Akonadi-basierte Adressbuch zur Adressverwaltung nutzen.
Zusätzlich zur Portierung, der mehr als die letzten 12 Monate in Anspruch nahm, beinhaltet Kraft V. 0.80 eine große Menge an Verbesserungen, zum Beispiel:
Weniger Abhänigkeiten
Kraft verwendet vor allem die Qt5 Bibliotheken. Die verwendeten KDE Frameworks Abhängigkeiten wurden bewusst auf das nötige Minimum reduziert. Die Akonadi-Bibliotheken, die die KDE-Adressbuch-Integration ermöglichen, sind jetzt optional. Die vorherige Verwendung von einer schweren Webbrowser-Komponente wurde komplett entfernt und von einer viel simpleren, in Qt integrierten Richtext-Komponente ersetzt.
Alle diese Änderungen machen es nicht nur einfacher, Kraft zu übersetzen, sondern vereinfachen einen möglichen Port auf andere Platformen wie MacOSX oder Windows.
Adressbuch-Integration
Da Akonadi nun optional ist, kann Kraft ohne es übersetzt werden. Selbst wenn es mit gebaut wurde, aber Akonadi aus irgendwelchen Gründen nicht funktioniert, läuft Kraft ohne Probleme weiter. Es fehlt dann lediglich der Komfort der Adressbuch-Integration und Adressen müssen manuell eingetragen werden.
Die Empfehlung ist weiterhin, die gute Integration mit dem Akonadi-basierten Adressbuch zu verwenden.
Benutzeroberfläche verbessert
Auch wenn die Funktionalität von Kraft in diesem Release im Vergleich zum letzten KDE4-basierten Release nicht wesentlich verbessert wurde, sind doch einige interessante Veränderungen passiert.
- Eine neue, größere und vereinfachte Seitenleiste erleichtern die Bedienung
- Im Zeitverlauf kann jetzt auf ein Jahr oder einen Monat geklickt werden und es wird eine Übersicht der versendeten Dokumente in dem Zeitraum angezeigt.
- Ein Filter erlaubt die Reduzierung der angezeigten Dokumente auf die aktuelle Woche oder den letzten Monat.
Unter der Haube
Zusätzlich wurden eine große Menge weiterer Fehlerbehebungen und Verbesserungen eingebracht. Ausserdem erleichtert der Umstieg auf modernere C++ Standards die Weiterentwicklung und Pflege der Software.
Installation
Kraft zu installieren ist nicht einfach, und Linux-Distributionen haben in der Vergangenheit nicht immer einen guten Job gemacht, die aktuelle Version von Kraft zu liefern.
Um es einfacher zu machen, Kraft auszuprobieren, wird ab jetzt ein sog. AppImage von Kraft angeboten, das auf den meisten modernen Linuxen lauffähig sein sollte. Dazu muss nur ein einziges File heruntergeladen werden.
LibreOffice Conference Indonesia 2018
On March 1st, I received some marketing material from openSUSE that we can put on our booth and distribute to the conference participant. Thanks openSUSE!

LibreOffice Conference Indonesia (LOCI) 2018 is the first LibreOffice Conference in Indonesia so as a user of Libre Office since a long time I'm so excited to attend this conference.
On early morning March 23, 2018 I took the flight flying through the golden hour to Surabaya. It was still 6.00 o'clock in the morning and I'm very surprised that Darian, the local committee of LOCI 2018, show up in the Juanda Surabaya Airport to pick me up and take me to the venue. Thanks Darian.
The day 0 is workshop day, it is Andika Triwidada stage. I didn't do much on this day except meeting with the EEPIS officials together with some friends from LibreOffice Community and KLAS (Linux User Group of Surabaya City). There were Noor Azam from KLAS, Franklin Weng and Eric Sun from TDF, Ahmad Haris from LibreOfficeID, Andika Triwidada as LibreOffice and Gnome Indonesia translator coordinator, Iwan Tahari from Sepatu Fans, Estu from BlankOn and myself.

On the night of Day 0, local committee invite us for a dinner. We have a good moment, discussed with the community and also with my long time friend Franklin Weng and Eric Sun, TDF member from Taiwan. The dinner was so delicious. Thanks to LibreOfficeID.


On the rest of the day I mainly on openSUSE booth explaining about openSUSE and distributing all of our stickers, magazine and anything else we can give :-) I should thanks our openSUSE Indonesia Community especially Didiet, Dhenandi and Kukuh Syafaat that help me to manage our booth. It was very crowded, hundred people visit us and we run out of our goodies :-)


The day 1 is closing by another delicious dinner sponsor by LibreOfficeID

The day 2 is opening by Noor Azam as keynote speaker from KLAS talking about "The Importance of Open Standards Data". It follows by another keynote speaker, Italo Vignoli with paper about "LibreOffice 6.0 - Positioning and Main Features". After that as I did in day 1, I mainly in openSUSE booth answering question about openSUSE and distributing our goodies :-)


This conference was really an enjoyable moment. Not only that it introduce LibreOffice for student at EEPIS but also to give more knowledge for young generation about an open source movement that already mature in the world. This event is also used by open source activist in Indonesia to meet face-to-face and to know and get better understanding for each other.
You can see more photos from the flickr so that you can feel the vibe of the event :-)
Finally, thanks openSUSE, openSUSE-ID, LibreOffice and LibreOfficeID for everything.
Have a lot of fun!
Будущее наступает
Прочитав заметку Кая Уве о глобальном меню в Plasma 5.13, я уже приготовился было ждать июня, когда эта версия официально выйдет, однако меня ждала хорошая новость! В новой версии openSUSE Leap 15.0, которая тоже ещё не вышла, но уже довольно давно доступна как бета-версия, уже давно всё сделано и работает! Напомню, что речь идёт о поддержке глобального меню не только для Qt-приложений, но и для GTK-программ. Это значит, что в Plasma теперь можно добиться гораздо лучшей интеграции чужеродных приложений (не основанных на Qt5) и наслаждаться отличным и единообразным видом программ, использующтх разные графические библиотеки.
Картинки покажут всё лучше слов, поэтому смотрим:
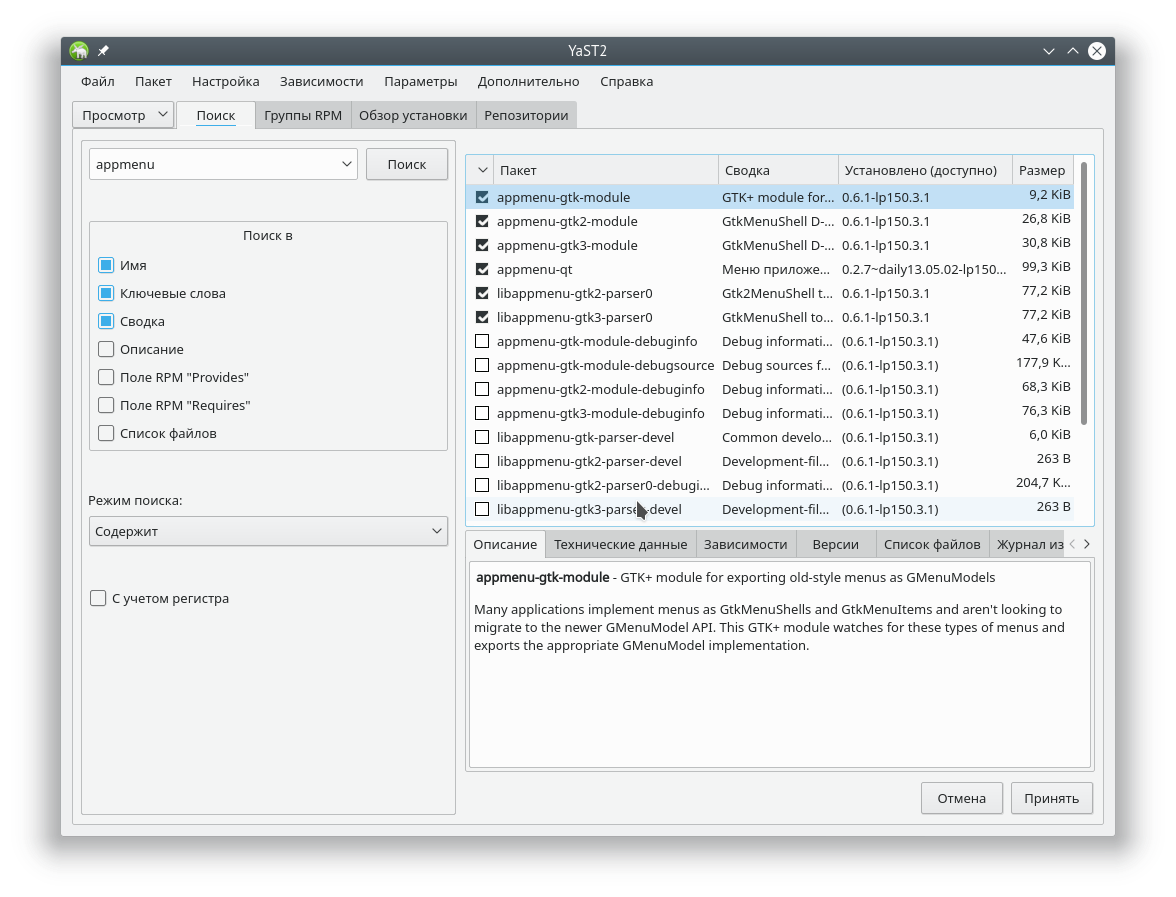
Для начала — список установленных пакетов, без которых ничего получится
Затем нужно просто добавить на рабочий стол верхнюю панель с меню приложений. В Plasma 5.12 это стало проще, так как больше не нужно идти в настройки стиля и выбирать там расположение меню. Теперь вы просто добавляете стандартную панель с меню и всё происходит автоматически. Так, к примеру выглядит у меня Gimp:
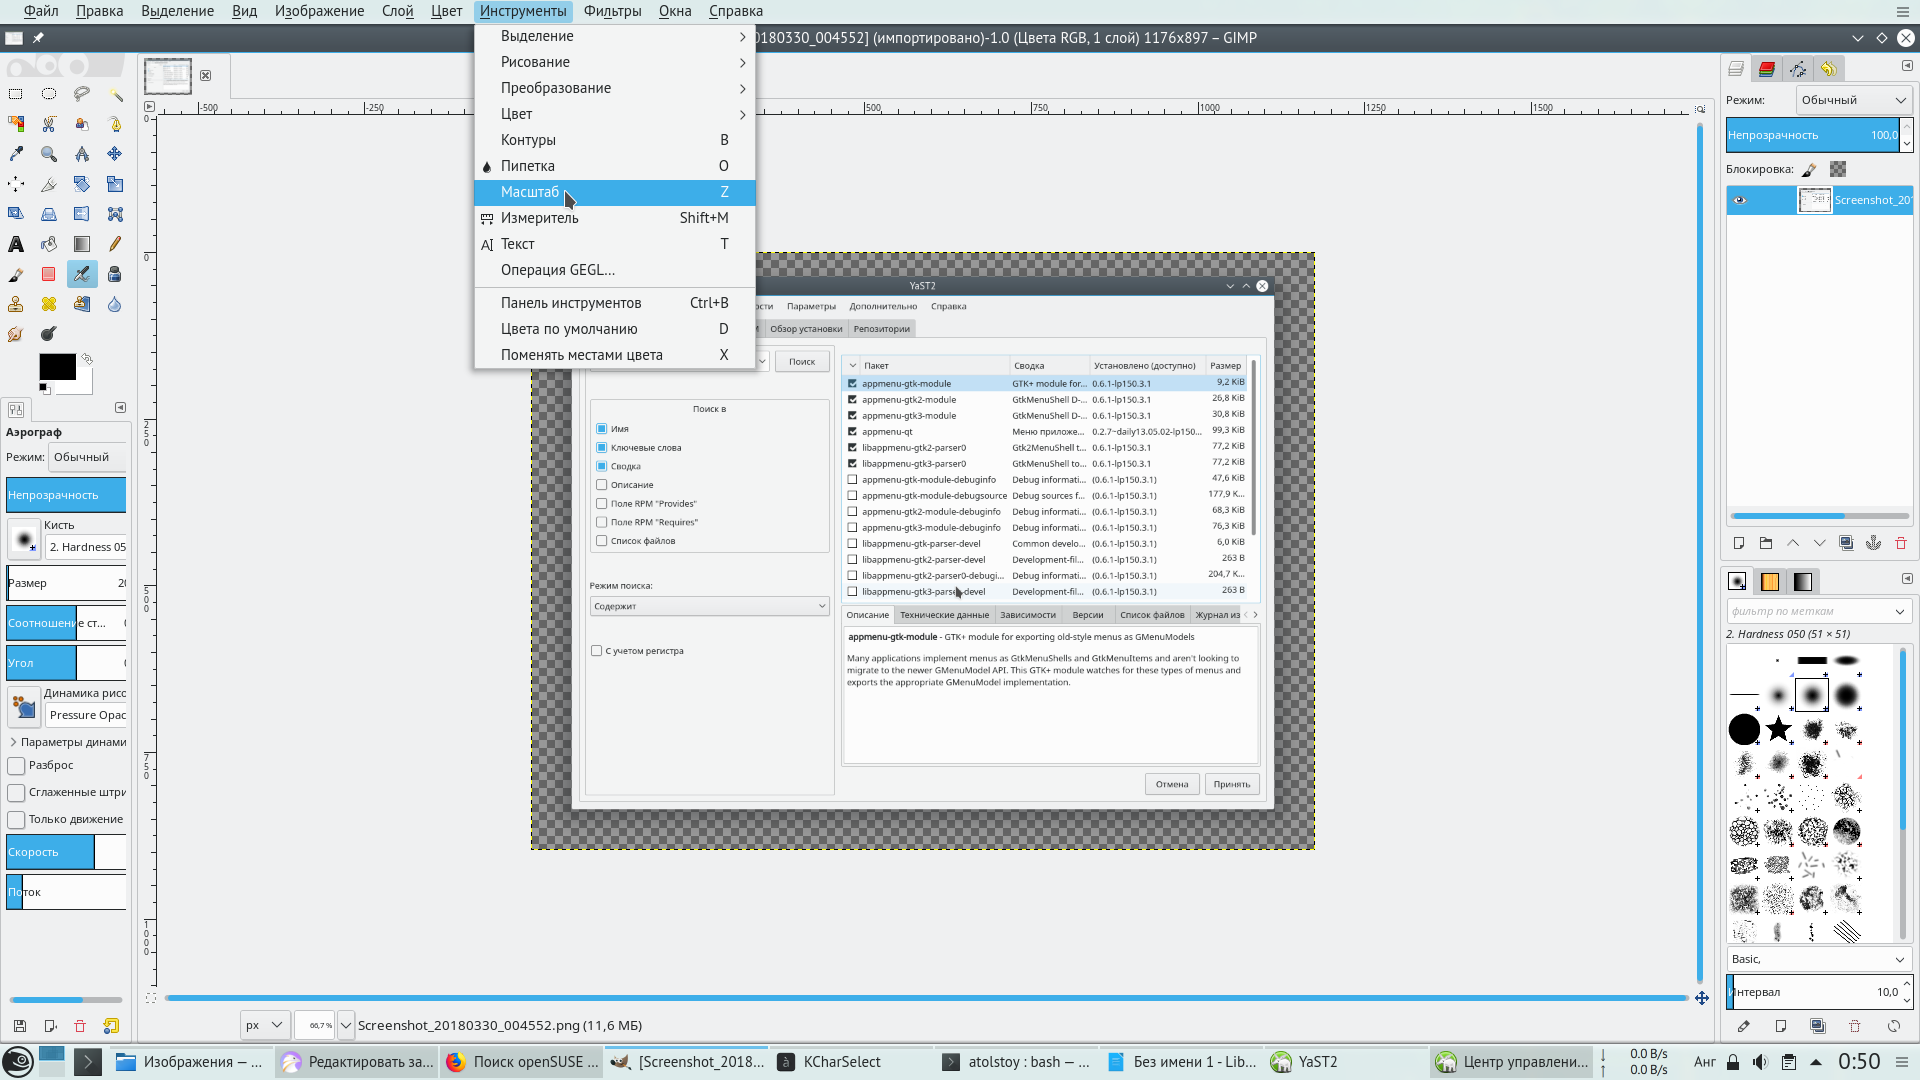
А так — Inkscape:
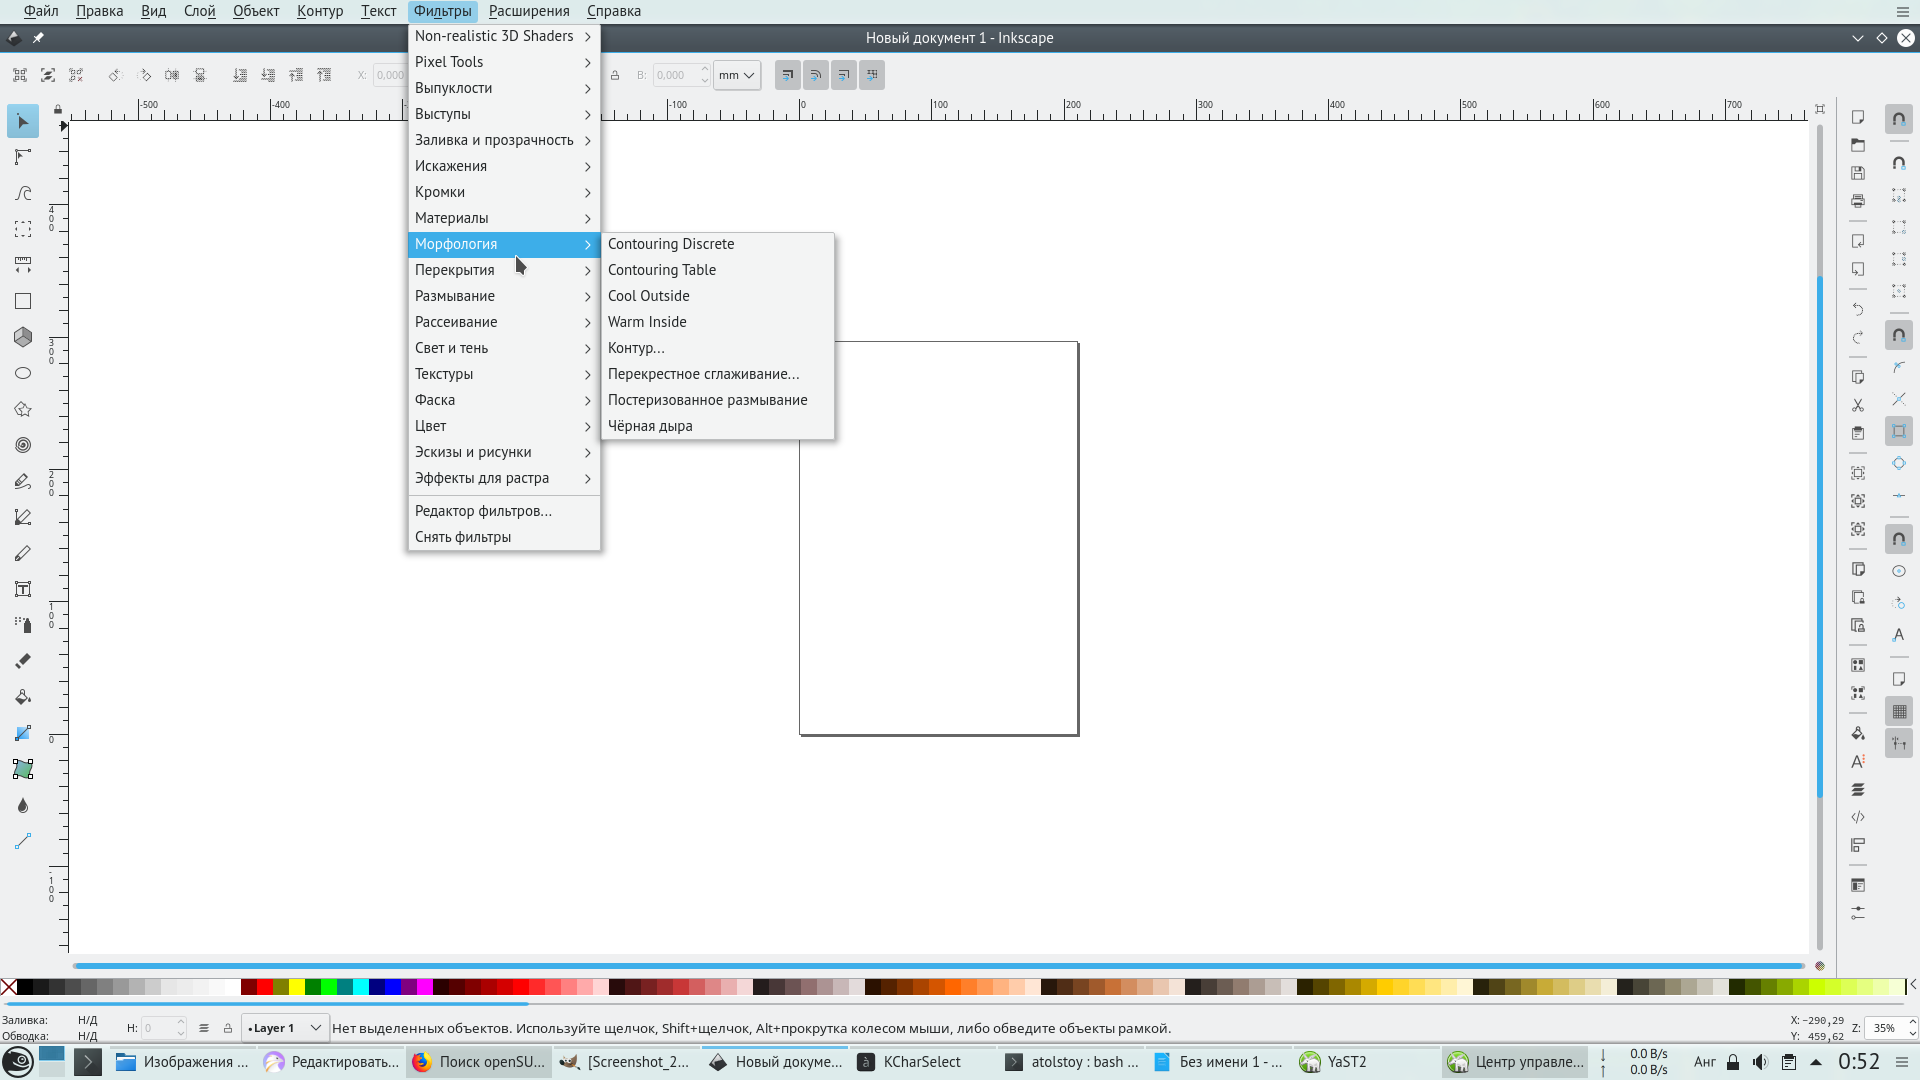
C Libreoffice нужно немного повозиться. Во-первых, потребуется установить VCL-плагины для интеграции пакета c GTK2 и GTK3 (увы, VCL-плагин для KF5 разрабатывается, но пока не готов). В openSUSE это пакеты libreoffice-gtk2 и libreoffice-gtk3. Затем нужно запустить любой из нужных вам компонентов, предварительно объявив переменную SAL_USE_VCLPLUGIN, например так:
SAL_USE_VCLPLUGIN=gtk oowriter
Результат:
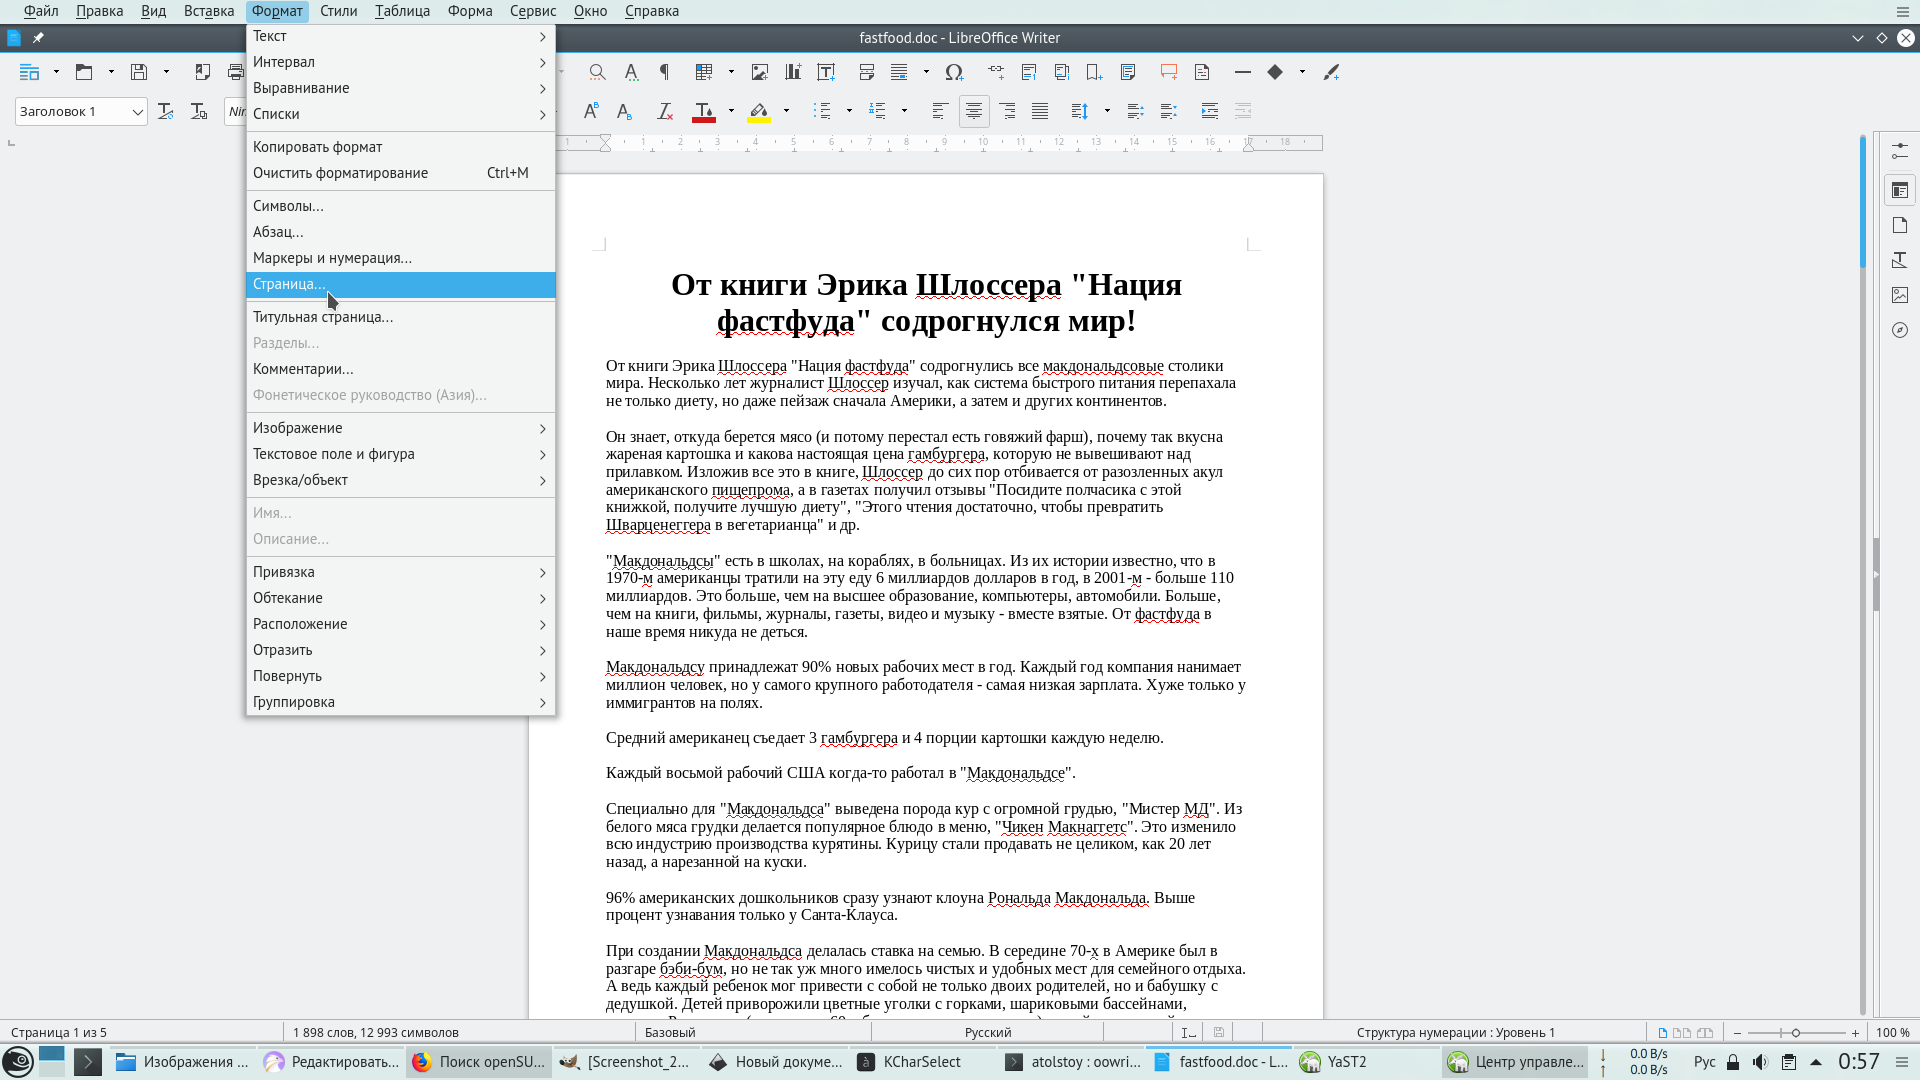
Это просто кра-со-та! Теперь в моём любимом KDE глобальное меню почти так же универсально как и в macOS, и уже явно не хуже чем vala-appmenu, которое работает в XFCE и Mate.
UPD.
Среди Linux-блогеров, которых я читаю, есть некий Alex285, являющийся большим фанатом Gnome. Он ведёт интересный блог World of Gnome (WOGUE), откуда удобно узнавать о самых свежих новостях, связанных с Gnome. Я слежу за этой темой для того, чтобы знать, что из себя представляет современный Gnome Shell и мир GTK3-приложений. Вдруг, в какой-нибудь параллельной вселенной или мире розовых пони так случится, что Gnome станет быстрее, удобнее и надёжнее чем KDE Plasma, и тогда мне придётся перейти в стан гномолюбов — хотя бы для того, чтобы оставаться честным с самим собой. К счастью, в реальном мире всё происходит ровно наоборот: последние версии Gnome (3.22-3.28) работают в моём VirtualBox заметно медленнее чем Plasma, а про убогий набор функций Gnome можно говорить бесконечно.
Так вот, этот самый блогер внезапно очень нервно и агрессивно отреагировал на новость про глобальное меню в KDE. Дескать, это всё не нужно и вообще, вместо меню разработчикам нужно работать над стандартным API приложений, чтобы их функции были доступны из HUD (это такая вываливающаяся сверху область уведомлений со строкой поиска). На это мне есть что сказать: я прекрасно понимаю природу гнева гномовода по поводу глобального меню в KDE. Причина здесь в зависти и бессильной злобе от того, что в конкурирующем настольном окружении хорошо работают штуки, которых в Gnome нет и в ближайшее время точно не будет. У нас есть KRunner (лучшая в своём классе реализация HUD), но самое главное — в KDE меню приложений можно настраивать. Его можно оставить в окне самого приложения, можно закинуть в кнопку в заголовке окна, можно вынести в отдельный плазмоид на панель, можно вообще отключить. Любой, кто пытался освоиться в Gnome Shell, может подтвердить убогость, бедность и малую информативность как оболочки в целом, так и отдельных GTK3-программ. Пользователь Gnome не видит какие программы у него запущены, но он также не видит функций по управлению документом, открытым в GTK3-программе до тех пор, пока не перейдёт к этой программе. Эта «слепота» приводит к тому, что в Gnome нужно тратить дополнительное время на то чтобы постоянно переключаться между обзором запущенных программ и рабочим приложением, а потом отдельно искать, где у приложения меню (и есть ли оно там вообще). Современные тенденции в развитии GTK3 приводят также к тому, что цельность таких рабочих окружений как XFCE и Mate размывается и становится эклектичной. Говоря по-русски, вместо продуманного рабочего стола вы рискуете получить помойку, щедро сдобренную фантазиями дизайнеров Gnome. По этой, и по многим другим причинам, KDE Plasma — лучший рабочий стол на сегодняшний день.