
 Member
 federico1
Refactoring some repetitive code to a Rust macro
I have started porting the code in librsvg that parses SVG's CSS properties from C to Rust. Many properties have symbolic values:
stroke-linejoin: miter | round | bevel | inherit

stroke-linecap: butt | round | square | inherit

fill-rule: nonzero | evenodd | inherit
StrokeLinejoin is the first property that I ported. First I had to
write a little bunch of machinery to allow CSS properties to be kept
in Rust-space instead of the main C structure that holds them
(upcoming blog post about that). But for now, I just want to show how
this boiled down to a macro after refactoring.
First cut at the code
The stroke-linejoin property can have the values miter, round,
bevel, or inherit. Here is an enum definition for those values,
and the conventional machinery which librsvg uses to parse property values:
#[derive(Debug, Copy, Clone)]
pub enum StrokeLinejoin {
    Miter,
    Round,
    Bevel,
    Inherit,
}

impl Parse for StrokeLinejoin {
    type Data = ();
    type Err = AttributeError;

    fn parse(s: &str, _: Self::Data) -> Result<StrokeLinejoin, AttributeError> {
        match s.trim() {
            "miter" => Ok(StrokeLinejoin::Miter),
            "round" => Ok(StrokeLinejoin::Round),
            "bevel" => Ok(StrokeLinejoin::Bevel),
            "inherit" => Ok(StrokeLinejoin::Inherit),
            _ => Err(AttributeError::from(ParseError::new("invalid value"))),
        }
    }
}
We match the allowed string values and map them to enum values. No
big deal, right?
Properties also have a default value. For example, the SVG spec says
that if a shape doesn't have a stroke-linejoin property specified,
it will use miter by default. Let's implement that:
impl Default for StrokeLinejoin {
    fn default() -> StrokeLinejoin {
        StrokeLinejoin::Miter
    }
}
So far, we have three things:
- An enum definition for the property's possible values.
-
impl Parseso we can parse the property from a string. -
impl Defaultso the property knows its default value.
Where things got repetitive
The next property I ported was stroke-linecap, which can take the
following values:
#[derive(Debug, Copy, Clone)]
pub enum StrokeLinecap {
    Butt,
    Round,
    Square,
    Inherit,
}
This is similar in shape to the StrokeLinejoin enum above;
it's just different names.
The parsing has exactly the same shape, and just different values:
impl Parse for StrokeLinecap {
    type Data = ();
    type Err = AttributeError;

    fn parse(s: &str, _: Self::Data) -> Result<StrokeLinecap, AttributeError> {
        match s.trim() {
            "butt" => Ok(StrokeLinecap::Butt),
            "round" => Ok(StrokeLinecap::Round),
            "square" => Ok(StrokeLinecap::Square),
            "inherit" => Ok(StrokeLinecap::Inherit),

            _ => Err(AttributeError::from(ParseError::new("invalid value"))),
        }
    }
}
Same thing with the default:
impl Default for StrokeLinecap {
    fn default() -> StrokeLinecap {
        StrokeLinecap::Butt
    }
}
Yes, the SVG spec has
default: butt
somewhere in it, much to the delight of the 12-year old in me.
Refactoring to a macro
Here I wanted to define a make_ident_property!() macro that would
get invoked like this:
make_ident_property!(
    StrokeLinejoin,
    default: Miter,

    "miter" => Miter,
    "round" => Round,
    "bevel" => Bevel,
    "inherit" => Inherit,
);
It's called make_ident_property because it makes a property
definition from simple string identifiers. It has the name of the
property (StrokeLinejoin), a default value, and a few repeating
elements, one for each possible value.
In Rust-speak, the macro's basic pattern is like this:
macro_rules! make_ident_property {
    ($name: ident,
     default: $default: ident,
     $($str_prop: expr => $variant: ident,)+
    ) => {
        ... macro body will go here ...
    };
}
Let's dissect that pattern:
macro_rules! make_ident_property {
    ($name: ident,
//   ^^^^^^^^^^^^ will match an identifier and put it in $name

     default: $default: ident,
//            ^^^^^^^^^^^^^^^ will match an identifier and put it in $default
//   ^^^^^^^^ arbitrary text

     $($str_prop: expr => $variant: ident,)+
                       ^^ arbitrary text
//   ^^ start of repetition               ^^ end of repetition, repeats one or more times

    ) => {
        ...
    };
}
For example, saying "$foo: ident" in a macro's pattern means that the
compiler will expect an identifier, and bind it to $foo within the
macro's definition.
Similarly, an expr means that the compiler will
look for an expression — in this case, we want one of the string
values.
In a macro pattern, anything that is not a binding is just arbitrary
text which must appear in the macro's invocation. This is how we can
create a little syntax of our own within the macro: the "default:"
part, and the "=>" inside each string/symbol pair.
Finally, macro patterns allow repetition. Anything within $(...)
indicates repetition. Here, $(...)+ indicates that the
compiler must match one or more of the repeating elements.
I pasted the duplicated code, and substituted the actual symbol names for the macro's bindings:
macro_rules! make_ident_property {
    ($name: ident,
     default: $default: ident,
     $($str_prop: expr => $variant: ident,)+
    ) => {
        #[derive(Debug, Copy, Clone)]
        pub enum $name {
            $($variant),+
//          ^^^^^^^^^^^^^ this is how we invoke a repeated element

        }

        impl Default for $name {
            fn default() -> $name {
                $name::$default
//              ^^^^^^^^^^^^^^^ construct an enum::variant

            }
        }

        impl Parse for $name {
            type Data = ();
            type Err = AttributeError;

            fn parse(s: &str, _: Self::Data) -> Result<$name, AttributeError> {
                match s.trim() {
                    $($str_prop => Ok($name::$variant),)+
//                  ^^^^^^^^^^^^^^^^^^^^^^^^^^^^^^^^^^^^^ expand repeated elements

                    _ => Err(AttributeError::from(ParseError::new("invalid value"))),
                }
            }
        }
    };
}
Getting rid of duplicated code
Now we have a macro that we can call to define new properties. Librsvg now has this, which is much more readable than all the code written by hand:
make_ident_property!(
    StrokeLinejoin,
    default: Miter,

    "miter" => Miter,
    "round" => Round,
    "bevel" => Bevel,
    "inherit" => Inherit,
);

make_ident_property!(
    StrokeLinecap,
    default: Butt,   // :)

    "butt" => Butt,
    "round" => Round,
    "square" => Square,
    "inherit" => Inherit,
);

make_ident_property!(
    FillRule,
    default: NonZero,

    "nonzero" => NonZero,
    "evenodd" => EvenOdd,
    "inherit" => Inherit,
);
Etcetera. It's now easy to port similar symbol-based properties from C to Rust.
Eventually I'll need to refactor all the crap that deals with inheritable properties, but that's for another time.
Conclusion and references
Rust macros are very powerful to refactor repetitive code like this.
The Rust book has an introductory appendix to macros, and The Little Book of Rust Macros is a fantastic resource that really dives into what you can do.

Kraft out of KDE
Following my last blog about Krafts upcoming release 0.80 I got a lot of positive reactions.
There was one reaction however, that puzzles me a bit and I want to share my thoughts here. It is about a comment about my announcement that I prefer to continue to develop Kraft on Github. The commenter reminded my friendly that there is still Kraft code on KDE infrastructure, and that switching to a different repository might waste peoples time when they work with the KDE repo.
That is a fair statement, of course I don’t want to waste peoples time. What sounds a bit strange to me is the second paragraph, that says that if I decide to stay with Github, I should let KDE people know that I wish Kraft to not be a KDE project anymore.
But … I never felt that Kraft should not be a KDE project any more.
A little History
Kraft has come a long way together with KDE. I started Kraft in (probably) 2004, gave a talk about Kraft at the Akademy Dublin 2006, maintained it with the best effort I could contribute until today. There is a small but loyal community around Kraft.
During all the time I got little substancial contribution to the code directly, with the exception of one cool developer who got interested for some time and made some very interesting contributions.
When I asked a for the subdomain http://kraft.kde.org long time ago I got the reply that it is not in the interest of KDE to give every little project a subdomain. As a result I reserved http://volle-kraft-voraus.de and run it since then, happily showing a “Part of the KDE family” logo on it.
Beside the indirect contributions to libraries that Kraft uses, I shipped Kraft with the translations made by the KDE i18n team, for which I always was very grateful. Otherwise I got no other services from KDE.
Why Github?
Githubs workflow serves me well in my day job, and since I have only little time for Kraft, I like to use the tools that I know best and give me the most efficiency.
I know that Github is not free software and I am sceptical about that. But Github also does not lock in, as we still are on git. We all know the arguments that usually come on the table at this point, so I am not elaborating here. One thing I want to mention though is that since I moved to Github publically I already got two little pull requests with code contributions. That is a lot compared to what came in the last twelfe years when living on KDE infrastructure only.
Summary
Kraft is a small project, driven by me alone. My development turnaround is good with Github as I am used to it. Even if no KDE developer would ever look at Github (which I know is not true) I have to say with heavy heart that Kraft would not take big harm by leaving KDEs infra, based on the experience of the last 12 years.
If the KDE translation teams do not want to work with Github, I am fine to accept that, and wonder if there could be a solution rather than switching to Transifex.
One point however I like to make very clear: I did not wish to leave KDE, nor aimed to move Kraft out. I still have friends in the KDE community, I am still very interested in free software on desktop and elsewhere, and my opinion is still that KDE is the best around.
If the KDE community feels that Kraft must not be a KDE project any longer because it is on Github, ok. I asked KDE Sysadmins to remove Kraft from the KDE git, and it is already done.
Kraft now lifes on on Github.
Making sure the repository doesn't break, automatically
Gitlab has a fairly conventional Continuous Integration system: you push some commits, the CI pipelines build the code and presumably run the test suite, and later you can know if this succeeded of failed.
But by the time something fails, the broken code is already in the public repository.
The Rust community uses Bors, a bot that prevents this from happening:
-
You push some commits and submit a merge request.
-
A human looks at your merge request; they may tell you to make changes, or they may tell Bors that your request is approved for merging.
-
Bors looks for approved merge requests. It merges each into a temporary branch and waits for the CI pipeline to run there. If CI passes, Bors automatically merges to master. If CI fails, Bors annotates the merge request with the failure, and the main repository stays working.
Bors also tells you if the mainline has moved forward and there's a merge conflict. In that case you need to do a rebase yourself; the repository stays working in the meantime.
This leads to a very fair, very transparent process for contributors and for maintainers. For all the details, watch Emily Dunham's presentation on Rust's community automation (transcript).
For a description of where Bors came from, read Graydon Hoare's blog.
Bors evolved into Homu and it is what Rust and Servo use currently. However, Homu depends on Github.
I just found out that there is a port of Homu for Gitlab. Would anyone care to set it up?
Update: Two people have suggested porting Bors-ng to Gitlab instead, for scalability reasons.

SUSE is the trusted source for your Cloud Foundry PaaS

Running for openSUSE Board
Hi! I am running as openSUSE Board member and I would like to let you know more about me, my view of what openSUSE is and why I want to be in the Board. :raised_hands:
About myself
I’m Ana María Martínez, 24 years old, from Madrid, Spain and living in Nuremberg, Germany. I studied Computer Science Engineering and Mathematics in Madrid. During my last year at university, I started in open source development contributing to a local open government project. At the end of my university studies (2016), I participated in Google Summer of Code (GSoC) as a student for openSUSE. I fell in love with the open source development and the openSUSE community. Because of that, after GSoC, I moved to Nuremberg to work as a Software Engineer at SUSE in the Open Build Service frontend team.
I’m currently writing a lot of Ruby code. As I can not avoid taking a look to every code that crosses my path, apart from my work at SUSE, I contribute to several open source projects inside and outside openSUSE. In some cases becoming active contributor, or even maintainer, for some of them. Some people say I am addicted to GitHub! :wink: In openSUSE, I maintain projects like Open Build Service (build.opensuse.org), OSEM (events.opensuse.org), Trollolo, mentoring (101.opensuse.org) and software-o-o (software.opensuse.org). Outside openSUSE, I have recently contributed to Jekyll, the Ruby core, Rubocop, Rantly, etc.
What I like the most of openSUSE and working in open source is that it is fun, I learn a lot and I have the chance to work with a lot of talented people interested in the same things as me all around the world. I think it is really important that everybody who is interested can join openSUSE development and community. Because of that I help newcomers to open source, for example by participating as a mentor and organization admin in GSoC for openSUSE.
I have also happily spoken at openSUSE events (openSUSE conference, openSUSE.Asia Summit) about topics like mentoring and Open Build Service and I try to contribute to make those events as fun as possible.
You will find me in Github, IRC and some other places as @Ana06. You can contact me in Twitter as well (@anamma_06).
Goals and values
I have heard from previous Board members that the board needs to become more approachable and improve communication. I also think this is important and that there is still room for improvement in this regard. In addition, I find really important that the board works as transparent as possible, so that every openSUSE member is aware of the things that are done and the decisions that are made and how they are made. In openSUSE we like to say that those who does, decide. And I also think that those who does, should be as informed as possible. I consider really important as well that openSUSE contributors are valued and have fun, and we should promote this fun spirit from the board. Last but not least, I think we have to improve as a community on encouraging new people to join us, keeping always fun and advertising openSUSE as much and spread as possible.
Why should you vote for me?
I think it is important that there are openSUSE developers in the board and openSUSE developer is a term that defines myself quite well. :joy: Most of the candidates to the board will probably mention here that they are using openSUSE since more than a decade. This is not something I can say. I am using openSUSE distribution and contributing to openSUSE since less than 2 years. Without forgetting that there are people in openSUSE that know much more than me, that I need to hear and learn from, I think that my point of view can be really valuable for the board. I bring new ideas and energy and a great desire to learn and improve things. And of course the reason why you should vote me is because you share my ideas and concept of what openSUSE is and the things that need to be improved.
Hack Days; Removing the Rules
At Unruly we have a quarterly whole-company hack day that we call Oneruly day. Hackdays allow the whole company to focus on one thing for a day.
Unlike our 20% time, which is time for individuals to work on what is most important to them, Hackdays are time for everyone to rally around a common goal.
In product development we run this in true Unruly style: avoiding rules or control. We do have a lightweight process that seems to work well for self-organisation in a group this size (~50 people).
Self Organisation
During the week in the run up to Oneruly day we set up a whiteboard in the middle of the office with the topic written on. Anyone with an idea of something related to that topic that we could work on writes it on an oversized postit note and pops it up on the board.

On the day itself there’s usually a last minute flurry of ideas added to the board, and the whole product development team (some 50-60 people) all gather around. We go through the ideas one by one. The proposer pitches their idea for around 60 seconds, explaining why it’s important/interesting, and why others might want to work on it.
Once we’ve heard the pitches, the proposers take their oversized postit and spread out, everyone else goes and joins one of the people with postits—forming small teams aligned around an interest in a topic.
Each group then finds a desk/workstation to use and starts discussing what they want to achieve & the best way of going about it.
This is facilitated by our pair-programming friendly office space—having workstations that are all set up the same, with large desks and plenty of space for groups to gather round, in any part of the office.
Usually each group ends up self-organising into either a large mob (multiple developers all working on the same thing, at the same time, on the same workstation), or a couple of smaller pairs or mobs (depending on the tasks at hand). Sometimes people will decide that their group has too many people, or they’re not adding value and and go and help another group instead.
Teams will often split up to investigate different things, explore different options or tackle sub-problems, and then come back together later.
Inspiring Results
We usually wrap up with a show and tell for the last hour of the day. It’s pretty inspiring to see the results from a very few hours work…
- There’s great ideas that are commercially strong and genuinely support the goal.
- We get improvements all the way from idea to production.
- People step up and on leadership roles, regardless of their seniority
- We learn things in areas that we wouldn’t normally explore.
- People work effectively in teams that didn’t exist until that morning.
- There’s a variety of activities from lightweight lean-startup style experiments to improving sustainability of existing systems.
All this despite the lack of any top down direction other than choosing the high level theme for the day.
What can we learn?
Seeing such a large group consistently self-organise to achieve valuable outcomes in a short space of time begets the question: How much are our normally more heavyweight processes and decision-making stifling excellence rather than improving outcomes?
What rules (real or imaginary) could we get rid of? What would happen if we did?
Hackdays are a great opportunity to run a timeboxed experiment of a completely different way of working.
The post Hack Days; Removing the Rules appeared first on Benji's Blog.
Leap 15.0 Beta testing: configuring 802.1x (auth with RADIUS)
 В этом посте я попытаюсь рассказать как настроить IEEE 802.1x в openSUSE. Сейчас Leap 15.0 в активной стадии бета-тестирования, поэтому возьмем её и для клиента и для сервера, чтобы убедиться, что все работает как надо, и никаких неприятных сюрпризов в финально-официальном релизе нам ждать не придется.
Если в двух словах, 802.1x это стандарт сетевой аутентификации. Работает на втором OSI уровне и определяет механизм контроля доступа к сети на основе принадлежности к порту и проверки x509-сертификатов. Доступ к сети получают только клиенты прошедшие аутентификацию. В качестве “системы, проверяющей подлинность” или просто аутентификатора я буду использовать CISCO SG300-28 28-Port Gigabit Managed Switch. Для проверки он будет обмениваться сертификатами с authentication server, который мы попытаемся развернуть на отдельной машине и который будет колдовать для нас x509 TLS-сертификаты.
Authentication server
Когда я только задумывал этот пост, я представлял это себе как “пустяковое дело на 20 минут”. Сразу же после установки я понял, что “приключение начинается”. Инсталлер разучился отключать firewall и включать OpenSSH. Фича? Аха щас… BUG! Первый баг. Попался  Пытался сначала достучаться до людей в IRC, все бестолку. Три дня думал, что я что-то пропустил и искал информацию. Так ничего и не найдя, я заглянул в ML, где меня ждал успех.
Очень не приятно после установки заходить в систему и отключать firewalld и включать sshd… но на сейчашний момент это именно то, что мы имеем:
# systemctl stop firewalld
# systemctl disable firewalld
# systemctl start sshd
# systemctl enable sshd
Напомню, что мы тут просто тестируем 802.1x. На практике отключать firewall конечно же не обязательно, достаточно открыть UDP/1812 и UDP/1813 порты.
Приступаем к установке authentication server. Мы будем использовать freeradius. Последняя стабильная версия – 3.0.16 – вышла два месяца назад. В openSUSE пакет называется freeradius-server. Устанавливаем его:
> sudo zypper in freeradius-server
> rpm -qa freeradius-server
freeradius-server-3.0.16-lp150.1.3.x86_64
После установки переходим в /etc/raddb/certs. Тут все будем делать от root.
# ll /etc/raddb/certs
total 48
-rw-r----- 1 root radiusd 6155 Feb 20 06:18 Makefile
-rw-r----- 1 root radiusd 8714 Feb 20 06:18 README
-rwxr-x--- 1 root radiusd 2706 Feb 20 06:18 bootstrap
-rw-r----- 1 root radiusd 1432 Feb 20 06:18 ca.cnf
-rw-r----- 1 root radiusd 1103 Feb 20 06:18 client.cnf
-rw-r----- 1 root radiusd 1131 Feb 20 06:18 inner-server.cnf
-rw-r--r-- 1 root radiusd  166 Feb 20 06:18 passwords.mk
-rw-r----- 1 root radiusd 1125 Feb 20 06:18 server.cnf
-rw-r----- 1 root radiusd  708 Feb 20 06:18 xpextensions
Документация о том, как сгенерировать сертификаты (самый минимум) находится в файле README. 3 шага: генерация root-сертификата (ca.pem), генерация сертификата сервера (server.pem) и клиента (client.pem). Необходимые параметры нужно указать в конфиг файлах: ca.cnf, server.cnf и client.cnf соответственно.
Несмотря на то, что все кажется простым и логичным, генерация TLS/SSL сертификатов может быть оказаться достаточно запарным процессом. Особенно если вы нечасто этим занимаетесь. Дело в том, что сообщения об ошибках не всегда понятны. Давайте рассмотрим пару примеров.
Во-первых, нигде не сказано, что пароль в /etc/raddb/certs/server.cnf и /etc/raddb/mods-enabled/eap должен быть один и тот же. Вот в этом месте файла /etc/raddb/mods-enabled/eap надо быть осторожней:
        tls-config tls-common {
                private_key_password = myTEST1eap
                private_key_file = ${certdir}/server.pem
Вот так выглядит часть /etc/raddb/certs/server.cnf файла, где нужно быть чуточку внимательней:
[ req ]
prompt                  = no
distinguished_name      = certificate_authority
default_bits            = 2048
input_password          = myTEST1eap
output_password         = myTEST1eap
x509_extensions         = v3_ca
Если пароли окажутся разными, то при запуске cервера мы получим в логах вот это:
Wed Mar  7 17:08:15 2018 : Info: Debugger not attached
Wed Mar  7 17:08:15 2018 : Error: tls: Failed reading private key file "/etc/raddb/certs/server.pem"
Wed Mar  7 17:08:15 2018 : Error: tls: error:06065064:digital envelope routines:EVP_DecryptFinal_ex:bad decrypt
Wed Mar  7 17:08:15 2018 : Error: tls: error:23077074:PKCS12 routines:PKCS12_pbe_crypt:pkcs12 cipherfinal error
Wed Mar  7 17:08:15 2018 : Error: tls: error:2306A075:PKCS12 routines:PKCS12_item_decrypt_d2i:pkcs12 pbe crypt
error
Wed Mar  7 17:08:15 2018 : Error: tls: error:0907B00D:PEM routines:PEM_read_bio_PrivateKey:ASN1 lib
Wed Mar  7 17:08:15 2018 : Error: tls: error:140B0009:SSL routines:SSL_CTX_use_PrivateKey_file:PEM lib
Wed Mar  7 17:08:15 2018 : Error: rlm_eap_tls: Failed initializing SSL context
Wed Mar  7 17:08:15 2018 : Error: rlm_eap (EAP): Failed to initialise rlm_eap_tls
Wed Mar  7 17:08:15 2018 : Error: /etc/raddb/mods-enabled/eap[14]: Instantiation failed for module "eap"
Согласитесь, с ходу не ясно в чем тут может быть проблема.
Остальные пароли могут быть (должны быть) разными.
Во-вторых, можно забыть про команду:
# openssl dhparam -out dh 2048
В bootstrap скрипте она есть, но если вы решите сгенерировать сертификаты дважды и отчистите все командой
# make destroycerts
то make удалит и файл /etc/raddb/certs/dh, а при make ca.pem или make server.pem файл dh снова создан не будет. При запуске сервера это приведет к следующему сообщению в логах:
Wed Mar  7 16:18:44 2018 : Info: Debugger not attached
Wed Mar  7 16:18:44 2018 : Error: Unable to check file "/etc/raddb/certs/dh": No such file or directory
Wed Mar  7 16:18:44 2018 : Error: rlm_eap_tls: Failed initializing SSL context
Wed Mar  7 16:18:44 2018 : Error: rlm_eap (EAP): Failed to initialise rlm_eap_tls
Wed Mar  7 16:18:44 2018 : Error: /etc/raddb/mods-enabled/eap[14]: Instantiation failed for module "eap"
Обратите внимание, что в README файле написано, что удалять старые сертификаты нужно вот так:
# rm -f *.pem *.der *.csr *.crt *.key *.p12 serial* index.txt*
т.е. без dh файла. Это, пожалуй, единственная проблема, суть которой ясна из сообщения об ошибке.
И вот еще одина проблема, с которой, я надеюсь, никому не придется столкнуться:
failed to update database
TXT_DB error number 2
Она возникает по причине того, что CN (Common Name) для генерируемого сертификата такое же как и для CA-сертификата.
Последний шаг настройки RADIUS – прописываем имя, ip и secret клиента (остальное можно оставить как есть) в /etc/raddb/clients.conf. Клиент в данном случае – наш cisco-коммутатор. Шаг простой, но очень важный. Без него RADIUS не будет отвечать коммутатору. Secret тут должен быть как можно сложнее.
После того как все сертификаты созданы, для уверености их можно сверить:
# openssl verify -CAfile ca.pem client.crt client.pem
client.crt: OK
client.pem: OK
Если все в порядке, запускаем сервер, проверяем созданные им сокеты:
# systemctl start radiusd

# lsof -i :1812
COMMAND  PID USER   FD   TYPE DEVICE SIZE/OFF NODE NAME
radiusd 4811 root    7u  IPv4 179990      0t0  UDP *:radius
radiusd 4811 root    9u  IPv6 179994      0t0  UDP *:radius

# lsof -i :1813
COMMAND  PID USER   FD   TYPE DEVICE SIZE/OFF NODE NAME
radiusd 4811 root    8u  IPv4 179993      0t0  UDP *:radius-acct
radiusd 4811 root   10u  IPv6 179995      0t0  UDP *:radius-acct

# tcpdump -vv -n -i eth0 -S port 1812 -l -A -X
Последняя команда может помочь при отладке. Вы видете, что именно ушло в сеть. Даже если вы подробно не знакомы с EAP, можно заметить отличие удачных попыток авторизации и не очень удачных Если по той или иной причине возникли проблемы, log radius-сервера находится в /var/log/radius/radius.log.
Если все же возникнет какая-то новая проблема, которая тут не описана, и вы начнете искать информацию в инете и найдете примеры программы radtest(1) и попытаетесь ее запусить… в openSUSE она лежит в отдельном пакете:
> rpm -qf $(which radtest)
freeradius-server-utils-3.0.16-lp150.1.3.x86_64
Я не стал описывать ВСЕ, что мне пришлось пережить за эти пару дней… и так этот пост разбух и стал походить на статью. Возможно я напишу еще что-то о самой openssl в отдельной статье. Тема PKI очень интересная и нужная. Ее понимание требуют многие работадатели.
Но вернемся к нашему тестированию. Переходим к настройке нашего коммутатора. Пока новых жуков не обнаружено
Authenticator
Настройка аутентификатора (или “системы, проверяющей подлинность”) сводится к простому добавлению в список RADIUS-серверов только что настроенной машины. Security => RADIUS => Add:

В появившемся окне просто добавляем IP-адрес и secret, который мы указывали /etc/raddb/clients.conf на RADIUS-сервере. Secret – это фактически единственный механизм аутентификации между cisco-коммутатором и сервером проверки подлинности (RADIUS). Эта часть сети в 802.1x-схеме подразумевает достаточно доверительные отношения между хостами, т.е. остается практически не защищенной. Поэтому повторюсь – secret должен быть как можно сложнее.

Client
Переходим к последнему шагу – настройке клиента.
Да, друзья мои, в качестве клиента openSUSE сейчас использовать увы, не получится. Для тестирования 802.1x мне пришлось взять какой-то другой GNU-дистрибутив. Но обо всем по порядку.
Сначала я поставил Leap 15.0 Beta с Plasma 5.12 LTS. networkmanagement отказался создавать соединение, и я сначала подумал, что проблема в созданных мной сертификатах. Я потратил несколько дней на проверку и перегенерацию сертификатов. Я устанавливал Leap с GNOME… с Xfce… и вообще без X. Паралельно я проверял все в Tumbleweed, и это меня и сбило с толку. Там соединение тоже не работало и я подумал, что проблема на 8 OSI уровне
Через несколько дней я попробовал другие GNU-дистрибутивы и оказалось, что, используя те же самые сертификаты и конфиги, там соеднинение удается создать одной командой…
BUUUUG! Да, черт побери, и сидит он так глубоко, что ни одним NM-апплетом его не достать. Он воспроизводится и через nmcli(1):
# cat /etc/NetworkManager/system-connections/LEAP_8021x
[connection]
id=LEAP_8021x
uuid=de2f2a7c-33cc-4d92-ae3b-785575dffddc
type=ethernet
permissions=user:alex:;

[ethernet]
auto-negotiate=true
mac-address-blacklist=

[802-1x]
ca-cert=/home/alex/ca.pem
client-cert=/home/alex/client.crt
eap=tls;
identity=GNOME
private-key=/home/alex/client.pem
private-key-password=GNOME

[ipv4]
dns-search=
method=auto

[ipv6]
addr-gen-mode=stable-privacy
dns-search=
method=auto

# nmcli con reload

# nmcli con up LEAP_8021x
Secrets are required to access the wired network 'LEAP_8021x'
Warning: password for '802-1x.identity' not given in 'passwd-file' and nmcli
cannot ask without '--ask' option.
Error: Connection activation failed: Secrets were required, but not provided
Secret я использую и в конфиге и прописывал его и в апплетах GNOME и KDE. Не принимает ни в какую.
Пробовал испльзовать ‘–ask’, результат тот же: спашивает, вводишь пароль… снова спрашивает, снова вводишь… снова спрашивает…
# nmcli con up LEAP_8021x --ask
Secrets are required to access the wired network 'LEAP_8021x'
Identity (802-1x.identity): GNOME
Secrets are required to access the wired network 'LEAP_8021x'
Private key password (802-1x.private-key-password): *****
Secrets are required to access the wired network 'LEAP_8021x'
Identity (802-1x.identity): GNOME
Secrets are required to access the wired network 'LEAP_8021x'
Private key password (802-1x.private-key-password): *****
Я использовал и wpa_supplicant(1). Результат такой же. Он просто повисает.
Чтобы довести дело до конца я взял Kubuntu 17.10. Выбор был не случайным, т.е. это не был “первый дистрибутив, который попался под руку”. Пока я искал инфу по поводу проблем с 802.1x, я нашел этот BUG. Я не уверен, что это именно то, но повеселил меня не тот факт, что проблема в upstream’е, а то, КАК это решили в Ubuntu Ребятами из RedHat (хотя там ссылка на GNOME, а оттуда на Debian…) было предложено и другое решение. Следить за изменениями я уже не стал. Хотя разобраться до конца все же стоило бы.
В Kubuntu 17.10 просто кидаешь конфиг в /etc/NetworkManager/system-connections/802.1x и перезапускаешь сеть (без ‘–ask’), как я показал выше. Понадобятся 3 сертификата: клиентские сертификаты client.pem и client.crt (к ним надо знать secret) и root-сертификат CA.pem. При генерировании новых клиентских сертификатов нужно лишь обновить client.cnf (имя и secret) и сделать
# make client.pem
Помните, что в случае повторной генерации root-сертификата придется перенастраивать уже настроенные клиенты.
Итак, ситуация Leap 15.0 пока очень и очень не классная. BUG’ов в beta хватает. О них знают, и можете быть уверенными, друзья мои, их исправят.
Оставайтесь на светлой стороне. И да прибудет с вами удовольствие от работы с openSUSE
Builder Nightly
One of the great aspects of the Flatpak model, apart from separating apps from the OS, is that you can have multiple versions of the same app installed concurrently. You can rely on the stable release while trying things out in the development or nightly built version. This creates a need to easily identify the two versions apart when launching it with the shell.
I think Mozilla has set a great precedent on how to manage multiple version identities.

Thus came the desire to spend a couple of nights working on the Builder nightly app icon. While we've generally tried to simplify app icons to match what's happening on the mobile platforms and trickling down to the older desktop OSes, I've decided to retain the 3D workflow for the builder icon. Mainly because I want to get better at it, but also because it's a perfect platform for kit bashing.

For Builder specifically I've identified some properties I think should describe the 'nightly' icon:
- Dark (nightly)
- Modern (new stuff)
- Not as polished — dangling cables, open panels, dirty
- Unstable / indicating it can move (wheels, legs ...)

Next up is giving a stab at a few more apps and then it's time to develop some guidelines for these nightly app icons and emphasize it with some Shell styling. Overlaid emblems haven't particularly worked in the past, but perhaps some tag style for the label could do.
Membangun GNOME Recipes dan Menjalankan dengan Antar Muka Indonesia
Tulisan ini masih sedikit melanjutkan pengalaman GNOME Recipes Hackfest 2018, namun sedikit ditambahkan atas pesanan Pak Andika (Koordinator Penerjemahan GNOME) terkait bagaimana cara menguji aplikasi dengan antar muka bahasa Indonesia (dengan file .po yang sudah kita terjemahkan).
Mari kita mulai!
Pasang GNOME Builder Nightly
- Unduh flatpakref untuk GNOME Nightly dari https://sdk.gnome.org/gnome-nightly.flatpakrepo dan pasang
flatpak –user remote-add gnome-nightly gnome-nightly.flatpakrepo
- Unduh flatpakref untuk GNOME Builder dari https://raw.githubusercontent.com/GNOME/gnome-apps-nightly/master/gnome-builder.flatpakref dan pasang
flatpak –user install –from gnome-builder.flatpakref
Jalankan Builder dan Ambil Kode GNOME Recipes
- Jalankan Builder dan pilih tombol Clone untuk kloning kode sumber
- Kloning dari https://gitlab.gnome.org/GNOME/recipes.git
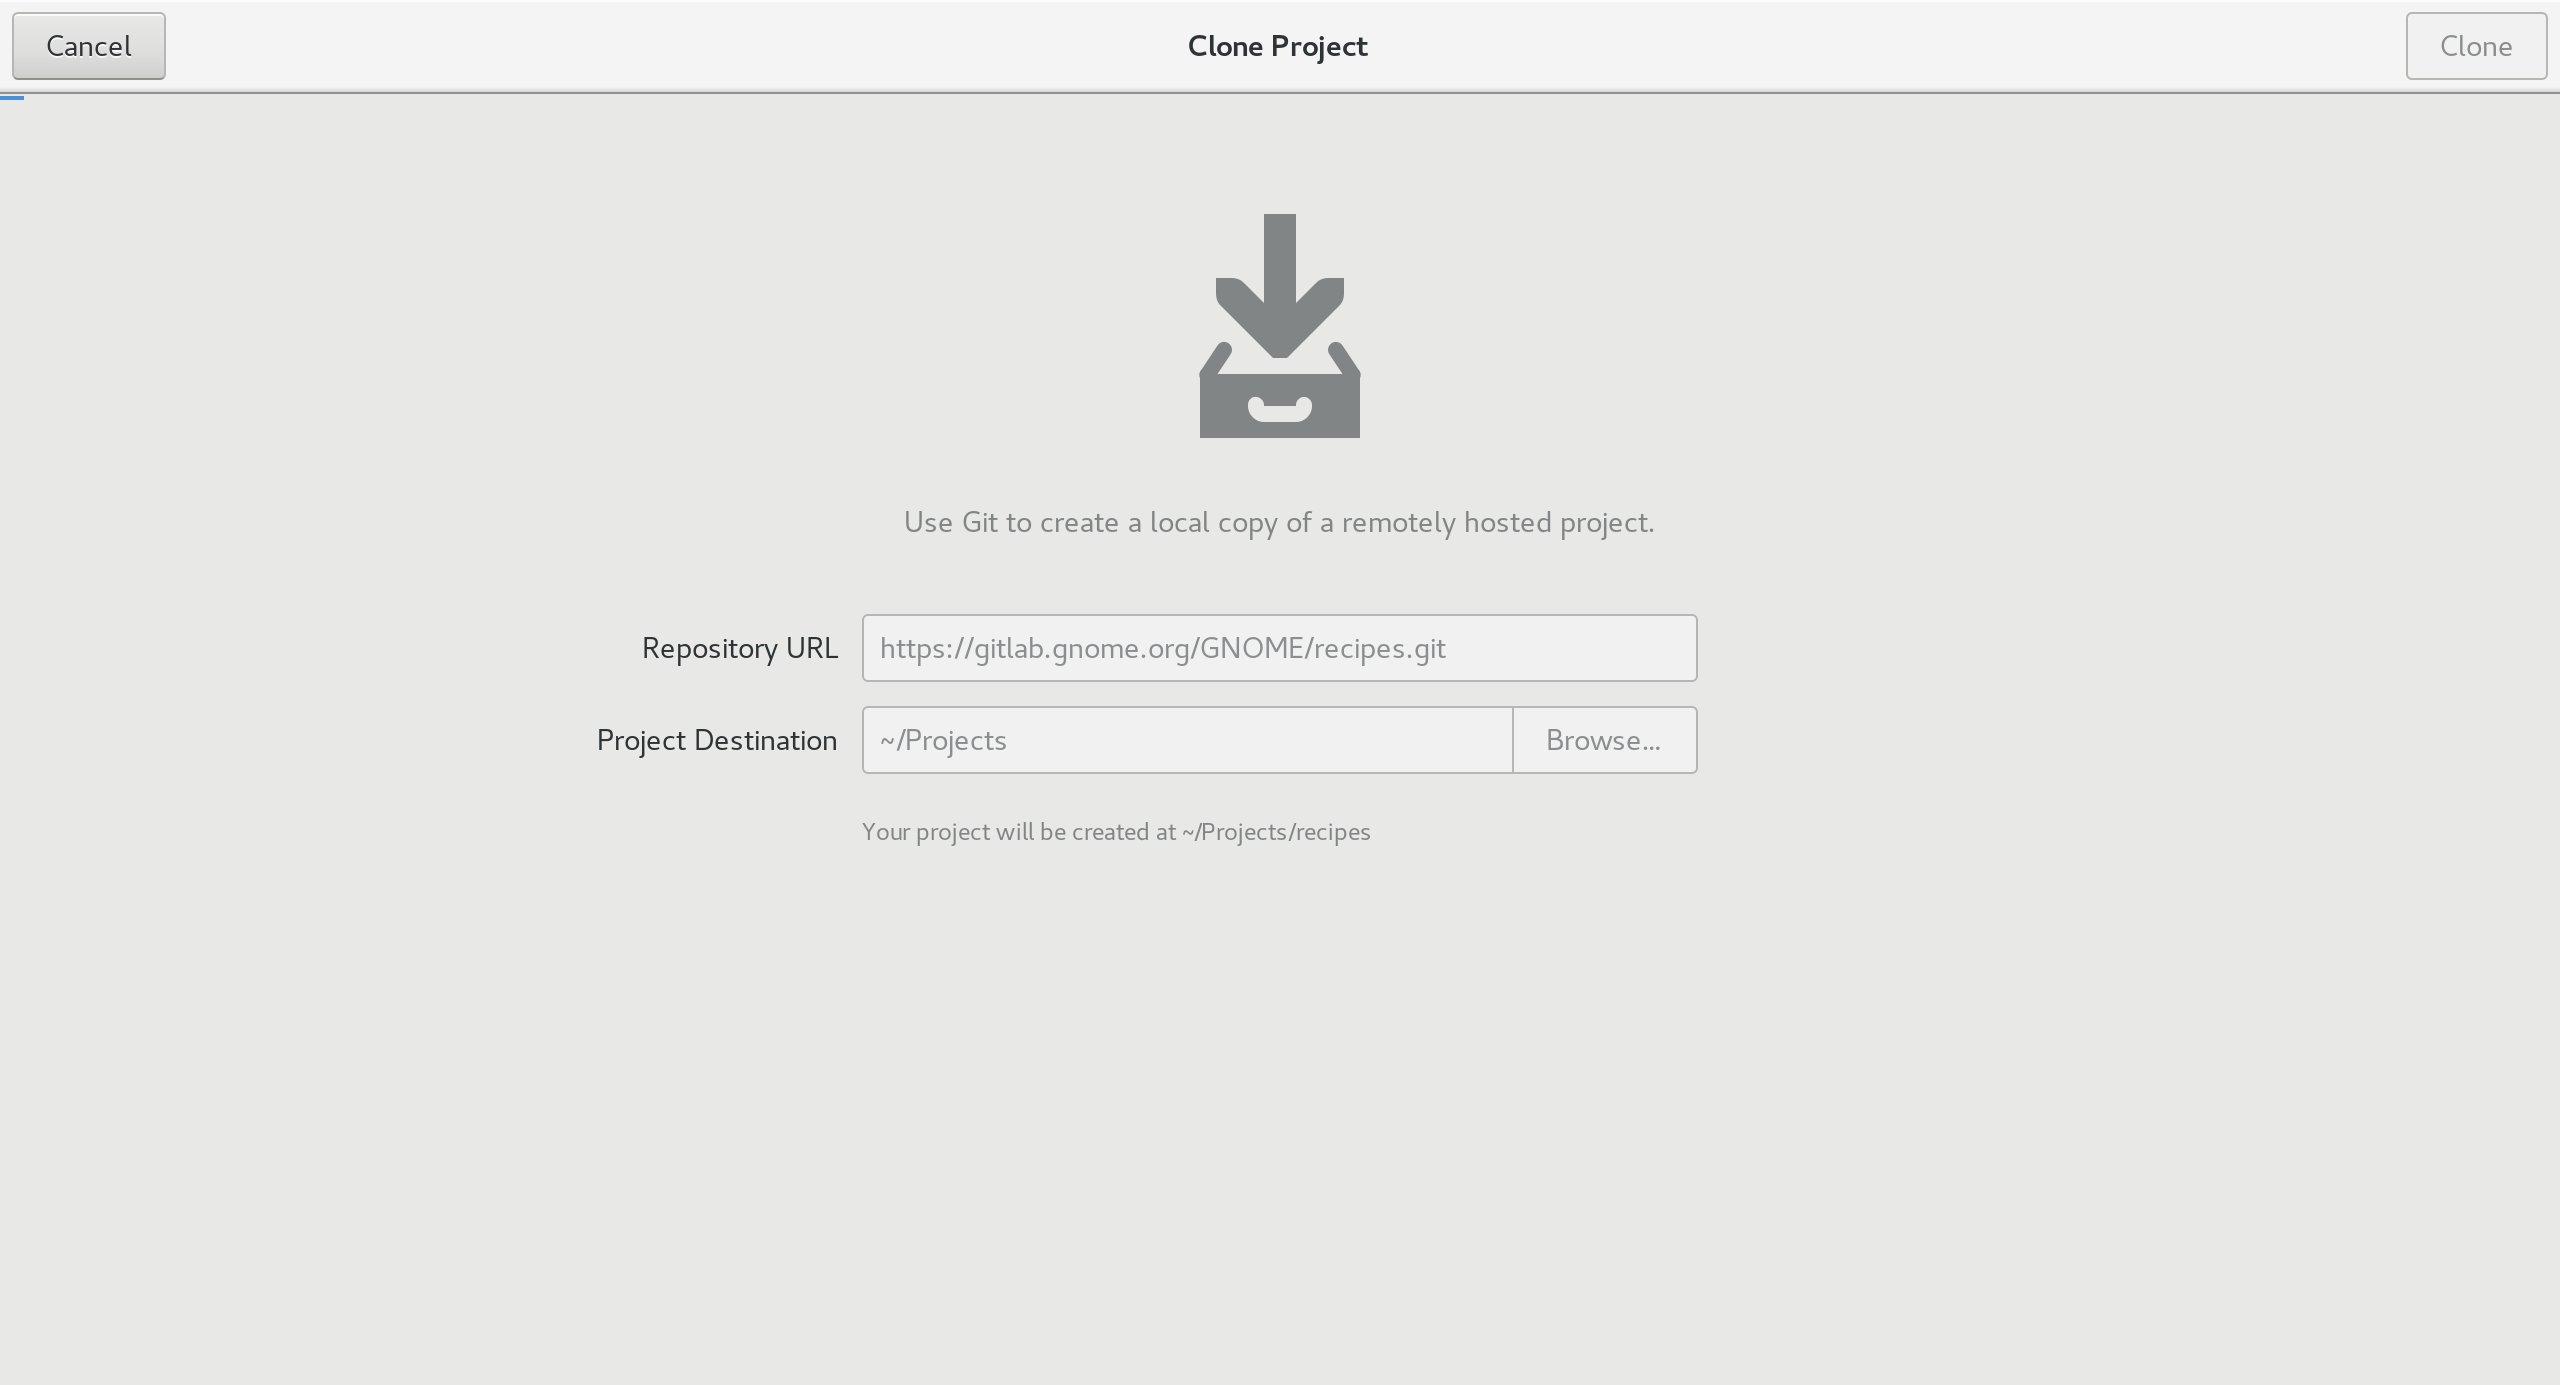
- Kode akan otomatis dibangun oleh Builder
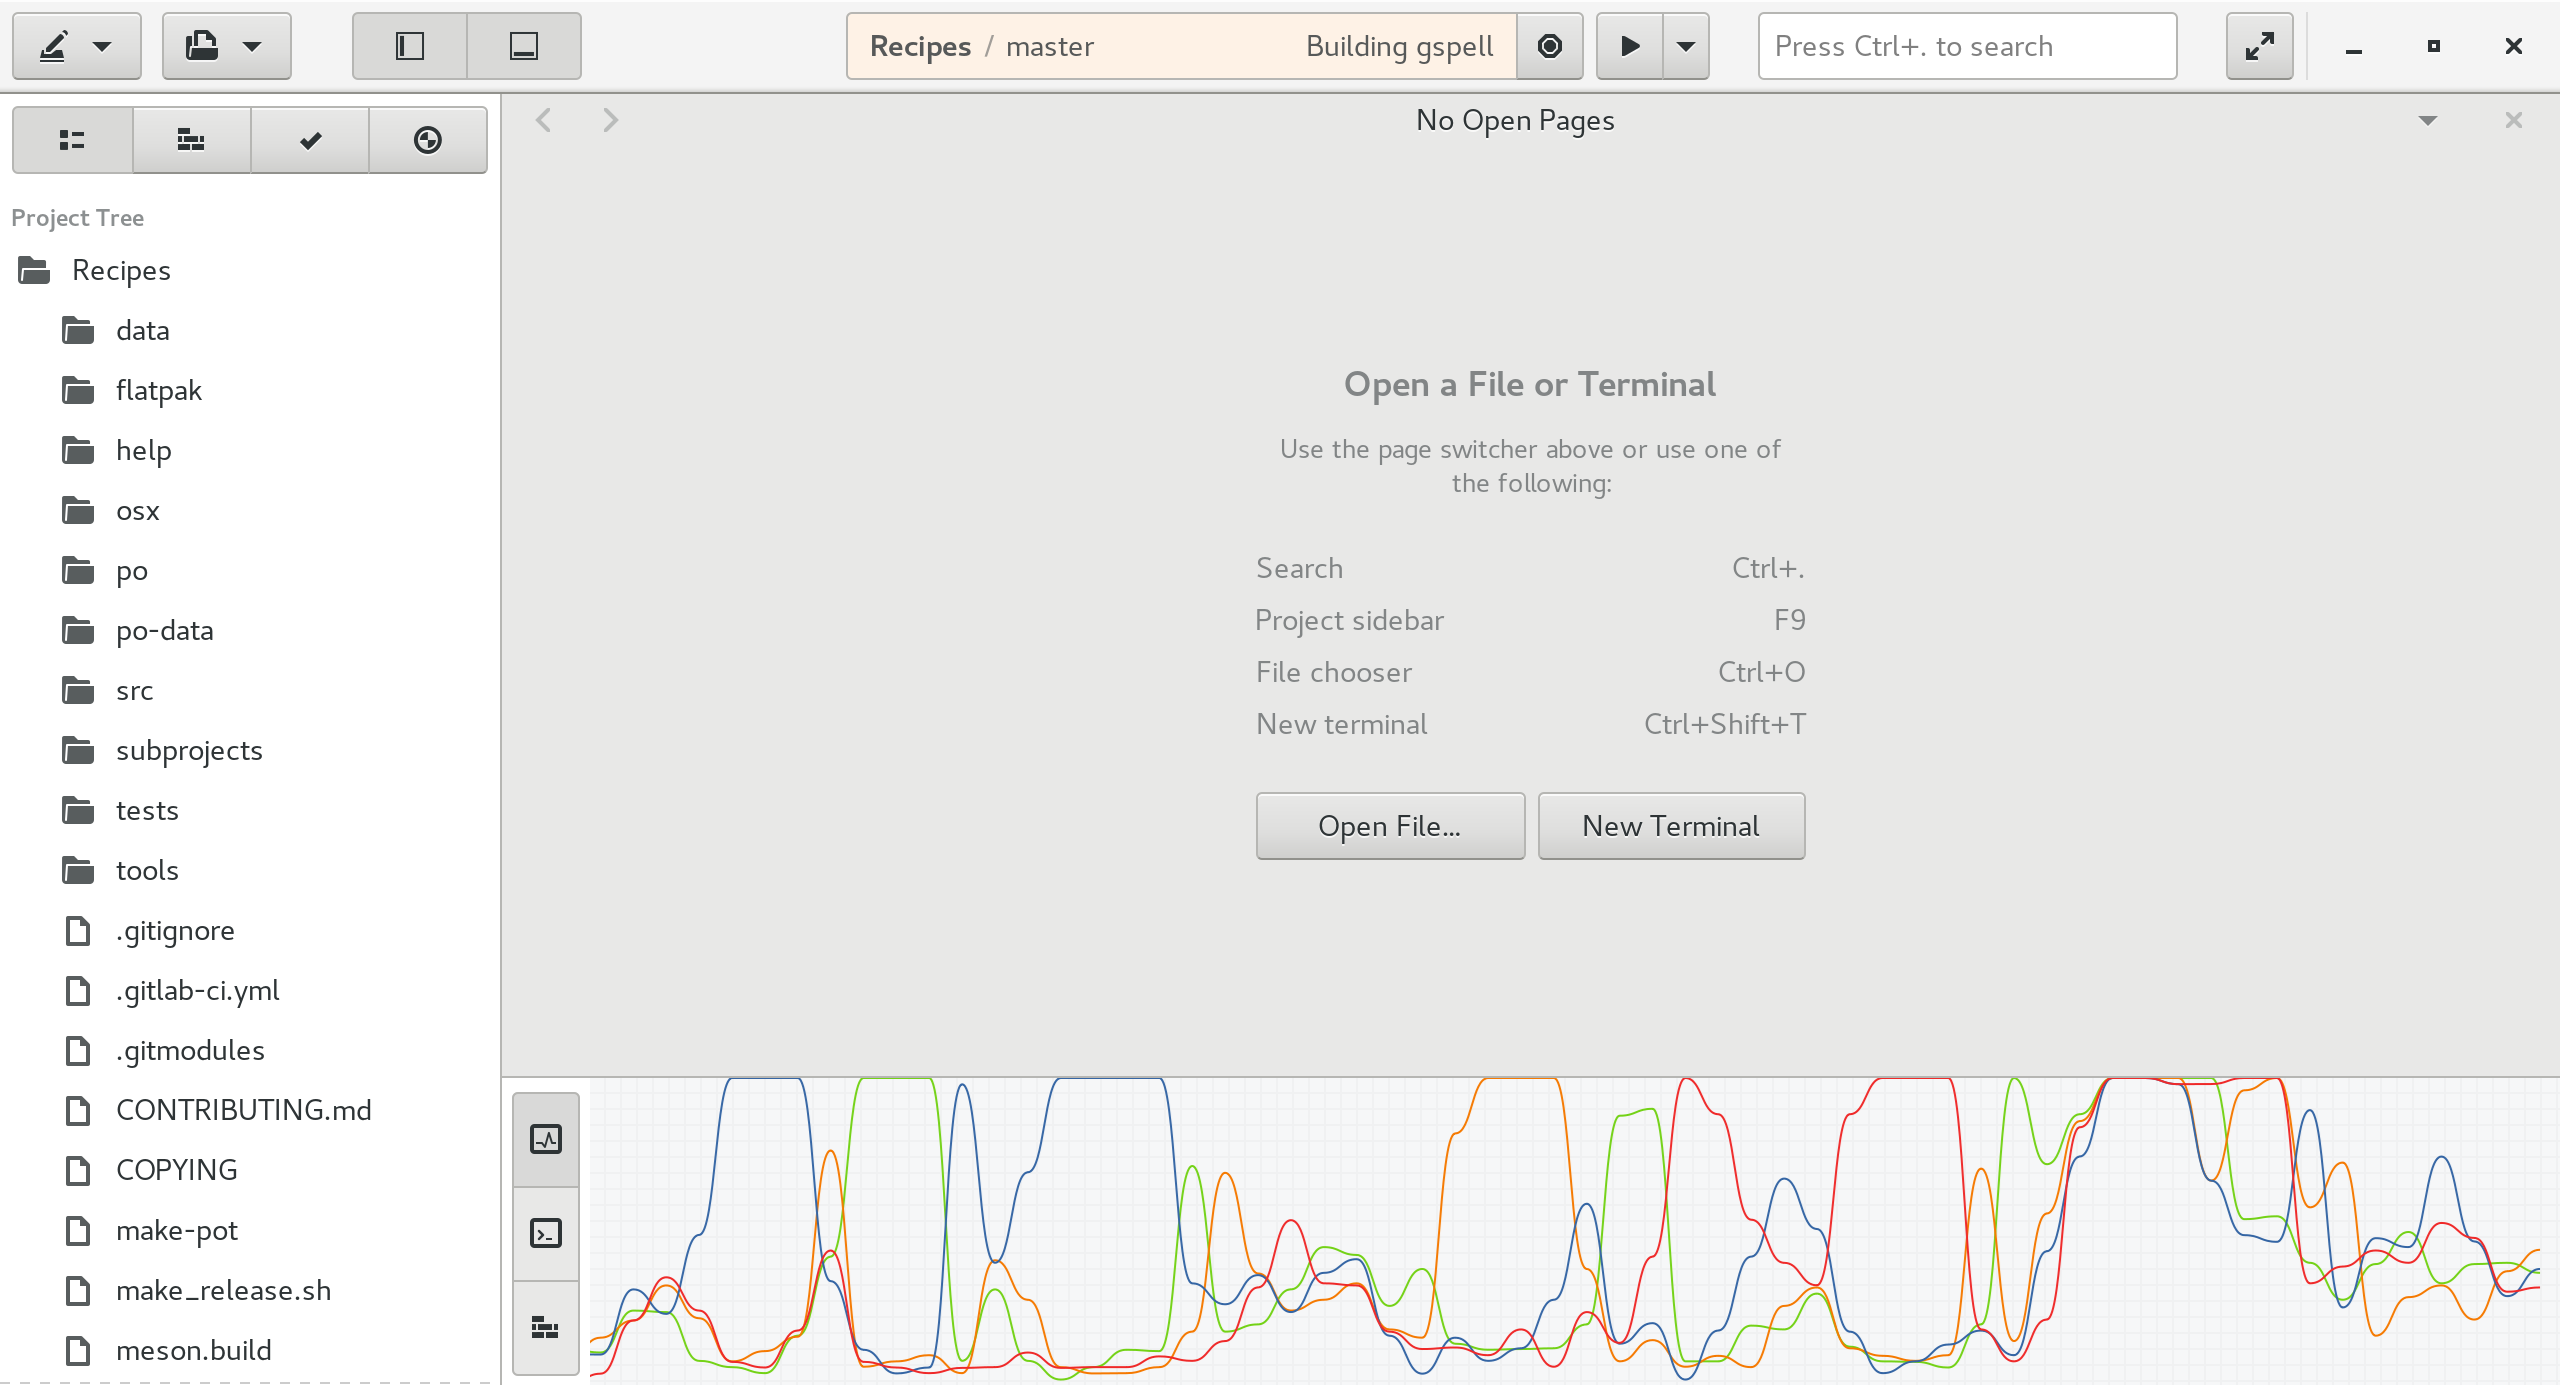

- Jalankan!


Mengubah Antar Muka ke bahasa Indonesia
Seperti gambar di atas, antar muka aplikasi yang kita jalankan menggunakan antar muka baku (bahasa Inggris). Untuk kasus teman-teman yang mengerjakan terjemahan, perlu menguji dan membuat antar mukanya ke bahasa Indonesia. Adapun langkahnya sebagai berikut:
- tambahkan “–env=LC_ALL=id_ID.utf8” pada bagian “finish-args” di berkas org.gnome.Recipes.json.

- Jalankan lagi!
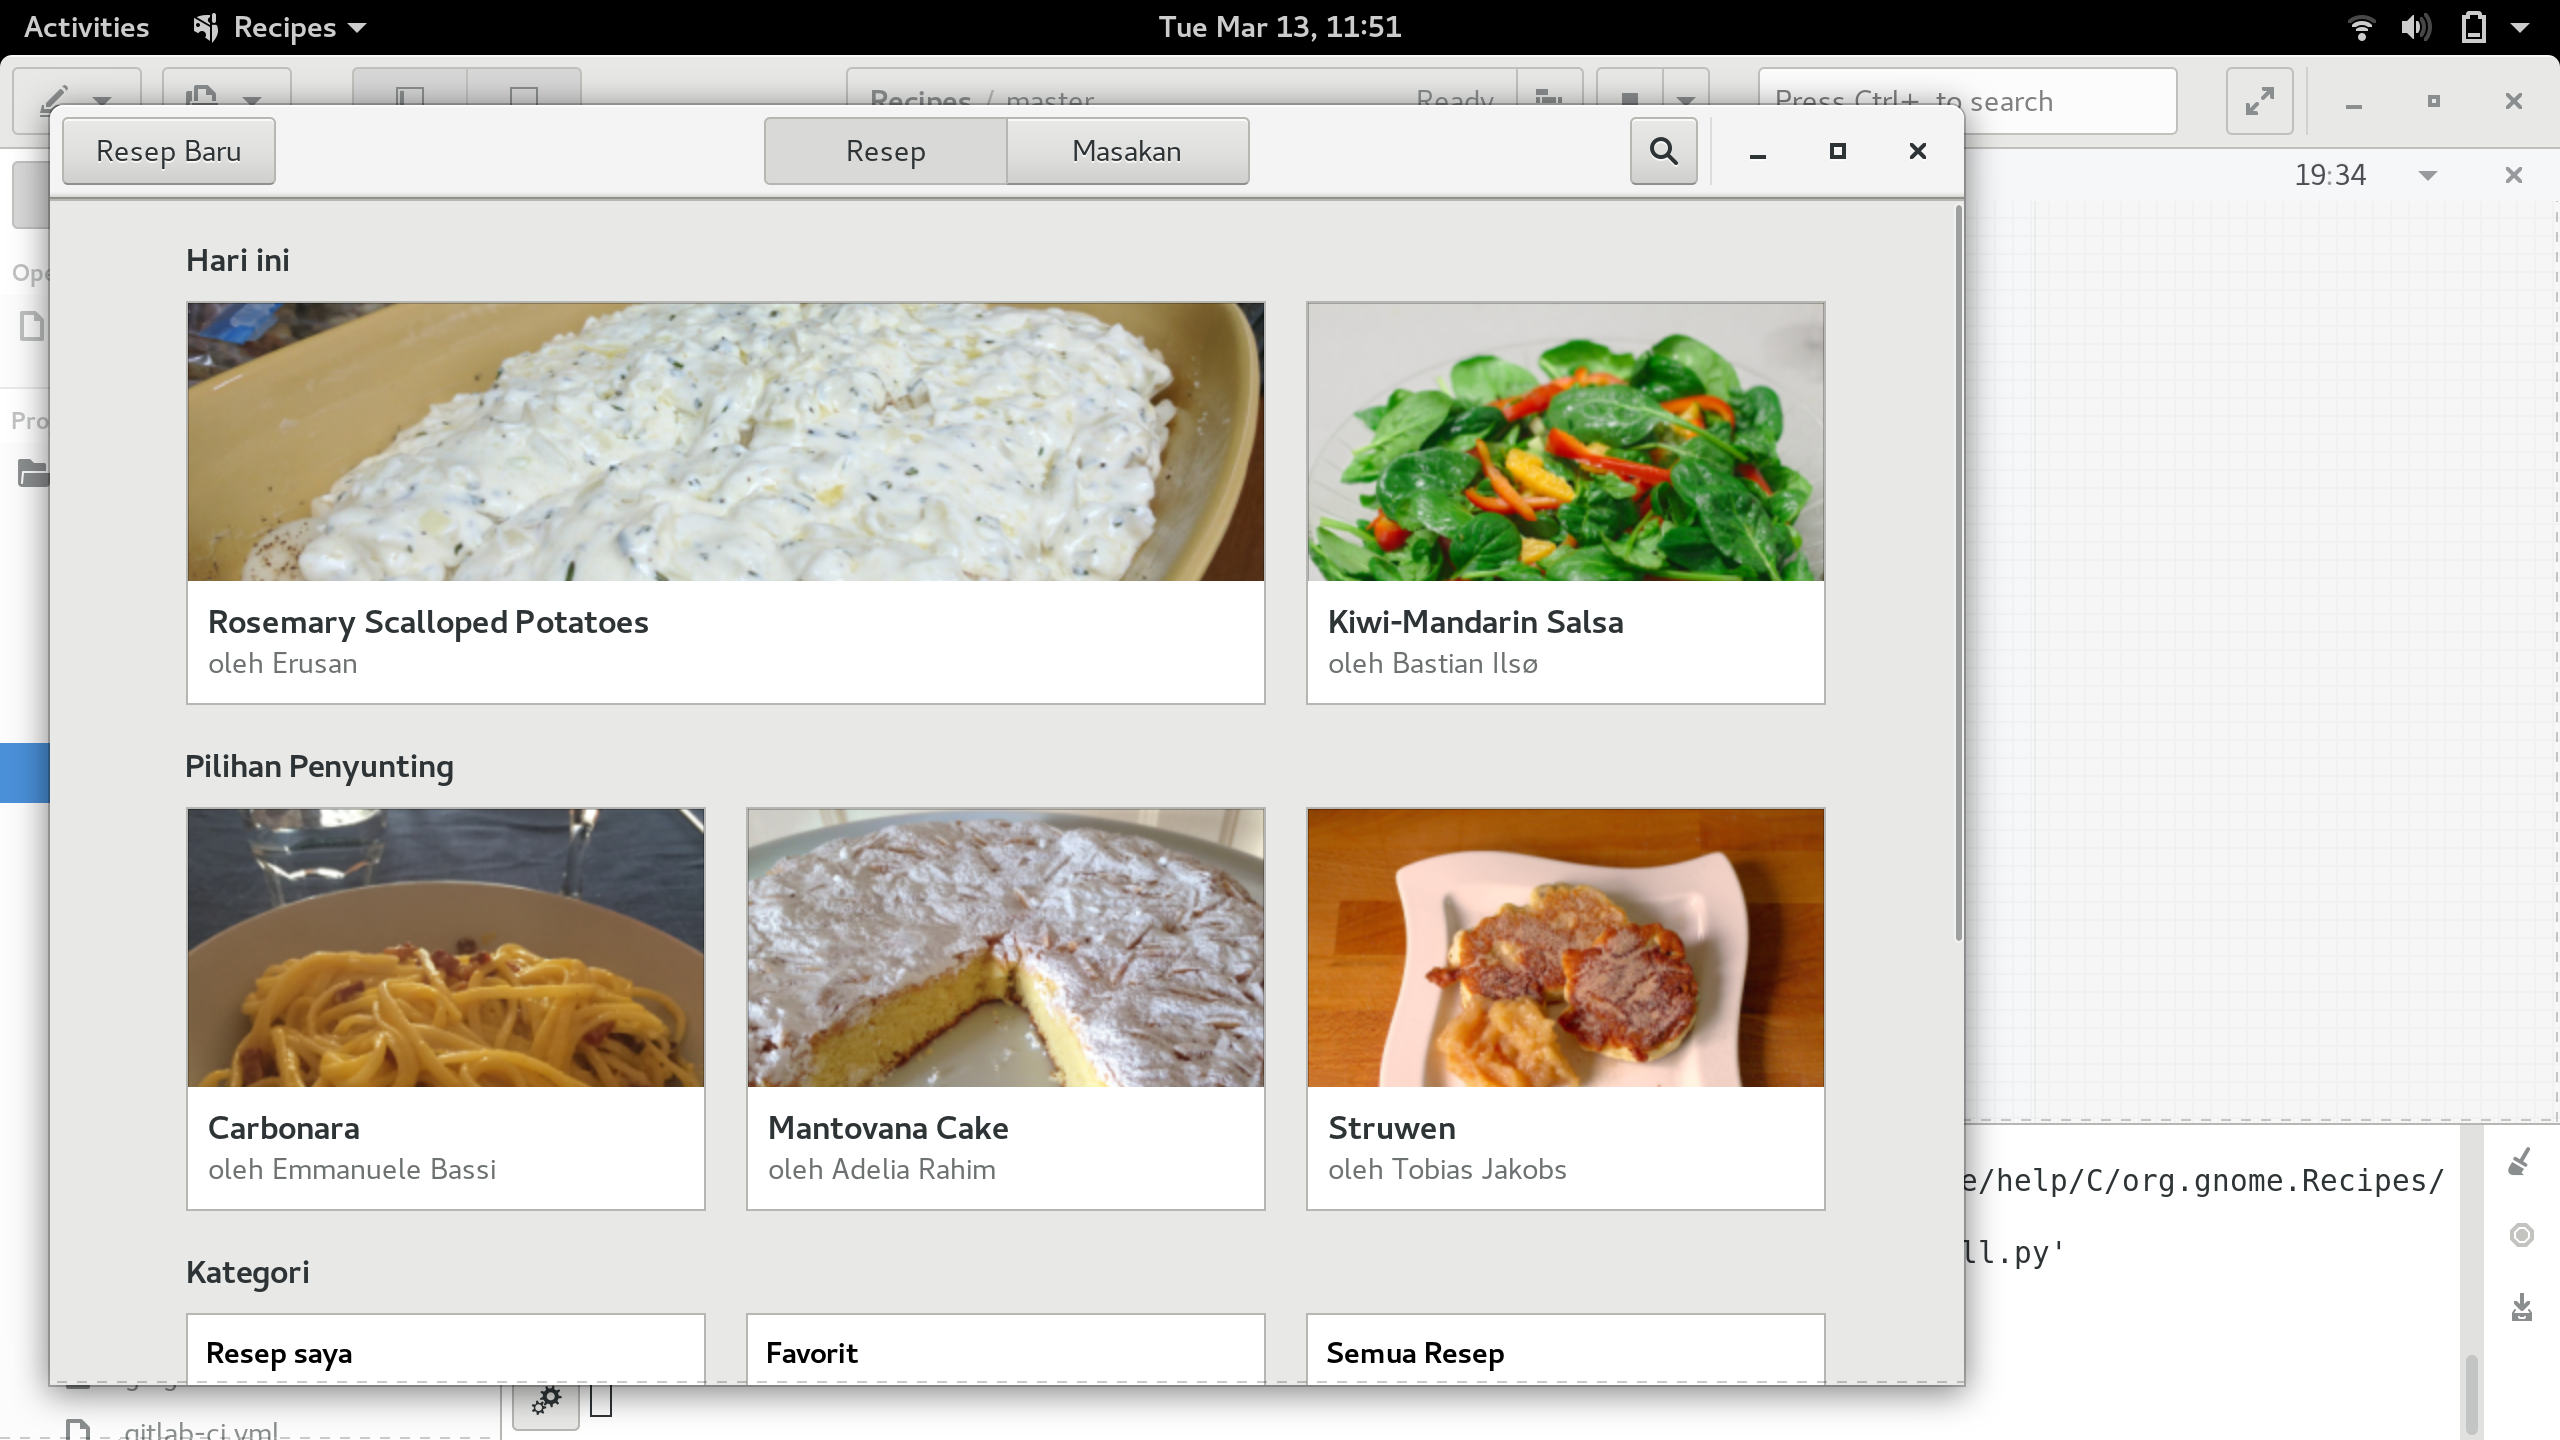
Selamat Mencoba!
Librsvg and Gnome-class accepting interns
I would like to mentor people for librsvg and gnome-class this Summer, both for Outreachy and Summer of Code.
Librsvg projects
Project: port filter effects from C to Rust
Currently librsvg implements SVG filter effects in C. These are basic image processing filters like Gaussian blur, matrix convolution, Porter-Duff alpha compositing, etc.
There are some things that need to be done:
-
Split the single
rsvg-filter.cinto multiple source files, so it's easier to port each one individually. -
Figure out the common infrasctructure:
RsvgFilter,RsvgFilterPrimitive. All the filter use these to store intermediate results when processing SVG elements. -
Experiment with the correct Rust abstractions to process images pixel-by-pixel. We would like to omit per-pixel bounds checks on array accesses. The image crate has some nice iterator traits for pixels. WebKit's implementation of SVG filters also has interesting abstractions for things like the need for a sliding window with edge handling for Gaussian blurs.
-
Ensure that our current filters code is actually working. Not all of the official SVG test suite's tests are in place right now for the filter effects; it is likely that some of our implementation is broken.
For this project, it will be especially helpful to have a little background in image processing. You don't need to be an expert; just to have done some pixel crunching at some point. You need to be able to read C and write Rust.
Project: CSS styling with rust-selectors
Librsvg uses an very simplistic algorithm for CSS cascading. It uses libcroco to parse CSS style data; libcroco is unmaintained and rather prone to exploits. I want to use Servo's selectors crate to do the cascading; we already use the rust-cssparser crate as a tokenizer for basic CSS properties.
-
For each node in its DOM tree, librsvg's
Nodestructure keeps aVec<>of children. We need to move this to store the next sibling and the first/last children instead. This is the data structure that rust-selectors prefers. The Kuchiki crate has an example implementation; borrowing some patterns from there could also help us simplify our reference counting for nodes. -
Our styling machinery needs porting to Rust. We have a big
RsvgStatestruct which holds the CSS state for each node. It is easy to port this to Rust; it's more interesting to gradually move it to a scheme like Servo's, with a distinction between specified/computed/used values for each CSS property.
For this project, it will be helpful to know a bit of how CSS works. Definitely be comfortable with Rust concepts like ownership and borrowing. You don't need to be an expert, but if you are going through the "fighting the borrow checker" stage, you'll have a harder time with this. Or it may be what lets you grow out of it! You need to be able to read C and write Rust.
Bugs for newcomers: We have a number of easy bugs for newcomers to librsvg. Some of these are in the Rust part, some in the C part, some in both — take your pick!
Projects for gnome-class
Gnome-class is the code generator that lets you write GObject implementations in Rust. Or at least that's the intention — the project is in early development. The code is so new that practically all of our bugs are of an exploratory nature.
Gnome-class works like a little compiler. This is from one of the
examples; note the call to gobject_gen! in there:
struct SignalerPrivate {
    val: Cell<u32>
}

impl Default for SignalerPrivate {
    fn default() -> Self {
        SignalerPrivate {
            val: Cell::new(0)
        }
    }
}

gobject_gen! {
    class Signaler {
        type InstancePrivate = SignalerPrivate;
    }

    impl Signaler {
        signal fn value_changed(&self);

        fn set_value(&self, v: u32) {
            let private = self.get_priv();
            private.val.set(v);
            self.emit_value_changed();
        }
    }
}
Gnome-class implements this gobject_gen! macro as follows:
-
First we parse the code inside the macro using the
syncrate. This is a crate that lets you parse Rust source code from theTokenStreamthat the compiler hands to implementations of procedural macros. You give aTokenStreamtosyn, and it gives you back structs that represent function definitions,implblocks, expressions, etc. From this parsing stage we build an Abstract Syntax Tree (AST) that closely matches the structure of the code that the user wrote. -
Second, we take the AST and convert it to higher-level concepts, while verifying that the code is semantically valid. For example, we build up a
Classstructure for each defined GObject class, and annotate it with the methods and signals that the user defined for it. This stage is the High-level Internal Representation (HIR). -
Third, we generate Rust code from the validated HIR. For each class, we write out the boilerplate needed to register it against the GObject type system. For each virtual method we write a trampoline to let the C code call into the Rust implementation, and then write out the actual Rust impl that the user wrote. For each signal, we register it against the GObjectClass, and write the appropriate trampolines both to invoke the signal's default handler and any Rust callbacks for signal handlers.
For this project, you definitely need to have written GObject code in C in the past. You don't need to know the GObject internals; just know that there are things like type registration, signal creation, argument marshalling, etc.
You don't need to know about compiler internals.
You don't need to have written Rust procedural macros; you can learn as you go. The code has enough infrastructure right now that you can cut&paste useful bits to get started with new features. You should definitely be comfortable with the Rust borrow checker and simple lifetimes — again, you can cut&paste useful code already, and I'm happy to help with those.
This project demands a little patience. Working on the implementation of procedural macros is not the smoothest experience right now (one needs to examine generated code carefully, and play some tricks with the compiler to debug things), but it's getting better very fast.