
 Syvolc
openSUSE Leap Beta est là !
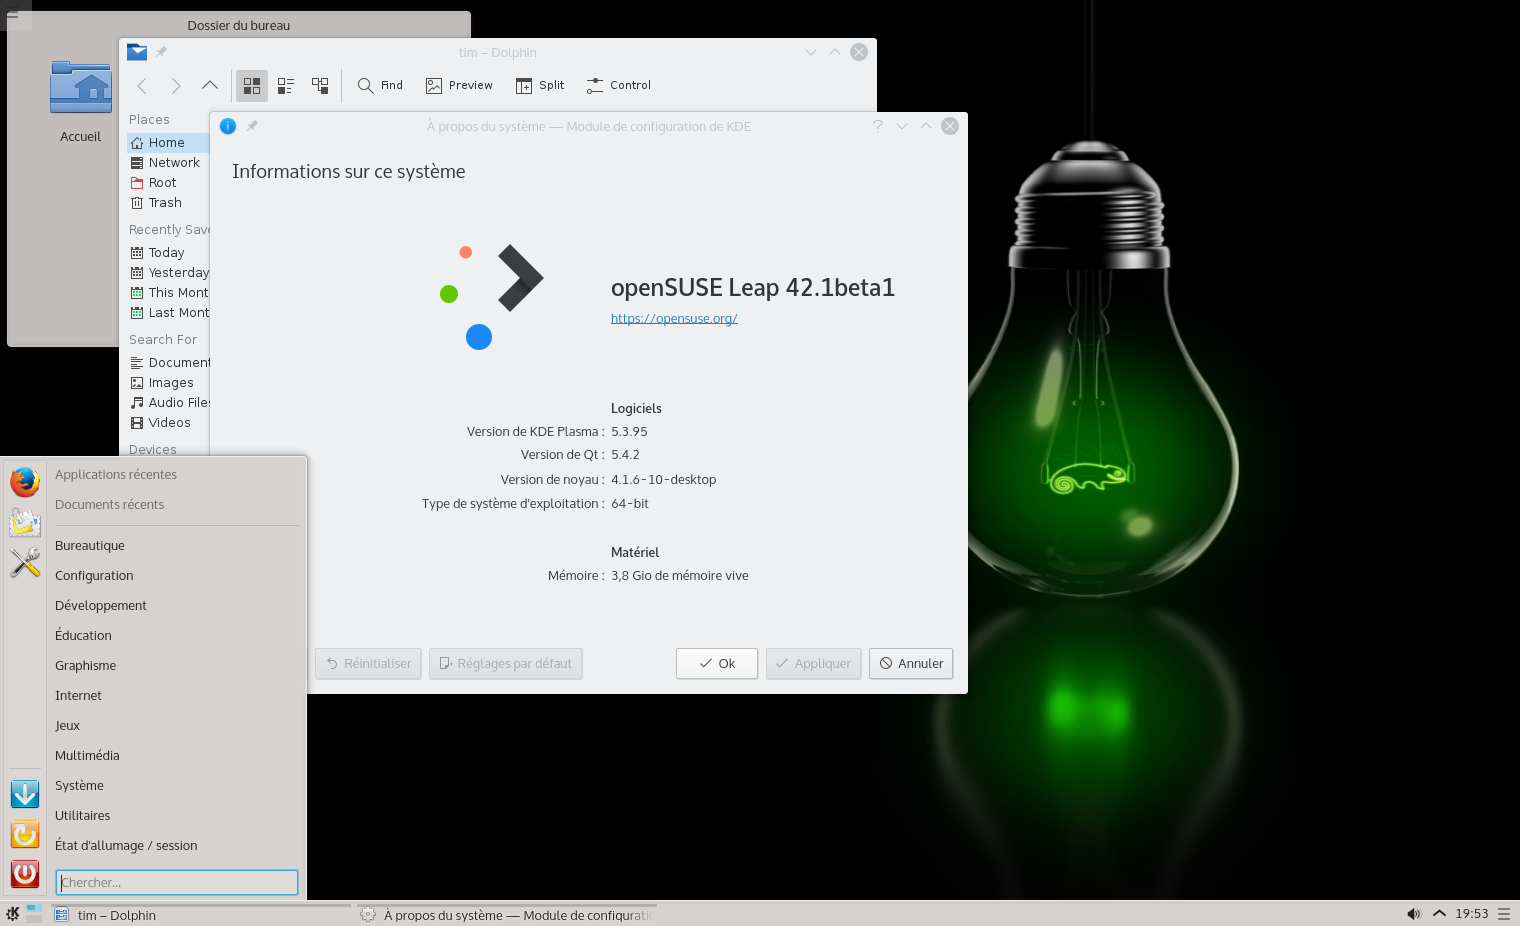
Les développeurs openSUSE viennent de sortir la Beta de la future version Leap 42.1 qui fourni un nouveau look.
Pour cette version classique (avec sorties régulières) Grub a été complété de Plymouth qui propose une démarrage plus visuel aux utilisateurs installant et utilisant Leap sur leur ordinateur ou via une machine virtuelle.

Le nouveau fond d’écran est spécifique à la verison Leap et openSUSE Tumbleweed aura sa propre image par défaut afin de les distinguer facilement.
Les utilisateurs souhaitant un système GNU/Linux stable sur le long terme peuvent attendre de Leap l’utilisation la branche la plus avancée du noyau Linux 4.1 avec un support à long terme qui fourni une amélioration significative pour les architectures ARM.
Si vous voulez tester cette Beta vous pouvez la télécharger et l’installer sur votre ordinateur ou sur une machine virtuelle telle que virtualbox.
La version finale sortira le 4 novembre pendant la SUSECon d’Amsterdam.
Cette version Leap Beta est retournée sur XDM 1.1.10 plutôt que sur la 1.1.11, qui est utilisée sur Tumbleweed et sur la 13.2.
Le KDE Plasma Framwork a été mis à jour de 5.12.0 vers 5.13.0 et beaucoup de paquets ont été ajoutés. Il y a environ 7 200 paquets dans cette Beta..
Pour rappel Leap est développé à partir du code source de SUSE Linux Enterprise et assemblé par des développeurs de logiciels Libres et Open Sources pour fournir une distribution totalement différente.
Sources :
L’annonce officielle [en] : https://news.opensuse.org/2015/09/24/opensuse-releases-leap-beta/
L’annonce sur Alionet [fr] : https://www.alionet.org/content.php?702-Sortie-d-openSUSE-Leap-42-1-Beta-!

 Member
How to create an openSUSE Banana Pi M1 image with MATE Desktop

I won a Banana Pi from ownCloud. So I tried to install openSUSE.
There are 3 options:
1. According to the wiki page, you can download the image they provide but there's no kernel support for Mali400MP2 GPU (who knows if it's fixed by now). No Mali mean no GUI. The link to image is http://download.opensuse.org/ports/armv7hl/tumbleweed/images/.
2. Download the image from http://www.lemaker.org. The GUI used is XFCE.
3. Do it the hard way, build it yourself. I would like to install MATE. I know, I could use the lemaker image.
I followed the page HowTo Build Banana Pi Image.
This post has 2 sections. The first is how to create the SD card and the next one is how to install MATE.
Create the SD card.
1. Create a folder where you're going to work (download the nessesary files).
cd WORKSPACE
2. I'll skip the steps 1-5 from the Build it yourself page. You can download the file:
BananaPi_hwpack.tar.xz
Download also the rootfs openSUSE image file.
openSUSE-Tumbleweed-ARM-JeOS.armv7-rootfs.armv7l-Current.tbz
3. Create the folder with the ROOTFS_DIR
4. Decompress the file to ROOTFS_DIR
openSUSE-Tumbleweed-ARM-JeOS.armv7-rootfs.armv7l-Current.tbz
5. Now work with the file BananaPi_hwpack.tar.xz. Decompress the file.
6. Copy related files to the directory ROOTFS_DIR
cp kernel/uImage ROOTFS_DIR/boot
Create the file:
with the following content
fatload mmc 0 0x48000000 uImage; if fatload mmc 0 0x43100000 uInitrd; \
then bootm 0x48000000 0x43100000; else bootm 0x48000000; fi
uenvcmd=run mmcboot
bootargs=console=ttyS0,115200 console=tty0 \
disp.screen0_output_mode=EDID:1280x720p60 \
hdmi.audio=EDID:0 root=/dev/mmcblk0p1
Copy the rootfs folder:
7. Now prepare the SD. Format the sdcard (assume the sdcard mounted at /dev/sdb. You can find it with the command cat /proc/partitions)
sudo dd if=/dev/zero of=/dev/sdb bs=1k count=1024
sudo dd if=bootloader/u-boot-sunxi-with-spl.bin of=/dev/sdb bs=1024 seek=8
Create partition (you can do it using gparted too)
* Delete partitions: o
* List partitions: p
* Create new partitions: n
* Primary partitions: p
* Partition number: 1
* Press ENTER twice to use the total size of the card
* Write the partition table: w
Format the parititon
8. Copy ROOTFS_DIR into sdcard
sudo mount /dev/sdb1 mnt
sudo cp -a ROOTFS_DIR/* mnt
sudo sync
sudo umount mnt
Now boot the card. The default username/password are:
Password: linux
Unfortunately ssh didn't work. I logged in and changed few things.
First of all I edited the file sshd_conf
And found:
Port 22
PasswordAthentication yes
PermitRootlogin yes
Then I used the command
Rebooted and all set.
You can download the image from openSUSE-Tumbleweed-BananaPi-headless-20150927.tar.xz
copy it at least 2GB sd card and resize it.
Install MATE Desktop
The first thing you have to do is to update (zypper up).
The easiest way is to open YaST and go to Software Management.
Then filter by Patterns.
Click to install MATE Desktop Environment and MATE Base system.
After everything is installed, make MATE-session as default window manager
Find the line:
DEFAULT_WM = "kde-plasma"
and change it to
DEFAULT_WM = "mate-session"
Then reboot. Login and type startx

184 Qt Libraries

Inqlude is based on a collection of manifests. If you like to add or update a library, simply submit a pull request there. The inqlude tool is used to manage the manifests, it generates the web site, but you can also use it to validate manifests, or download libraries. There also is inqlude-client, which is a C++ client for retrieving sources of libraries via the data on the Inqlude web site. It's pretty handy, if you want to integrate some library into your project.
If you want to get a brief introduction into Inqlude, you might want to watch my award winning lightning talk from Qt Dev Days 2013: "News from Inqlude, the Qt library archive". It still provides a pretty accurate explanation of what Inqlude is about and how it works.
A big part of the libraries which are collected on Inqlude are coming from KDE as part of KDE Frameworks. We just released KDE Frameworks 5.14. It's 60 Qt addon libraries which represent the state of the art of Linux desktop development and more.
Inqlude as well as KDE Frameworks are a community effort. Incidentally they both started at a developer sprint at Randa. Getting community people together for intense hacking and discussions is a tremendously powerful catalyst in the free software world. Randa exemplifies how this is done. The initial ideas for Inqlude were created there and last year it enabled me to release the first alpha version of Inqlude. These events are important for the free software world. You can help to make them happen by donating. Do this now. It's very much appreciated.

One more recent change was the addition of a manifest for all libraries part of the Inqlude archive. This is a JSON file aggregating all latest individual manifests. It makes it very easy for tools who don't need to deal with the history of releases to get everything in one go. The inqlude client uses it, and it's a straight-forward choice for integration with other tools which would like to benefit from the data available through Inqlude.
At the last Qt contributors summit we had some very good discussions about more integration. Integration with the Qt installer would allow to get third party library the same way you get Qt itself, or integration with Qt Creator would allow to find and use third party libraries for specific purposes natively in the environment you use to develop your application. One topic which came up was a classification of libraries to provide some information about stability, active development, and support. We will need to look into that, if there are some automatic indications we can offer for activity, or what else we can do to help people to find suitable libraries for their projects.
It's quite intriguing to follow what is going on in the Qt world. As an application developer there is a lot of good stuff to choose from. Inqlude intends to help with that. The web site is there and will continue to be updated and there also are a number of ideas and plans how to improve Inqlude to serve this purpose. Stay tuned. Or get involved. You are very welcome.

SSH Schlüssel beim KDE-Login entsperren

Deploying Limba packages: Ideas & current status
 The Limba project does not only have the goal to allow developers to deploy their applications directly on multiple Linux distributions while reducing duplication of shared resources, it should also make it easy for developers to build software for Limba.
Limba is worth nothing without good tooling to make it fun to use. That’s why I am working on that too, and I want to share some ideas of how things could work in future and which services I would like to have running. I will also show what is working today already (and that’s quite something!). This time I look at things from a developer’s perspective (since the last posts on Limba were more end-user centric). If you read on, you will also find a nice video of the developer workflow 
1. Creating metadata and building the software
To make building Limba packages as simple as possible, Limba reuses already existing metadata, like AppStream metadata to find information about the software you want to create your package for.
To ensure upstreams can build their software in a clean environment, Limba makes using one as simple as possible: The limba-build CLI tool creates a clean chroot environment quickly by using an environment created by debootstrap (or a comparable tool suitable for the Linux distribution), and then using OverlayFS to have all changes to the environment done during the build process land in a separate directory.
To define build instructions, limba-build uses the same YAML format TravisCI uses as well for continuous integration. So there is a chance this data is already present as well (if not, it’s trivial to write).
In case upstream projects don’t want to use these tools, e.g. because they have well-working CI already, then all commands needed to build a Limba package can be called individually as well (ideally, building a Limba package is just one call to lipkgen).
I am currently planning “DeveloperIPK” packages containing resources needed to develop against another Limba package. With that in place and integrated with the automatic build-environment creation, upstream developers can be sure the application they just built is built against the right libraries as present in the package they depend on. The build tool could even fetch the build-dependencies automatically from a central repository.
2. Uploading the software to a repository
While everyone can set up their own Limba repository, and the limba-build repo command will help with that, there are lots of benefits in having a central place where upstream developers can upload their software to.
I am currently developing a service like that, called “LimbaHub”. LimbaHub will contain different repositories distributors can make available to their users by default, e.g. there will be one with only free software, and one for proprietary software. It will also later allow upstreams to create private repositories, e.g. for beta-releases.
3. Security in LimbaHub
Every Limba package is signed with they key of its creator anyway, so in order to get a package into LimbaHub, one needs to get their OpenPGP key accepted by the service first.
Additionally, the Hub service works with a per-package permission system. This means I can e.g. allow the Mozilla release team members to upload a package with the component-ID “org.mozilla.firefox.desktop” or even allow those user(s) to “own” the whole org.mozilla.* namespace.
This should prevent people hijacking other people’s uploads accidentally or on purpose.
4. QA with LimbaHub
LimbaHub should also act as guardian over ABI stability and general quality of the software. We could for example warn upstreams that they broke ABI without declaring that in the package information, or even reject the package then. We could validate .desktop files and AppStream metadata, or even check if a package was built using hardening flags.
This should help both developers to improve their software as well as users who benefit from that effort. In case something really bad gets submitted to LimbaHub, we always have the ability to remove the package from the repositories as a last resort (which might trigger Limba to issue a warning for the user that he won’t receive updates anymore).
What works
Limba, LimbaHub and the tools around it are developing nicely, so far no big issues have been encountered yet.
That’s why I made a video showing how Limba and LimbaHub work together at time:
Still, there is a lot of room for improvement – Limba has not yet received enough testing, and LimbaHub is merely a proof-of-concept at time. Also, lots of high-priority features are not yet implemented.
LimbaHub and Limba need help!
At time I am developing LimbaHub and Limba alone with only occasional contributions from others (which are amazing and highly welcomed!). So, if you like Python and Flask, and want to help developing LimbaHub, please contact me – the LimbaHub software could benefit from a more experienced Python web developer than I am (and maybe having a designer look over the frontend later makes sense as well). If you are not afraid of C and GLib, and like to chase bugs or play with building Limba packages, consider helping Limba development 
Criando entradas no Menu do lançador de aplicativos
Aqui vai uma dica legal pra você que instalou por exemplo, um software pelo PlayOnLinux, mas que então percebeu que não foi criado um atalho no Menu de aplicativos.
Calma…é bem simples resolver essa questão…
1- Clique com o botão direito em cima do ícone do Menu de aplicativos e selecione Editar Aplicativos.
2- Na janela que abrirá escolha o submenu desejado, neste caso, por exemplo vamos criar as entradas para o Microsoft Office no Submenu Suíte de Escritório.
3- Clique em novo Submenu na barra superior e escreva Microsoft Office
4- Clique em Novo item na barra superior
O PlayonLinux costuma criar atalhos na Área de Trabalho, então..
5- Clique com o botão direito do mouse em cima do atalho, no caso foi o Excel e, depois em Propriedade
6- Na janela que abriu, copie o conteúdo que está na caixa comando
 7- Volte no editor do Menu de Aplicativos e cole o que você copiou na caixa de Comando
 8- Na Caixa nome digite o nome do Aplicativo.
9- Para deixar o menu bacana, você inserir ícones, que por padrão o PlauonLinux utiliza a pasta ful_size, qua fica oculta na pasta do usuário. Você localizá-la asim: /home/SEU USUÁRIO/.PlayOnLinux/icones/full_size/
10- Eu costumo utilizar esta pasta para guardar os ícones dos aplicativos que eu for utilizar através de ma instalação feita com o PlayOnLinux.
Um abraço
Livros - Nosferatu
Team Efficiency is Irrelevant
The most common reaction I hear when I tell people about mob programming (or even paired programing) is “How can that possibly be efficient?”, sometimes phrased as “How can you justify that to management?” or “How productive are you?”
I think that efficiency in terms of “How much stuff can we get done in a week” is the wrong thing to be focussing on in teams. It can often be helpful to be less efficient.
“All the brilliant people working at the same time, in the same space, on the same thing, at the same computer.” — Woody Zuill
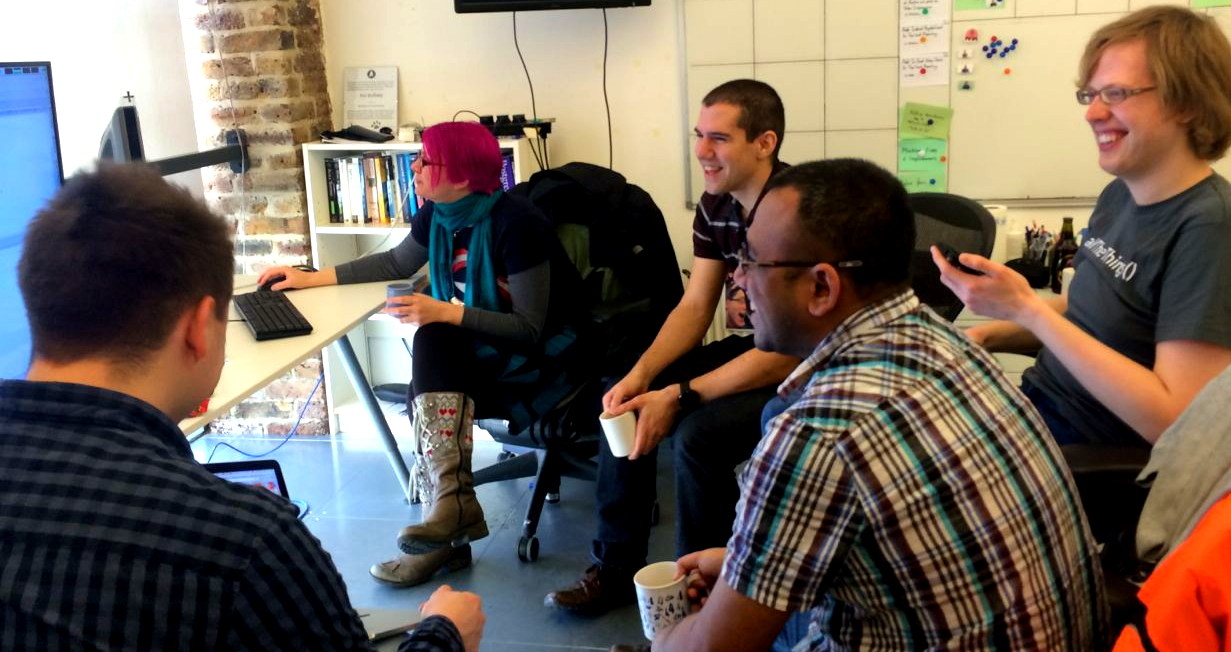
At Unruly we’ve been Mob Programming regularly over the last year.
At first glance it’s hard to see why it could be worth working this way. Five or more people working on a single task seems inefficient compared to working on five tasks simultaneously. As developers we’re used to thinking about parallelising work so that we can scale out.
Build Less!
If your team builds twice as much stuff as another team, are you more effective?
What if 80% of the software your team builds is never used, and everything another team builds is heavily used?
What if all the features you build are worth less than a single feature the other team has built?
We’re better off slowing down if it means that what we do build is more valuable
Value Disparity
There’s often a huge disparity between the relative value of different things we can be working on. We can easily get distracted building Feature A that might make us $10,000 this year, when we could be building Feature B which will make us $10,000,000 this year.
It’s often not evident up front which of these will be more valuable. However, if we can order our development to start with testing hypotheses about features A and B we often learn that one is much less valuable than we thought, for some reason it won’t work for us — meanwhile, new opportunities often open up that makes the other option much more interesting.
Focus on Goal
When working alone it’s very easy to get sidetracked into working on things you notice along the way that are important but unrelated to the current goal of the team. When working together there are more people to hold one another accountable and bring the focus of the team back to the primary goal, avoiding time consuming diversions.
When working together we also help hold each other accountable for following working agreements like fixing non-deterministic tests immediately, or refactoring a piece of code the next time we’re in the area.
If you’re going to build it, build it right
It’s easy to plan a feature, implement what you planned to do, and have it technically working, but generating no value. Here is a case where “technically correct” is not the best kind of correct.

If we release a feature and it’s not being used, or not making any money, we need to learn, iterate and improve. This may involve ordering the development to prioritise trying things out early, even if we’re not entirely happy with the finished product.
Unstoppable Team
It’s often more interesting how quickly we can achieve a team goal, than how much our team can get done in a set time period. In programmer parlance Low latency is more valuable than high throughput.
Therefore it can be worth trading off “efficiency” if it means you get to your goal slightly quicker.
In Extreme Programming circles there’s a concept of ideal time — if everything went exactly according to plan, and you had no interruptions, how long would a task take.
Ideal Days
Working together as team in a mob is the closest I’ve experienced to real “Ideal Days”.
When working alone, or even when pairing, there are often interruptions. You have to go off to a meeting, so work stops. Somebody asks you a question, and work stops. You get stuck on a distracting problem, so work stops. You take a bathroom break, and work stops.
This tends to lead to individual or pair developer days being less than ideal. Rather, you get a few periods of productivity interspersed with interruptions where you lose your “flow” and train of thought.
This is quite different with a mob of a few people.
Can’t stop the mob

If you need to go off to a meeting, you go off to your meeting. The mob keeps on rolling.
If someone comes over with a question, someone peels off the mob to help them. The mob keeps on rolling.
You encounter a puzzling problem, no-one has any idea how to approach it, someone peels off to go and spike a couple of approaches. The mob keeps on rolling.
You’re feeling like a break, you can just take one whenever you like. The mob keeps on rolling. In this regard mob programming is actually less tiring than pair programming. There’s no amount of guilt from losing concentration or taking a break. You know the team will continue.
So while a mob requires more people, it lets us achieve a specific goal more quickly than if we were working on individual tasks.
Team Investment
It’s also worth bearing in mind that the value of your team practices can’t be measured purely by the amount of stuff you deliver, or even in the amount of money generated by the features you build.
If your work is investing in the team’s ability to support the software in production in the future, or in their ability to move and learn faster in the future, then that’s adding value, albeit sometimes hard to measure.
So…
Don’t aim to be an efficient team, aim to be an effective team.
Instead of optimising the amount of stuff you deliver, optimise the amount of value you add to your organisation.
Mob-programming and pair-programming are techniques that can help teams be more effective. They may or may not affect productivity, but it doesn’t matter.
Living on Tumbleweed
Since we have staging for Factory/Tumbleweed, it became surprisingly stable. Major breakages at least for core packages are really rare now. But even for leaf packages it is not a common sight.
One thing was still annoying: for upgrading you should use zypper dist-upgrade or short zypper dup normally. zypper dup will upgrade all the packages to the latest version it finds but also downgrade/uninstall packages, if required. Something a zypper up will not do. This is all fine when you only use the core distribution repositories. If you start using e.g. packman or any other repository from the build service, zypper did switch around the package to the distribution package and a few days later back to the OBS based repository. Depending on what was newer. It is allowed to do that because zypper dup allows also vendor changes.

Experiencia con Disco de Estado Sólido en openSUSE
Esta es la estructura que elegí para computador:
SSD:
- 4GB para Swap
- 110 para /
- 40GB para Home
- 409GB para Archivos