
 Member
 henne
henneMy Toolbelt
Here is my personal hardware & software stack. The things I use and enjoy on a daily basis since a long time. The software is pretty much the standard in Free Software development stack. Don't expect to find anything you don't know here. I write this because people keep asking me, especially in mentoring situations.
Operating System: openSUSE Tumbleweed
It's my Linux of choice. Why? Because it's the German Engineering version of Linux: Long heritage, a certain kind of stiffness and it's super tidy. The rolling nature of Tumbleweed gives me the stability and the velocity I need. It brings all the standard Linux tools through a kick ass package manager (zypper). And it embodies what makes the Free Software eco system great: software diversity. openSUSE tries very hard to treat all software as first class citizen of the distribution.
Okay I admit it, I have been involved in making this Linux distribution for decades. So take this as pure bragging on my part. What it also means for me is that it's super easy to "scratch my itch" a.k.a. understand things, fix bugs, implement features and find the right people to poke. I can only recommend this to you, find a Linux home, help to maintain it and make it your own.
Desktop Environment: GNOME
The thing I like most about GNOME is that it get's out of my way. It's restraint, simplistic, straight forward. And yet, if I want to do a thing I have never done before, it'll have an opinion on how to do it. I also dig the esthetics, I think I actually switched to it because it's soo damn beautiful to look at.
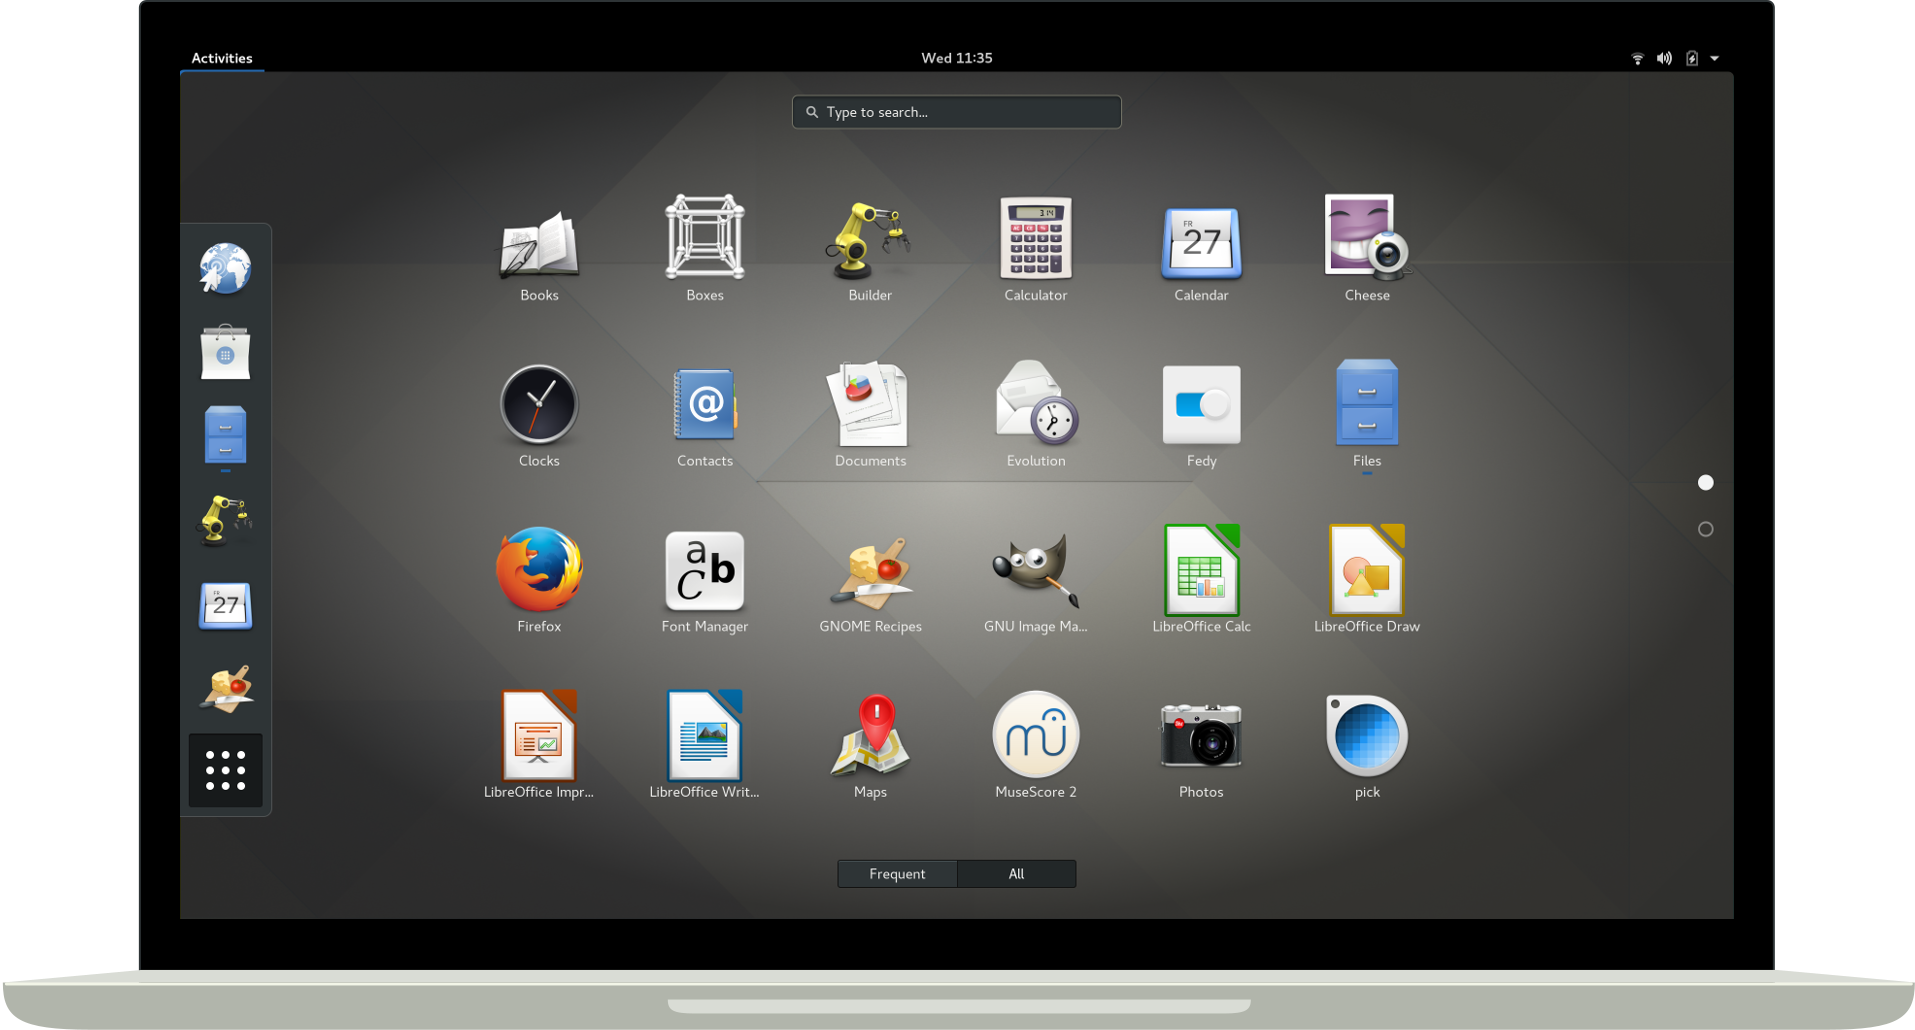
GNOME 3 Desktop by gnome.org
Shell: zsh
Well, any shell. I couldn't live without all those glorious one-liners like
for i in *; do echo mv $i `echo $i |sed 's/.rb/_spec.rb/'`; done or
history | awk '{print $2}' | sort | uniq -c | sort -nr |head -n 20. Utilizing all those
programs that do only one thing, but one thing well. cp, mv, echo, grep, cat, awk, sed, find,
head, tail, curl, test, sleep and so on and so on. What a wonderful chest of lego bricks, ready for you to plug
together your own world. Also, I literally grew up in bash. It was shell scripting that introduced
me to software development. And I will forever be fascinated by it, despite all the sneeze from the more
sophisticated languages. Shell scripting is messy, raw, dangerous. Shell scripting is beautifully punk!
Browser: Mozilla Firefox
I think, not counting the Linux kernel, Firefox is the only piece of software I used all my life (if you think of netscape communicator as ancestor). It's because the single most important quality of Firefox is progress. Tabs, add-ons, session restore, firebug, sync, mobile version and now built in privacy. Mozilla has been steadily pushing it's flagship product forward. It might not always be the first to market, it might not always be perfect from the start but it is always moving forward relentlessly. That is a rare quality. We all should pray that Mozilla continues this despite the google browser monopoly. BTW how the flying f**k is that monopoly OK with 65% of you? Don't you remember any computing history? </rant>
Source Code Management: git
In the meanwhile all projects I contribute to use git. I like git for being the right amount of clever CLI.
That opens the pager only in the right moment, corrects me if I typo or let's me extend it, just by nameing a
command git-diff-to-deploy. And I really dig the file based approach which means that I can often recover my idiot mistakes by nervously mocking around in .git. It shows that the people maintaining this are seriously dog-fooding their own product day in and day out.
Source Code Collaboration: github
With github I have a love-hate relationship. I admire the idea, the product and many of the people who build it. I build a tool in the same space of the industry (developer tooling) using the same technology (Ruby on Rails) and github people set the gold standard in collaboration workflows since years. I only humbly follow their set out examples.
But I really don't like them riding and emphasizing the network effect. And I flat out hate that such a large piece of software in my stack is closed source. Quite frankly I do not understand how anyone at Microsoft can justify to their mirror that github is not Free Software. It's not like anyone will ever be able to take any business away from github.com which value is the number of people using it. As you can see with me and my projects, that ship has sailed a long time ago. Why do you have to deny me my software freedoms if I can't use them to hurt you in any way?
I am a Ruby on Rails developer, I know a thing or two about collaborating on software. I want to send a pull-requests fixing gripes or missing functionality I have with github itself. Why the hell can't I do that? Why do people have to resort to write browser extensions to be able to collaborate on github functionality. This is insane! </rant>
Mailer: Mozilla Thunderbird
Thunderbird is the only piece of software in this list I'm not very passionate about. It helps me reading, finding and writing mail from my four imap accounts in one single interface. It does so better than any mail user agent, web mailer or mobile app I have tried so far. Yet I have the feeling there should be something better. Can't seem to find it though, despite really searching. Guess Churchill was right: Thunderbird is the worst MUA, except for all the others.
Editor: Visual Studio Code and vim
I fire up vim when I need to do a quick script, jog down a note, edit configuration files or for a quick
fix. Visual Studio Code is what I use for deep dive bug fixes or feature development. About vim I like most
the raw power that comes with it. Doing something like gqaw or v<end>~ is gold.
But I have a problem with vim: I easily remember a small set of things for a long time, but I have not much capacity
to remember 50 keyboad shortcuts forever ¯\_(ツ)_/¯ That's why I need a user interface that guides me and offers
me a place to search visually for what I want to do. CTRL+p+fold level+click is exactly that.
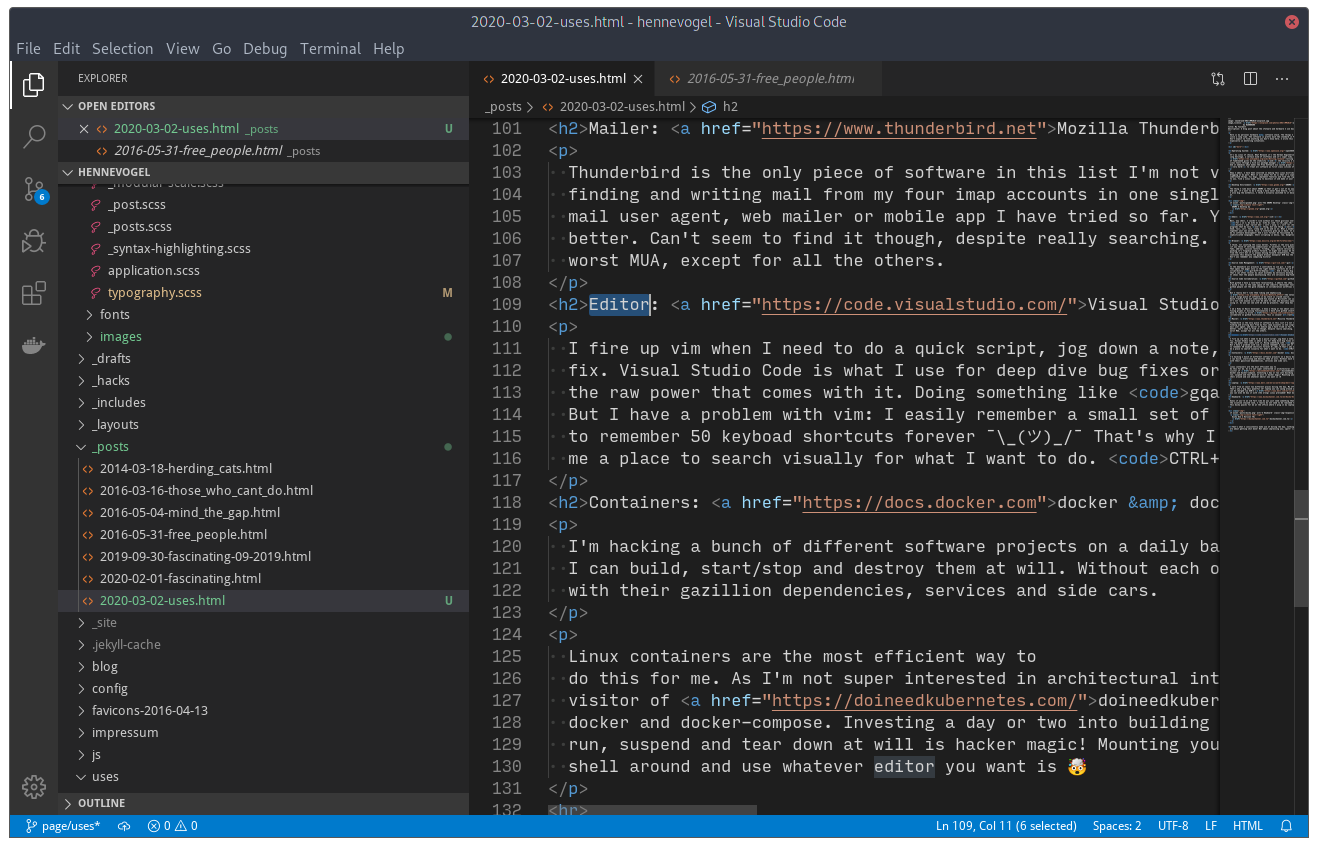
Visual Studio Code by Henne Vogelsang licensed CC BY 4.0
Containers: docker & docker-compose
I'm hacking a bunch of different software projects on a daily basis. I need them compartmentalized so I can build, start/stop and destroy them at will. Without each of them compromising the other, or my system, with their gazillion dependencies, services and side cars.
Linux containers are the most efficient way to do this for me. As I'm not super interested in architectural intricacies of container runtimes and a frequent visitor of doineedkubernetes.com, I'm kind of habituated to docker and docker-compose. Investing a day or two into building a development environment that you can set up, run, suspend and tear down at will is hacker magic! Mounting your local file system into it, so your can shell around and use whatever editor you want is 🤯
Laptop: Dell XPS 13 (9380)
I work from at least two different places during the day. My office, meeting room, home office etc. That's why I dig this powerful 13" laptop you can swing around with ease. It also features a nice enough keyboard, can be charged via USB-C (power bank ready) and you can even be buy it with (the wrong) Linux preloaded! What more can you ask from hardware?
Keyboard: Ducky One 2 Horizon TKL
Guess if you're an old fart like me you just need something that feels a bit like a model M keyboard. But please without the nicotine stained look. This ducky quacks for me at the office where I plug in my laptop into a docking station.

Ducky One 2 Horizon TKL duckychannel.com.tw
That's what I consistently make use of during the day, nothing spectacular right? Of course not, those things are about getting shit done! Not about impressing you, sport! 😜

openSUSE community welcomes new board member
The results of the openSUSE Board election were published on 1 February 2020. The community welcomed Sarah Julia Kriesch and Simon Lees as they started their new term.
However, ten days later, Sarah stepped down, leaving a vacant seat on the board. Under such circumstance and the board election rules, the sitting board may appoint someone until the next board election.
On 27 February 2020, openSUSE Chairman Gerald Pfeifer, announced the appointment of Vinzenz Vietzke as board member. His appointment was unanimously supported by the Board and the openSUSE Election Officials.
The appointment of Vinzenz, aka Vinz, on the Board was welcomed by the community.

KDE Plasma 5.18 on openSUSE Tumbleweed | Awesome-Sauce
Fascinating! February 2020
The universe is full of captivating, compelling and exquisite things. The internet, the most complete representation of humanity, is no different in that regard. Both are vast, seemingly endless and full of places you should know about. Let me share content that has moved me, in some way, in the last month. February was mostly inter-personal stuff like ethics, hiring or collaborating remote. Enjoy.
YubiKey 5C Nano a product by yubico
Some collegue of mine mentioned andOTP and good Free Software citizen I am, moved all of my 2FA to it. Doing so made me think of checking support for hardware security modules on Linux again. Ordered this YubiKey, now I'm off 2FA with my phone and just touch my laptop when asked. Thanks WebAuthn! One of those "Why they heck did I not do this earlier?" moments.
A student guide for navigating ethical issues in the tech industry by Mozilla
I have no idea why Mozilla says this is for students? Clearly this is for everybody! Be it people considering going into the tech industry (like students), people already in it or even people who just want to know what it going on in this cesspool.
Especially if you are in this industry already: Read this, think about it, talk about it with your peers, dive deeper into this topic. Do this so you can help to save the environment you probably planed to work the rest of your life in. Ethics help them who help themselves!
git sparse-checkout a post by Derrick Stolee
An experimental git command that allows you to checkout one or more sub-directories of a repo. Primarily meant for monorepos with gazillion of projects in it. But I think this could also turn out to be usefull for other situations. Like skipping large infrequently used directories etc. Check it out!
The 2020 State of Remote Work a survey by Buffer.com
No real shockers this year, the concept of distributed teams is humming along. One thing I find interesting about this is how much the top challenges are also the top challenges of (larger) Free Software communities. If you reach a certain size your community fractures because people start their own communication neighborhoods. Mailing lists, forums, IRC etc. Each group get's enough information about the community (mostly from wanderers between the neighborhoods) so they feel they don't miss out. Yet, some important things fall through the cracks. Frequent cries for unification of groups are either ignored or end up in XKCD#927. In the end, you just live with it and realize that you can't streamline a large amount of people to this degree.
And I think loneliness is also at the root of many of the problems that Free Software communities face. Especially I suspect this to be the top reason for contributor churn. You can't vent at the time you're angry about something in the code base. You don't have anyone to share your joy with, at the time you finally feel confident enough to open this super cool feature pull request. You have to context switch to something else because no one is around at the time you need to know why this code behaves like it behaves. Those situations are just a little less fulfilling than they are if you're together with people. And this will bite at your willingness to continue, one at a time. And that's how you can eat an elephant.
Often I'd wish we would not have been such punks in the Free Software movement. That we instead collectively focused some of the time and energy we've spend on creating software on figuring out what happened to us and between us. We made collaboration among free equals into a viable option to be creative. But we were to lazy to write the documentation how to organize people doing it...
The Horrifically Dystopian World of Software Engineering Interviews a post by Jared Nelsen
One persons odyssey through many of the ridicolous hiring practices in play today. And the best analysis of why this is like it is I have read to today.
We are being consumed by our own mythology. We all know algorithm challenges are a contrived game. Why are we measuring people and not learning about people?
I start to feel bad for the nail, as much as this hits it on the head. Or as Chelsea puts it “Smart” is Not a Hiring Criterion.
Tools I found interesting
- flameshot · A screenshot tool
- scc · Fastest LOC counter possible
-
Browser Lazy Load · Coming to a browser near you
<img src="image.png" loading="lazy"> - Git Command Explorer · Interactive git documentation
- explorabl.es · A hub for learning through play!
- hackertyper · A neat way to show non-nerds what you do for a living
- capycorder · Generating capybara request specs by clicking in your browser
Talks I enjoyed
- Compassionate—Yet Candid—Code Reviews by April Wensel
- Salary Negotiation Workshop by Josh Doody
- Implementing a Strong Code-Review Culture by Derek Prior
- Single-Vendor Open Source Firms by Prof. Dr. Dirk Riehle
- Vom Ich zum Wir by maha and Kai Biermann
Neat stuff! Hope some of it makes you think/act in new ways, as it has me.

openSUSE Tumbleweed – Review of the week 2020/09
Dear Tumbleweed users and hackers,
During this week we released 4 snapshots (0220, 0222, 0224 and 0226) – an average week from that perspective, yet there have been some interesting and well-awaited updates in these snapshots:
- zsh 5.8
- Mesa 19.3.4 & Mesa 20.0
- libcap 2.32
- GNOME 3.34.4
- KDE Plasma 5.18.1
- LLVM 6 has been removed from the repository
- ncurses 6.2
- Linux kernel 5.5.5
- Mozilla Firefox 73.0.1: it will now launch in Wayland mode inside a Wayland session
- MariaDB 10.4.12
Despite all those things happenings, stagings are still – or again – filled up:
- Zypper 1.14.34: beware! This version no longer supports abbreviated command line parameters (e.g
zypper in --no-ris no longer accepted) - KDE Plasma 5.18.2
- Qt 5.15.0 (currently betas being tested)
- Ruby 2.7 – possibly paired with the removal of Ruby 2.6
- GCC 10
- Python 3.8 (unchanged, awaiting the fix for salt)
- Removal of Python 2
- GNU Make 4.3
- RPM: change of database format to ndb

Citrix Workspace on openSUSE Tumbleweed
Please find a 2021 update below and furtherdown a comment from 2024!
Some companies offer their employees to access their corporate computer work space remotely using a remote desktop connection. The company Citrix provides software for such a connection. To connect, the employees need the software Citrix Workspace on their terminal devices. The company provides on their download page also files for Linux including openSUSE. Unfortunately, their version 1912 from 12 December 2019 did not just work on my openSUSE Tumbleweed 64bit computer (and earlier versions I tried neither).
Segmentation Fault and Missing Libraries
First, I tried to install the software package from the vendor.
- I downloaded the SuSE Full Package (Self-Service Support) Citrix Workspace app for Linux (x86_64) in version 1912 from 12 December 2019.
zypper in ICAClient-suse-19.12.0.19-0.x86_64.rpm- I logged into a corporate page, open a connection configuration file (*.ica) and nothing happened. So I assumed the application may have crashed. I downloaded the file and opened it in the terminal to see more.
/usr/lib64/ICAClient/wfica -icaroot /opt/Citrix/ICAClient configuration-file.ica- The app opened shortly and crashed then with the error message
segmentation fault (core dumped)
Then, I tried to install somebody’s own software package. Note that this requires trust or a review of the package.
- I downloaded the ICAClient from https://download.opensuse.org/repositories/home:/enzokiel/openSUSE_15.2_Update/x86_64/ for openSUSE 15.2 Update x86_64 (hence, not Tumbleweed).
- I installed the package despite the missing library
libcrypto.so.1.0.0. - I found the missing library openssl 1.0.0 and installed it.
Afterwards, the application did not segfault any longer. However, it produced an error due to a missing certificate from the GlobalSign Root CA.
- So I went to Firefox, went to the Privacy and Security tab in the Preferences, and clicked on “View Certificates”.
- I exported the GlobalSign Root CA certificate to e.g.
/tmp. There is more than one. Look for the one in the tree GlobalSign nv-sa. - Then, the certificate needs to be put into the certificate folder of Citrix Workspace. For the sofware package I use, this is
/usr/lib64/ICAClient/keystore/cacerts. Navigate in the terminal to this folder and copy the certificate file in it. Then usechown root:root [file.crt]andchmod 444 [file.crt]to adapt file ownership and properties.
Afterwards, Citrix Workspace worked for me. If I have too much time, I will try to use the vendor package and see if I still get the segfault considering that I have now openssl 1.0.0 installed.
Exchanging Data between Citrix Host and Citrix Client
There are two options to get data from your host OS to your Citrix client:
- Clipboard: Copy’n’paste of text from the host to the client is suppoted on Linux. It did not work for me with files.
- Mapping client devices: folders from the host can be mapped in the client as distinct drives. This is very useful to exchange files between host and client. To configure this option, launch from the startmenu “Citrix Receiver (configmgr)”. Alternatively, the tool can be launched from the command line with
/usr/lib64/ICAClient/util/configmgr -icaroot /usr/lib64/ICAClient. In the tool, mappings are configured in the tab file access.
Update 2021
At some point, the setup broke due to an expiring SSL certificate I believe. After some time trying, I ended up with the following easy setup:
- deinstall the outdated version:
zypper rm ICAClient - go to https://www.citrix.com/downloads/workspace-app/linux/workspace-app-for-linux-latest.html and downoad the rpm. In my case it was
ICAClient-suse-21.1.0.14-0.x86_64.rpm - install the rpm with e.g.
zypper install [your folder]/ICAClient-suse-21.1.0.14-0.x86_64.rpm - try to open a file. In my case, I got a “SSL error 61” (see Citrix help)
- I renamed the Citrix cacert storage:
mv /opt/Citrix/ICAClient/keystore/cacerts{,~} - I linked in the system storage:
ln -sv /etc/ssl/certs /opt/Citrix/ICAClient/keystore/cacerts
This did the trick!
References
- https://kenfallon.com/citrix-ssl-error-61-globalsign-root-ca/ with a tip on how to install the missing certificate
- https://docs.citrix.com/en-us/receiver/windows/current-release/optimize/map-client-devices.html with explanations on device mapping for Windows
DRM Plugin crashes after openSUSE Tumbleweed update
A few days ago openSUSE users started complaining about DRM Plugin crashes in Firefox after running a Tumbleweed update.

Netflix requires the DRM plugin in Firefox to be able to play encrypted videos. The plugin would crash due to a bug in Firefox 73. While this bug affected not just openSUSE users, but everyone using Firefox 73, it became apparent to TW users as v73 landed in the Tumbleweed repo.
Mozilla fixed the bug in the 73.0.1 release. I tweeted about that a little more than a week ago.
Yo Mozillians! #Firefox 73.0.1 has been released. Fixes crashes on Windows & Linux.https://t.co/UZsfGf2MgT
— Ish Sookun (@IshSookun) February 18, 2020
Firefox 73.0.01 is now available in the Tumbleweed repo. So, a quick update should fix your Netflix. 😉
Information for package MozillaFirefox:
---------------------------------------
Repository     : openSUSE-Tumbleweed-Oss
Name           : MozillaFirefox
Version        : 73.0.1-1.1
Arch           : x86_64
Vendor         : openSUSE
Installed Size : 186.7 MiB
Installed      : Yes
Status         : out-of-date (version 73.0-1.1 installed)
Source package : MozillaFirefox-73.0.1-1.1.src
Summary        : Mozilla Firefox Web Browser
Description    :
    Mozilla Firefox is a standalone web browser, designed for standards
    compliance and performance.  Its functionality can be enhanced via a
    plethora of extensions.

Semantic versioning and containers
Developers are used to express the dependencies of their programs using semantic versioning constraints.
For example a Node.js application relying on left-pad could force only certain
versions of this library to be used by specifying a constraint like
>= 1.1.0 < 1.2.0. This would force npm to install the latest version of the
library that satisfies the constraint.
How does that translates to containers?
Imagine the following scenario: a developer deploys a containerized application
that requires a Redi database. The developer deploys the latest version
of the redis container (eg: redis:4.0.5), ensures his application works fine
and then moves to do other things.
After some weeks a security issue/bug is found inside of Redis and a new patched release takes place. Suddenly the deployed container is outdated. How can the developer be aware a new v4 release of Redis is available? Wouldn’t be even better to have some automated tool taking care of this upgrade?
After some more weeks a new minor release of Redis is released (eg: 4.1.0).
Is it safe to automatically update to a new minor release of Redis, is the
developer application going to work as expected?
Some container images have special tags like v4 or v4.1 and the developer
could just leverage them to kinda pinpoint the redis container to a more
delimited set of versions. However using these tags reduces reproducibility
and debuggability.
Let’s imagine the redis image being deployed is redis:v4.1 and everything is
working as expected. Assume after some time the developer (or some automated tool)
pulls a new version of the redis:v4.1 image and suddenly the application
has some issues. How can the developer understand what really changed?
Wouldn’t it be great to be able to say something like “everything worked fine
with redis:4.1.0 but it broke when I upgraded to redis:4.1.9”?
There are some tools that can be used to find and automatically update old container images: Watchtower and ouroboros. However none of them allows the flexibility I was looking for (in terms of checks), plus they are both tailored to work only against docker.
Because of that, during the 2020 edition of SUSE Hackweek, I spent some time working on a different solution to this use case.
Introducing fresh-container
fresh-container is a tool that can be used to see if a container can be updated to a more recent release.
fresh-container is different compared to Watchtower and ouroboros because it relies on semantic versioning to process container image tags.
Semantic versioning is used to express the version constraints a container version must satisfy. This gives more flexibility, for example take a look at the following scenarios:
- I’m fine with any release of Redis that is part of the v4 code stream:
>= 4.0.0 < 5.0.0 - I’m fine only with patch releases of Redis that belong to the 4.1 code stream:
>= 4.1.0 < 4.2.0 - I’m don’t want any release of Redis after v6:
< 6.0.0
CLI mode
fresh-container can be run as a standalone program:
$ fresh-container check --constraint ">= 1.9.0 < 1.10.0" nginx:1.9.0

The 'docker.io/library/nginx' container image can be upgraded from the '1.9.0' tag to the '1.9.15' one and still satisfy the '>= 1.9.0 < 1.10.0' constraint.
Behind the scenes fresh-container will query the container registry hosting the image to gather the list of all the available tags. The tags that do not respect semantic versioning will be ignored and finally the tool will evaluate the constraint provided by the user.
It can also generate computer parsable output by producing a JSON response:
$ fresh-container check -o json --constraint ">= 1.9.0 < 1.10.0" nginx:1.9.0

{
  "image": "docker.io/library/nginx",
  "constraint": ">= 1.9.0 < 1.10.0",
  "current_version": "1.9.0",
  "next_version": "1.9.15",
  "stale": true
}
Server mode
Querying the remote container registries to fetch all the available tags of a container image is an expensive operation. That gets even worse when multiple containers have to be inspected on a regular basis.
The fresh-container binary can operate in a server mode to alleviate this issue:
$ fresh-container serverThis will start a web server offering a simple REST API that can be used to perform queries. The remote tags of the container images are cached inside of an in-memory database to speed up constraint resolution.
It’s possible to run fresh-container check against a fresh-container server
to perform faster queries by using the --server <http://fresh-container-server>
flag.
Kubernetes integration
fresh-container is a tool built to serve one specific use case: your provide some data as input and, as output, it will tell you if the container image can be updated to a more recent version.
It’s main goal is to be leveraged by other tools to build something bigger like fresh-container-operator.
This is a kubernetes operator that, once deployed inside of a kubernetes cluster, will look at all the kubernetes deployments running inside of it and finds the ones having stale containers.
The operator can also automatically update these outdated deployments to use the latest version of the container images that satisfy their requirements.
Usage
How does it work? First of all you have to enrich your deployment definition by adding some ad-hoc annotations.
For each container image used by the deployment you have to specify the semantic versioning constraint that has to be used to evaluate their “freshness”.
Take a look at the following example:
apiVersion: apps/v1
kind: Deployment
metadata:
  name: nginx-deployment
  annotations:
    fresh-container.autopilot: "false"
spec:
  selector:
    matchLabels:
      app: nginx
  replicas: 1
  template:
    metadata:
      labels:
        app: nginx
      annotations:
        fresh-container.constraint/nginx: ">= 1.9.0 < 1.10.0"
    spec:
      containers:
      - name: nginx
        image: nginx:1.9.0
        ports:
        - containerPort: 80
In this case the operator will look at the version of the nginx container
in use and evaluate it against the >= 1.9.0 < 1.10.0 constraint.
Note well: deployments that do not have any
fresh-container.constraint/<container name> will be ignored by the operator.
Find stale deployments
The operator adds the special label fresh-container.hasOutdatedContainers=true
to all the deployments that have one or more stale containers inside of them.
This allows quick searches against all the deployments:
$ kubectl get deployments --all-namespaces -l fresh-container.hasOutdatedContainers=true
NAMESPACE   NAME               READY   UP-TO-DATE   AVAILABLE   AGE
default     nginx-deployment   1/1     1            1           19m
Why is a deployment stale?
The details about the stale containers are added by the operator as annotations of the deployment:
kubectl describe deployments.apps nginx-deployment
Name:                   nginx-deployment
Namespace:              default
CreationTimestamp:      Thu, 27 Feb 2020 10:32:55 +0100
Labels:                 fresh-container.hasOutdatedContainers=true
Annotations:            deployment.kubernetes.io/revision: 1
                        fresh-container.autopilot: false
                        fresh-container.lastChecked: 2020-02-27T09:45:07Z
                        fresh-container.nextTag/nginx: 1.9.15
For each stale container the operator adds an annotation with
fresh-container.nextTag/<container name> as key and the tag of the most recent
container that satisfies the constraint as value.
In the example above you can see that the nginx container inside of the
deployment can be updated to the 1.9.15 tag while still satisfying the
>= 1.9.0 < 1.10.0 constraint.
Automatic upgrades
The next step is to allow fresh-container-operator to update all the deployments that have stale containers.
This is not done by default, but can be enable on a per-deployment basis
by adding the fresh-container.autopilot=true annotation inside of the
deployment metadata.
What comes next
As I stated in the beginning I created these projects during the 2020 edition of SUSE Hackweek. They are early prototypes that need more love.
I would be happy to hear what you think about them. Feel free to leave a comment below or open an issue on their GitHub projects:

Moving to the new News
In an effort to make contributing to openSUSE easier, openSUSE News has moved from being a Wordpress application to a Jekyll static site developed directly on Github. Now you too can write an article, or a series of articles, by sending pull requests to the openSUSE/news-o-o repository.
How to do it
The repository contains _posts directory, that’s where you will upload your own markdown formatted post, following the structure of other posts in the folder. Additionally, you can upload your images to assets/images directory, and reference them from the post.
After you pull request a post like that, the marketing team will review and, if needed, suggest improvements. A successfully reviewed post will be merged into the repository and published at the date specified by the post itself.
Leap 15.2 Enters Beta Builds Phase
openSUSE Leap 15.2 entered the Beta phase last week and has already released two snapshots with the release of build 581.2 and build 588.2. Leap has a rolling development model until it’s final build, so multiple builds will be released according to the road map until the gold master is released, which is scheduled for May 7.
There are no concrete milestones in the rolling development model. As bugs are fixed and new packages introduced or excluded, snapshots of the latest beta phase builds will be released once they pass openQA testing.
After the gold master is released, the rolling development model will stop and maintenance and security updates will then be released for the new minor version of the Leap 15 series.
The alpha phase has been ongoing for several months now and builds have been released regularly on a rolling basis. The alpha was stable enough to use for demos at FOSDEM, but testing is still needed.
Distro hoppers, hobbyists, users and tech enthusiast can download the current builds and help test the releases at software.opensuse.org/distributions/testing. People testing the beta are encouraged to
Record their Leap Beta testing effort on the following spreadsheet: https://docs.google.com/spreadsheets/d/1AGKijKpKiJCB616-bHVoNQuhWHpQLHPWCb3m1p6gXPc/edit#gid=801313279
Leap Beta testers have an option to receive a T-shirt, so make sure to fill in all the proper information and bug reports to get one.
In the email announcement notifying the community about Leap entering the beta phase, Leap’s new release manager, Luboš Kocman stated the release team is working on a 15.1 upgrade test suite to get decent upgrade test results.
“So any manual upgrade effort would be extremely valuable,” Luboš Kocman wrote.
Kocman also highlighted Windows Subsystem for Linux and said the hard work put in for WSL images has risen it to a first-class citizen in both the Open Build Service and openQA.
Those interested in Beta testing of openSUSE Leap 15.2 WSL images can contact Kocman or the factory mailing list. For more information on WSL, visit https://en.opensuse.org/openSUSE:WSL.