
 oy
oyImage Editing with 30-bit Monitors
Payable hardware for professionals is capable of 30-bit throughput since quite some years. And costs continue to go down. This means even budget setups are possible with this kind of gear. So lets follow the question why, who and how monitors capable of displaying 30-bit alias 10-bit per red, green and blue channel can be used. This blog article will first touch some basics, followed by technical aspects below.
Why is it useful to display graphics on a 30-bit monitor setup?
It is essential for graphical editing, to see what effect a editing step has. It is pretty common that low resolution monitors impose a barrier to reliably predict the intended output. This is true for geometrical resolution like for colour resolution and for gamut. The rule of thumb is, the graphics editor needs the most information available to do here/his job and spot artefacts and issues early in the process. This principle is deployed for print, web, film and video editing to reduce costs. You know, redoing something costs time and is part of the jobs calculation. More image information means as well more certainty to reach a graphical result. The typical artefact caused by low colour resolution is reduced tonal range. Colour conversions can reduce the tonal range further. So a sRGB image will look different on a 8-bit per channel monitor with a native gamma close to 2.2 compared to a pipeline with 10-bit per channel. The 8-bit output imposes a bottleneck resulting in loosing some tonal steps known as banding, which must not necessarily be present in the observed sRGB image. One very often read argument against higher bit depth is, that editing hardware shall be as close as possible to customers ones. But that is a illusion. The wide diversity of media and devices makes this nearly impossible. But simulation of end customer hardware is of course an issue and many graphics software has implemented simulation capabilities to address that concern.
Who is most interested in 30-bit colour editing on Linux?
Graphics professional and ambitious users closely observe Linux since many years and deploy it. Many block busters are produced and rendered on Linux machines. Web graphics is well supported since years and camera raw programs implemented a impressive level of features in the last years. So Linux is a potential content creation platform beside content consumption. The typical work flow for content creating people is to generate and edit their art work in high geometrical and colour resolution and down convert to lower resolutions as fits for the job, be that web, print, catalog previews and more flexible high quality delivery depending on actual contract. For instance many photographers archive their shootings in the cameras native format to preserve all available information for later editing or improved rendering. This is a important investment in the future for non short lived work, where old files can shine in new light. Motion picture productions are often rendered and color graded in floating point space by using the OpenEXR intermediate file format and output to 12 bits per component for playback in a cinema. Video production uses in parts raw workflows for advertisements. Medical-, scientific- and archival imaging are potentially interested too and require in parts 30-bit setups like in the DICOM standard. The benefit of 10-bit per channel versus 8-bit does not matter to everyone. Most consumers will not spot any difference while watching web video. But in more demanding areas it is a small but helpful improvement.
How to deploy 30-bit displays on Linux?
That feature was implemented by several companies starting on low level software components like X11, Cairo and pixman. However desktops where pretty slow to adapt software to the new needs and fix bugs. That was in part of the initially higher costs for the hardware. Only few developers in the open source community had early access to suitable gear. I do not write here about suitable graphic cards and monitor combinations. You should consult the web for this. Search for 30-bit monitor. Many early adopters observed psychedelic colours, not working graphics areas and more. Here the state on the well known KDE X11 desktop in release 4.11 on a openSUSE-13.1 . The login screen colours are broken. The splash screen after login looks correct and after some period the desktop becomes visible with again broken colours. To manually fix most of that, one have to tell that Qt shall use native colours. Create following text into a file called ~/.kde4/env/qtnative.sh .
$ kwrite ~/.kde4/env/qtnative.sh
#!/bin/sh
export QT_GRAPHICSSYSTEM=native
With the above variable the desktop should look reasonably in KWin, which is really great. Automating that in Qt would be appreciated.
However 30-bit monitors typical aim at high quality setups. Beside colour resolution they often enough offer a wider gamut than usual monitors. This results in partially heavily saturated colours, which burns in sensible eyes. Those people who do colour grading or photo editing are mostly affected, otherwise they can not easily play this work. So desktop colour correction is an other important feature to enable here. KWin supports ICC based colour correction through KolorManager, which would be useful for the colour saturation. But KWin disables all effects for 30-bit OpenGL visuals. The alternative Compiz-0.8 series has the CompIcc colour server plug-in, which provides the same ICC colour correction feature. To make use of it, one needs to install following packages: compizconfig-settings-manager, CompIcc-0.8.9. Unfortunedly the KDE decorator is no longer available. So use the Emerald decorator from X11:Compiz with the 30-bit-shadow.patch in order to avoid artefacts in the shadow code. Compiz can be used as a default window manager application. Use the system settings to switch to Compiz. Use ccsm to switch on Color Management if not done automatically. And voila the 30-bit desktop should be ready to explore.
What works and what not?
The Plasma desktop is fine including all menus. Dolphin, KWrite, and other applications work. Thunderbird shows some artefacts due to not properly supporting the R10G10B10A2 pixel format. The same is true for Firefox, which lets in parts shine through content behind the Firefox window. Gwenview and ShowFoto work fine within their 8-bit drawing. Only the preview is broken in ShowFoto. Krita supports with the OpenGL backend even native 10-bit per colour component. Menus in Sketch are black. Krita shows minimal artefacts through twice colour converting from image to sRGB by Krita and from sRGB to the monitor colour space by CompIcc. But this effect is much lesser visible than the improvements through its 30-bit support. Applications which try to code 24-bit colour themselves are broken like Konqueror. Gtk and hence Gnome applications with graphical areas do not work. They show black areas. VLC works fine. So daily work should be fine in with 30-bit in the KDE application family depending what you do, with some minor glitches. Valuable Gtk applications as is like Inkscape and most Gtk applications are unusable in a 30-bit setup, with Gimps drawing area being a exception. Thunderbird/Firefox are guessedly affected by the same Gtk bug for which a patch was created some time ago. A patched libgtk-2 is available for testing on openSUSE, which appears to have fixed the problem almost for me.
Beside the need to exchange a windowmanager, to patch a few components and do some manual settings, Linux appears almost there in support of 30-bit setups. Polishing of that feature needs testing of patches and finally acceptance for distribution. Your feedback about bugs, tests and patches can make a difference to developers.
Removing files from the recent documents list
As always, it was lots of talking to others, sharing ideas, plugging in the new people (few students appeared, and were interested - one even drew few dialogs in Glade, still need to integrate them). And the rest of the time, I was hacking - LibreOffice Start center again:
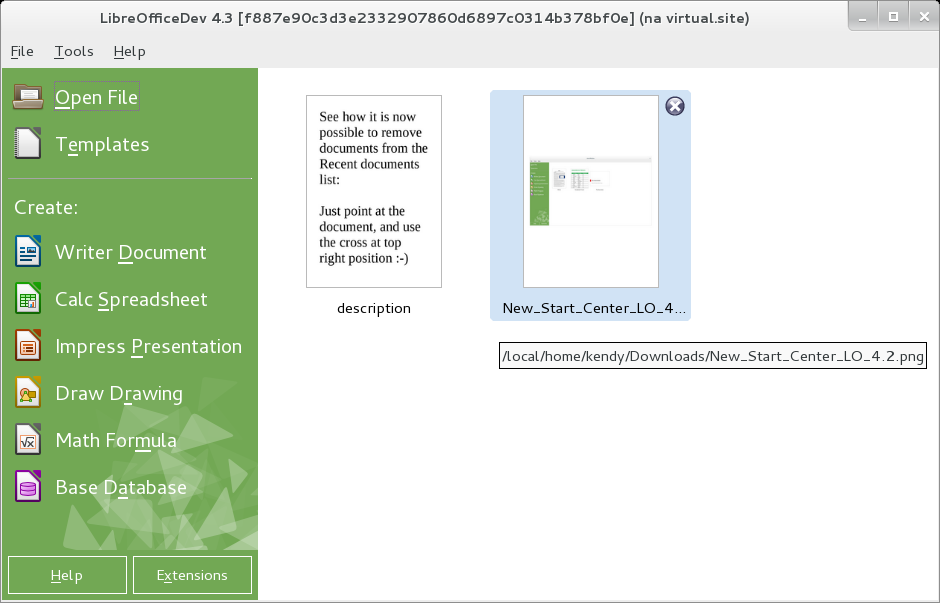
This time, it was the removal of files from the recent documents in the Start center; you can now point the mouse to the cross at the top right side of the document you want to remove from the list (but not from the disk of course!), a click - it is gone.
It will be available in LibreOffice 4.3; try the betas soon!

 Member
2014 GNOME.Asia Summit and FUDCon APAC Registration open !!
2014 GNOME.Asia Summit and FUDCon APAC
Registration open !!


New Kraft Release 0.54
 I am happy to tell about the new release 0.54 of Kraft which was released a couple of days ago.
It is not only a maintenance release but also comes with a couple of new features, the most outstandig is the ability to handle a new document type, the delivery note which prints no prices. That closes a gap for interesting use cases. Here is a more detailed log of what was added to this release.
Kraft is KDE software to help people driving a small business. Emphasis is on small and business. We are not talking CMS, ERP or any other monster. Kraft is about a handy alternative for people who wrote their first 25 invoices using Libre Office and now start to think of how they could could be more efficient in doing that: Using structured templates, being able to create an invoice based on a quote that was done before, no need to fiddle around with slipping paragraphs, a proper address book, such stuff.  Software for people who have other things to do than sit in front of their computer. Hard to understand for geeks like us who enjoy this technology, but yes, there are a lot of people who do not, who just use computers because they must, because they have a business.
I started to work on Kraft in 2006, and worked on similar software before, well, we all have our dark history. I always enjoyed doing software for people who would prefer to not use the computer. And the more I got involved into KDE the more obvious it became to me how perfectly KDE is able to help with that. High level classes, components to reuse, other projects aiming the same direction, and a community of helpful, friendly and open minded people. Also I think software like Kraft is a good addition to the KDE family as it has potential to bring more and different users to KDE.
However, if measured by the number of known users of Kraft, this idea failed completely. Compared to other KDE software, Kraft has disappointing little (known) users. Also contributors: Apart from very few brave developers who spent some time on Kraft, I am the only contributor. The reasons for that can be discussed in another thread.
What still keeps me motivated to work on Kraft is that the few users often tell how happy they are with it. And that Kraft really helps them to drive their business and save time. Also that they found with Linux and KDE a computer “environment” that really helps them reliably instead of facing them with scary stuff. That is really cool, and the best is that this recently happened more often than the years before.
That is what keeps me around with Kraft.
For the future, there are enough ideas: “Combined Kraft” which means using one instance of Kraft from distributed home offices, with ownCloud as sync hub, or an easy to use project management and of course a port to KDE Frameworks 5 to be able to ship for Mac and and and…
Well, it’s a pet project, and my day unfortunately does not leave very much energy behind for that currently, so don’t expect big movement, but be sure that there will be small steps.
Kraft Version 0.54 veröffentlicht
Heute wurde die neue Kraft Version 0.54 veröffentlicht!
Diese Version hat eine interessante Liste an neuen Features. Als wichtigstes sei herausgestellt, dass Kraft jetzt das Erstellen von Lieferscheinen unterstützt. Lieferscheine tragen keine Preisangaben, sondern listen nur gelieferte Artikel. Kraft kommt nun mit passenden Vorlagen, so dass diese Dokumente problemlos erstellt werden können.
Aus Lieferscheinen können dann Rechnungen als Folgedokumenten generiert werden.
Weiterhin wurde die Integration mit dem KDE Adressbuch deutlich verbessert. In der Vergangenheit gab es immer wieder Probleme mit der Abfrage der Adressdaten aus dem KDE Adressbuch, wenn z.B. keine Indizierung mit Nepomuk eingeschaltet war. Das ist nun anders realisiert, so dass mit KDE neuer als KDE 4.12 eine einfachere, schnellere und vor allem robustere Adressbuchintegration verwendet wird.
Ausserdem wurde dem Kraft Paket ein Kommandozeilentool mit dem Namen findcontact hinzugefügt, dass die Abfrage von Adressdaten anhand der Adress-UID, die von Kraft zur Adressatenverwaltung verwendet wird, ermöglicht. Damit können einfacher integrierte Lösungen rund um Kraft gebaut werden.
Eine große Menge an Fehlerfixes und kleineren Verbesserungen wurde ebenfalls in diese Version aufgenommen, so dass allen Benutzerinnen und Benutzern ein Update angeraten ist.
Wie immer ist eine Reaktion auf das Release willkommen, sei es als Kommentar in Forum oder auf der Mailingliste, oder als Bugreport.
Die neue Software ist über die Projektseite verfügbar.

Coffee: my personal history
Why, would you ask ? Mostly because with my not-so-new-anymore position at SUSE (Enterprise Desktop Release Manager), I'm mostly working behind the scene (discovery the joy of OBS to create ISO images and lot of crazy similar stuff) which might not be that sexy to describe but still need to be done ;)
So, instead of closing this blog for new posts, I'm trying something new to me: writing about things which aren't Free Software but might still interest people:
My new thing these days (asks my wife ;) is coffee.

I've always been fond of coffee (and tea, they aren't mutually exclusive, fortunately), probably because when I was a child, my parents loved good coffee and I was happy to be the one taking care of both electric grinder and Expresso machine we had. And I remember how difficult it was to find good coffee, even more when you were living in a very rural area of France and when the only online services were accessible with a Minitel and were definitively not selling coffee ;)

And then started my love story with Nespresso, which has not ended (yet), with its ups (being part of a customer panel once, including UI designers, very interesting) and downs. I often skipped coffee in cafés and restaurants because I knew it wouldn't be good!

And it has happened these days, somehow unexpectedly: for a few years, I was reading about strange devices (Aeropress being cited often) and tasty filter coffee (which, for me, as always been synonym of bad coffee) and I also heared some radio shows on coffee which make me think: let's try.
I ordered an Aeropress and tried it (with some fair trade coffee from my supermarket since I don't have any grinded coffee at home and opening caps wasn't really a good idea). Result: not bad, compared to the consistency of Nespresso but not that great. I knew I wasn't using great coffee.
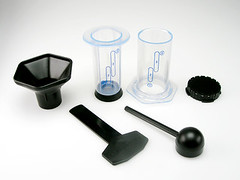

So, I'm now with this exact same coffee at home, waiting for delivery of a freshly ordered manual grinder to try to duplicate this coffee experience, because I try other coffee and other Paris roasters.
Let's see if I succeed :)
Is Canonical planning to take out Microsoft Office with OEM Kingsoft Office?
Lately I've been seeing more and more buzz surrounding Kingsoft Office for Linux. KSO has been gaining a rather devoted following despite it's Linux port still being in alpha and not near to release. My first familiarity with Kingsoft Office was reading about their Android offering which has had rave reviews and a devoted following. Across all platforms, people praise it for its interface and its exceptional compatibility with Microsoft Office formatted documents. So with all the buzz, rumors, and conflicting information I wanted some clear answers for myself and to share with you. On May 5th I had the opportunity to interview Jin who serves as the Chief Software Architect for +Kingsoft Office .

Before I dive right into the things we addressed in the course of our interview, I wanted to give you a brief background for Kingsoft and their office software. For brevity I'll pull from Wikipedia.
Kingsoft was founded in 1988 by the JinShan company located in Hong Kong. JinShan is a manufacturer of IBM PCs and was founded in 1973. In the late 1980s and early 1990s, Kingsoft researched and developed word processors and other office applications, such as its flagship product, Word Processing System 1.0, which launched in 1989. Today, the latest version of Kingsoft Office 2013 is a freeware office suite which includes Kingsoft Writer, Kingsoft Presentation and Kingsoft Spreadsheet. Kingsoft has established collaborative relationships with Dell, Intel and IBM.
Jin mentioned that Kingsoft has attempted Linux ports in the past (2003, 2007, 2009), which did not succeed. Kingsoft Office (the Chinese market version is called WPS) has over 10 million lines of code, making this porting effort very significant. Complicating the porting effort further is the matter that over 600 dialogs are written in Delphi which needs to be rewritten, including the chart feature which many users have bemoaned the lack of.
So why though is Kingsoft making such a powerful effort to port their flagship office suite to Linux? The reasons Jin gives are interesting. "Firstly, *Nix is a large family of operating systems. Making our product for Windows only is not a good strategy. We once depended on Delphi, and have paid a price for this. So now we say to not put all of our eggs in one basket." Once bitten twice shy, they have come to be reticent of relying on proprietary technologies. I asked about +OpenOffice.org and +LibreOffice, "These are very powerful suites, but fall short in two major areas; the interface, and compatibility with Microsoft document formats." Elaborating on their emphasis of compatibility, he stated they had four dedicated teams working on compatibility with Microsoft formats exclusively. In response to the reports I've read saying that previous versions of Kingsoft Office were based on OpenOffice, "er... It's a rumour, KSO was never based on OpenOffice."
Though these are all philosophically sound reasons, I doubted it was so simple. Certainly we could use a better office suite (I used to work in zoning and entitlements, and wasted a lot of time trying to generate complex documents in LibreOffice) and I certainly can understand being wary of vendor lock in. Jin mentioned, "Linux deals" and I pried a bit further. "Last year, we have a deal from Canonical. They want to make a business version." Canonical whom makes the +Ubuntu distribution has purchased 5 million OEM licenses in order to do this. "They need an office similar to MS Office."
I think the implications for a KSO business version from Canonical could be huge. Clearly this means Kingsoft and Canonical are gunning for the big daddy of the office, Microsoft Office. But this could also mean Canonical is looking to move into the business and enterprise desktop market putting them in direct and formidable competition with the likes of +SUSE whom has been in this arena for a long time. Also, it may imply there could be a version for the Ubuntu Phone OS which could bring their devices into a realm of mobile business that has been largely the domain of +BlackBerry. Whatever the case is, I think it's good news for +Linux users everywhere and helps bring people who weren't able to transition to Linux due to the lack of Microsoft Office in a much better position to join us.
There has been a good amount of rumor saying that Kingsoft will release the code as open source for KSO. Considering how Kingsoft has learned to shy away from proprietary lock in, it might even seem plausible. However, when asked Jin stated "Free to use and distribute. Kingsoft Office is the only profitable product for us. Open source is a very dangerous choice for us. We will however release some source of our product such as emf support, we know the Linux community needs it also." With this in mind I asked what would happen to KSO for Linux when it's ready for official release and out of testing. "KSO for Linux is based on our Pro version, having the full set of functions. We will not change it, but the name will change to Community Version." So thankfully the Linux community will still be getting Kingsoft Office Pro without any feature regressions, and still offered as free to use and distribute.
They plan to bring important features such as charting, mail merge, and the ability to embed formulas in Writer documents. However, the challenges are significant. Besides the transition from Delphi, much of KSO relies on Microsoft APIs. "And too many thing out of our control, for example; we can't input formula in Kingsoft Writer. Why? Because we buy a formula editor on Windows Version. But they can not offer a Linux version. Mail merge is similar. We can not find a good data source on Linux."
Finally I asked how we in the Linux community can help, and if there is any message they would like to convey. "We need quality assurance." "We want to thank the Linux community for their support and enthusiasm. We are not the best yet, but we are working hard on it."
P.S. To install in +openSUSE is very simple. Simply download the RPM from their site and install as you would any RPM. In my test, everything works correctly. KSO checks for updates on launch, and will prompt you to download the newest available alpha version.

Echoes from oSC’14: state of Factory and openQA

There has a been a lot of work going on regarding the stabilization of Factory. It is still ongoing process. We have a lot of submissions, Factory is moving really fast and was hard to keep stable. Over the time, there were more and more checks added to the process to make Factory more stable and usable in everyday life. Last of them being added right now are rings and openQA. You can learn more about that in the talk by our release manager coolo. It will also allow you a quick peek behind the curtain on what future will bring.
In that future, one of the core roles in making Factory stable will be played by openQA. As such it got quite some attention during openSUSE Conference 2014 in Dubrovnik. Stable Factory will not happen by itself, it need quite some work. Currently openQA is under heavy development to match the new needs. You can help improving it! The work is being coordinated in a progress.o.o project, the sources are available in a Github’s organization and there is even a talk to introduce you to the world of openQA development 
At some point, when openQA gets integrated well enough, users will be able to enjoy “almost” bug free Factory as a rolling distro. How bugfree it will be will depend on our test coverage of the distribution. What is the current state? We have basics pretty well covered, but still sometimes existing tests break and sometimes we miss more tests. If you want to help with making Factory better tested, you can get openQA running locally and start writing tests for stuff that matters to you! During a nice workshop in openSUSE Conference, Ludwig Nussel trained some geekos on how to get a local openQA running and start writing tests. Luckily, workshop was recorded so even if you missed the conference, you can watch it and start writing tests. New tests are welcome, although due to performance reasons (we want openQA to finish at some point, right?), not everything might get run every time. Even though, you can always run your own openQA instance for testing stuff that you care about and reporting to bugzilla!
Looks like there is a bright future in front of us with stable well tested Factory continually rolling forward. There is plenty of work to be done to achieve this, but progress made so far is starting to show results and we will approach the final goal faster as we get more people involved.

The Week that was oSC14

Building docker images with KIWI
I’m pleased to announce Marcus Schäfer has just made possible to build docker images with KIWI.
For those who never heard about it, KIWI is a tool which creates Linux systems for both physical and virtual machines. It can create openSUSE, SUSE and other types of Linux distributions.
Update: I changed the required version of kiwi and the openSUSE 13.1 template. Kiwi just received some improvements which do no longer force the image to include the lxc package.
Why is this important?
As you might know Docker has already its build system which provides a really easy way to create new images. However these images must be based on existing ones, which leads to the problem of creating the 1st parent image. That’s where KIWI comes to the rescue.
Indeed Kiwi can be used to build the openSUSE/SUSE/whatever docker images that are going to act as the foundation blocks of other ones.
Requirements
Docker support has been added to KIWI 5.06.87. You can find this package inside of the Virtualization:Appliances project on OBS.
Install the kiwi and the kiwi-doc packages on your system. Then go to the
/usr/share/doc/packages/kiwi/examples/ directory where you will find a simple
openSUSE 13.1 template.
Building the system
Just copy the whole /usr/share/doc/packages/kiwi/examples/suse-13.1/suse-docker-container
directory to another location and make your changes.
The heart of the whole image is the config.xml file:
<?xml version="1.0" encoding="utf-8"?>

<image schemaversion="6.1" name="suse-13.1-docker-guest">
  <description type="system">
    <author>Flavio Castelli</author>
    <contact>fcastelli@suse.com</contact>
    <specification>openSUSE 13.1 docker image</specification>
  </description>
  <preferences>
    <type image="docker" container="os131">
      <machine>
        <vmdisk/>
        <vmnic interface="eth0" mode="veth"/>
      </machine>
    </type>
    <version>1.0.0</version>
    <packagemanager>zypper</packagemanager>
    <rpm-check-signatures>false</rpm-check-signatures>
    <rpm-force>true</rpm-force>
    <locale>en_US</locale>
    <keytable>us.map.gz</keytable>
    <hwclock>utc</hwclock>
    <timezone>US/Eastern</timezone>
  </preferences>
  <users group="root">
    <user password="$1$wYJUgpM5$RXMMeASDc035eX.NbYWFl0" home="/root" name="root"/>
  </users>
  <repository type="yast2">
    <source path="opensuse://13.1/repo/oss/"/>
  </repository>
  <packages type="image">
    <package name="coreutils"/>
    <package name="iputils"/>
  </packages>
  <packages type="bootstrap">
    <package name="filesystem"/>
    <package name="glibc-locale"/>
    <package name="module-init-tools"/>
  </packages>
</image>
This is a really minimal image which contains just a bunch of packages.
The first step is the creation of the image’s root system:
kiwi -p /usr/share/doc/packages/kiwi/examples/suse-13.1/suse-docker-container \
     --root /tmp/myimage
The next step compresses the file system of the image into a single tarball:
kiwi --create /tmp/myimage --type docker -d /tmp/myimage-result
The tarball can be found under /tmp/myimage-result. This can be imported
into docker using the following command:
docker import - myImage < /path/to/myimage.tbz
The image named myImage is now ready to be used.
What’s next
In the next days I’ll make another blog post explaining how to build docker images using KIWI and the Open Build Service. This is a powerful combination which allows to achieve continuous delivery.
Stay tuned and have fun!