
 Member
 baltolkien
Calendario original para tu escritorio, Almanac Asimetric – Plasmoides para Plasma 6 (2)
ir
Tras un parón debido al salto de Qt5/KF5 a Qt6/KF6 que realizó la Comunidad KDE el pasado 28 de febrero he decidido retomar esta sección aunque renonbrándola ya que en ella solo hablaré de Plasmoides para Plasma 6. De esta forma os presento un calendario original paa tu escritorio llamado Almanac Asimetric, el segundo plasmoide de esta nueva sección que tiene muy buena pinta.
Calendario original para tu escritorio, Almanac Asimetric – Plasmoides para Plasma 6 (2)
Como he comentado en otras ocasiones, de plasmoides tenemos de todo tipo funcionales, de configuración, de comportamiento, de decoración o, como no podía ser de otra forma, de información sobre nuestro sistema como puede ser el uso de disco duro, o de memoria RAM, la temperatura o la carga de uso de nuestras CPUs.
Así que espero que le deis la bienvenida a un plasmoide creado por un viejo conocido del blog ZayronXIO que recibe el nombre de Almanac Asimetric y que nos ofrece una original forma de mostrar el calendario en nuestro fondo de pantalla ya que combina escritura horizontal para el número de día y el mes, y vertical para el día de la semana.

Y como siempre digo, si os gusta el plasmoide podéis «pagarlo» de muchas formas en la página de KDE Store, que estoy seguro que el desarrollador lo agradecerá: puntúale positivamente, hazle un comentario en la página o realiza una donación. Ayudar al desarrollo del Software Libre también se hace simplemente dando las gracias, ayuda mucho más de lo que os podéis imaginar, recordad la campaña I love Free Software Day de la Free Software Foundation donde se nos recordaba esta forma tan sencilla de colaborar con el gran proyecto del Software Libre y que en el blog dedicamos un artículo.
¿Qué son los plasmoides?
Para los no iniciados en el blog, quizás la palabra plasmoide le suene un poco rara pero no es mas que el nombre que reciben los widgets para el escritorio Plasma de KDE.
En otras palabras, los plasmoides no son más que pequeñas aplicaciones que puestas sobre el escritorio o sobre una de las barras de tareas del mismo aumentan las funcionalidades del mismo o simplemente lo decoran.
La entrada Calendario original para tu escritorio, Almanac Asimetric – Plasmoides para Plasma 6 (2) se publicó primero en KDE Blog.

Hardware failure on IPFire | Blathering
Introducción a Obsidian + Montar un Asistente Inteligente de tus datos en local en Linux Center València
Vuelven las charlas y talleres a Linux Center València, el espacio creado por Slimbook para la divulgación del Software Libre . De esta forma me complace compartir una sesión dual: Introducción a Obsidian + Montar un Asistente Inteligente de tus datos en local en Linux Center València. ¡No te lo pierdas!
Introducción a Obsidian + Montar un Asistente Inteligente de tus datos en local en Linux Center València
Ya es un clásico del blog hablar de la compañía valenciana de ensamblaje de dispositivos compatibles 100% con el Software Libre conocida como Slimbook. Tras su primera charla en octubre que inició esta nueva temporada de eventos vuelven a promocionar el Software Libre mediante actividades comunitarias que realizan en su Linux Center.

De esta forma el próximo sábado 8 de junio vamos a poder disfrutar de una sesión doble de talleres en la sede de Slimbook.
Por un lado tendremos Introducción a Obsidian, una charla a cargo de Borja López, organizador y dinamizador de comunidades tecnológicas de Valencia (WordPress y PrestaShop son dos ejemplos de ello), y consultor y desarrollador de proyectos online basados en WordPress.

Este taller está diseñado para familiarizarte con la herramienta de productividad y gestión de conocimiento llamada Obsidian. Aprenderás cómo crear y organizar notas, vincular ideas, utilizar etiquetas y aprovechar las funciones avanzadas de esta aplicación. Ideal para aquellos interesados en mejorar su flujo de trabajo personal o colaborativo
El segundo taller lleva por título Montar un Asistente Inteligente de tus datos en local y corre a cargo de Manuel S. Lemos, organizador de la comunidad WordPress Valencia (WP-Valencia), titulado como Técnico Superior en Desarrollo de Software, cuenta con dilatada experiencia en desarrollo y programación.

En este taller, aprenderás a configurar y ejecutar un asistente de chat basado en inteligencia artificial en tu propio ordenador. A diferencia de los asistentes alojados en servidores externos, este funcionará localmente, lo que significa que tus datos no se enviarán a ningún servidor remoto. Usaremos la información que hay en Obsidian para personalizarlo con tu conocimiento.
Los talleres son presenciales, por tanto no se va a retransmitir por streaming pero se colgará un resumen del curso en el canal de Youtube, varias semanas después del evento.
La información adicional que necesitas es esta:
Plazas Total: 20 (corre que suelen agotarse)
¿Curso Gratuito o de Pago?: GRATUITO gracias a SLIMBOOK y a Borja y Manuel.
Duración del evento: 4h + Preguntas y respuestas
¿Podemos retransmitirlo via streaming?: No
Localización: Linux Center (Grupo Odín). Ronda de la Química s/n Edificio ABM L’Andana, 7ª planta Frente a Parque Técnológico 46980 Paterna, Valencia
Más información: Linux Center
La entrada Introducción a Obsidian + Montar un Asistente Inteligente de tus datos en local en Linux Center València se publicó primero en KDE Blog.

openSUSE.Asia Summit 2024 Call for Speakers
We are pleased to announce that the call for speakers for openSUSE.Asia Summit 2024 started today. The event will be held on November 2 and 3 in Tokyo, Japan. Please check our announcement for more details of the event.
The openSUSE.Asia committee members are looking for the speakers who share their knowledge or experiences related to openSUSE from different avenues of life. The speakers are able to receive sponsorship from the openSUSE Travel Support Program (TSP). It is a good opportunity for you to consider applying for the proposal and participating even if you are far from Japan.
In this year, we will invite Cross-Distro Track in collaboration with other distribution communities like AlmaLinux, Debian, and Ubuntu; we will welcome talks related to those distributions.
Topics
The examples of the topics (not limited to) are as the following:
- openSUSE (e.g., Leap, Tumbleweed, Micro OS, Open Build Services, openQA, YaST)
- Desktop environments and applications (e.g., GNOME, KDE, XFCE)
- Office suite, graphic art, multimedia (e.g., LibreOffice, Calligra, GIMP, Inkscape)
- Multilingualization support (e.g., input methods, translation)
- Cloud, Virtualization, Container, and Container Orchestration (e.g., Kubernetes, Rancher)
- Package supply-chain security, vulnerability management
- Embedded and IoT
- Other applications running on openSUSE
Topics that are not related to a specific technology are also welcome. For example:
- An overview of FLOSS technologies
- Development, Quality Assurance, Translation
- Tips & Tricks, Experience stories (success or fail), Best practice
- Marketing and community management
- Education
Types of sessions
We are inviting proposals for these two types of sessions.
- Long talks with presentation (30 min. + Q&A)
- Short talks with presentation (15 min. + Q&A)
Lighting talk sessions (5 min.) will be announced later.
Schedule
- The deadline for the call for proposal documents: on August 4, 2024
- Notification to speakers: on August 26, 2024
How to submit your proposal document
Please submit your proposal to the events.opensuse.org. If you do not have a SUSE community account, please sign up from the top menu of the system before submitting your proposal document.
- You must follow the openSUSE Conference Code of Conduct.
- Your proposal needs to be written in English ranging from 130 to 250 words. It should also have a suitable title that reflects topics in your talk.
- Please check the misspelling and the wrong grammar for them before the submission by using LibreOffice, Google Docs, or Grammarly.
- Please check our guide for how to write a better proposal
- If you are not familiar with writing documents and need any help, please contact committee members in your country/region.
Requirements for your presentation
- You may use English or Japanese in speech but you need to write your documents or slides in English.
- The speaker needs to be present at the venue; prerecorded video and a video call are not to be allowed.
Warning about lodging fee in Tokyo
Nov. 4 is a public holiday this year. Thus, the hotel price is very high. We strongly recommend booking your hotel right away with a cancelable plan while rooms of budget hotels are available at appropriate prices. Please check the event site for more details.

OpenCV 4.10.0 Lançada!

A biblioteca OpenCV lançou sua versão 4.10.0. Esta ferramenta, globalmente reconhecida e aplicada em diversos setores, foi originalmente apresentada ao mundo pela Intel no ano 2000. Hoje, conta com uma comunidade de mais de 47 mil contribuidores. E fiquei muito feliz de encontrar meu nome na lista de contribuidores deste release.
Abaixo alguns itens que merecem destaques:
- Added more DNN layers with OpenVINO
- Added CuDNN 9+ support
- Added OpenVINO 2024 support
- CUDA 12.4+ support
- OneAPI 2024 support (IPP, TBB)
Mais informações: https://opencv.org/blog/opencv-4-10-0/

Amarok ha regresado, larga vida a Amarok
Aunque la primera noticia data del 2021 (KDE’s Summer Apps Update) ha sido este mes de mayo de 2024 cuando se ha hecho realidad. Amarok ha regresado por fin. Mi reproductor de música más querido y que me acompaño durante mis inicios en el mundo GNU/Linux está disfrutando de una segunda juventud gracias a un equipo de desarrolladores que han pensado, acertadamente, que este pedazo de software mercer estar en lo más alto.
Amarok, más que un reproductor de música
Okular, Konqueror, Kontact o Tellico fueron esas aplicaciones que me enamoraron en mis inicios con KDE 3.5… y a este poker de aplicaciones hay que sumarle Amarok.
Y es que hubo un tiempo que podía pasar mucho tiempo delante del ordenador escuchando música, y no había nada mejor en ningún sistema operativo que superara a Amarok como gestor y reproductor de música.
Además, las funciones extra de Amarok como su editor de etiquetas de los archivos mp3, su conexión a la Wikipedia o su gestión de letras hacía que estuviera siempre en primer plano de mi equipo.
Lamentablemente, el paso a Qt5 fue mortal para su desarrollo y nunca funcionó bien en Plasma (el nombre con el que se consolidó el escritorio de la Comunidad KDE cuando adoptó las librerías Qt5 y se creó KDE Frameworks 5).
Además, coincidió con la época en la que la música dejó de ocupar un gran tiempo de mi vida (ya que fue ocupada por otra cosa mucho más valiosa y amada).
Así que cuando volví a querer escuchar música descubrí que Amarok estaba muerto (o herido de gravedad) y empecé a buscar alternativas… y evidentemente las encontré (strawberry, clementina, elisa, vavve, etc) pero siempre eché de menos al reproductor del lobo.
Amarok ha regresado, larga vida a Amarok
Lo leí en el magnífico blog de Victorhck, que lo anunció de esta forma:
Hoy mismo (30/04/2024) último día del mes de abril de 2024, se acaba de anunciar que ya se ha publicado la versión estable 3.0 de Amarok con nombre en clave «Castaway».
Es la primera versión estable de Amarok basada en Qt5/KDE Frameworks 5, y la primera versión estable desde 2018, cuando se lanzó la versión final 2.9.0 basada en Qt4.
La noticia corrió como la polvora y traté de probarlo, pero todavía no estaba disponible de ninguna forma que no fuera compilando para mi distribución, así que me tocó esperar pues estaba inmerso en la promoción de Akademy-es 2024 de València.

En palabras de sus desarrolladores:
El camino hacia la versión 3.0 no ha sido corto. Gran parte de la migración de Qt5/KF5 ya se realizó en 2015, pero terminar y pulir todo ha sido un proceso lento, a veces continuo y a veces estancado desde entonces.
La versión 3.0 Alpha se lanzó en febrero de 2021 y desde entonces ha sido usado y probado por muchas personas, al igual que las compilaciones más recientes de git master disponibles para varias distribuciones. En los últimos meses, se hizo un esfuerzo para tener todo listo para una versión 3.0 adecuada.
Los casos de uso comunes deberían funcionar bastante bien y, además de corregir las regresiones relacionadas con KDE Frameworks 5 reportadas en las versiones preliminares.
Y, a continuación, comentan que hay mucho trabajo por hacer y cosas rotas por culpa del cambio en las APIS de muchos servicios de terceros, pero que se espera ir poco a poco, hasta llegar a la madurez para dar el salto a a Qt6/KDE Frameworks 6, con el objetivo de tener una versión beta utilizable basada en Qt6/KF6 en 2024.

Recientemente, es decir ayer, fue publicada la primera revisión seria de Amarok 3, la 3.0.1, que ofrece algunas pequeñas mejoras, y lo más importante para mi, la posibilidad de instalarlo vía flatpak-beta, tal y como nos vuelve a explcar Victorhck, algo que ya he realizado. Mientras escribo estas líneas Amarok está ofreciéndome sus servicios. No puedo estar más que feliz.
El regreso de este reproductor multimedia supone un vuelta a mis orígenes linuxeros y aunque veo que falta mucho por hacer ya que se debe adaptar todavía un poco a los nuevos estilos visuales predominantes en Plasma, su funcionamiento es, de momento, exquisito.
¡Larga vida a Amarok!
La entrada Amarok ha regresado, larga vida a Amarok se publicó primero en KDE Blog.
Recopilación del boletín de noticias de la Free Software Foundation – junio de 2024
Recopilación y traducción del boletín mensual de noticias relacionadas con el software libre publicado por la Free Software Foundation.

La Free Software Foundation (FSF) es una organización creada en Octubre de 1985 por Richard Stallman y otros entusiastas del software libre con el propósito de difundir esta filosofía, frente a las restricciones y abusos a los usuarios por parte del software privativo.
La Fundación para el software libre (FSF) se dedica a eliminar las restricciones sobre la copia, redistribución, entendimiento, y modificación de programas de computadoras. Con este objeto, promociona el desarrollo y uso del software libre en todas las áreas de la computación, pero muy particularmente, ayudando a desarrollar el sistema operativo GNU.
Mensualmente publican un boletín (supporter) con noticias relacionadas con el software libre, sus campañas, o eventos. Una forma de difundir los proyectos, para que la gente conozca los hechos, se haga su propia opinión, y tomen partido si creen que la reivindicación es justa!!
- En este enlace podéis leer el original en inglés: https://www.fsf.org/free-software-supporter/2024/june
- Y traducido en español (cuando el equipo de traducción lo tenga disponible) en este enlace: https://www.fsf.org/free-software-supporter/2024/junio

Puedes ver todos los números publicados en este enlace: http://www.fsf.org/free-software-supporter/free-software-supporter
Después de muchos años colaborando en la traducción al español del boletín, desde inicios del año 2020 decidí tomarme un descanso en esta tarea.
Pero hay detrás un pequeño grupo de personas que siguen haciendo posible la difusión en español del boletín de noticias de la FSF.
¿Te gustaría aportar tu ayuda en la traducción y colaborar con la FSF? Lee el siguiente enlace:
Por aquí te traigo un extracto de algunas de las noticias que ha destacado la FSF este mes de junio de 2024.
Todas las escuelas de lengua italiana del Tirol del Sur migraron al software libre
Del 20 de mayo por Paolo Dongilli
El proyecto Free Upgrade for a Digitally Sustainable School (FUSS o en español Actualización libre para una escuela digitalmente sostenible) logró la migración de las escuelas públicas italianas del Tirol del Sur al software libre.
Para ello, el Proyecto FUSS desarrolló una distribución GNU/Linux completa llamada FUSS, una solución de servidores, clientes y escritorios basada en Debian para gestionar toda una red escolar.
La elección de utilizar software libre fue una elección ética y política basada en los valores de la libertad informática, el acceso a la información y el intercambio de conocimientos. En este artículo, puedes leer sobre el proyecto, los resultados y lo que otras escuelas pueden aprender de la experiencia del Proyecto FUSS al migrar al software libre.
Se anuncian los ganadores de los premios Free Software Awards: Bruno Haible, code.gouv.fr, Nick Logozzo
Del 4 de mayo
La FSF anunció los ganadores de los Premios al Software Libre 2023, que se otorgan anualmente en la conferencia LibrePlanet de la FSF a grupos e individuos de la comunidad del software libre que han hecho contribuciones significativas a la causa de la libertad del software.
Los ganadores de los premios de este año fueron Bruno Haible, Nick Logozzo y la Unidad Francesa de Software Libre del gobierno francés. Lee el anuncio e inspírate con estos proyectos:
Los fiscales de Georgia avivan los temores sobre el uso de mensajería cifrada y Tor
Del 20 de mayo por Bill Budington y José Martinez
En una acusación contra los activistas de Defend the Atlanta Forest en Georgia, los fiscales estatales arrojaron sospechas sobre el uso de mensajería cifrada y Tor por parte de los acusados.
Utiliza el cifrado y demuestra que resistirse a la vigilancia masiva no es un acto sospechoso, sino simple defensa propia. Nuestra guía de autodefensa del correo electrónico puede ayudarte a enviar y recibir correos electrónicos cifrados.
- https://www.eff.org/deeplinks/2024/05/georgia-prosecutors-stoke-fears-over-use-encrypted-messengers-and-tor
- https://emailselfdefense.fsf.org/es

Estas son solo algunas de las noticias recogidas este mes, ¡¡pero hay muchas más muy interesantes!! si quieres leerlas todas (cuando estén traducidas) visita este enlace:
Y todos los números del «supporter» o boletín de noticias de 2024 en español, francés, portugués e inglés aquí:

—————————————————————
Publicado Amarok 3.0.1
Se acaba de publicar Amarok 3.0.1, el mítico reproductor de música de KDE, con más correcciones de errores, más mejoras y más cariño

El pasado 30 de abril de 2024 podías leer en el blog que se publicaba la versión 3.0 de Amarok, el reproductor de música de la comunidad KDE con una larga historia detrás.
Y este 2 de junio de 2024 las personas que han vuelto a dar nueva vida al reproductor de música Amarok han publicado la primera de las versiones que corrigen errores y añaden algunas nuevas funcionalidades. Veamos las novedades.
Este Amarok 3.0.1 presenta una serie de pequeñas mejoras y correcciones de errores, la solicitud de función más antigua que se ha implementado, se remonta a 2010. Nunca es tarde…
El applet de Wikipedia, las cadenas de interfaz de usuario y la generación de listas de reproducción y el filtrado de colecciones se encuentran entre los componentes que han recibido múltiples mejoras en esta versión.
Los esfuerzos para pulir aún más la versión Qt5/KF5, y seguir haciendo limpieza y preparativos que acerquen una versión Qt6/KF6, han sido continuos y continuarán.
Así que paciencia y si quieres puedes aportar tus conocimientos y contribuir en el desarrollo. Ya sea reportando bugs, aportando ideas (yo mismo hice una sugerencia), corrigiendo código, etc…
Veamos qué cambios y nuevas funcionalidades se han añadido desde la versión 3.0:
- Se añadió una opción para copiar la imagen al portapapeles en el applet de Wikipedia y una notificación en la que se puede hacer clic si se hace clic en un enlace que no es de Wikipedia.
- Se añadió una opción para seleccionar si el artista de la pista se muestra para las entradas en varios artistas / diferentes artistas del álbum en el navegador contextual.
- Indicar qué opción de búsqueda está activa en el applet de Wikipedia
- Amarok ahora depende de KDE Frameworks 5.78.
- Mejora de textos en la interfaz del usuario
- Reducir el uso de la CPU minimizando/ocultando el analizador y otros componentes
- Evitar que el volumen se ajuste a 0 cuando se detenga la reproducción de phonon-vlc
- Correcciones de eliminación de pistas duplicadas de listas de reproducción
Ya puedes disfrutar de estas mejoras instalando el reproductor mediante Faltpak disponible en Flatpak-beta o cuando llegue a los repositorios de tu distribución de GNU/Linux.
Mi enhorabuena a quienes están haciendo que Amarok recupere su esplendor y puliendo aquello que era necesario para seguir manteniendo un software de calidad y que he recuperado como aplicación para escuchar mi música.
Enlaces de interés
- https://blogs.kde.org/2024/06/02/amarok-3.0.1-released/
- https://invent.kde.org/multimedia/amarok
- https://bugs.kde.org/describecomponents.cgi?product=amarok

esLibre en Café con la OfiLibre de la Universidad Rey Juan Carlos
El 24 y 25 de mayo se celebró el mayor evento de la Asociación KDE España, Akademy-es, integrado a la prefección (ahora sí puedo decirlo sin temor a decir ninguna mentira) con esLibre, el encuentro de personas interesadas en la divulgación de la cultura libre y las tecnologías libres, tanto en forma de software libre como en forma de hardware libre, así como de las comunidades que hacen esto posible.
esLibre en Café con la OfiLibre de la Universidad Rey Juan Carlos
Una de las cosas que me llevo de la pasada edición de esLibre fue conocer un poco mejor algunas de las Oficinas del Software Libre que existen en España, y que espero que también existan en otros países.
Asistí a una conferencia donde cuatro de estas oficinas realizaron un coloquio donde contaron su historia, sus acciones, sus fortalezas y, muy interesante, sus limitaciones y debilidades.
A parte de aprender mucho, esto me ha acercado a algunas que no tenía en el radar como es las OfiLibre de la Universidad Juan Carlos, que es como se llama allí la Oficina del Software Libre.
Pues bien, creo que al día siguiente de estar en el evento sus integrantes decidieron que sería buena idea hablar del evento y realizaron un pequeño video podcast.
Esta es su descipción del capítulo dedicado al evento:
Hemos estado en el VI congreso de EsLibre en Valencia y te lo contamos
Hoy charlamos sobre el último viaje que realizó el equipo de la OfiLibre: esLibre 2024. Este congreso, único en su especia, es un encuentro de personas interesadas en la divulgación de la cultura libre y las tecnologías libres, tanto en forma de software libre como en forma de hardware libre, así como de las comunidades que hacen esto posible.
¡Es por ello que la OfiLibre no podía perdérselo!
¡Anímate y ahonda un poco más sobre este tema de la mano de la OfiLibre!
Y dicho y hecho, me he puesto a ver el vídeo y creo que vosotros también deberíais.
Más información: Universidad Rey Juan Carlos (UJC)
¿Qué es esLibre?
La respuesta más secilla a esta pregunta es uno de los más grandes eventos comunitarios, en su acepción más general, del Software Libre de España ya que reune a gente de toda la península e islas de todo tipo de proyectos: grandes, pequeños, veteranos, incipientes, etc.
No obstante, siempre está bien recoger las palabras formales de sus organizadores:
esLibre es un encuentro de personas interesadas en la divulgación de la cultura libre y las tecnologías libres, tanto en forma de software libre como en forma de hardware libre, así como de las comunidades que hacen esto posible.
Hasta este 2024 ya son 6 las ediciones realizadas, desde la primera del 2019 en Granada hasta la penúltima del 2023 en Zaragoza, pasando por las ediciones virtuales del 2020 y 2021.
¿Qué es Akademy-es?
Akademy-es (#akademyes, que es la etiqueta para las redes sociales) es evento más importante para los desarrolladores y simpatizantes de KDE, que se ha ido celebrando desde el 2006 con éxito creciente.
En general, las Akademy-es son el lugar adecuado para conocer a los desarrolladores, diseñadores, traductores, usuarios y empresas que mueven este gran proyecto.
En ellas se realizan ponencias, se presentan programas, se hace un poco de caja para los proyectos libres (camisetas, chapas, etc) pero sobre todo se conoce a gente muy interesante y se cargan baterías para el futuro.
Podéis repasar las anteriores ediciones en estas entradas del blog:
- Camino Akademy-es 2013: Las anteriores ediciones (I): 2006 – 2008
- Camino Akademy-es 2013: Las anteriores ediciones (II): 2009-2010
- Camino Akademy-es 2013: Las anteriores ediciones (III): 2011-2012
- Anteriores ediciones de Akademy-es (IV): 2013 y 2014
La entrada esLibre en Café con la OfiLibre de la Universidad Rey Juan Carlos se publicó primero en KDE Blog.
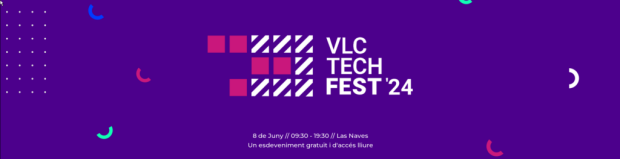
VLC FEST Tech 2024, sábado 8 de junio
Los eventos relacionados con el Software Libre no paran en València. Os invito a asistir a VLC FEST Tech 2024, que se celebrará el próximo sábado 8 de junio en Las Naves, sede de la recienste esLibre y Akademy-es. Un evento dirigido a professionales y estudiantes de tecnología pero abierto a todo el mundo que sea entusiasta en la tecnología (que en mi opinión debería ser todo el mundo).
VLC FEST Tech 2024, sábado 8 de junio
Que València se ha convertido en uno de los motores del movimiento del Conocimiento Libres es ya un hecho. Y para demostrarloos invito a asisitr al próximo evento que tenemos en el radas: VLC FEST TECH 2024.
En palabras de sus organizadores
És un dia de xarrades per i per a les comunitats tecnològiques de la Comunitat Valenciana. És un dia per descobrir, connectar i compartir.
Un format de conferència amb diversos tracks simultanis amb xarrades per a tots els gustos, amb temps per a preguntes i espai per al networking.
Un festival on el focus està en la participació, per la qual cosa és un esdeveniment gratuït i d’accés lliure sense entrada fins a completar l’aforament. La primera edició del 2018 va ser tot un èxit i més de 120 assistents van passar per VLCTechFest.
Durant els anys 2020 i 2021, a causa de la pandèmia global per coronavirus, es va veure obligat a suspendre l’esdeveniment. L’última edició va ser la del 2022 i ara tornen amb energies renovades disposades a reprendre-ho on ho van deixar.
Es un día de charlas por y para las comunidades tecnológicas de la Comunidad Valenciana. Es un día para descubrir, conectar y compartir.
Un formato de conferencia con varios *tracks simultáneos con charlas para todos los gustos, con tiempos para preguntas y espacio para el *networking.
Un festival donde el foco está en la participación, por lo cual es un acontecimiento gratuito y de acceso libre sin entrada hasta completar el aforo. La primera edición del 2018 fue todo un éxito y más de 120 #asistente pasaron por VLCTechFest.
Durante los años 2020 y 2021, a causa de la pandemia global por coronavirus, se vio obligado a suspender el acontecimiento. La última edición fue la del 2022 y ahora vuelven con energías renovadas dispuestas a retomarlo donde lo dejaron.
De esta forma, ¿qué podemos esperar de este evento?
Ponencias: expertos de reconocida trayectoria compartirán sus perspectivas sobre el futuro de la tecnología y su aplicación en diferentes ámbitos.
Talleres: Sesiones prácticas donde podréis aprender nuevas habilidades y técnicas de la mano de profesionales.
Espacios de Networking: Zonas dedicadas a conocer otros #asistente, intercambiar ideas y establecer contactos profesionales.
Exhibiciones de Productos: Una área de exposición
Más información: VLC Fest Tech
La entrada VLC FEST Tech 2024, sábado 8 de junio se publicó primero en KDE Blog.