Member
 Victorhck
Cómo mostrar en #Linux un calendario en la terminal
Vamos a echar un vistazo a la utilidad cal de Linux que nos muestra un calendario en nuestra terminal

Al empezar el año, es común hacerse con un nuevo calendario para colgar en nuestras casas. Pero quienes usamos GNU/Linux tenemos el comando cal para mostrar un calendario en nuestra terminal.
El comando cal apareció por primera vez en la versión 6 de AT&T Unix y ahora forma parte del paquete de utilidades de Linux. Vamos a ver algunas de sus opciones.
La opción más sencilla es ejecutar el comando sin ninguna opción, lo que nos mostrará el mes actual resaltando el día del mes en el que nos encontremos:
cal
     enero 2024
lu ma mi ju vi sá do
 1  2  3  4  5  6  7
 8  9 10 11 12 13 14
15 16 17 18 19 20 21
22 23 24 25 26 27 28
29 30 31
También podemos ejecutar el comando y pedir que nos muestre un mes en concreto del año actual. Podemos pasarle el mes que queremos bien con un número del 1 al 12 o mediante la abreviatura del nombre. Por ejemplo para noviembre podríamos hacerlo de cualquiera de esta manera:
cal 11
cal nov
Si queremos ver el contexto del mes actual, el anterior y el posterior, podemos ejecutar cal -3 que nos mostrará esos tres meses.
Para hacer que muestre el primer día de la semana en domingo, podemos utilizar la opción cal -s o --sunday en la versión larga de la opción. Si queremos que muestre el lunes como inicio (la opción predeterminada) lo haremos con cal -m o --monday
También podemos hacer que en vez de en horizontal se muestren los meses en vertical mediante cal -v
cal -v
    enero 2024
lu  1  8 15 22 29
ma  2  9 16 23 30
mi  3 10 17 24 31
ju  4 11 18 25
vi  5 12 19 26
sá  6 13 20 27
do  7 14 21 28
Algo que me parece muy útil es la opción de poder hacer que también muestre el número de la semana en el calendario, mediante cal -w
      enero 2024
   lu ma mi ju vi sá do
 1  1  2  3  4  5  6  7
 2  8  9 10 11 12 13 14
 3 15 16 17 18 19 20 21
 4 22 23 24 25 26 27 28
 5 29 30 31
También podemos mostrar el calendirio de todo el año añadiendo el año que queremos mostrar. O una fecha en concreto. Por ejemplo, saber qué día era el día de nuestro cumpleaños:
cal 1 12 1975
   diciembre 1975
lu ma mi ju vi sá do
 1  2  3  4  5  6  7
 8  9 10 11 12 13 14
15 16 17 18 19 20 21
22 23 24 25 26 27 28
29 30 31
Con la opción cal -j nos mostrará no el día del mes, si no el día del año ordinal del mes. Es decir, si es el día 30, 43, o 321 del año.
cal -j feb
        febrero 2024
lun mar mié jue vie sáb dom
             32  33  34  35
 36  37  38  39  40  41  42
 43  44  45  46  47  48  49
 50  51  52  53  54  55  56
 57  58  59  60
Como curiosidad vemos que se utilizan dos sistemas de calendario diferentes, gregoriano y juliano. Estos son sistemas casi idénticos con el gregoriano haciendo un pequeño ajuste en la frecuencia de los años bisiestos; esto facilita una mejor sincronización con eventos solares como los equinoccios.
La reforma del calendario gregoriano se introdujo en 1582, pero su adopción continuó hasta 1923. Por defecto, cal utiliza la fecha de adopción del 3 de septiembre de 1752. A partir de esa fecha se muestra el calendario gregoriano;
Las fechas anteriores utilizan el sistema de calendario juliano. Se eliminaron 11 días en el momento de la adopción para sincronizar el calendario con los eventos solares. Entonces, septiembre de 1752 tiene una mezcla de fechas julianas y gregorianas en las que al 2 le sigue el 14 (del 3 al 13 están ausentes).
Para más información ejecuta el comando man cal y verás estas y algunas opciones más que ofrece el comando cal.


Project to have Workshop for Mentorship Application
The openSUSE Project will have a workshop on Jan. 16 at 15:30 UTC on meet.opensuse.org/meeting that will focus on this year’s Google Summer of Code application and mentorship efforts.
The openSUSE Project has a long tradition of participating in GSoC and community members that want to participate as a mentor should attend or update their project they want listed on 101.opensuse.org by opening up an issue on openSUSE’s GitHub Mentoring project.
The workshop will follow the openSUSE community meeting to determine the amount of projects can be listed for this year’s application, which is open between Jan. 22 and Feb 6.
The workshop will give mentors and people who would like to get involved with mentoring enough time to describe several project ideas before the administrators submit the GSoC application.
Participants are encouraged to create an outline of some project ideas before the workshop on the event’s etherpad.
Mentors and administrators who participated in previous Google Summer of Code programs will attend the workshop.
Cuarto audio de Podcast Linux «Amor de Distro Madre» – Podcast Linux #4
Aunque el proyecto Podcast Linux está parado esto no significa que no tenga cabida en el blog y, mientras pueda, seguirépromocionándolo con la esperanza de que reviva, como cierto pájaro mitológico. Y he pensado hacerlo de una forma sencilla para mi y creo que benificiosa para todas, creando poco a poco un índice de todas sus emisiones, de forma que podamos encontrar en este blog una alternativa a su magnífica obra. Así que bienvenidos al cuarto audio de Podcast Linux, «Amor de Distro Madre» y que, aunque estoy seguro que al bueno de Juan le dará un poco de reparo que lo promocione dado que nuestros primeros trabajos suelen ser de menor calidad es un perfecto ejemplo de que si quieres llegar a hacer las cosas bien tienes que atreverte a hacerlas no tan bien.
Cuarto audio de Podcast Linux «» – Podcast Linux #4

Como los lectores del blog sabrán hace un tiempo Podcast Linux cerró sus emisiones por motivos que solo incumben a su creador. Desde el blog no quiero dejar que su recuerdo se desvanezca así que seguiré publicitando sus audios ya que su calidad no debe caer en el olvido.
Hace poco decidí empezar por el principio, mostrando su primer audio, el cual no promocioné en su día. Lo mismo ocurría con los siguientes, y, si las búsquedas no me engañan no fue hasta los episodios 19, 20, 21 y 22 cuando empecé a hacerlo.
De esta forma continuo con su cuarto audio que, en palabras de Juan, se nos presentaba así:
Muy buenas Linuxeros. Bienvenido a un episodio más de Podcast Linux.
Mi nombre es Juan Febles y este es mi proyecto más personal con el que quiero acercar el mundo GNU/Linux a los usuarios domésticos de sistemas operativos de escritorio.Gestor de Arranque: Resumen del episodio
En el Núcleo Kernel te hablaré de las distros madres, fundamental para entender el universo GNU/Linux.
En el Gestor de Paquetes daremos paso a OBS Studio, un programa multiplataforma de software libre para la grabación de vídeo y streaming en vivo.
https://obsproject.com/El invitado de Comunidad Linux es Yoyo Fernández, blogero, podcaster y youtuber linuxero.
@yoyo308
https://salmorejogeek.com
Más información: Podcast Linux
Sigue a Podcast Linux
Aprovecho para animaros a seguir Podcast Linux en algunos de los canales de comunicación que tiene:
- Twitter: https://twitter.com/podcastlinux
- Mastodon: https://mastodon.social/@podcastlinux/
- Correo: podcastlinux@disroot.org
- Web: https://podcastlinux.com/
- Telegram: https://t.me/podcastlinux
- Telegram Juan Febles: https://t.me/juanfebles
- Youtube: https://www.youtube.com/PodcastLinux
- Feed Podcast Linux: https://podcastlinux.com/feed
- Feed Linux Express (Audios Telegram): https://podcastlinux.com/Linux-Express/feed
La entrada Cuarto audio de Podcast Linux «Amor de Distro Madre» – Podcast Linux #4 se publicó primero en KDE Blog.

Música para Carnaval criada com IA

Estou lançando o que pode ser o primeiro hit de carnaval em português do Brasil criado por inteligência artificial. Esta música reflete um aspecto contemporâneo do comportamento humano: a tendência de capturar e compartilhar momentos através de selfies, e a expectativa de receber curtidas em troca. Esta prática se tornou uma característica marcante da nossa sociedade digital.
Vivemos em uma era de mudanças sem precedentes, descrita como o momento mais disruptivo para a humanidade. As inovações tecnológicas estão abrindo portas para novas oportunidades e um significativo aumento na produtividade. Estas transformações estão redefinindo como vivemos e trabalhamos.
Um dos maiores benefícios desta era tecnológica é a contribuição da inteligência artificial para melhorar nossa qualidade de vida. A IA está cada vez mais capacitada para assumir tarefas repetitivas, liberando os seres humanos para se dedicarem a atividades mais criativas e significativas. Este avanço promete não apenas mais eficiência, mas também uma nova forma de experienciar o mundo.
Clique na imagem abaixo para ouvir a música
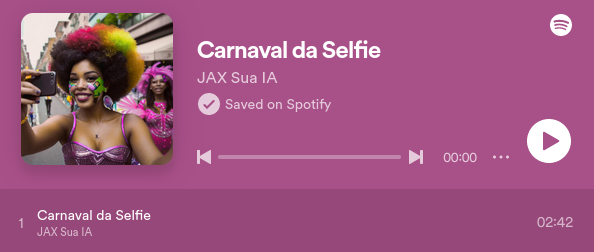
Em breve estará disponível JAX: A nossa IA!
Música para Carnaval criada 100% com IA

Estou lançando o que pode ser o primeiro hit de carnaval em português do Brasil criado por inteligência artificial. Esta música ( Carnaval da Selfie ) reflete um aspecto contemporâneo do comportamento humano: a tendência de capturar e compartilhar momentos através de selfies, e a expectativa de receber curtidas em troca. Esta prática se tornou uma característica marcante da nossa sociedade digital.
Vivemos em uma era de mudanças sem precedentes, descrita como o momento mais disruptivo para a humanidade. As inovações tecnológicas estão abrindo portas para novas oportunidades e um significativo aumento na produtividade. Estas transformações estão redefinindo como vivemos e trabalhamos.
Um dos maiores benefícios desta era tecnológica é a contribuição da inteligência artificial para melhorar nossa qualidade de vida. A IA está cada vez mais capacitada para assumir tarefas repetitivas, liberando os seres humanos para se dedicarem a atividades mais criativas e significativas. Este avanço promete não apenas mais eficiência, mas também uma nova forma de experienciar o mundo.
Clique na imagem abaixo para ouvir a música
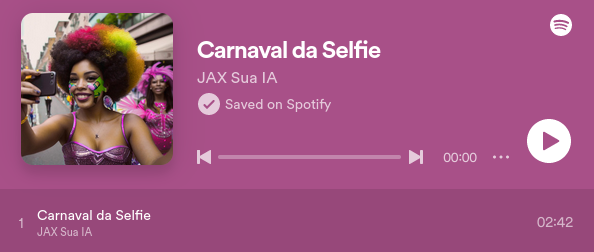
Em breve estará disponível JAX: A nossa IA!

Comment Détecter si Vous Avez été Bloqué sur WhatsApp : Guide Pas à Pas
WhatsApp est l’une des applications de messagerie les plus populaires au monde, mais parfois, il peut être difficile de savoir si quelqu’un vous a bloqué. Dans cet article, nous allons examiner les signes qui indiquent que vous avez été bloqué sur WhatsApp, ainsi que la manière de bloquer ou débloquer un numéro. Que vous ayez des doutes sur votre statut de blocage ou que vous souhaitiez simplement en savoir plus sur le sujet, cet article vous guidera à travers les réponses que vous cherchez.
Les 7 signes qui montrent qu’on vous a bloqué sur WhatsApp
Le premier signe qui suggère que vous avez été bloqué sur WhatsApp est l’absence de la photo de profil de la personne concernée. Lorsque vous ne pouvez pas voir la photo de profil d’un contact avec lequel vous étiez auparavant en contact, cela peut indiquer un blocage. De plus, si vous ne pouvez pas voir le statut de connexion de cette personne, cela signifie probablement que vous avez été bloqué.
Un autre signe est que vous ne pouvez pas voir le statut du profil de la personne en question. Si vous aviez l’habitude de voir son statut, mais que celui-ci a subitement disparu, il est possible que vous ayez été bloqué. De plus, si vos messages ne sont pas délivrés à cette personne, cela signifie généralement que vous avez été bloqué. Vous pouvez également vérifier si vos appels ne sont pas complétés ou si vos appels aboutissent directement à la messagerie vocale.
Comment bloquer ou débloquer un numéro sur WhatsApp ?
Si vous soupçonnez que quelqu’un vous a bloqué sur WhatsApp et que vous souhaitez bloquer ou débloquer un numéro, voici comment procéder :
- Ouvrez WhatsApp et allez dans la section des « Paramètres ».
- Appuyez sur « Compte » puis « Confidentialité ».
- Sélectionnez « Bloqués » pour voir la liste des contacts bloqués.
- Appuyez sur « Ajouter nouveau » pour bloquer un contact.
- Pour débloquer un contact, appuyez sur son nom dans la liste des contacts bloqués et sélectionnez « Débloquer ».
En suivant ces étapes simples, vous pourrez bloquer ou débloquer un numéro sur WhatsApp en toute facilité.
En bref : avez-vous été bloqué sur WhatsApp ?
Si vous pensez que vous avez été bloqué sur WhatsApp, les signes peuvent être subtils mais identifiables. L’absence de photo de profil, de statut de connexion, ou de statut du profil peuvent indiquer que vous avez été bloqué. De plus, si vos messages ne sont pas délivrés et que vous ne parvenez pas à passer des appels à cette personne, il est possible que vous ayez été bloqué. En gardant ces signes à l’esprit, vous pourrez mieux évaluer la situation et agir en conséquence sur WhatsApp.
Bloqué sur WhatsApp : comment le savoir ?
Savoir si vous avez été bloqué sur WhatsApp n’est pas toujours évident, mais en gardant un œil sur les signes mentionnés précédemment, vous pourrez mieux évaluer la situation. Il est important de se rappeler que les blocages sur WhatsApp ne sont pas toujours personnels et peuvent être le reflet de diverses circonstances. Dans tous les cas, être conscient des signes de blocage peut vous aider à gérer vos contacts sur WhatsApp de manière plus informée.
L’absence de photo de profil
L’absence de photo de profil d’un contact peut indiquer que vous avez été bloqué sur WhatsApp. Si la photo de profil était précédemment visible et qu’elle a disparu subitement, cela peut être un signe de blocage. Dans ce cas, il est conseillé de respecter la vie privée de cette personne et de ne pas tenter de la contacter par d’autres moyens.
Aucun statut de connexion
Lorsque vous ne pouvez pas voir le statut de connexion d’un contact sur WhatsApp, il peut s’agir d’un signe que vous avez été bloqué. Cette absence de statut de connexion peut être un indicateur supplémentaire de blocage, surtout si vous étiez auparavant en mesure de le voir.
Pas de statut du profil
Si un contact avait l’habitude de publier un statut sur son profil, mais que celui-ci a subitement disparu, cela peut signifier que vous avez été bloqué sur WhatsApp. La disparition du statut du profil peut indiquer un retrait volontaire de l’accès aux informations personnelles pour éviter tout contact indésirable.
Messages pas délivrés
Lorsque vos messages ne parviennent pas à être délivrés à un contact sur WhatsApp, cela peut être un signe que vous avez été bloqué. Les messages non délivrés peuvent indiquer que la communication avec cette personne a été interrompue de façon intentionnelle.
En résumé : suis-je bloqué sur WhatsApp ?
Si vous soupçonnez que vous avez été bloqué sur WhatsApp, il est important de garder à l’esprit les signes qui peuvent indiquer un blocage. L’absence de photo de profil, de statut de connexion, ou de statut du profil, ainsi que les messages non délivrés, peuvent être des indices. En étant attentif à ces signes, vous pourrez mieux évaluer la situation et agir en conséquence sur WhatsApp.
Articles similaires
Si le sujet vous intéresse, vous pourriez également être intéressé par les articles suivants :
- Appels groupés sur WhatsApp: voici comment ça marche
- Récupérer des conversations WhatsApp: instructions étape par étape
- Réinstaller WhatsApp sans perdre ses données
Résumé du contenu
| Section | Contenu |
|---|---|
| Les 7 signes qui montrent qu’on vous a bloqué sur WhatsApp | Présence des signes de blocage tels que l’absence de photo de profil et de statut de connexion, ainsi que des messages non délivrés. |
| Comment bloquer ou débloquer un numéro sur WhatsApp ? | Étapes pour bloquer ou débloquer un contact sur WhatsApp. |
| En bref : avez-vous été bloqué sur WhatsApp ? | Récapitulatif des signes de blocage à surveiller sur WhatsApp. |
| Bloqué sur WhatsApp : comment le savoir ? | Conseils pour évaluer la possibilité d’avoir été bloqué sur WhatsApp. |
| Articles similaires | Renvoi vers d’autres articles connexes sur WhatsApp. |
[‘Leçons apprises’]
En observant attentivement les signes de blocage sur WhatsApp, vous pourrez mieux comprendre la situation et agir de manière appropriée. Il est important de respecter la vie privée des autres utilisateurs et de gérer vos contacts de manière respectueuse, en tenant compte des indications de blocage lorsque cela est nécessaire.
FAQ
Comment savoir si on est bloqué sur WhatsApp sans envoyer de message ?
Il existe quelques indices: si vous ne pouvez plus voir la photo de profil, l’heure de dernière connexion, les mises à jour de statut de la personne ou si vos appels ne passent pas, alors il est possible que vous soyez bloqué. Cependant, WhatsApp a conçu son système de blocage pour être discret, il est donc difficile d’en être certain sans envoyer de message.
Comment savoir si on est bloqué ?
Généralement, on sait qu’on est bloqué lorsqu’on ne reçoit plus de messages ou de notifications de la personne concernée, qu’on ne peut plus voir ses activités en ligne ou qu’on ne peut plus lui envoyer de messages ou de demandes d’amis sur les réseaux sociaux.
L’article Comment Détecter si Vous Avez été Bloqué sur WhatsApp : Guide Pas à Pas est apparu en premier sur Astuces Tech.
Año nuevo, ¿blog nuevo?
Arranca el año 2024 y quiero escuchar a quienes leéis o visitáis este blog de manera habitual o esporádica

No, a pesar del título del artículo no estoy pensando en abrir otro blog. Pero sí estaba pensando que igual con el año nuevo podía darle un nuevo aspecto al blog… y quería conocer vuestra opinión al respecto.
Permitidme este «meta-artículo» del blog escribiendo sobre el blog.
Desde el año pasado ha habido una tendencia a la baja en cuanto a visitas al blog. Aunque nunca he tenido grandes estadísticas en las visitas, últimamente están cayendo y realmente no sé el motivo.
La principal motivación de publicar no son las visitas, pero me resulta curioso. No habrá cambios en la línea del blog en cuanto a publicaciones para atraer visitas. Seguiré escribiendo sobre lo que me guste independientemente de si es tendencia o no.
Pero me lleva a pensar varias cosas. Una de ellas es al tema del blog. Así que os pregunto a quienes visitáis el blog:
¿Os gusta el tema de colores? Personalmente me gustan los fondos oscuros (por eso uso y dono al complementeo DarkReader), pero no sé si se os hace cómodo leer así el blog con ese esquema de colores.
¿Os gusta el tema en general? Uso el tema de wordpress llamado Independent Publisher 2, por su minimalismo. Centrado en el texto y sin florituras.
Eso sí, he configurado la barra lateral con alguna información. Pero no quiero que distraiga o sobrecargue el contenido.
¿Cómo leéis normalmente el blog? Me gustaría saber si mayoritáriamente lo leéis visitando el blog de manera asídua, si lo seguís por correo, si seguís los feeds o el canal de Telegram y no visitáis el blog (eso explicaría el descenso del número de visitas).
En definitiva, conocer un poco a quienes queráis compartirlo, cual es vuestro hábito a la hora de leer este blog porque os parece más cómodo.
Creo que nada más, excepto por supuesto saber si tenéis alguna sugerencia. No digo que la vaya a implementar, pero sí que será escuchada y evaluaré si merece la pena.
Desde luego no se puede agradar a todo el mundo, ni lo pretendo. Pero sí está bien saber qué opina quien te lee al otro lado del hilo de internet.
Gracias por vuestro tiempo, y seguiré en la brecha mientras haya ganas y tiempo.

Novedades de Krita 5.2, vídeo de Ramón Miranda
Hoy os traigo una nueva obra de Ramón Miranda que lleva por título «Novedades de Krita 5.2» donde nos explica las nuevas funcionalidades que nos ofrece este maravillosa aplicación destinada avanzadas de Krita necesarias si quieres dominar la creación de texturas. Y para hacerlo nada mejor que hacerlo mediante un vídeo donde nos explica todas las opciones.
Novedades de Krita 5.2, vídeo de Ramón Miranda

Estas entradas ya son un clásico del blog los vídeos de Ramón Miranda y el fabuloso Krita. Ya han aparecido en esta bitácora 10 trucos para Krita, pintando con Krita el «Tajo de Ronda», perspectiva con Krita y cómo grabar con Krita así que no es de extrañar que esta serie siga creciendo, como es el caso de hoy en el que os presento hoy.
En sus propias palabras:
NUEVO AÑO 2024 ¡Allá vamos con la máxima potencia! Descubre en profundidad algunas de las novedades incluidas en Krita 5.2. Si quieres más entra en https://krita.org/en/krita-5-2-releas… y disfruta.
El vídeo tiene subtítulos en inglés para la gente con discapacidad auditiva y está separado en partes ya que los tiempos están en la descripción de Youtube. No obstante, para el que solo quiera ver el vídeo lo pongo abajo
Recuerdo bien a Ramón Miranda, al cual tuve el gusto de conocer en la Akademy y Akademy-es de 2013 de Bilbao, y que sigue promocionando Krita con su maravilloso trabajo.
Más información: Krita
¿Qué es Krita?
Para los que no lo sepan, Krita es el software de pintura digital e ilustración basado en las librerías de la plataforma KDE que antes estaba incluido en Calligra Suite.
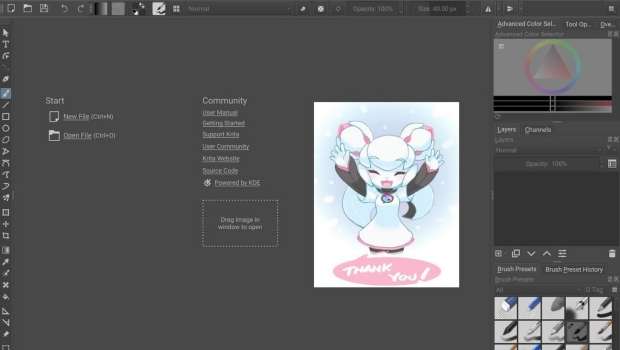
A diferencia de otras aplicaciones gráficas, se diseño hace énfasis en la creación de imágenes desde cero, es decir, está especialmente orientado para los artistas gráficos como ilustradores, dibujantes de cómics, etc.
Krita es software libre distribuido bajo la licencia GNU GPL y fue lanzado por primera vez como parte de la versión 1.4.0 de KOffice, el 21 de junio de 2005. (Vía: Wikipedia)
Para ver el funcionamiento de esta aplicación nada mejor que ver un vídeo de Odysseas Stamoglou en la que nos muestra como dibujar una chica futurística con Krita.
La entrada Novedades de Krita 5.2, vídeo de Ramón Miranda se publicó primero en KDE Blog.

Remote Desktop | KRDP Server with Plasma Wayland

Minecraft auf openSUSE Leap 15.5
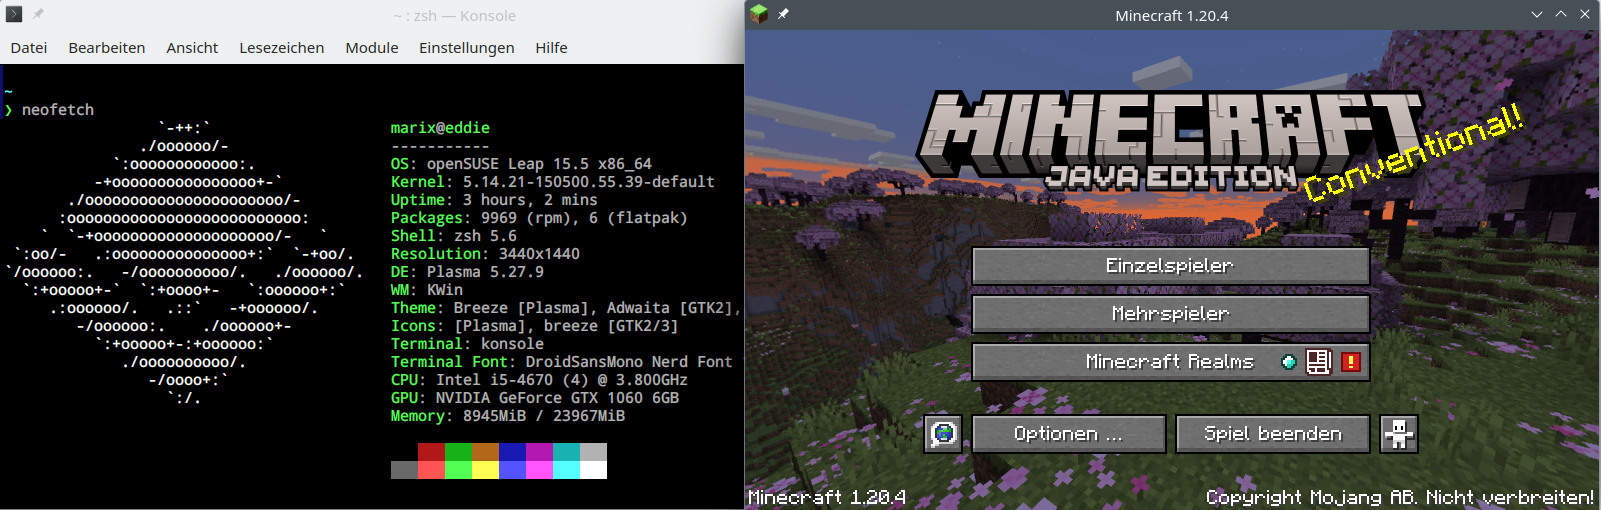
Während Minecraft auf openSUSE früher auf älteren Version immer einfach so funktioniert hat, endet der Versuch Version 1.20.4 auf openSUSE Leap 15.5 zu starten reproduzierbar mit einem Absturz.
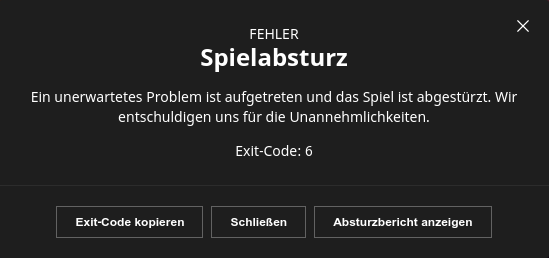
Der in der Fehlermeldung angegebene Exit-Code 6 hiflt leider nicht viel weiter. Suchen danach führen zu vielen verschiedenen möglichen Problemen. Einen guten Hinweis liefert aber der über die Fehlermeldung erreichbare Absturzbericht:
#
# A fatal error has been detected by the Java Runtime Environment:
#
#  SIGSEGV (0xb) at pc=0x0000000000000000, pid=22905, tid=22907
#
# JRE version:  (17.0.8+7) (build )
# Java VM: OpenJDK 64-Bit Server VM (17.0.8+7-LTS, mixed mode, tiered, compressed oops, compressed class ptrs, g1 gc, linux-amd64)
# Problematic frame:
# C  [libjimage.so+0x3ac8]  ZipDecompressor::decompress_resource(unsigned char*, unsigned char*, ResourceHeader*, ImageStrings const*)+0x28
#
Grund für den Absturz ist ein ungültiger Speicherzugriff. Und dieser scheint nicht im eigentlichen Minecraft-Code sondern in der Java-Laufzeitumgebung (JRE) selbst zu passieren. Es scheint also eine Inkompatilibität zwischen der von Minecraft verwendeten Java-Laufzeitumgebung und openSUSE Leap 15.5 zu geben.
Glücklicherweise lässt sich die von Minecraft verwendete Java-Laufzeitumgebung konfigurieren.
Diese findet sich im Abschnitt "Mehr Optionen" der Installationseinstellungen.
Tragen wir hier /usr/bin/java ein, so wird das aktuellste auf dem System installierte Java verwendet.
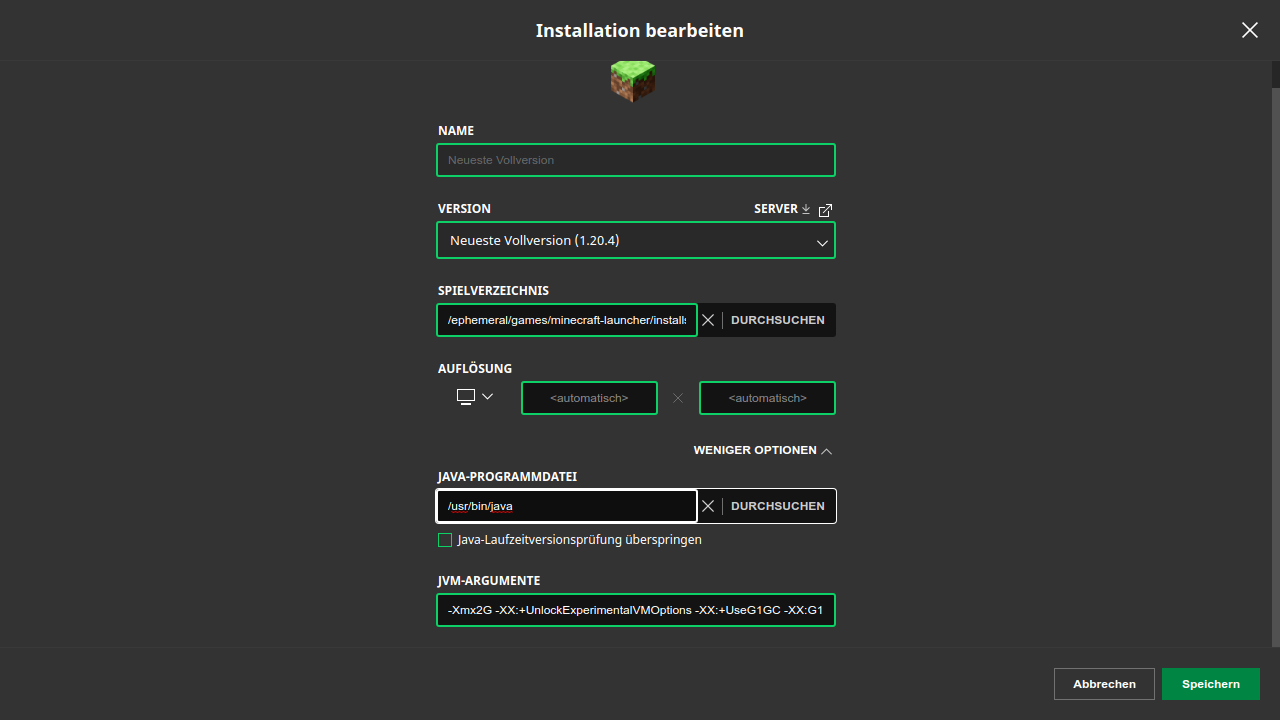
Sollten wir später zur mitgelieferten Version zurückkehren wollen, so können wir den Wert über das X neben dem Feld auch wieder löschen. In diesem Fall benutzt Minecraft dann wieder seine eigene Version.
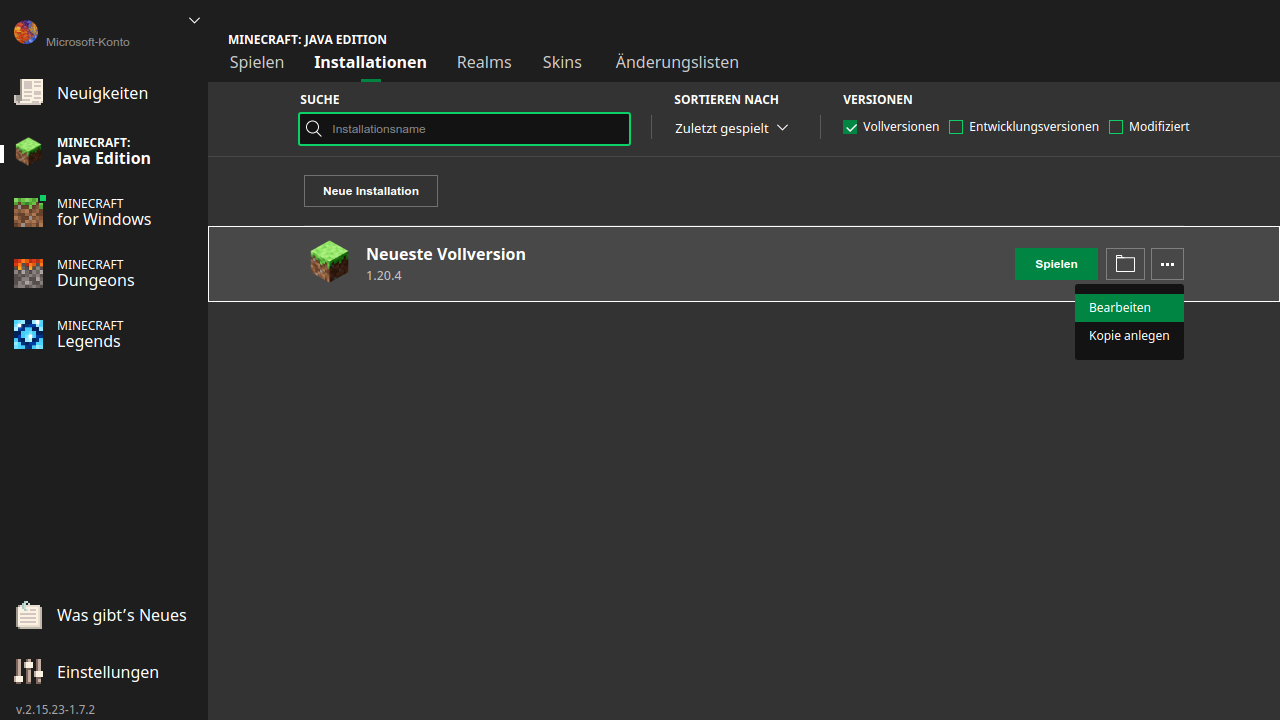
Die Konfiguration einer Installation von Minecraft finden wir übrigens unter „Bearbeiten“ im erweiterten Menü der Installation im Reiter „Installationen“.
Sollte auf unserem System keine aktuelle Laufzeitumgebung für Java installiert sein, so endet der nächste Versuch Minecraft zu starten übrigens wieder mit einer Fehlermeldung. Die Laufzeitumgebung können wir in diesem Fall schnell per Zypper nachinstallieren. Da der Absturzbericht uns verraten hat, dass Minecraft normallerwise Version 17 verwendet, installieren wir am besten auch genau diese nach:
sudo zypper in java-17-openjdk
Danach können wir dann endlich Minecraft auf openSUSE Leap 15.5 genießen.