
 Member
 baltolkien
Rocky Linux se convierte en patrocinador de KDE
Como buen blog sobre KDE me tengo que hacer eco de esta noticia que es importante para conocer un poco mejor como funciona la fundación KDE y cómo seguir constatando que poco a poco más y más empresas creen que la colaboración con el Software Libre. Este aspecto es algo que beneficia a todos y todas. Así que me congratula comentar que Rocky Linux se convierte así en una de las entidades que colabora como patrón de KDE.
Rocky Linux se convierte en patrocinador de KDE
El pasado 3 de marzo anunció que KDE tiene un nuevo patrocinador. A los recientes Kubuntu Focus, g10 Code y Techpaladin, se les une Rocky Linux, un sistema operativo empresarial de código abierto diseñado para ser 100 % compatible con Red Hat Enterprise Linux® en cuanto a errores.

En palabras Brian Clemens CEO de cofundador y vicepresidente de la Rocky Enterprise Software Foundation:
«El código abierto sostenible depende de grandes comunidades de código abierto que se apoyen mutuamente [..] Hacemos todo lo posible por apoyar a nuestros upstreams, y respaldar a KDE fue una decisión fácil para nosotros dada la popularidad de la versión KDE de Rocky Linux».
Por otra parte Aleix Pol, Presidente de KDE e.V., comenta:
«Como comunidad centrada en el usuario, KDE crea soluciones para satisfacer las necesidades del mundo real. Estamos encantados de dar la bienvenida a Rocky Linux como patrocinador de KDE y ver cómo el software de KDE brilla en Rocky Linux, su sistema operativo preparado para empresas».
De esta forma, Rockey Linux se une a otras compañías en su alianza con KDE: The Qt Company, SUSE, Google, Blue Systems, Canonical, Private Internet Access, enioka Haute Couture, Slimbook , Pine64, Kubuntu Focus, G10 Code o Techpaladin para continuar apoyando el Software Libre y el desarrollo de los proyectos KDE a través de KDE e.V.
Más información: KDE e.V.
La entrada Rocky Linux se convierte en patrocinador de KDE se publicó primero en KDE Blog.

Post-mortem: Stuck Critical Jobs Queue
Errores de certificados en curl y OpenSSL al actualizar openSUSE Tumbleweed
Al intentar actualizar openSUSE Tumbleweed curl me daba una serie de errores de certificados al querer acceder a los repositorios y no me dejaba actualizar el sistema

Hoy me ha dado por encender mi viejo portátil que desde que compré mi Slimbook Exkalibur KDE Edition está durmiendo el sueño de los justos para actualizar el sistema openSUSE Tumbleweed que todavía reside en sus entrañas digitales.
Así que esperé a que terminara de iniciar el sistema (de verdad tardaba tanto antes) y abrí una terminal para correr un sudo zypper dup o zdup que es como tengo configurado un alias… y error. No podía acceder a ciertos repositorios y debido a eso no actualizaba el sistema ¿qué hacer?
Los errores en cuestión estaban relacionados con certificados a la hora de que curl u openSSH accedan a las url de los repositorios configurados para actualizar el sistema. En concreto algo así:
El repositorio 'Packman' no es válido.
[Packman|https://ftp.gwdg.de/pub/linux/misc/packman/suse/openSUSE_Tumbleweed/] No se pudieron recuperar los nuevos metadatos del repositorio.
Historial:
- [|] Error al intentar leer https://ftp.gwdg.de/pub/linux/misc/packman/suse/openSUSE_Tumbleweed/
- Error de descarga (curl) para https://ftp.gwdg.de/pub/linux/misc/packman/suse/openSUSE_Tumbleweed/content:
Código de error: The peer certificate could not be verified Curl error (60)
Mensaje de error: SSL certificate OpenSSL verify result: unable to get local issuer certificate (20)
Lo primero comprobar que los servidores donde están los repositorios no están caidos, accediendo a las url desde el navegador. Todo parece estar Ok. Además comprobaba entre los dos portátiles que mi equipo nuevo podía acceder y el viejo portátil no.
Pero lo que parece que que los certificados SSL no son válidos o que curl no confía en ellos. Echando un vistazo (he perdido los enlaces…) veo que una solución para tratar de solucionarlo puede ser actualizar los certificados del sistema.
Para eso primero instalamos un par de paquetes que contienen certificados actualizados mediante:
sudo zypper in ca-certificates ca-certificates-mozilla
Y los actualizamos mediante:
sudo update-ca-certificates
Que reconstruye los certificados que se guardan en /etc/ssl/certs. Cuando terminó, volví a probar la actualización del sistema y esta vez todo funcionó sin problemas y pude actualizar todos los paquetes a sus nuevas versiones.
El problema es que hacía mucho tiempo que no arrancaba ese equipo por lo que sus certificados estaban desfasados y no podía acceder a los repositorios. En sistemas que utilizamos muy a menudo, esos certificados se renuevan automáticamente al actualizar el sistema por lo que no sería necesario ejecutar nada de esto.
Pero nunca está de más saberlo para otra vez ¿Lo conocías? Ahora mismo está actualizando más de 3.300 paquetes de software, entre ellos paquetes tan importantes como el kernel o del escritorio Plasma a nuevas versiones.

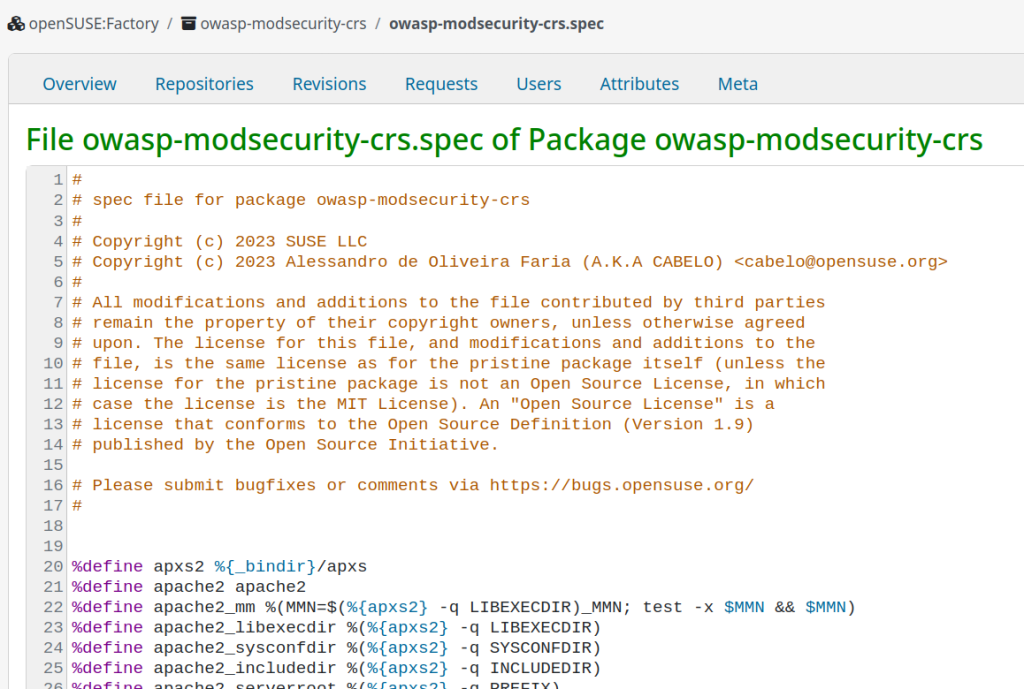
OWASP SP disponibiliza ModSecurity (CRS) para openSUSE.

Hoje dia 09 de Março de 2026 às 14h30, uma hora a após lançar a versão 4.21.1 do OWASP CRS, o Capítulo SP disponibilizou esta versão para todas as versões da plataforma openSUSE LINUX. Isto demonstra o nosso compromisso com a evangelização e colaboração com a comunidade de desenvolvedores de Software Livre.
OWASP CRS é um conjunto de regras genéricas de detecção de ataques para uso com o ModSecurity ou firewalls de aplicações web compatíveis. O CRS visa proteger aplicações web contra uma ampla gama de ataques, incluindo os dez principais da OWASP, com um mínimo de falsos positivos.
OWASP Core Rule Set 4.24.1: Atualização das regras de proteção para WAF
Foi disponibilizada a nova versão 4.24.1 do OWASP Core Rule Set (CRS), um dos conjuntos de regras mais utilizados no mundo para Web Application Firewalls (WAF), especialmente com ModSecurity e outros motores compatíveis. O CRS fornece um conjunto de regras genéricas para detectar e bloquear ataques comuns contra aplicações web, incluindo vulnerabilidades presentes no OWASP Top 10, como SQL Injection, XSS e File Inclusion. Essa atualização faz parte da série 4.x, que recebe melhorias contínuas focadas principalmente em novas detecções de ataques, redução de falsos positivos e ajustes internos nas regras, mantendo compatibilidade com os principais motores de WAF.
Principais melhorias desta versão
A versão 4.24.1 traz um conjunto de refinamentos importantes no ruleset:
1. Correções e estabilidade das regras
Foram aplicadas correções em regras existentes para evitar comportamentos inesperados ou falhas de detecção. Isso inclui ajustes em expressões regulares, lógica de validação e melhorias no processamento das requisições HTTP.
2. Redução de falsos positivos (false positives)
Um dos focos constantes do projeto CRS é reduzir bloqueios indevidos. Nesta atualização foram feitos refinamentos em diversas regras para evitar que tráfego legítimo seja interpretado como ataque.
3. Melhorias nas detecções de ataques web
A atualização inclui aprimoramentos em regras relacionadas a categorias de ataques comuns como:
- SQL Injection (SQLi)
- Cross-Site Scripting (XSS)
- Remote Code Execution (RCE)
- exploração de headers HTTP
- evasão de filtros em payloads
Essas melhorias aumentam a capacidade do WAF de identificar técnicas modernas de evasão utilizadas por atacantes.
4. Manutenção e limpeza do ruleset
Também foram incluídas melhorias de manutenção do projeto, como ajustes em scripts, testes e organização interna das regras, facilitando o desenvolvimento e a evolução futura do CRS.
Por que atualizar?
O OWASP CRS é a primeira linha de defesa contra ataques a aplicações web quando utilizado com um WAF. Atualizações frequentes são importantes porque:
- novos vetores de ataque surgem constantemente
- técnicas de bypass evoluem rapidamente
- correções de falsos positivos melhoram a operação em produção
A série 4.24.x está entre as versões oficialmente suportadas pelo projeto, o que significa que continuará recebendo atualizações de segurança e correções.
Conclusão
A versão 4.24.1 do OWASP Core Rule Set é uma atualização incremental focada em estabilidade, melhoria de detecção e redução de falsos positivos, mantendo o ruleset alinhado com as técnicas modernas de ataque à web.
Para ambientes que utilizam ModSecurity, Nginx, Apache ou outros WAFs compatíveis, manter o CRS atualizado é essencial para garantir proteção eficaz contra ameaças emergentes.
Mais informações, download e outros:
https://build.opensuse.org/package/show/home:cabelo:innovators/owasp-modsecurity-crs
Muchos progresos en Marknote y Drawy – Esta semana en KDE Apps
Es increíble el trabajo de promoción que está realizando Nate en su blog, desde hace más del tiempo que puedo recordar, ha sido replicado en ocasiones por Carl Schwan hablando de aplicaciones. Igual que Nate, se trata de un resumen de las novedades más destacadas, pero no en forma de telegrama, sino de artículo completo y no tan regular. De hecho esta última edición ha sido una recopilación mensual, y dado que en la actualidad tenemos herramientas que nos facilitan la traducción y la edición, os voy a presentar un resumen adaptado del mismo. Bienvenidos pues al artículo de la serie «Muchos progresos en Marknote y Drawy» de Esta semana en KDE Apps, aunque en realidad recoge los avances de todo un mes. Espero que os guste y que os ponga los dientes largos viendo lo que nos espera.
Muchos progresos en Marknote y Drawy – Esta semana en KDE Apps
Nota: Artículo original en Blogs KDE. Traducción realizada utilizando herramientas IA. Esta entrada está llena de novedades en las aplicaciones de la Comunidad KDE.
¡Bienvenido a una nueva edición de «This Week/Moth in KDE Apps»! Cada semana (más o menos) cubrimos todo lo posible de lo que está pasando en el mundo de las aplicaciones KDE.
Ha pasado un tiempo desde la última edición, así que haré lo posible por resumir todas las cosas importantes que han ocurrido recientemente.

Como decía el mes pasado, para este nuevo año he decidido cambiar un poco esta serie de artículos, ya que con los títulos coloridos se hace pesada la escritura, invirtiendo demasiado tiempo en aspecto visuales que quizás enmascaran el contenido. Así que me tomaré menos al pie de la letra la estructura del artículo original y realizaré mi entrada más a mi manera, y dado a su extensión no estarán todas las novedades, así que os invito a leer el artículo original para estar bien informado.
Marknote, la aplicación de notas de KDE
Esta aplicación ha alcanzado la versión 1.4.0 , una una importante actualización centrada en corregir muchos errores y mejorar su estabilidad. También incorpora nuevas funciones como deshacer/rehacer en el editor de bocetos office/marknote MR #91 y arrastrar y soltar imágenes dentro de la app office/marknote MR #90.
Además, y esto es lo que nos vendrán en la siguiente versión, la rama de desarrollo se han añadido mejoras orientadas a la productividad:
- Un contador de notas en la barra lateral que muestra cuántas notas hay en cada cuaderno office/marknote MR #110.
- Búsqueda de texto dentro de una nota office/marknote MR #109,
- Arrastrar y soltar notas entre cuadernos office/marknote MR #111.
- Enlaces tipo wiki entre cuadernos office/marknote MR #115.
- Un panel de tabla de contenidos office/marknote MR #112.
- Un botón para copiar todo el contenido de la nota office/marknote MR #108.

Además, se ha potenciado notablemente el trabajo con imágenes:
- Ahora se pueden arrastrar y soltar varias a la vez office/marknote MR #104.
- La carga de imágenes es asíncrona para no bloquear la interfaz office/marknote MR #99
- Se han migrado delegados personalizados a los nuevos delegados estandarizados de Kirigami Addons office/marknote MR #144 office/marknote MR #122.
Para finalizar comentar que también se han añadido bloques de código office/marknote MR #146, citas en bloque office/marknote MR #142, un soporte mucho mejor para tablas office/marknote MR #143 y una larga lista de correcciones de errores, refactorización de código y pulido de la interfaz.
Drawy, la pizarra digital infinita
Drawy ha recibido una oleada masiva de mejoras y nuevas funciones este mes, vamos a repasarlo mirando el trabajo de los desarrolladores.
- Prayag ha realizado una renovación importante de la interfaz: nuevo menú hamburguesa graphics/drawy MR #295, controles mejorados de zoom y deshacer/rehacer graphics/drawy MR #193, apariencia más uniforme en toda la app y mejor mecanismo de guardado que recuerda el último archivo usado graphics/drawy MR #345.
- Laurent Montel expandió las capacidades básicas: nuevo sistema de plugins para facilitar la adición de herramientas graphics/drawy MR #352, menú de esquemas de color para cambiar temas graphics/drawy MR #372 y personalización de atajos de teclado.
- Nikolay Kochulin mejoró la interacción con el contenido: soporte para lápices con goma de borrar y exportación del lienzo final a SVG graphics/drawy MR #258; copiar y pegar elementos, pegar imágenes directamente graphics/drawy MR #285 y arrastrar y soltar contenido directamente al lienzo graphics/drawy MR #322.
- Abdelhadi Wael pulió la experiencia visual haciendo que el fondo del lienzo detecte automáticamente el tema claro u oscuro del sistema graphics/drawy MR #380.

Mix de novedades de aplicaciones
Para no hacerlo infinito, recolecto aquí las pequeñas novedades que llegan a un gran número de aplicaciones:
- Okular: Posibiliadad de abrir página última vista al reabrir documentos graphics/okular MR #1324; archivos adjuntos incrustados graphics/okular MR #1312.
- KDE Itinerary: Diálogos convergentes Kirigami pim/itinerary MR #413; soporte Hostel World, GetYourGuide, FRS, FCM, French TER, Gomus. Blog Volker Krause.
- Akonadi: SQLite por defecto pim/akonadi MR #311.
- Merkuro Mail: Reservas de viaje en vista correo pim/mimetreeparser MR #90.
- Kdenlive: Previews animadas transiciones (26.04.0) multimedia/kdenlive MR #816.
- Photos (Koko): Atajos zoom estándar (26.04.0) graphics/koko MR #267.
- Kasts: Sincronización más eficiente (26.04.0) multimedia/kasts MR #315, (https://invent.kde.org/multimedia/kasts/-/merge_requests/305).
- AudioTube: Páginas home/explore multimedia/audiotube MR #179.
- Kate: Posibilidad de limpiar historial búsqueda (26.04.0) utilities/kate MR #2044.
- KomoDo: 1.6.0 con enlaces Markdown, sin monoespaciado utilities/komodo MR #72.
- Clock (KClock): Overlay bloqueo temporizador/alarmas utilities/kclock MR #244, (https://invent.kde.org/utilities/kclock/-/merge_requests/243).
- Tokodon: Respuestas múltiples menciones network/tokodon MR #796.
- Journald Browser: Vista común logs sistema/usuario system/kjournald MR #79.
Y no olvides que …
Esta entrada solo cubre la punta del iceberg. Descubre más en el blog de Nate sobre Plasma y su serie This Week in Plasma, donde detalla las novedades del entorno de escritorio Plasma de KDE. Para información sin filtrar, visita KDE’s Planet.
Participa
La organización KDE se ha vuelto importante a nivel mundial, y tu tiempo y contribuciones nos han ayudado a llegar hasta aquí. A medida que crecemos, necesitaremos tu apoyo para que KDE sea sostenible.
Puedes ayudar a KDE siendo un miembro activo de la comunidad y participando. Cada colaborador hace una gran diferencia en KDE: no eres un número ni una pieza más en una máquina. ¡Ni siquiera tienes que ser programador! Hay muchas cosas que puedes hacer: ayudar a encontrar y confirmar errores, e incluso quizás solucionarlos; contribuir con diseños para fondos de pantalla, páginas web, iconos e interfaces de aplicaciones; traducir mensajes y elementos de menús a tu idioma; promover KDE en tu comunidad local; y muchas más cosas.
También puedes ayudarnos donando. Cualquier contribución monetaria, por pequeña que sea, nos ayudará a cubrir los costos operativos, salarios, gastos de viaje para los colaboradores y, en general, a que KDE pueda seguir llevando Software Libre al mundo.
Para que tu aplicación sea mencionada aquí, por favor contáctanos en invent o en Matrix.
La entrada Muchos progresos en Marknote y Drawy – Esta semana en KDE Apps se publicó primero en KDE Blog.

Updating perltidy (and other dependencies) in os-autoinst
When updating the dependencies.yaml file in os-autoinst, e.g. when you’d like to fix the outdated perltidy version in the repo the recommended workflow is to:
- Update
dependencies.yaml - Run
make update-deps
This will update the cpanfile for you and you only need to make your changes in one single file (dependencies.yaml).
Pulido y estabilidad – Esta semana en Plasma
Es increíble el trabajo de promoción que está realizando Nate (ahora con ayuda de otros desarrolladores) en su blog, desde hace más del tiempo que puedo recordar. Cada semana hace un resumen de las novedades más destacadas, pero no en forma de telegrama, sino de artículo completo. Su cita semanal no falla y voy a intentar hacer algo que es simple pero requiere constancia. Traducir sus artículos al castellano utilizando los magníficos traductores lo cual hará que la gente que no domine el inglés esté al día y que yo me entere bien de todo. Bienvenidos pues a «Pulido y estabilidad» de Esta semana en Plasma. Espero que os guste.
Pulido y estabilidad – Esta semana en Plasma
Nota: Artículo original en Blogs KDE. Traducción realizada utilizando Perplexity. Esta entrada está llena de novedades de la Comunidad KDE. Mis escasos comentarios sobre las mejoras entre corchetes.
¡Bienvenido a una nueva edición de This Week in Plasma!
Esta ha sido otra semana centrada en la corrección de errores y el pulido de la interfaz de usuario. No son cosas muy vistosas, pero sí críticas para la estabilidad a largo plazo de la plataforma. Échale un vistazo al trabajo realizado:
Mejoras en la interfaz de usuario
Plasma 6.6.2
Las flechas de los botones «Ver más» de Discover ahora están en el lugar correcto y apuntan en la dirección adecuada tanto para idiomas de izquierda a derecha como de derecha a izquierda. (Nate Graham, discover MR #1275)
Plasma 6.6.3
El widget Separador de panel ya no aparece en la barra lateral de widgets, porque solo tiene sentido colocarlo en paneles y ya existe un botón dedicado para hacerlo. (Tobias Fella, plasma-workspace MR #6376) [Optimizando las acciones].
Se permitió que algunas etiquetas en los tooltips del widget Task Manager puedan ocupar varias líneas en lugar de ser recortadas con puntos suspensivos. (Nate Graham, plasma-desktop MR #3598) [Con esto se gana claridad].


Plasma 6.7.0
Intentar guardar un esquema de color con el nombre de un esquema de color del sistema ya existente ya no muestra un mensaje de error acusatorio y poco claro; ahora te indica que tendrás que elegir un nombre diferente y después te invita a hacerlo. (Akseli Lahtinen, plasma-workspace MR #6316) [Pedagogía digital].
Se habilitó por defecto el complemento «Atajos globales» de KRunner. (Nate Graham, plasma-desktop MR #3590) [Esto está bien para invitarnos a ser más eficientes, algo que los atajos de teclado consiguen].

Corrección de errores importantes
[No comento las correcciones de errores ya que son bastante evidentes y, además, el aluvión es importante.
Plasma 6.6.2
Se corrigió un error que hacía que KWin fallara si usabas la herramienta kscreen-doctor para crear un modeline personalizado mientras ya usabas otro modeline personalizado diferente. (Vlad Zahorodnii, KDE Bugzilla #516452)
Spectacle ya no falla al intentar compartir una captura de región rectangular usando KDE Connect. (Noah Davis, KDE Bugzilla #516717)
Se corrigieron varios problemas con el servidor de escritorio remoto de Plasma cuando se accedía desde un cliente con Microsoft Windows. (Nicolas Blackburn, krdp MR #148, krdp MR #149, krdp MR #150 y krdp MR #151)
Se corrigió una regresión que hacía que las redes Ethernet puenteadas mostraran un icono inapropiado en el widget Redes. Las VLAN todavía muestran el icono incorrecto, pero esperemos que se corrija la próxima semana. ¡Las redes son complicadas! (Nate Graham, KDE Bugzilla #516712)
Plasma 6.6.3
Se corrigió un caso en el que KWin podía fallar al usar la herramienta kscreen-doctor para cambiar la resolución de una pantalla virtual de ciertas maneras. (Xaver Hugl, KDE Bugzilla #517198)
Se corrigió un error que podía hacer que Plasma fallara al iniciar sesión con ciertas configuraciones de múltiples monitores. (Dobry Nikolov, KDE Bugzilla #516937)
Se corrigió una regresión que impedía que ciertos monitores se atenuaran automáticamente en los momentos correctos. (Xaver Hugl, KDE Bugzilla #516867)
Se corrigió una regresión que hacía que Spectacle fallara a veces al salir, en lugar de cerrarse limpiamente. (Noah Davis, KDE Bugzilla #517064)
Se corrigió una regresión que podía hacer que las pulsaciones largas en widgets del escritorio activaran inesperadamente controles interactivos en ellos. (Marco Martin, KDE Bugzilla #517040)
Se corrigieron dos errores visuales que afectaban a los interruptores on/off en Plasma cuando se usaban estilos de Plasma no predeterminados. (Filip Fila, KDE Bugzilla #504116 y KDE Bugzilla #516542)
Plasma 6.7
Se corrigió una forma bastante común en la que Plasma se cerraba (no fallaba, realmente se cerraba) con un error de protocolo Wayland cuando ciertos monitores despertaban del sueño. (Vlad Zahorodnii, KDE Bugzilla #507691)
Se corrigió un error que hacía que las notificaciones de progreso de transferencia de archivos de Plasma afirmaran que el número total de archivos era 0 cuando el número real era muy muy grande. (Kai Uwe Broulik, plasma-workspace #6369)
Se corrigió un error curioso que hacía que los paneles Plasma autoocultos se mostraran inesperadamente cuando aparecía el diálogo de contraseña mientras el efecto «Atenuar pantalla para modo administrador» estaba activo, que lo está por defecto. (Vlad Zahorodnii, KDE Bugzilla #516864)
Frameworks 6.23.1
Se solucionó un error de Qt que hacía que Plasma fallara repetidamente al iniciar sesión para algunas personas. (David Redondo, KDE Bugzilla #514098)
Se corrigió un error que hacía que la implementación del portal de escritorio de KDE fallara al copiar cierto contenido en una sesión de escritorio remoto. (David Edmundson, KDE Bugzilla #515465)
Se corrigieron varios problemas relacionados con la base de datos de aplicaciones que podían hacer que las aplicaciones favoritas desaparecieran de los menús de lanzamiento y del widget Task Manager en ciertas circunstancias, incluyendo cuando se usaban ciertas aplicaciones JetBrains en modo auto-inicio. (Harald Sitter, KDE Bugzilla #516426 y KDE Bugzilla #507838)
PulseAudioQt 1.8.0
Se corrigió un error que podía hacer que Plasma fallara al intentar acceder a los menús de perfiles de ciertos dispositivos de audio. (Harald Sitter, KDE Bugzilla #496067)
Mejoras de rendimiento y aspectos técnicos
Plasma 6.6.2
Se hizo más robusto el widget Menú Global frente a aplicaciones que mienten sobre tener menús. (Christoph Wolk, plasma-workspace MR#6345)
Plasma 6.6.3
Se hizo más robusta la función de screen-casting de KWin cuando se usa PipeWire 1.6.0 o superior, que impone requisitos más estrictos comparados con versiones anteriores. (Conn O’Griofa, kwin MR #8939)
Plasma 6.7
Se permite que la herramienta kscreen-doctor modifique el valor de la clave AutoRotatePolicy de las pantallas. (Xaver Hugl, libkscreen MR #291)
Se hizo que la herramienta kscreen-doctor pueda dirigirse a la pantalla activa, para que no necesites buscar su ID técnico. También se permite alternar simultáneamente el soporte HDR y gamut de color amplio. (Yossef Rostaqi, libkscreen MR #294)
Cómo puedes ayudar
KDE se ha vuelto importante en el mundo, y tu tiempo y contribuciones han ayudado a llegar hasta aquí. A medida que crecemos, necesitamos tu apoyo para mantener KDE sostenible.
¿Te gustaría ayudar a preparar este informe semanal? Preséntate en la sala de Matrix y únete al equipo.
Más allá de eso, puedes ayudar a KDE involucrándote directamente en cualquier otro proyecto. Donar tiempo es realmente más impactante que donar dinero. Cada colaborador marca una gran diferencia en KDE — ¡no eres un número ni un engranaje en una máquina! No tienes que ser programador, existen muchas otras oportunidades.
También puedes ayudar haciendo una donación. Esto ayuda a cubrir costes operativos, salarios, gastos de viaje para colaboradores y, en general, a mantener KDE llevando Software Libre al mundo.
La entrada Pulido y estabilidad – Esta semana en Plasma se publicó primero en KDE Blog.

Linux Saloon 191 | Application Managers
3 juegos nativos de conducción para linux
Hace poco os presenté varios vídeos con juegos nativos para linux. De momento he presentado de RTS (estrategia en tiempo real), de RPG (juego de rol) y de FPS (disparos en primera persona), demostrando que no solo se puede jugar en nuestro sistema libre sino que además, se puede hacer de forma 100% libre. Hoy continúo con 3 juegos nativos de conducción para linux, ya que Planeta Tecno tiene todavía más de la serie.
3 juegos nativos de conducción para linux
De nuevo de la mano de Planeta Tecno (que además tienen una web) os presento el siguiente vídeo donde nos presenta 3 juegos excelentes para instalar de forma nativa en Linux.
En esta ocasión se trata de tres juegos de conducción, juegos que suelen ser exigentes con las máquinas por la gran rapidez con la que tienen que generar imágenes.
En esta ocasión los juegos que nos presenta Planeta Tecno son Speed Dreams, Trigger Rally y Stunt Rally, solo el primero de ellos ha aparecido en la serie Juegos Linux del blog, así que ya sigo sumando nuevos objetivos para analizar a fondo.
Sin más, os dejo con el vídeo.
Aunque he dicho arriba que he dedicado artículos al primero de ellos (que fue jústamente el segundo de la serie) de ellos no me resisto a poner una breve reseña de cada uno de ellos:
Speed Dreams
Es un simulador de código abierto que nació como un fork de Torcs. Se caracteriza por buscar el realismo, aunque es altamente personalizable.
Incluye una gran variedad de coches (desde modelos de los años 30 hasta superdeportivos modernos) y múltiples pistas, con muchos modos de juego (carreras rápidas, prácticas y un modo carrera, donde el piloto evoluciona en diferentes competencias)
Tecnológicamente hablando soporta ciclos de día y noche, condiciones climáticas variables y permite jugar en pantalla dividida para hasta cuatro jugadores.
Trigger Rally
A diferencia del anterior, este juego tiene un enfoque mucho más arcade y está diseñado exclusivamente para Linux (¡hasta tenemos juegos exclusivos!).
De esta forma, básicamente se centra en la diversión rápida con un motor de físicas de derrape muy bien logrado, contando con más de 100 mapas con distintos terrenos como tierra, asfalto, arena y nieve.
Como detalle interesante, comentar que incluye un copiloto que da indicaciones mediante voz e iconos y que al ganar eventos, se desbloquean nuevos vehículos y desafíos.
Stunt Rally
Llegamos al juego más complejo y completo de esta breve lista, destacando por su estilo de rally con elementos de fantasía y efectos especiales.
El juego destaca por tener un variedad extrema tanto en circuitos como en vehículos. Por ejemplo, nos ofrece más de 200 pistas en 37 escenarios, incluyendo algunos de ciencia ficción en otros planetas. Y si hablamos de vehículos nos encontramos desde coches comunes hasta naves espaciales, pasando por una pelota rebotadora, motos y viejos camiones.
Además, nos ofrece un editor de pistas potente para crear y editar circuitos desde cero, permitiendo modificar el clima, la vegetación y la iluminación.
Contribuye al avance del Software Libre: difunde el conocimiento
Si os gusta el vídeo no dejéis pasar la oportunidad de pagar a su creador Planeta Tecno, en esta ocasión, utilizando las forma que te permite la plataforma de vídeos Youtube:
- Subscríbete a su canal.
- Ponle un comentario
- Comparte en redes sociales
- O cualquier otra forma que se te ocurra.
Hoy es un buen día para insistir que ayudar al desarrollo del Software Libre también se hace simplemente dando las gracias, ayuda mucho más de lo que os podéis imaginar, recordad la campaña I love Free Software Day 2017 de la Free Software Foundation donde se nos recordaba esta forma tan sencilla de colaborar con el gran proyecto del Software Libre y que en el blog dedicamos un artículo.
La entrada 3 juegos nativos de conducción para linux se publicó primero en KDE Blog.
#openSUSE Tumbleweed revisión de la semana 10 de 2026
Tumbleweed es una distribución de GNU/Linux «Rolling Release» o de actualización contínua. Aquí puedes estar al tanto de las últimas novedades.

openSUSE Tumbleweed es la versión «rolling release» o de actualización continua de la distribución de GNU/Linux openSUSE.
Hagamos un repaso a las novedades que han llegado hasta los repositorios esta semana.
Y recuerda que puedes estar al tanto de las nuevas publicaciones de snapshots en esta web:
El anuncio original lo puedes leer en el blog de Dominique Leuenberger, publicado bajo licencia CC-by-sa, en este este enlace:
El fin de semana pasado y a principios de esta semana, Tumbleweed se topó con algunos pequeños obstáculos. Un pequeño cambio en el paquete selinux-policy, que parecía (y se confirmó) obviamente correcto, provocó varios fallos de openQA donde los sistemas no arrancaban debido a las reglas de cumplimiento de SELinux.
Por suerte, openQA pudo detectar esto a tiempo. Tras algunas dudas el lunes, se descubrió que, si bien el cambio en sí era correcto, otro código se basaba inadvertidamente en el comportamiento incorrecto de la política anterior.
Siempre es preferible identificar estos problemas en las pruebas QA en lugar de que esos problemas lleguen hasta el usuario final.
Una vez resuelto esto, Tumbleweed recuperó su esplendor natural y entregó tres nuevas snapshots (0302, 0303 y 0304).
Las actualizaciones más destacadas de esta semana:
- Se eliminaron todos los módulos python3.12, liberando poder de compilación para agregar módulos python3.14.
- KDE Plasma 6.6.1 & 6.6.2
- Linux kernel 6.19.5
- postfix 3.10.8
- procps 4.0.6
- systemd 258.5
- PostgreSQL 18.3
Y para próximas snapshots, ya se están preparando las siguientes actualizaciones:
- Shadow 4.19.4
- iptables 1.8.13
- gstreamer 1.28.1
- PackageKit 1.3.4
- kernel longterm 6.18.16
- KDE Gear 25.12.3
- Linux kernel 6.19.6
- ystemd 259.3
- Cambiar el bootloader predeterminado en sistemas uefi a systemd-boot
- glibc 2.43
- GNOME 50
Si quieres estar a la última con software actualizado y probado utiliza openSUSE Tumbleweed la opción rolling release de la distribución de GNU/Linux openSUSE.
Mantente actualizado y ya sabes: Have a lot of fun!!
Enlaces de interés
- ¿Por qué deberías utilizar openSUSE Tumbleweed?
- zypper dup en Tumbleweed hace todo el trabajo al actualizar
- ¿Cual es el mejor comando para actualizar Tumbleweed?
- ¿Qué es el test openQA?
- http://download.opensuse.org/tumbleweed/iso/
- https://es.opensuse.org/Portal:Tumbleweed
——————————–