
 Member
 Futureboy
Kdenlive 19.12 on openSUSE | Review
Emby Media Server on openSUSE Linux | Review

Εγκατάσταση Greenfoot σε openSUSE

ΤΙ ΕΙΝΑΙ ΤΟ GREENFOOT
Το Greenfoot είναι ένα Ολοκληρωμένο Περιβάλλον Ανάπτυξης Εφαρμογών (IDE) που έχει ως σκοπό τη διδασκαλία του Αντικειμενοστραφούς προγραμματισμού με τη γλώσσα Java. Με το Greenfoot μπορεί να δημιουργηθεί ένας κόσμος μέσα στον οποίο αλληλεπιδρούν μορφές (actors) με τις οποίες μπορούν να προγραμματιστούν παιχνίδια, προσομοιώσεις και άλλα προγράμματα με γραφικά. Χρησιμοποιείται δε για την εξοικείωση των μαθητών Δευτεροβάθμιας Eκπαίδευσης με την γλώσσα προγραμματισμού Java.Στην ιστοσελίδα των λήψεων βλέπουμε ότι είναι διαθέσιμο για όλα τα λειτουργικά συστήματα. Όσον αφορά δε τα συστήματα GNU/Linux, υπάρχει διαθέσιμο ως deb (για Ubuntu και Debian). Εμείς εδώ θα δούμε την περίπτωση του Pure Java πακέτου.
Επίσης λίγη προσοχή στην έκδοση που δουλεύει η ομάδα εργασίας σας. Για παλαιότερες εκδόσεις, μπορείτε να επισκεφθείτε την σελίδα των λήψεων παλαιών εκδόσεων.
ΕΓΚΑΤΑΣΤΑΣΗ
0. Πρέπει να τσεκάρετε ότι έχετε εγκατεστημένη την java.
Εγκατάσταση του πακέτου java-1_8_0-openjdk-devel (πιθανό να θέλει και άλλα πακέτα. Εγώ εγκατέστησα java develipement pattern από το Yast).
Στη συνέχεια ελέξτε την έκδοση της java με την εντολή:
Βλέπετε ποια έκδοση έχετε εγκατεστημένη. Εγώ είχα τα εξής:
OpenJDK Runtime Environment (IcedTea 3.14.0) (build 1.8.0_232-b08 suse-1.1-x86_64)
OpenJDK 64-Bit Server VM (build 25.232-b09, mixed mode)
Με την εντολή θα χρειαστεί να επιλέξετε πως θα εκτελείται η Java:
τσεκάρετε την επιλογή:
1. Τώρα πρέπει να εγκαταστήσετε το openjfx, έτσι ώστε να μπορείτε να φτιάξετε προγράμματα-παιχνίδια με Java. Για το openSUSE, μπορείτε να το εγκαταστήσετε από εδώ.
https://software.opensuse.org/package/java-1_8_0-openjfx
2. Στη συνέχεια ανοίξτε το τερματικό στον κατάλογο που έγινε η λήψη και εκτελέστε το αρχείο με την εντολή:

3. Στο παράθυρο που θα ανοίξει, φροντίστε τους καταλόγους.
Προτιμώ τον κατάλογο bin μέσα στον προσωπικό μου κατάλογο, ώστε να γνωρίζω που έκανα την εγκατάσταση. Όσον αφορά τον JDK κατάλογο, τον βρήκε αυτόματα (Tumbleweed). Εάν δεν τον βρει, τότε προσπαθήστε να βρείτε εδώ /usr/lib64/jvm/java-1.8.0-openjdk-1.8.0. Εάν δεν υπάρχει, μάλλον δεν έχει εγκατασταθεί σωστά η Java.
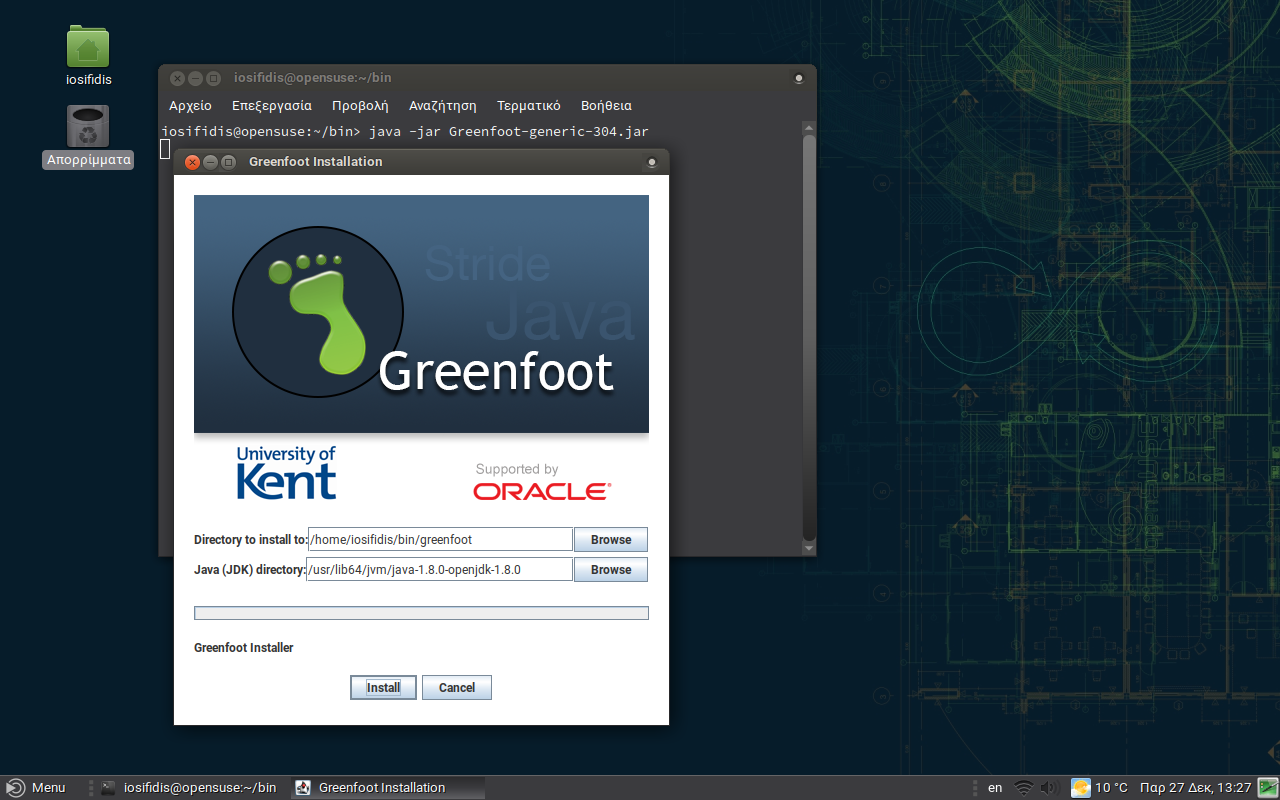
Απλά πατήστε το Install και περιμένετε να ολοκληρωθεί η εγκατάσταση.
ΡΥΘΜΙΣΕΙΣ
1. Το πρώτο που πρέπει να κάνετε είναι να προσθέσετε μια συντόμευση στο μενού σας. Αλλιώς θα πρέπει να ανοίγετε τον κατάλογο /bin/greenfoot και να εκτελείτε το greenfoot.2. Αλλαγή γλώσσας στα Ελληνικά.
Ανοίξτε το Greenfoot.

Στη συνέχεια πάμε στο Edit.
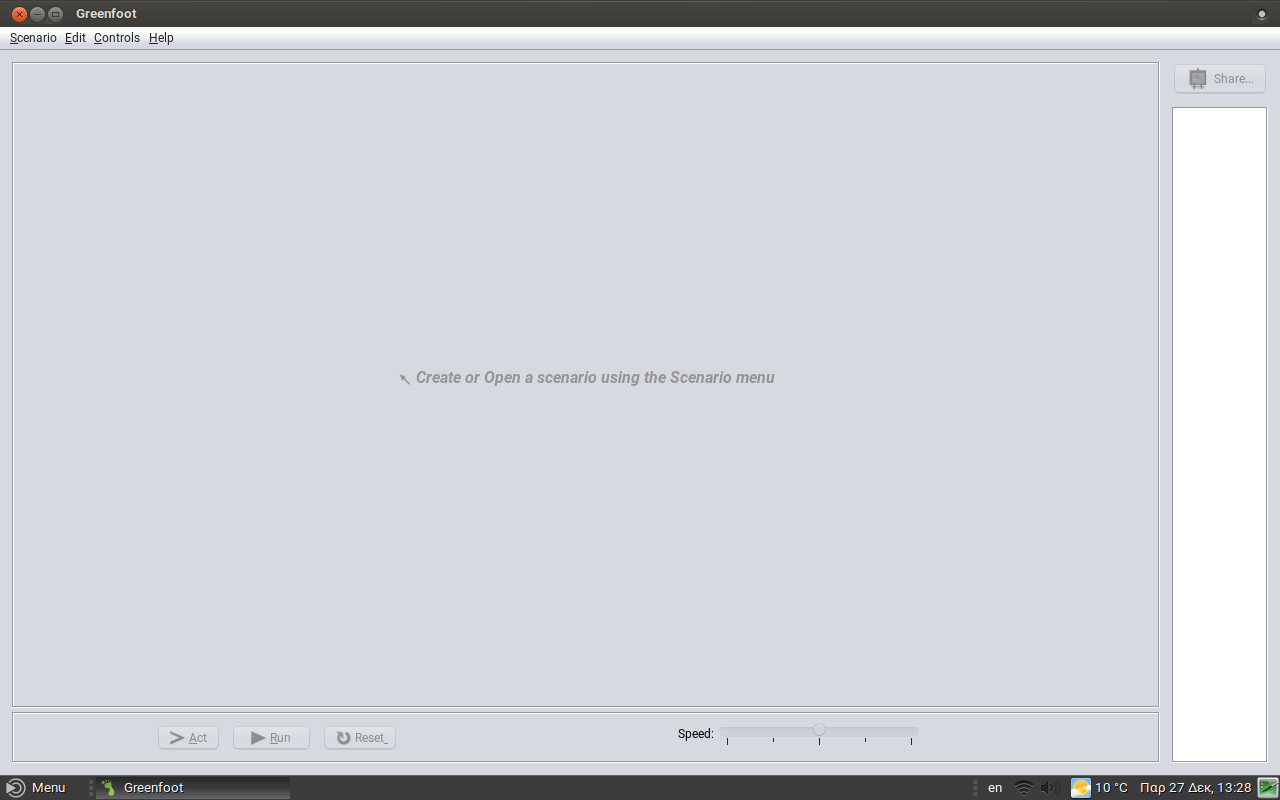
Στο Preferences.

Στην καρτέλα Interfaces αλλάζουμε σε Greek.

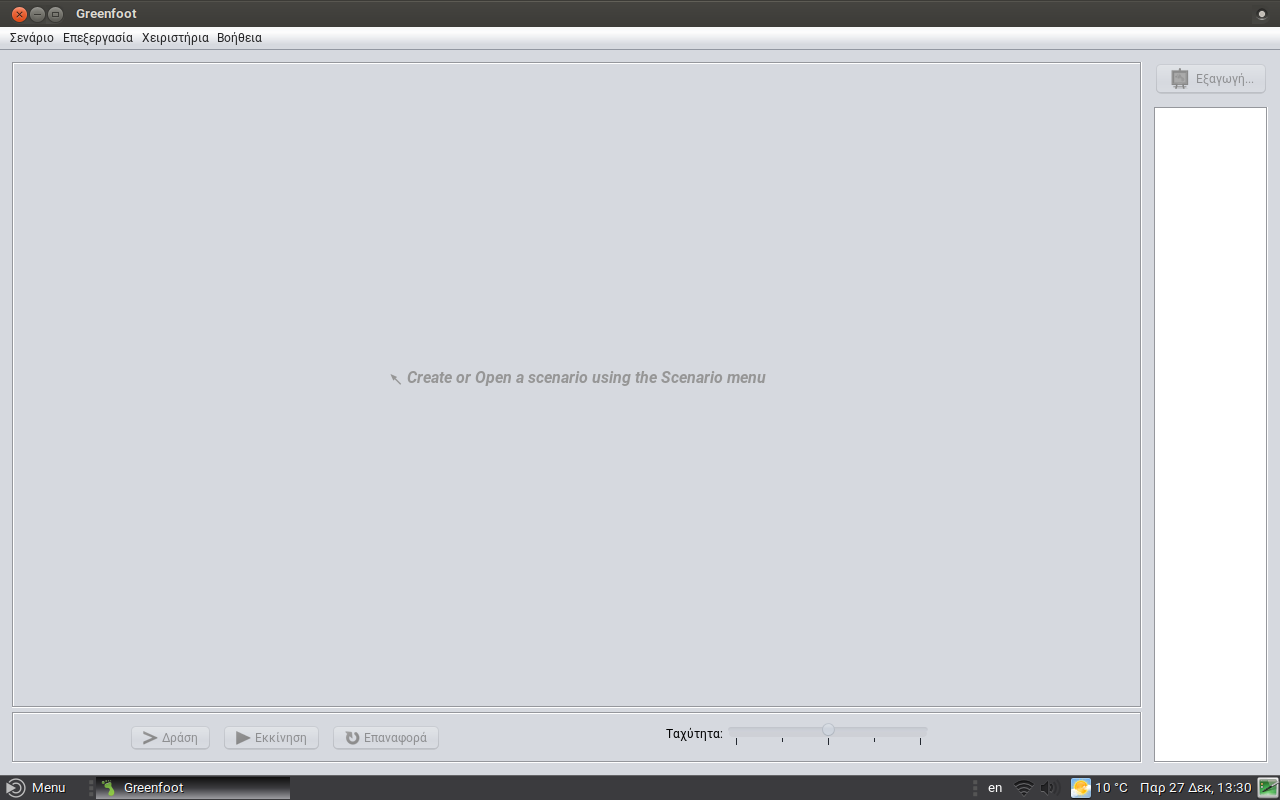
Αφού τελειώσει, κλείστε και ανοίξτε ξανά το πρόγραμμα.
3. Μπορείτε να φτιάξετε την δικιά σας εφαρμογή.

Εάν θέλετε να κατεβάσετε και να δοκιμάσετε τα αρχεία που δημιούργησα στα πλαίσια του σχολικού μαθήματος, μπορείτε να επισκεφθείτε το github μου εδώ.

Q&A: What it is like to be on the openSUSE Board
 You already know what a fantastic platform openSUSE is for doing just about anything with Linux. So what’s behind that easy-to-use and super powerful distribution that we know and love, and have come to rely on. In many minds there is a perception that its simply SUSE with the proprietary code stripped out. It’s true that a lot of the development work does flow down from SUSE but there is also an active community of dedicated volunteers who drive and make the project work, adding the goodies we have come to take for granted for the myriad of uses we have come to rely on it for.
It’s election time at openSUSE and the election board asked an existing board member Gertjan who has agreed to step up again and run for re-election of what it is like to be on the board. Below is a transcript of an offline interview between fellow election committee member Edwin and Gertjan highlighting what it’s like to be on the board of openSUSE.
Edwin: Would you like to tell us about your daily schedule and how does being an openSUSE Board member impacts on that?
Gertjan: To be fair, my daily schedule varies a lot, depending on what is on my table. Most of the time this leaves me with enough spare time to do board related things. But before I was on board, I spent that time in openSUSE too, i.e. forums, IRC etc., so the main impact on my daily schedule were the bi-weekly video conference calls. For the rest I just spread the spare time a bit differently. It does take a couple of hours though, on an average week.
Edwin: Do you still remember what motivated you to step up for Board candidacy the first time? And then why a second time?
Gertjan: O, yes, I do. I was asked by Richard whether I had ever considered running for board. My reply was “Hey, you know me, I’m the one that considers others to run”… Followed by a small discussion, a night of sleep, some others asking me to step up as a candidate. All in all, I felt I could not ignore all that, and at least see if the community would have me on board. So basically the community motivated me, and felt I had to go for it. The second time was not much different. And, in both cases, a huge motivation was the love I feel for the project and the people in its community.
Edwin: What was your first task as a Board member?
Gertjan: To read all the docs. Like many people, I had to find out that my impression of what the board does wasn’t accurate.
Edwin: What’s your best memory serving on the openSUSE Board?
Gertjan: Lots of good memories, but to summarize: The learning experience re. all the aspects of the openSUSE Project, the relationship with SUSE.
Edwin: Any negative incident that you recall and would like to share?
Gertjan: I do recall some, yeah. Most of them with the PRIVATE stamp all over them, but the thing I disliked most was me crossing ( a.o. my own ) lines on a couple of occasions.
Edwin: Could you tell us what is the biggest transformation / change in the openSUSE community that you witnessed after becoming Board member?
Gertjan: For me that would be the current process of getting some form of openSUSE Foundation on its feet.
Edwin: How is life as an openSUSE Board member?
Gertjan: Not too bad. I loved the biweekly video meetings, the F2F meetings, working together with people passionate about the project and the community.
Edwin: Any message or suggestion for members unsure about running for Board?
Gertjan: Don’t doubt, do it. It’s fun. And, the project needs you !!!
Edwin: Is there anybody you would like to nominate?
Gertjan: O, yes !!! Stasiek Michalski, a.k.a. hellcp, a.ka. LCP
Edwin: Would you still be involved in the project as your second and last term ends?
Gertjan: No doubt. I’m still a forums admin / mod, mod on Discord, Matrix, Facebook, so I’ll be around on those a bit more after my term ends. And who knows, I might go for another term next year.
So you can see there is no magic to being a board member the main criteria is to have a love for the project and a desire to move it forward. You don’t have to be a geek or niche expert, the project and the board needs all types of skill-sets so if you feel you have some free time and something to contribute jump in and put in your nomination, as Gertjan says “Don’t doubt, do it. It’s fun. And, the project needs you !!!”
This article was revised at 10:35 on Jan. 7, 2020.
Building an AMD Server and Game Machine out of Yester-Year’s Parts

Etherpad updated (again)
As you might have noticed on our status page, our etherpad instance at https://etherpad.opensuse.org/ was updated to the latest version 3 days ago.
But this time,we did not only upgrade the package (which lives, btw, in our openSUSE:infrastructure project), we also migrated the underlying database.
As often, the initial deployment was done with a "just for testing" mindset by someone, who afterward left his little project. And - also as often - these kind of deployments suddenly became productive. This means - in turn - that our openSUSE heroes team suddenly gets tickets for services we originally did neither set up, nor maintain.
For etherpad, this means that we suddenly faced a "dirty.db" file of over 2GB in size, filling up the root-fs of the machine. Upstream even has a warning in their boot script, telling everyone that a dirty.db is NOT for production... :-/
The first try, using the dirty-db-cleaner.py script to reduce the size, did not finish after 2 days. So we decided to dump the data directly from the dirty.db into our Galera cluster. After fixing the initially created table scheme from MyISAM to InnoDB (Galera does not like MyISAM), the migration script took "only" 16 hours.
With this final migration, we hope to be prepared for the next update - and hope that this only takes minutes again.

Podman dan Buildah di openSUSE Tumbleweed

Ini cuma ulasan pendek di sela-sela kegalauan turing nyepeda.
Masih mengingat beberapa pe-er komunitas, bareng Ish Sookun untuk mengerjakan beberapa tulisan terkait Kubic, dan turunannya. Belum sempat nyolek lagi. Saya mencoba menulis catatan kecil tentang mainan di akhir tahun. Ini sebenarnya merupakan catatan lama, namun tersisih di mesin berbeda.
Balik ke tema, saya sedang coba-coba menggunakan container daemon selain docker.
Podman
What is Podman? Podman is a daemonless container engine for developing, managing, and running OCI Containers on your Linux System. Containers can either be run as root or in rootless mode. Simply put:
alias docker=podman.Containers under the control of Podman can either be run by root or by a non-privileged user. Podman manages the entire container ecosystem which includes pods, containers, container images, and container volumes using the libpod library. Podman specializes in all of the commands and functions that help you to maintain and modify OCI container images, such as pulling and tagging. It allows you to create, run, and maintain those containers created from those images in a production environment.
podman.io
Kira-kira begitu pengertiannya.
Persiapan Lab
Saya mencoba podman di minipc saya dan di laptop dalam vagrant. Step-step berikut saya lakukan dalam vagrant. Berikut Vagrantfile saya:
Vagrant.configure("2") do |config|
  config.vm.box = "opensuse/Tumbleweed.x86_64"
  config.vm.box_version = "1.0.20191231"

  config.vm.define :podman do |podman|
    podman.vm.host_name="podman"
    podman.vm.network "private_network", ip: "192.168.33.99", bridge: "wlan0"
    podman.vm.provider "virtualbox" do |vb|
      vb.memory = "1024"
    end
  end
end
Lanjut dengan vagrant up dan vagrant ssh. Akan login sebagai user vagrant
Bacaan Podman
Memasang Podman
sudo zypper in slirp4netns podman
Rootless
sudo bash -c 'echo 10000 > /proc/sys/user/max_user_namespaces'
sudo bash -c "echo $(whoami):100000:65536 > /etc/subuid"
sudo bash -c "echo $(whoami):100000:65536 > /etc/subgid"
Menjalankan Podman
FYI: ubi=Red Hat universal base image
podman pull registry.access.redhat.com/ubi8/ubi
podman run --name redhat registry.access.redhat.com/ubi8/ubi cat /etc/os-release
podman rm redhat
Podman Cheat Sheet
podman login docker.io
podman search tuanpembual
podman run docker.io/tuanpembual/hello
podman run --rm --name hello -p 8080:80/tcp docker.io/tuanpembual/hello
podman rm hello
Sampe batas ini, ya memang benar kita bisa dengan entengnya membuat alias docker=podman.

Buildah
Bacaan Buildah
Buildah – a tool that facilitates building OCI container images.
Buildah.io
Buildah adalah tool buat bikin container images, dengan beberapa fitur yang menawan, diantaranya:
- Tidak ada Daemon. Jadi kalo mau build image ya tinggal build aja.
- Buat image dari nol(scratch) atau dari image yang sudah jadi.
- Merupakan Build tools external, sehingga memiliki karakter:
- Ukuran image lebih kecil
- Membuat lebih aman dengan tidak memasukkan software untuk membuat container (like gcc, make, and dnf) within the resulting image.
- Membutuhkan resource yang lebih kecil untuk mengirim images.
Buildah is able to operate without Docker or other container runtimes by storing data separately and by including features that let you not only build images, but run those images as containers as well. By default, Buildah stores images in an area identified as containers-storage (/var/lib/containers).
Buildah.io
Kira kira gitu pengantar teorinya.
Memasang Buildah
sudo zypper in buildah
Membuat image dengan Buildah dari Dockerfile
# ls
Dockerfile  myecho
# cat Dockerfile
FROM registry.access.redhat.com/ubi8/ubi
ADD myecho /usr/local/bin
ENTRYPOINT "/usr/local/bin/myecho"
# cat myecho
echo "This container works!"
# chmod 755 myecho
# ./myecho
This container works!
Build Step:
# buildah bud -t tuanpembual/myecho .
STEP 1: FROM registry.redhat.io/ubi8/ubi
STEP 2: ADD myecho /usr/local/bin
STEP 3: ENTRYPOINT "/usr/local/bin/myecho"
Docker format and push
buildah bud --format=docker -t docker.io/tuanpembual/myecho .
buildah push docker.io/tuanpembual/myecho
List images:
buildah images
podman images
Running dan Inspect Images
podman run --rm tuanpembual/myecho
buildah inspect tuanpembual/myecho | less
Dah itu saja dulu. Ngoprek selanjutnya bagaimana menggunakan dua perkakas ini ke Gitlab-CI.
Estu~
Noodlings 11 | Quick Tiling Fusion 360 in the Kitchen

Introducing geewallet
- Make it even more user friendly: blockchain addresses are akin to the numeric IP addresses of the early 80s when DNS still didn’t exist. We plan to use either ENS or IPNS or BNS or OpenCAP so that people can identify recipients much more easily.
- Implement Layer2 technologies: we’re already past the proof of concept phase. We have branches that can open channels. The promise of these technologies is instantaneous transactions (no waits!) and ridiculous (if not free) fees.
- Switch the GTK Xamarin.Forms driver to work with the new “GtkSharp” binding under the hood, which doesn’t require glue libraries. (I’ve had quite a few nightmares with native dependencies/libs when building the sandboxed snap package!)
- Integrate with some Rust projects: MimbleWimble(Grin) lib, the distributed COMIT project for trustless atomic swaps, or other Layer2-related ones such as rust-lightning.
- Cryptography work: threshold keys or deniable encryption (think "duress" passwords).
- NFC support (find recipients without QR codes!).
- Tizen support (watches!).
- Acceptance testing via UI Selenium tests (look up the Uno Platform).
- Flatpak support: unfortunately I haven’t had time to look at this sandboxing technology, but it shouldn’t be too hard to do, especially considering that there’s already a Mono-based project that supports it: SparkleShare.
- Ubuntu packaging: there’s a patch blocked on some Ubuntu bug that makes the wallet (or any .NET app these days, as it affects the .NET package manager: nuget) not build in Ubuntu 19.10. If this patch is not merged soon, the next LTS of Ubuntu will have this bug :( As far as I understand, what needs to be solved is this issue so that the latest hotfixes are bundled. (BTW I have to thank Timotheus Pokorra, the person in charge to package Mono in Fedora, for his help on this matter so far.)
- GNOME community: I’m in search for a home for this project. I don’t like that it lives in my GitLab username, because it’s not easy to find. One of the reasons I’ve used GitLab is because I love the fact that being open source, many communities are adopting this infrastructure, like Debian and GNOME. That’s why I’ve used as a bug tracker, for merge requests and to run CI jobs. This means that it should be easy to migrate to GNOME’s GitLab, isn’t it? There are unmaintained projects (e.g. banshee, which I couldn’t continue maintaining due to changes in life priorities...) already hosted there, so maybe it’s not much to ask if I could host a maintained one? It's probably the first Gtk-based wallet out there.
- Please don’t ask me to add support for your favourite %coin% or <token>.
- If you want to contribute, don’t ask me what to work on, just think of your personal itch you want to scratch and discuss it with me filing a GitLab issue. If you’re a C# developer, I wrote a quick F# tutorial for you.
- Thanks for reading up until here! It’s my pleasure to write about this project.
PS: If you're still not convinced about these technologies or if you didn't understand that PoW video I posted earlier, I recommend you to go back to basics by watching this other video produced by a mathematician educator which explains it really well.
Creating Onion Services on OpenBSD
OpenBSD is a new beast for me. I’m still learning, experimenting, and trying out new things. Yesterday I was able to create 3 onion services on it quite easily but it takes time to learn the correct order of operations and to learn how to find out why things don’t work when you think they should.
A word about OpenBSD
OpenBSD isn’t friendly to newbies. The developers, users, and management work to make the best and most secure OS that they can. When you work with OpenBSD, it is assumed that you have at least a moderate to advanced amount of Linux or Unix knowledge and experience before starting and that you know how to read documentation, man pages, etc. Don’t bother asking for help unless you’ve done your homework first. Here’s an unedited quote from a recent mailing list post:
> I never read
Please stop wasting our time then.
Setting up Tor
It will become obvious in a minute, but it’s important to set up your Tor onion services first and your web server later. We will be setting up 3 onion services with 3 completely different addresses that have completely different websites associated with them.
First install Tor:
pkg_add tor
Enable the tor service:
rcctl enable tor
Here is my torrc file. It can be a little hard to see, but I enabled separate logging and debugging for Tor when I was working through this. If you don’t, it can be hard to see why something isn’t working. For example, mine kept failing but I couldn’t get a good error as to why until I did this. The reason was because I hand’t actually created the /var/tor/ directories nor set them to the correct permissions. I didn’t see that until I starting watching those logs.
Here is how I set up the configuration for each site. These are the directories that I forgot to create. They contain the public and private keys and the hostname for each onion service.
HiddenServiceDir /var/tor/site1
HiddenServicePort 80 127.0.0.1:8080

HiddenServiceDir /var/tor/site2
HiddenServicePort 80 127.0.0.1:8081

HiddenServiceDir /var/tor/site3
HiddenServicePort 80 127.0.0.1:8082
Each onion service is running internally on port 8080, 8081, or 8082, etc. This is the port that the actual OpenBSD OS will see running. However, tor will be expecting traffic to come in on the standard http port 80. You might be wondering how this works. Tor will be advertising my onion service on port 80. That traffic will come in via tor and get translated to the internal port that the OS will use.
Once I had this running correctly, I finally started tor.
rcctl start tor
Once tor is up an running, check each HiddenServiceDir for the hostname of each onion service. You will need them to test the web server.
Setting up httpd
OpenBSD has it’s own web server that comes with the standard installation called httpd. This is not the same as the Apache httpd that comes with Redhat or Ubuntu. This is a secure minimalist webserver which might actually be ideal for Onion services.
By default, you can’t just start the httpd service and have it running with a default configuration like you can with Apache or Nginx. You actually need to create an /etc/httpd.conf file first. Here is mine.
## Site 1

server "tpsh5cb4zl73pwymkkuopl4roibk4envf6k3ybdcdzuhuztrytsnxxqd.onion" {
listen on * port 8080
root "/htdocs/tpsh5cb4zl73pwymkkuopl4roibk4envf6k3ybdcdzuhuztrytsnxxqd.onion"
}

# Include additional MIME types
types {
include "/usr/share/misc/mime.types"
}

## Site 2

server "ueaireabdst7uqupz5dlrt5vhltgid3wyz4esgwd7buug7nc2absawyd.onion" {
listen on * port 8081
root "/htdocs/ueaireabdst7uqupz5dlrt5vhltgid3wyz4esgwd7buug7nc2absawyd.onion"
}

## Site 3

server "r6udfh5el5bigkpnh7twtsx3j6w6cxmyexlaa23vacqugq7jo6hxlryd.onion" {
listen on * port 8082
root "/htdocs/r6udfh5el5bigkpnh7twtsx3j6w6cxmyexlaa23vacqugq7jo6hxlryd.onion"
}
The first things is the define the name of the url that traffic will be coming in on. I got this from the onion hostname that was generated by tor. Secondly, that hostname needs to be matched with the internal port number that tor will be sending traffic to. Finally you need to tell the web server where to find the actual html that make up that website. I used the complete onion name for that directory. That’s not actually necessary but to me it is helpful. Be careful: although the line of code says “root” it is not the compete directory. htdocs is actually under /var/www/.
You can test your web server’s configuration without actually starting it by running:
httpd -n
Once you get a “configuration OK” status, you can enable and start it
rcctl enable httpd

rcctl start httpd
A really great resource for starting to work with this web server is here. I would suggest waiting 30 seconds or so after starting the web server to check the urls with the Tor Browser or you can check them directly using the internal ports with curl.
Final thoughts:
OpenBSD put security before performance.
OpenBSD believes in strong security. Our aspiration is to be NUMBER ONE in the industry for security (if we are not already there). Our open software development model permits us to take a more uncompromising view towards increased security than most vendors are able to. We can make changes the vendors would not make. Also, since OpenBSD is exported with cryptography, we are able to take cryptographic approaches towards fixing security problems.
Security is not privacy and it is certainly not anonymity and yet these things work well together. This focus makes OpenBSD the right match for those who want to use Tor and why I will always suggest that people avoid Windows or Macs for those who are serious about privacy because they put those platforms put user experience and sales before anything else on top of being closed source.