
 Member
 Ilmehtar
Changing of the Guard
Dear Community,
After six years on the openSUSE Board and five as its Chairperson, I have decided to step down as Chair of the openSUSE Board effective today, August 19.
This has been a very difficult decision for me to make, with reasons that are diverse, interlinked, and personal. Some of the key factors that led me to make this step include the time required to do the job properly, and the length of time I’ve served. Five years is more than twice as long as any of my predecessors. The time required to do the role properly has increased and I now find it impossible to balance the demands of the role with the requirements of my primary role as a developer in SUSE, and with what I wish to achieve outside of work and community. As difficult as it is to step back from something I’ve enjoyed doing for so long, I am looking forward to achieving a better balance between work, community, and life in general.
Serving as member and chair of the openSUSE Board has been an absolute pleasure and highly rewarding. Meeting and communicating with members of the project as well as championing the cause of openSUSE has been a joyous part of my life that I know I will miss going forward.
openSUSE won’t get rid of me entirely. While I do intend to step back from any governance topics, I will still be working at SUSE in the Future Technology Team. Following SUSE’s Open Source policy, we do a lot in openSUSE. I am especially looking forward to being able to focus on Kubic & MicroOS much more than I have been lately.
As I’m sure it’s likely to be a question, I wish to make it crystal clear that my decision has nothing to do with the Board’s ongoing efforts to form an independent openSUSE Foundation.
The Board’s decision to form a Foundation had my complete backing as Chairperson, and will continue to have as a regular openSUSE contributor. I have absolute confidence in the openSUSE Board; Indeed, I don’t think I would be able to make this decision at this time if I wasn’t certain that I was leaving openSUSE in good hands.
On that note, SUSE has appointed Gerald Pfeifer as my replacement as Chair. Gerald is SUSE’s EMEA-based CTO, with a long history as a Tumbleweed user, an active openSUSE Member, and upstream contributor/maintainer in projects like GCC and Wine.
Gerald has been a regular source of advice & support during my tenure as Chairperson. In particular, I will always remember my first visit to FOSDEM as openSUSE Chair. Turning up more smartly dressed than usual, I was surprised to find Gerald, a senior Director at SUSE, diving in to help at the incredibly busy openSUSE booth, and doing so dressed in quite possibly the oldest and most well-loved openSUSE T-shirt I’ve ever seen. When booth visitors came with questions about SUSE-specific stuff, I think he took some glee in being able to point them in my direction while teasingly saying “Richard is the corporate guy here, I’m just representing the community..”
Knowing full well he will continue being so community minded, while finally giving me the opportunity to tease him in return, it is with a similar glee I now hand over the reigns to Gerald.
As much as I’m going to miss things about being chairperson of this awesome community, I’m confident and excited to see how openSUSE evolves from here.
Keep having a lot of fun,
Richard
Note: This announcement has been cross-posted in several places, but please send any replies and discussion to the opensuse-project@opensuse.org Mailinglist. Thanks!

FrOSCon 2019 - openSUSE booth & AppArmor Crash Course


To avoid getting bored ;-) I did a sub-booth featuring my other two hobbies - AppArmor and PostfixAdmin. As expected, I didn't get too many questions about them, but it was a nice addition and side job while running the openSUSE booth ;-)
I also gave an updated version of my "AppArmor Crash Course" talk. You can find the slides on the right, and the video recording (in german) on media.ccc.de.

Αυτά είναι τα καταπληκτικά μπλουζάκια του GUADEC

Σχεδόν σε κάθε συνέδριο που συμμετέχω, τυπώνονται μπλουζάκια ως "αναμνηστικό". Η γκαρνταρόμπα μου αποτελείται κατά 90% από μπλουζάκια από συνέδρια ή γενικά από projects ανοικτού κώδικα.
Όπως κάθε χρόνο, έτσι και φέτος τυπωθηκαν μπλουζάκια. Προσωπικά τα θεωρώ πανέμορφα.
Αυτά είναι τα μπλουζάκια που μπορείτε να προμηθευτείτε στο συνέδριο σε λίγες ημέρες.
Ποιο σας άρεσε;

openSUSE Leap 15.1 安裝小記
- 15.1 可以撐到 2020/11
- / 大小為 60GB, 一樣使用 btrfs, 但是取消勾選”啟用快照”
- swap 大小為 16GB
- /boot/efi, 大小為 1GB, 使用 fat
- /home 大小為剩下的所有空間(126 GB ), 使用 xfs ( 如果有勾選 )
- 有鑒於之前 flatpak 的 bug 還有 snapper 佔用空間, 這次把 / 大小調整為 60GB, 然後取消啟用快照
- Ifconfig 預設沒有安裝, 要使用 ip address show

- 以 system_key( windows ) + 空白鍵 切換輸入法
- Mp4 codec 應該是要安裝 vlc-codecs, 需要 Packman 套件庫
- 下載軟體的 .tar.gz 然後以 root 安裝
- TopIcons
- NetSpeed
VMware workstation Pro 15:


- 但是目前實務上是使用容器的方式來執行
- AWS Toolkit for Visual Studio Code
- Bracket Pair Colorizer
- Code Time
- Git Graph
- GitHub Pull Requests
- GitLens
- Kubernetes
- Python
Όλες οι πληροφορίες για το GUADEC θα τις βρείτε στην εφαρμογή στο κινητό σας

Μπορεί να έχετε διαβάσει προηγούμενες αναρτήσεις μου σχετικά με το συνέδριο GUADEC. Κάτι καινούργιο που θα εφαρμοστεί για πρώτη φορά, είναι η εφαρμογή με όλες τις πληροφορίες που πρέπει να γνωρίζει κάποιος συμμετέχοντας.
Η όλη προσπάθεια στηρίζεται στο λογισμικό Connfa, το οποίο είναι ένα ανοικτού κώδικα λογισμικό για events, συνέδρια κλπ.
Ο Britt μαζί με την ομάδα του, φτιάξανε την εφαρμογή αυτή για συσκευές android και iPhone αλλά και για όσους δεν θέλουν να εγκαταστήσουν, υπάρχει και online.

Αρχικά για να κατεβάσετε στο κινητό σας, μπορείτε να πάτε στο google play στην διεύθυνση:
https://play.google.com/store/apps/details?id=org.gnome.guadec

Αφού την εγκαταστήσετε, μπορείτε να δείτε το πρόγραμμα, ποιες δραστηριότητες θα έχουμε και πότε (τα parties κλπ).
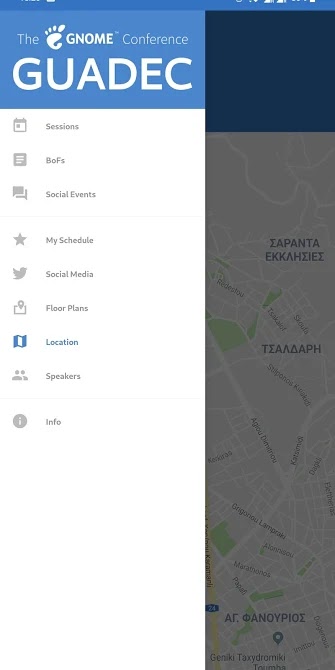
Η εφαρμογή έχει κατασκευαστεί και για iPhone αλλά η αλήθεια είναι ότι δεν την βρήκα στο appstore για να αφήσω τον σύνδεσμο εδώ.
Online μπορείτε να το βρείτε στο https://schedule.guadec.org/.

ownCloud and CryFS
It is a great idea to encrypt files on client side before uploading them to an ownCloud server if that one is not running in controlled environment, or if one just wants to act defensive and minimize risk.
Some people think it is a great idea to include the functionality in the sync client.
I don’t agree because it combines two very complex topics into one code base and makes the code difficult to maintain. The risk is high to end up with a kind of code base which nobody is able to maintain properly any more. So let’s better avoid that for ownCloud and look for alternatives.
A good way is to use a so called encrypted overlay filesystem and let ownCloud sync the encrypted files. The downside is that you can not use the encrypted files in the web interface because it can not decrypt the files easily. To me, that is not overly important because I want to sync files between different clients, which probably is the most common usecase.
Encrypted overlay filesystems put the encrypted data in one directory called the cipher directory. A decrypted representation of the data is mounted to a different directory, in which the user works.
That is easy to setup and use, and also in principle good to use with file sync software like ownCloud because it does not store the files in one huge container file that needs to be synced if one bit changes as other solutions do.
To use it, the cypher directory must be configured as local sync dir of the client. If a file is changed in the mounted dir, the overlay file system changes the crypto files in the cypher dir. These are synced by the ownCloud client.
One of the solutions I tried is CryFS. It works nicely in general, but is unfortunately very slow together with ownCloud sync.
The reason for that is that CryFS is chunking all files in the cypher dir into 16 kB blocks, which are spread over a set of directories. It is very beneficial because file names and sizes are not reconstructable in the cypher dir, but it hits on one of the weak sides of the ownCloud sync. ownCloud is traditionally a bit slow with many small files spread over many directories. That shows dramatically in a test with CryFS: Adding eleven new files with a overall size of around 45 MB to a CryFS filesystem directory makes the ownCloud client upload for 6:30 minutes.
Adding another four files with a total size of a bit over 1MB results in an upload of 130 files and directories, with an overall size of 1.1 MB.
A typical change use case like changing an existing office text document locally is not that bad. CryFS splits a 8,2 kB big LibreOffice text doc into three 16 kB files in three directories here. When one word gets inserted, CryFS needs to create three new dirs in the cypher dir and uploads four new 16 kB blocks.
My personal conclusion: CryFS is an interesting project. It has a nice integration in the KDE desktop with Plasma Vault. Splitting files into equal sized blocks is good because it does not allow to guess data based on names and sizes. However, for syncing with ownCloud, it is not the best partner.
If there is a way how to improve the situation, I would be eager to learn. Maybe the size of the blocks can be expanded, or the number of directories limited? Also the upcoming ownCloud sync client version 2.6.0 again has optimizations in the discovery and propagation of changes, I am sure that improves the situation.
Let’s see what other alternatives can be found.
GUADEC: BoF, workshop και hacking days
Το πρόγραμμα μπορεί να μην ανακοινώθηκε ακόμα λόγω των αλλαγών της τελευταίας στιγμής, όμως έχει ανακοινωθεί το πρόγραμμα για τα λεγόμενα Birds of a feather ή αλλιώς BoF. Τι σημαίνει αυτό και γιατί ονομάστηκε έτσι; Ρίξτε μια ματιά στο wiki για την ιστορία.
Πάμε να δούμε λοιπόν αναλυτικά τι συναντήσεις θα έχουμε. Όσοι ενδιαφέρεστε για το θέμα, πατήστε επάνω στον τίτλο για να διαβάσετε περισσότερα και εάν θέλετε, μπορείτε να συμμετάσχετε προσθέτοντας το όνομά σας. Εάν δεν μπορείτε, πείτε σε εμένα ή σε κάποιον άλλο από τους οργανωτές να προσθέσει το όνομά σας.
Στις 26 Αυγούστου:
1. FreeDesktop Dark Style Preference: ώρα 10:00-13:00
2. Engagement: ώρα 14:00-17:00
3. GTK: ώρα 10:00-13:00 και 14:00-17:00
4. GNOME documentation and localization: ώρα 14:00-17:00
5. Newcomers Workshop: ώρα 10:00-13:00 και 14:00-17:00
6. GNOME OS: ώρα 10:00-13:00 και 14:00-17:00
7. Rust + GTK + GStreamer Workshop: ώρα 10:00-13:00 και 14:00-17:00
Στις 27 Αυγούστου:
1. GTask: ώρα 10:00-13:00
2. Flatpak Donations/Store: ώρα 14:00-17:00
3. Rust: ώρα 10:00-13:00
4. GStreamer: ώρα 14:00-17:00
5. SpinachCon: ώρα 10:00-13:00 και 14:00-17:00
6. Vendor Themes: ώρα 10:00-13:00
7. Boxes: ώρα 14:00-17:00
8. Freedesktop SDK: ώρα 10:00-13:00
9. Content Apps & Tracker: ώρα 10:00-13:00
10. Diversity: ώρα 14:00-17:00
Όλα μαζί μπορείτε να τα δείτε μαζεμένα στην σελίδα https://wiki.gnome.org/GUADEC/2019/Hackingdays
Kernel Adventures: Enabling VPD Pages for USB Storage Devices in sysfs

Alte Kernelversionen installiert behalten
OpenSUSE behält in seiner Standardkonfiguration bei einer Aktualisierung des Kernels stets die letzte zuvor installierte Version. Diese kann beim Systemstart über die erweiterten Startmodi ausgewählt werden. Das hat den großen Vorteil, dass sollte der neue Kernel einen Fehler haben, man noch zu einem funktionierenden System zurückkehren kann. Man kann also einfach mit dem alten Kernel weiterarbeiten und auf eine Behebung des Fehlers warten.
Doch was passiert bei der nächsten Aktualisierung? Hier gibt es mehrere Optionen. Löst die nächste Aktualisierung das Problem, kann man wieder auf den aktuellen Kernel wechseln und die alten Versionen können einem egal sein. Ist das Problem mit der nächsten Aktualisierung nicht behoben gibt es zwei mögliche Fälle. Im einfachen Fall startet das System mit dem neuen Kernel gar nicht. In diesem Fall kann man weiterhin mit dem alten Kernel weiterarbeiten, denn das System behält stets den aktuell laufenden Kernel installiert Solange neuere Kernel gar nicht starten können die alten Versionen somit auch nicht entfernt werden. Spannender wird es, wenn der neue Kernel zwar startet, aber trotzdem nicht korrekt funktioniert. So läuft womöglich der proprietäre Treiber von NVIDIA nicht oder ein Fehler im Kernel tritt nur in bestimmten Situationen auf. In diesem Fall würde das System in der Standardkonfiguration nach dem, aus seiner Sicht erfolgreichen, Start den alten Kernel entfernen und nur die zwei defekten Kernel behalten.
Zum Glück lässt sich die Menge der aufbewahrten Kernel sehr flexibel Konfigurieren.
Die Konfiguration findet sich in der Datei /etc/zypp/zypp.conf
Entscheiden ist der Wert der Option multiversion.kernels.
Diese wird standardmäßig wie folgt gesetzt:
multiversion.kernels = latest,latest-1,running
Damit werden die neuesten beiden und der aktuell laufende Kernel behalten. Hier lassen sich aber auch explizite Versionen eintragen. Damit sieht die Zeile dann wie folgt aus:
multiversion.kernels = latest,latest-1,running,4.12.14-lp151.28.10.1
Wichtig ist, dass hier die Paketversion benötigt wird, nicht die vom Kernel bei einem uname -a ausgegebene Version.
Letzteres würde lautet für den im Beispiel benutzen Kernel folgendes ausgeben.
Linux test 4.12.14-lp151.28.10-default #1 SMP Sat Jul 13 17:59:31 UTC 2019 (0ab03b7) x86_64 x86_64 x86_64 GNU/Linux
Die dazugehörige Paketversion lässt sich per rpm oder zypper abfragen:
> rpm -qa kernel-default
kernel-default-4.12.14-lp151.28.10.1.x86_64
kernel-default-4.12.14-lp151.28.13.1.x86_64

> zypper search -s kernel-default
Repository-Daten werden geladen...
Installierte Pakete werden gelesen...

S  | Name                 | Typ        | Version               | Arch   | Repository
---+----------------------+------------+-----------------------+--------+--------------------------------
i+ | kernel-default       | Paket      | 4.12.14-lp151.28.13.1 | x86_64 | Hauptaktualisierungs-Repository
i+ | kernel-default       | Paket      | 4.12.14-lp151.28.10.1 | x86_64 | Hauptaktualisierungs-Repository
v  | kernel-default       | Paket      | 4.12.14-lp151.28.7.1  | x86_64 | Hauptaktualisierungs-Repository
v  | kernel-default       | Paket      | 4.12.14-lp151.28.4.1  | x86_64 | Hauptaktualisierungs-Repository
v  | kernel-default       | Paket      | 4.12.14-lp151.27.3    | x86_64 | Haupt-Repository (OSS)
   | kernel-default       | Quellpaket | 4.12.14-lp151.28.13.1 | noarch | Hauptaktualisierungs-Repository
   | kernel-default       | Quellpaket | 4.12.14-lp151.28.10.1 | noarch | Hauptaktualisierungs-Repository
   | kernel-default       | Quellpaket | 4.12.14-lp151.28.7.1  | noarch | Hauptaktualisierungs-Repository
   | kernel-default       | Quellpaket | 4.12.14-lp151.28.4.1  | noarch | Hauptaktualisierungs-Repository
   | kernel-default-base  | Paket      | 4.12.14-lp151.28.13.1 | x86_64 | Hauptaktualisierungs-Repository
   | kernel-default-base  | Paket      | 4.12.14-lp151.28.10.1 | x86_64 | Hauptaktualisierungs-Repository
   | kernel-default-base  | Paket      | 4.12.14-lp151.28.7.1  | x86_64 | Hauptaktualisierungs-Repository
   | kernel-default-base  | Paket      | 4.12.14-lp151.28.4.1  | x86_64 | Hauptaktualisierungs-Repository
   | kernel-default-base  | Paket      | 4.12.14-lp151.27.3    | x86_64 | Haupt-Repository (OSS)
i+ | kernel-default-devel | Paket      | 4.12.14-lp151.28.13.1 | x86_64 | Hauptaktualisierungs-Repository
i+ | kernel-default-devel | Paket      | 4.12.14-lp151.28.10.1 | x86_64 | Hauptaktualisierungs-Repository
v  | kernel-default-devel | Paket      | 4.12.14-lp151.28.7.1  | x86_64 | Hauptaktualisierungs-Repository
v  | kernel-default-devel | Paket      | 4.12.14-lp151.28.4.1  | x86_64 | Hauptaktualisierungs-Repository
v  | kernel-default-devel | Paket      | 4.12.14-lp151.27.3    | x86_64 | Haupt-Repository (OSS)
Wie im Beispiel zu sehen ist, liefert zypper die einfacher zu lesende Ausgabe, rpm aber eine deutlich kompaktere.
Hat man so den funktionierenden Kernel vor dem automatischen Aufräumen geschützt, lässt es sich ganz entspannt auf eine reparierte Version warten. Wurde der Fehler behoben, und spätestens nach dem nächsten Distributionsupgrade, sollte man allerdings die Konfiguration wieder zurücksetzen um nicht unnötig alte Kernel mit sich herumzuschleppen. Denn diese benötigen nicht nur Platz, sie verlängern auch die Installationszeit mancher Updates.
Weitere Informationen zur Installation mehrerer Kernelversionen finden sich in der englischen Referenzdokumentation von openSUSE Leap.

Kata Containers now available in Tumbleweed

Kata Containers is an open source container runtime that is crafted to seamlessly plug into the containers ecosystem.
We are now excited to announce that the Kata Containers packages are finally available in the official openSUSE Tumbleweed repository.
It is worthwhile to spend few words explaining why this is a great news, considering the role of Kata Containers (a.k.a. Kata) in fulfilling the need for security in the containers ecosystem, and given its importance for openSUSE and Kubic.
What is Kata
As already mentioned, Kata is a container runtime focusing on security and on ease of integration with the existing containers ecosystem. If you are wondering what’s a container runtime, this blog post by Sascha will give you a clear introduction about the topic.
Kata should be used when running container images whose source is not fully trusted, or when allowing other users to run their own containers on your platform.
Traditionally, containers share the same physical and operating system (OS) resources with host processes, and specific kernel features such as namespaces are used to provide an isolation layer between host and container processes. By contrast, Kata containers run inside lightweight virtual machines, adding an extra isolation and security layer, that minimizes the host attack surface and mitigates the consequences of containers breakout. Despite this extra layer, Kata achieves impressive runtime performances thanks to KVM hardware virtualization, and when configured to use a minimalist virtual machine manager (VMM) like Firecracker, a high density of microVM can be packed on a single host.
If you want to know more about Kata features and performances:
- katacontainers.io is a great starting point.
- For something more SUSE oriented, Flavio gave a interesting talk about Kata at SUSECON 2019,
- Kata folks hang out on katacontainers.slack.com, and will be happy to answer any quesitons.
Why is it important for Kubic and openSUSE
SUSE has been an early and relevant open source contributor to containers projects, believing that this technology is the future way of deploying and running software.
The most relevant example is the openSUSE Kubic project, that’s a certified Kubernetes distribution and a set of container-related technologies built by the openSUSE community.
We have also been working for some time in well known container projects, like runC, libpod and CRI-O, and since a year we also collaborate with Kata.
Kata complements other more popular ways to run containers, so it makes sense for us to work on improving it and to assure it can smoothly plug with our products.
How to use
While Kata may be used as a standalone piece of software, it’s intended use is serve as a runtime when integrated in a container engine like Podman or CRI-O.
This section shows a quick and easy way to spin up a Kata container using Podman on openSUSE Tumbleweed.
First, install the Kata packages:
$ sudo zypper in katacontainers
Make sure your system is providing the needed set of hardware virtualization features required by Kata:
$ sudo kata-runtime kata-check
If no errors are reported, great! Your system is now ready to run Kata Containers.
If you haven’t already, install podman with:
$ sudo zypper in podman
That’ all. Try running a your first Kata container with:
$ sudo podman run -it --rm --runtime=/usr/bin/kata-runtime opensuse/leap uname -a
Linux ab511687b1ed 5.2.5-1-kvmsmall #1 SMP Wed Jul 31 10:41:36 UTC 2019 (79b6a9c) x86_64 x86_64 x86_64 GNU/Linux
Differences with runC
Now that you have Kata up and running, let’s see some of the differences between Kata and runC, the most popular container runtime.
When starting a container with runC, container processes can be seen in the host processes tree:
...
10212 ?        Ssl    0:00 /usr/lib/podman/bin/conmon -s -c <ctr-id> -u <ctr-id>
10236 ?        Ss     0:00  \_ nginx: master process nginx -g daemon off;
10255 ?        S      0:00      \_ nginx: worker process
10256 ?        S      0:00      \_ nginx: worker process
10257 ?        S      0:00      \_ nginx: worker process
10258 ?        S      0:00      \_ nginx: worker process
...
With Kata, container processes are instead running in a dedicated VM, so they are not sharing OS resources with the host:
...
10651 ?        Ssl    0:00 /home/marco/go/src/github.com/containers/conmon/bin/conmon -s -c <ctr-id> -u <ctr-id>
10703 ?        Sl     0:01  \_ /usr/bin/qemu-system-x86_64 -name sandbox-<ctr-id> -uuid e54ee910-2927-456e-a180-836b92ce5e7a -machine pc,accel=kvm,kernel_ir
10709 ?        Ssl    0:00  \_ /usr/lib/kata-containers/kata-proxy -listen-socket unix:///run/vc/sbs/<ctr-id>/proxy.sock -mux-socket /run/vc/vm/829d8fe0680b
10729 ?        Sl     0:00  \_ /usr/lib/kata-containers/kata-shim -agent unix:///run/vc/sbs/<ctr-id>/proxy.sock -container <ctr-id>
...
Future plans
We are continuing to work to offer you a great user experience when using Kata on openSUSE by:
- improving packages quality and stability,
- delivering periodic releases,
- making sure that Kata well integrates with the other container projects, like Podman and CRI-O.
As a longer term goal, we will integrate Kata in the Kubic distribution and in CaaSP, to make them some of the most complete and secure solutions to manage containers.