
Run Azure images in Hyper-V or kvm
Disclaimer: This blog post is about SUSE Linux Enterprise Server images on Azure and probably only useful to SUSE Employees who work with such images.

 Member
 Victorhck
Aprende sobre seguridad informática, hacking, pentesting con retos CTF en Hackmyvm
Seguro que muchas de las personas que recaláis en este blog, os gustan los retos hacking, el pentesting, la seguridad informática y temas similares. Una forma de retarnos a nosotros mismos y aprender de manera empírica.

Pero la mejor manera de hacerlo es en un entorno controlado, o por lo menos en un entorno seguro en el que todas esas técnica se puedan desarrollar en seguridad y sin necesidad de atacar máquinas reales en producción, cosa que además es ilegal.
Así que hoy os traigo por el blog una web que ofrece todo eso: retos CTF, pentesting, hacking en máquinas virtuales en las que desplegar todos nuestros conocimientos y hacerlo en comunidad, para aprender y enseñar.
La web en cuestión se trata de:
Y ofrece esa posibilidad con retos propios y retos compartidos por la comunidad.
De entre todas las opciones disponibles para practicar todas estas técnicas de hacking, esta comunidad de hackmyvm tiene algunas opciones muy interesantes como son: registro gratuito para participar, registro sin necesidad de correos, IPs y logs de los que acceden se borran a las 72 horas, y muchas otras peculiaridades que les hacen interesantes.
Pero mejor que os las cuente yo, vamos a preguntar a sML, webmaster y alma mater del sitio web, que responderá de primera mano y mucho más acertadamente que yo cualquier pregunta que queráis saber
Vhck: Pero ¿Qué es exactamente hackmyvm? ¿Cuando y cómo se formó?
sML: HackMyVM es una plataforma web donde se pueden descargar máquinas virtuales con fallos de seguridad, que han sido creadas por la comunidad, hechas para que la gente practique y pase un buen rato (o no tan bueno :)) intentando «hackearlas» y obteniendo root del sistema, también tenemos un «wargame» online para que la gente pueda practicar sus habilidades de linux/CTF.
La plataforma nació el verano pasado (Verano 2020), la idea inicial era unicamente tener una web donde descargarse maquinas vulnerables y poco mas, pero con ideas que fue proponiendo la gente, como añadir un ranking, poner trofeos y demás, fue evolucionando hasta lo que es ahora, y no sabemos en que se convertirá mañana.
Nos gustan los retos, y no queremos un proyecto «estático», por eso la comunidad es tan importante, porque aportan ideas, y siempre salen muchas cosas nuevas después de discutir
algo que a alguien le parece que quizá no funcione.
Hemos probado poner un chat usando XMPP, poner un blog y muchas otras, y son cosas que no han funcionado, las quitamos y ya está, pero si es interesante, siempre lo probamos.
No tenemos que rendir cuentas con nadie, así que improvisar y fallar no es ningún problema , a veces incluso acertamos con algo.
Vhck: Las comparaciones son odiosas, pero sirven para acotar y definirnos ¿qué ofrece hackmyvm que no ofrecen otros servicios? ¿Cuales son las diferencias entre vosotros y otras opciones?
sML: Lo que ofrecemos nosotros es gratis, y todo, desde las maquinas, los retos, la estética de la web y demás, absolutamente todo está hecho con amor (y ademas con buen gusto!).
No colaboramos con terceros, obviamente no guardamos ningún tipo de dato personal, de hecho no pedimos ni el mail en el registro, y valoramos la privacidad por ello borramos los logs
donde aparecen las IPs y demas cada 72 horas (Ese tiempo solo la tenemos para tema de posibles debugs/funcionamiento).
No tenemos parte Premium/VIP, todo el mundo es bienvenido, la idea intrínseca en todo esto es el compartir y el experimentar, no el tema económico, a fin de cuentas, es parte
de la idea del open source, que todo el mundo pueda tener acceso de forma gratuita.
Está el típico botón de «Donaciones» por si alguien quiere contribuir ayudando para pagar los servers/dominios y demás, pero no es necesario.
Tampoco somos excluyentes, ojala hubiera muchísimas plataformas como esta gratis donde la gente pudiera practicar sin tener una empresa detrás.
También añadir que existe el mito de que lo gratis es malo/feo y lo que pagas es bueno, en nuestro caso intentamos que como mínimo sea igual de bueno a una plataforma de pago.
Vhck: Retos, retos, retos… ¿Cuantos retos hay disponibles para probar en vuestra web? ¿Hay competiciones? ¿de qué tratan vuestros retos? ¿Qué se consigue al resolver los retos?
sML: Actualmente tenemos unas 130 mñaquinas virtuales y recientemente hemos sacado un «laboratorio» online, donde la gente puede empezar a practicar sin necesidad de descargarse nada.
Hay un apartado para meter las flags que se obtienen al hackear las máquinas, o solucionar el reto, las cuales te dan puntos y entras en un ranking, pero es opcional, hay gente que se descarga las máquinas o juega en el laboratorio y no aparece en ningun ranking.
Competiciones como tal no hay, aunque si que existe el ranking mensual, anual y el desde que se inició la plataforma.
Los retos tratan todos de temas relacionados a la seguridad informática, en este caso las máquinas son todas GNU/Linux y es buscar/explotar vulnerabilidades en dicha maquina para llegar a ser root.
Hay varios niveles fáciles, medio, y difíciles, aunque ya sabemos que el tema de la dificultad es algo objetivo…
Como «premio», ademas de la satisfacción de uno mismo de haber resuelto un reto (que no es poco), existen «trofeos» que son como insignias que se te otorgan una vez has realizado
X logros, como hackear 5 maquinas, proponernos alguna idea, participar contribuyendo con una maquina etc….
Vhck: Creo que el software libre y GNU/Linux están en vuestros genes ¿me equivoco? ¿Hay retos que involucren estas tecnologías?
sML: Nos encanta GNU/Linux y todo lo relacionado con el software libre. La gran mayoría de nuestras maquinas usan Debian y en definitiva todos los retos están relacionados
con GNU/Linux.
Hay temas como el chat de Discord, que también evaluamos el montar nuestro propio servidor de Matrix o IRC para evitar en la medida de lo posible el software propietario, pero tampoco somos radicales para ello.

Vhck: ¿Cómo es de grande la comunidad que se ha formado en torno a vuestro proyecto?
Actualmente habrá unas 1500 personas registradas, y en Discord seremos 200-300 personas, aunque como es típico, participa una minoría…
Aun así la comunidad es muy abierta y siempre hay alguien dispuesto a ayudar a resolver un problema o a resolver alguna duda respecto a la seguridad informática.
El idioma que se utiliza en el canal oficial es el inglás, aunque recientemente un compañero ha abierto un Discord solo para los hispanoparlantes..
Vchk: ¿De qué maneras se puede colaborar con hackmyvm además de participar en vuestros retos?
sML: Hay muchas formas de colaborar con nosotros, las mas fácil para algunos (y mas difícil para otros) es tan simple como visitar la web, y decirnos que cambiarían o añadirían.
También pueden colaborar en el apartado «artístico» ya sea diseñando unos iconos, o unos dibujos para algún proyecto que vayamos a sacar etc…
Y por ultimo, en la web hay una sección «Submit» donde la gente puede enviar sus propias maquinas o proponernos nuevos retos para que añadamos.
Recalcar que las maquinas las intentamos hacer que ocupen menos de 1Gb para que la gente que vive en paises donde Internet no tiene la velocidad de la que podemos disfrutar algunos de nosotros, no les suponga tampoco mucho problema.
Vhck: La última palabra es vuestra para decir lo que queráis.
sML: Aprovecho esta oportunidad entonces para decirle a la gente que cree y comparta. Es necesario que haya mas fuentes de conocimiento accesibles a todo el mundo y no solo hablo
de seguridad informática, hablo de todo en general, seguro que hay algo que se te da bien y de lo que puedes escribir en un blog, crear tu propia web para compartir lo que sea…
Programar algo que te sea útil y subirlo a algún github/gitlab puesto que puede que también le sea útil a alguien mas.
Tampoco insto a crear por crear, si vas a compartir algo, curratelo y que merezca la pena verlo.
Ha sido todo un placer estar aquí! 
Pues esta es la propuesta que hoy quería daros a conocer por aquí. Gracias a la gente hackmyvm por hacerme llegar noticias de esta web y su propuesta, espero que os haya parecido interesante y si os interesan estos temas les echéis un vistazo y participéis en su comunidad.
¡Ya me contaréis si habéis resuelto algún reto interesante!
Happy hacking!

Syslog-ng on MacOS Monterey
Each new MacOS release brings some surprises when it comes to compiling syslog-ng. Just a couple of months ago, I provided you with a couple of pointers on how to compile syslog-ng on MacOS. Since then, MacOS Monterey was released and Homebrew was updated. So, here are some updated instructions for MacOS Monterey.
You can read my blog at https://www.syslog-ng.com/community/b/blog/posts/syslog-ng-on-macos-monterey
syslog-ng logo
Python support arrives in Safeguard for Sudo
Version 1.9 of sudo was released almost two years ago. One of the major new features was support for Python plugins. Previously, you could only extend sudo by coding in C to better suit your environment, which is not the easiest task to manage. Python makes both coding and distributing the results easier. Starting with Safeguard for Sudo 7.2, Python support is also available in a commercial sudo management solution.
You can read my complete blog at https://blog.sudo.ws/posts/2021/11/python-support-arrives-in-safeguard-for-sudo/
Sudo logo
Lanzada la cuarta actualización de Plasma 5.23
Tal y como estaba previsto en el calendario de lanzamiento de los desarrolladores, hoy martes 30 de noviembre la Comunidad KDE ha comunicado que ha sido lanzada la cuarta actualización de Plasma 5.23. Una noticia que aunque es esperada y previsible es la demostración palpable del alto grado de implicación de la Comunidad en la mejora continua de este gran entorno de escritorio de Software Libre.
Lanzada la cuarta actualización de Plasma 5.23
No existe Software creado por la humanidad que no contenga errores. Es un hecho incontestable y cuya única solución son las actualizaciones. Es por ello que en el ciclo de desarrollo del software creado por la Comunidad KDE se incluye siempre las fechas de las actualizaciones.

De esta forma, el martes 30 de noviembre ha sido lanzada la tercera actualización de Plasma 5.23, la cual solo trae (que no es poco) soluciones a los bugs encontrados en este mes y mucho de vida del escritorio y mejoras en las traducciones. Es por tanto, una actualización 100% recomendable.
Más información: KDE
Las novedades básicas de Plasma 5.22
Aún tengo pendiente el resumen de las novedades pero he aquí la lista preliminar de ellas.
- Nuevo fondo para el escritorio
- Nuevo tema: Brisa — Océano azul que mejora el aspecto de Plasma y aclara su cometido.
- Nuevos efectos visuales permanentes: los elementos activos de una ventana de diálogo, por ejemplo, se «iluminan» cuando la ventana obtiene el foco, las casillas de verificación muestran marcas reales y los botones de radio se encienden como bombillas.
- Las barras de desplazamiento y los controles numéricos son más grandes, haciéndolos más accesibles y fáciles de usar en las pantallas táctiles
- Nueva opción que le permite escoger los colores de acentuación del escritorio.
- Diálogo con una cuenta atrás al cambiar la resolución de pantalla.
- Nuevas opciones para Activar, desactivar o recordar el estado del Bluetooth.
- Reescrito grandes partes del código del lanzador de aplicaciones para hacerlo más rápido y fácil de usar.
- Mejoras en la bandeja del sistema.
- Mejoras en Wayland.
Más información: KDE
packagesの説明文書を訳しつつ、使えるものを探してみました(H編その1)
この記事は openSUSE Advent Calendar の1日目です。
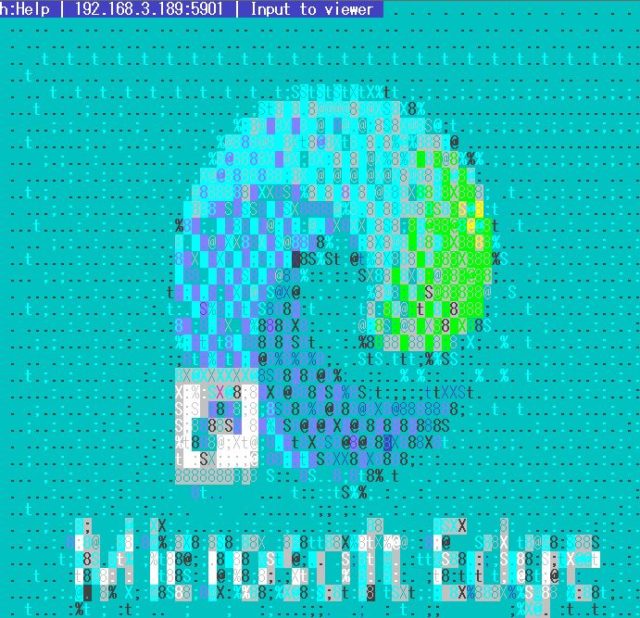
今回は、 headmore を紹介します。
パッケージ名 headmore
バージョン headmore-1.2-1.16.x86_64
動作 △
テキストベースのVNC クライアントです。しかし、一応画面は表示されるのですが(ここではWindowsに繋いでいます)、GUIな画面をテキストで表示しているため、大まかな雰囲気が掴めるという感じでしかありません。ものすごくズームすれば、大まかな形は分かりますが。
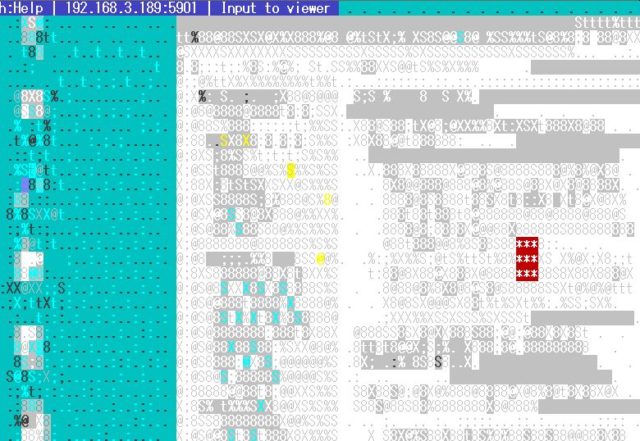
取りあえずコンソールから、GUIな画面がおおよそどうなっているかを簡単に確認するときには便利に使えるかもしれません。
#openSUSE Leap 15.4 ya en fase Alfa
Ya se puede descargar una versión muy previa de desarrollo o Alfa de openSUSE Leap 15.4

Todavía estamos disfrutando de openSUSE Leap 15.3 publicada el pasado 2 de junio de 2021 y que tendrá soporte durante un año y medio.
Pero el equipo de desarrollo de openSUSE no paró. Al mes de la publicación ya se ponía en marcha el desarrollo de la versión openSUSE 15.4 o también conocido como el el 4º service pack de actualización de la serie 15 de la distribución de GNU/Linux de publicaciones periódicas openSUSE Leap.
Así que si eres muy fan de openSUSE y quieres echar un vistazo a cómo vea el desarrollo de openSUSE Leap 15.4 podrás descargarte la ISO y probarla en tu equipo:
Está en una fase muy temprana de desarrollo, así que habrá poco software disponible en los pocos repositorios disponibles. Y mucha inestabilidad del sistema, hasta que se vaya puliendo poco a poco.
Sin duda lo mejor es utilizar estas ISO’s para ayudar en el desarrollo de esta distribución de GNU/Linux junto con desarrolladores y técnicos de todo el mundo. Y publicar de nuevo otra gran versión de openSUSE Leap para el próximo mes de junio de 2022.

Ticki – Plasmoides de KDE (187)
Creo que es la primera vez que hablo de un plasmoide de este tipo en esta serie de plasmoides. De esta forma me complace presentaros Ticki una miniaplicación que nos permite leer las entradas rss de las páginas web que más nos interesan en nuestro escritorio Plasma de la Comundidad KDE.
Ticki – Plasmoides de KDE (187)
Hoy sigo con los plasmoides y con Ticki, una creación de crazy-andi que nos ofrece una simple barra horizontal en la que van apareciendo noticias rss de las webs que te interesan, es decir, la típica línea con titulares que se suelen ver en los telediarios y que resumen lo que ha pasado ese día.
Sus opciones de configuración son simples ya que apenas podemos cambiar la fuente de las noticias y poco más, pero creo que en mi #viernesdeescritorio de diciembre aparecerá.

Y como siempre digo, si os gusta el plasmoide podéis “pagarlo” de muchas formas en la mutante página de KDE Store, que estoy seguro que el desarrollador lo agradecerá: puntúale positivamente, hazle un comentario en la página o realiza una donación. Ayudar al desarrollo del Software Libre también se hace simplemente dando las gracias, ayuda mucho más de lo que os podéis imaginar, recordad la campaña I love Free Software Day de la Free Software Foundation donde se nos recordaba esta forma tan sencilla de colaborar con el gran proyecto del Software Libre y que en el blog dedicamos un artículo.
Más información: KDE Store
¿Qué son los plasmoides?
Para los no iniciados en el blog, quizás la palabra plasmoide le suene un poco rara pero no es mas que el nombre que reciben los widgets para el escritorio Plasma de KDE.
En otras palabras, los plasmoides no son más que pequeñas aplicaciones que puestas sobre el escritorio o sobre una de las barras de tareas del mismo aumentan las funcionalidades del mismo o simplemente lo decoran.
Powerlevel10k como prompt para la shell zsh
Powerlevel10k es un prompt para la shell zsh ligero, rápido y simple de configurar y con un montón de opciones
Si hace poco escribí sobre el prompt Tide para la shell Fish:
Hoy quiero daros a conocer el prompt en el que se inspiró, llamado Powerlevel10k para la shell zsh. Que probé hace un tiempo y sobre la que escribí algunos tutoriales:
- https://victorhckinthefreeworld.com/2021/06/21/instalar-la-shell-zsh-en-opensuse/
- https://victorhckinthefreeworld.com/2021/06/22/un-par-de-complementos-muy-utiles-para-zsh/
El tiempo que utilicé la shell zsh utilicé el prompt Powerlevel10k publicado bajo licencia MIT, por sencillez de configuración, por toda la información que mostraba y por hacerlo de manera elegante.
En el repositorio de GitHub de Powerlevel10k vienen las diferentes maneras de instalar este prompt.
Para instalarlo yo recomendaría utilizar oh my zsh!, un framework para Zsh que nos permitirá instalar útiles complementos o diferentes temas para la shell. Además de manera periódica se va actualizando, por lo que tendremos siempre al día nuestros complementos instalados.
Y aunque no es estrictamente necesario, también es recomendable instalar una fuente que contenga símbolos, como la família de NerdFont, para poder mostrarlos en el propio prompt y darle así un diseño diferente y más atractivo.
Una vez con todos los elementos instalados en nuestro sistema, vamos a configurar nuestro nuevo prompt, para ello lo más sencillo es ejecutar el asistente de configuración, que nos irá haciendo algunas preguntas para poner el prompt a nuestro gusto. Ejecutando:
p10k configura
Una de las cosas que más me gustaron de este prompt para Zsh, es que al estar en un repositorio de Git en una carpeta de nuestro equipo, el prompt nos muestra un icono indicándos si el repo está en GitLab, GitHub, o en otro servicio de git.
Además de la información gráfica del estado de nuestra copia local, si está por detrás del repo original, si tiene cambios sin añadir, etc.
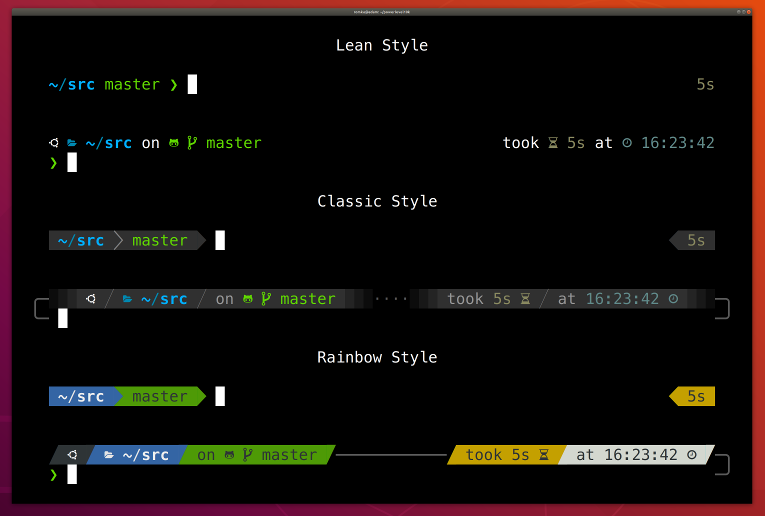
Otra cosa curiosa, es que podemos tener Powerlevel10k y hacerle que tome el aspecto de otros prompts más utilizados (como Pure, agnoster, robbyrussell, etc)
Al prompt se le pueden añadir diferentes módulos extra para que muestre diferente información, como estado de la batería en nuestro prompt, un icono del lenguaje del proyecto en el que estamos trabajando, etc.
Y ya si nos ponemos exquisitos, además podemos crear nuestros propios módulos para añadir información personalizada.
Tanto Powerlevel10k como Tide (por ser un versión para Fish) admiten el prompt en el lado derecho que muestra información complementaria como duración y estado del último comando, hora o fecha del sistema y aquella información que desees añadir.
Para más información, puedes consultar las preguntas frecuentes que seguro resolverá tus dudas.
Si utilizas Zsh, anímate a probar este prompt que podrás configurar desde muy simple a lleno de opciones e información. ¿Te animas?

Flip Weather – Plasmoides de KDE (186)
A decir verdad, no hay una gran variedad de plasmoides meteorológicos disponibles para el escritorio Plasma de la Comunidad KDE. Es por ello que me alegra presentaros Flip Weather, una miniaplicación que nos retrotrae años atrás con un aspecto del inicio de los smartphones (a mi me recuerda a los primeros anuncios de los HTC) y que nos permite tener tanto un reloj «retro» como una completa información meteorológica en vuestro escritorio.
Flip Weather – Plasmoides de KDE (186)
Tener un plasmoide meteorológico fue una de las razones por las que me interesaron estos adornos visuales y funcionales que pueblan en ocasiones mi escritorio y que reciben el nombre de plasmoides o widgets, pero que años atras, en KDE 3.x, estaban representados por los widgets de SuperKaramba.
Es por ellos que he presentado algunos en el blog como Condensed Weather o Simple Weather, buenos plasmoides pero que se quedan un poco lejos de la voluntad del plasmoide que hoy os presento
Se trata de Flip Weather, una creación de driglu4it que nos ofrece un reloj flip típico de los años 60 combinado con el también clásico widget meteorológico, que además, se amplía con la información detallada diaria si pasas el puntero sobre uno de los días. Y todo ello con animaciones.

Y como siempre digo, si os gusta el plasmoide podéis “pagarlo” de muchas formas en la mutante página de KDE Store, que estoy seguro que el desarrollador lo agradecerá: puntúale positivamente, hazle un comentario en la página o realiza una donación. Ayudar al desarrollo del Software Libre también se hace simplemente dando las gracias, ayuda mucho más de lo que os podéis imaginar, recordad la campaña I love Free Software Day de la Free Software Foundation donde se nos recordaba esta forma tan sencilla de colaborar con el gran proyecto del Software Libre y que en el blog dedicamos un artículo.
Más información: KDE Store
¿Qué son los plasmoides?
Para los no iniciados en el blog, quizás la palabra plasmoide le suene un poco rara pero no es mas que el nombre que reciben los widgets para el escritorio Plasma de KDE.
En otras palabras, los plasmoides no son más que pequeñas aplicaciones que puestas sobre el escritorio o sobre una de las barras de tareas del mismo aumentan las funcionalidades del mismo o simplemente lo decoran.