nijel
nijelWeblate 3.5.1
Weblate 3.5.1 has been released today. Compared to the 3.5 release it brings several bug fixes and performance improvements.
Full list of changes:
- Fixed Celery systemd unit example.
- Fixed notifications from http repositories with login.
- Fixed race condition in editing source string for monolingual translations.
- Include output of failed addon execution in the logs.
- Improved validation of choices for adding new language.
- Allow to edit file format in component settings.
- Update installation instructions to prefer Python 3.
- Performance and consistency improvements for loading translations.
- Make Microsoft Terminology service compatible with current zeep releases.
- Localization updates.
If you are upgrading from older version, please follow our upgrading instructions.
You can find more information about Weblate on https://weblate.org, the code is hosted on Github. If you are curious how it looks, you can try it out on demo server. Weblate is also being used on https://hosted.weblate.org/ as official translating service for phpMyAdmin, OsmAnd, Turris, FreedomBox, Weblate itself and many other projects.
Should you be looking for hosting of translations for your project, I'm happy to host them for you or help with setting it up on your infrastructure.
Further development of Weblate would not be possible without people providing donations, thanks to everybody who have helped so far! The roadmap for next release is just being prepared, you can influence this by expressing support for individual issues either by comments or by providing bounty for them.

 Member
Password Security with GPG in Salt on openSUSE Leap 15.0
We are creating a deployment of openSUSE clients with Salt. Kerberos needs password authentication. Therefore, we want to encrypt passwords before using them in Salt. I want to explain how to integrate that all.
At first, you have to install gpg, python-gnupg and python-pip. openSUSE wants to install only the package python-python-gnupg which isn’t enough for Salt. You have to use additionally pip install python-gpg.
After that, you have to create the directory /etc/salt/gpgkeys with mkdir. That will be the home directory for the decryption key of Salt. Then you can create a password less key in this directory. Salt is not able to enter any password for encryption.
# gpg --gen-key --pinentry-mode loopback --homedir /etc/salt/gpgkeys
gpg (GnuPG) 2.2.5; Copyright (C) 2018 Free Software Foundation, Inc.This is free software: you are free to change and redistribute it.There is NO WARRANTY, to the extent permitted by law.

Note: Use "gpg2 --full-generate-key" for a full featured key generation dialog.

GnuPG needs to construct a user ID to identify your key.

Real name: Salt-Master
Email address: sarahjulia.kriesch@th-nuernberg.de
You selected this USER-ID:"Salt-Master <sarahjulia.kriesch@th-nuernberg.de>"

Change (N)ame, (E)mail, or (O)kay/(Q)uit? O
We need to generate a lot of random bytes. It is a good idea to perform
some other action (type on the keyboard, move the mouse, utilize the
disks) during the prime generation; this gives the random number
generator a better chance to gain enough entropy.
We need to generate a lot of random bytes. It is a good idea to perform
some other action (type on the keyboard, move the mouse, utilize the
disks) during the prime generation; this gives the random number
generator a better chance to gain enough entropy.
gpg: /root/.gnupg/trustdb.gpg: trustdb created
gpg: key B24D083B4A54DB47 marked as ultimately trusted
gpg: directory '/root/.gnupg/openpgp-revocs.d' created
gpg: revocation certificate stored as '/root/.gnupg/openpgp-revocs.d/6632312B6E178E0031B9C8E8B24D083B4A54DB47.rev'
public and secret key created and signed.

pub   rsa2048 2019-02-05 [SC] [expires: 2021-02-04]
      6632312B6E178E0031B9C8E8B24D083B4A54DB47
uid   Salt-Master <sarahjulia.kriesch@th-nuernberg.de>
sub   rsa2048 2019-02-05 [E] [expires: 2021-02-04]
After that you have to export and import your public and secret key in an importable format. Salt can not decrypt passwords without the Secret Key.
# gpg --homedir /etc/salt/gpgkeys --export-secret-keys --armor > /etc/salt/gpgkeys/Salt-Master.key
# gpg --homedir /etc/salt/gpgkeys --armor --export > /etc/salt/gpgkeys/Salt-Master.gpg
# gpg --import Salt-Master.key
gpg: key 9BE990C7DBD19726: public key "Salt-Master <sarahjulia.kriesch@th-nuernberg.de>" imported
gpg: key 9BE990C7DBD19726: secret key imported
gpg: Total number processed: 1
gpg:               imported: 1
gpg:       secret keys read: 1
gpg:   secret keys imported: 1

# gpg --import salt-master.pub
gpg: key 9BE990C7DBD19726: "Salt-Master <sarahjulia.kriesch@th-nuernberg.de>" not changed
gpg: Total number processed: 1
gpg:              unchanged: 1
The key has the validity unknown at the moment. We have to trust that. Therefore, we have to edit the key, trust that, enter a 5 for utimately and save that.
# gpg --key-edit Salt-Master
gpg (GnuPG) 2.2.5; Copyright (C) 2018 Free Software Foundation, Inc.
This is free software: you are free to change and redistribute it.
There is NO WARRANTY, to the extent permitted by law.

Secret key is available.

sec  rsa2048/3580EA8183E8E03E
     created: 2019-02-05  expires: 2021-02-04  usage: SC
     trust: unknown       validity: unknown
ssb  rsa2048/4ABC9E975BD76370
     created: 2019-02-05  expires: 2021-02-04  usage: E
[ unknown] (1). Salt-Master <sarahjulia.kriesch@th-nuernberg.de>

gpg> trust
sec  rsa2048/3580EA8183E8E03E
     created: 2019-02-05  expires: 2021-02-04  usage: SC
     trust: unknown       validity: unknown
ssb  rsa2048/4ABC9E975BD76370
     created: 2019-02-05  expires: 2021-02-04  usage: E
[ unknown] (1). Salt-Master <sarahjulia.kriesch@th-nuernberg.de>

Please decide how far you trust this user to correctly verify other users' keys
(by looking at passports, checking fingerprints from different sources, etc.)

  1 = I don't know or won't say
  2 = I do NOT trust
  3 = I trust marginally
  4 = I trust fully
  5 = I trust ultimately
  m = back to the main menu

Your decision? 5
Do you really want to set this key to ultimate trust? (y/N) y

sec  rsa2048/3580EA8183E8E03E
     created: 2019-03-07  expires: 2021-03-06  usage: SC
     trust: ultimate      validity: unknown
ssb  rsa2048/4ABC9E975BD76370
     created: 2019-03-07  expires: 2021-03-06  usage: E
[ unknown] (1). Salt-Master <sarahjulia.kriesch@th-nuernberg.de>
Please note that the shown key validity is not necessarily correct
unless you restart the program.
gpg> save
So the key is validity and usable. You can see your keys listed with following commands.
# gpg --list-keys
# gpg --homedir /etc/salt/gpgkeys --list-keys
Salt needs access to the key for decryption. Therefore, you have to change permissions on /etc/salt/gpgkeys.
# chmod 0700 /etc/salt/gpgkeys
# chown -R salt /etc/salt/gpgkeys
We can decrypt passwords with the key now. Replace supersecret with your password and Salt-Master with the name of the key.
# echo -n "supersecret" | gpg --armor --batch --trust-model always --encrypt -r "Salt-Master"
    -----BEGIN PGP MESSAGE-----

    hQEMA0q8npdb12NwAQf+IuJgOPMLdsfHR1hGRPPkUPWaw7kbmRyMDT0VdGzCupQr
    +biaeIF2vuCjUn3RyI0t/E8GcBKUcsc1z7Xy22jAXl5c0pQNj0X9iK4ebpP5sHWc
    vdnn6J2KIKMe5lRsgcVmnZ9/yBssarpLLsw8SiPu1XofVmMjzRjQFONa2gpBe/5q
    hb/dSccP2f2kbDZ0Up12ntjUReyImn9/TLOsLOlQzEH0OGcJJXqk0SKP/HoH5+jJ
    FDMEZYWDhUyLdSwsa7RVB8tgFSQW8EJnehc2oLExKZ+ngW5hJfHI3l8N4IWv92ow
    bSvZsVaH+h8epCOLgiYQsiWBJ/dWl1ZQx+tmHfAtT9JFAbk/gbeOfZ8RboX2JvRv
    h7semDNEYxqG8zusn8JykzivV37DERixR8nbh1XQDsOF5l0AmIrdJB6dvGW88tR+
    ei2ij0QM
    =rl1+
    -----END PGP MESSAGE-----
The output is a Base64 encoded PGP Message. You can use that in your sls file (in my case kerberos.sls) in the pillar directory.
kerberos:
  principal: X95A
  password: |
    -----BEGIN PGP MESSAGE-----

    hQEMA0q8npdb12NwAQf+IuJgOPMLdsfHR1hGRPPkUPWaw7kbmRyMDT0VdGzCupQr
    +biaeIF2vuCjUn3RyI0t/E8GcBKUcsc1z7Xy22jAXl5c0pQNj0X9iK4ebpP5sHWc
    vdnn6J2KIKMe5lRsgcVmnZ9/yBssarpLLsw8SiPu1XofVmMjzRjQFONa2gpBe/5q
    hb/dSccP2f2kbDZ0Up12ntjUReyImn9/TLOsLOlQzEH0OGcJJXqk0SKP/HoH5+jJ
    FDMEZYWDhUyLdSwsa7RVB8tgFSQW8EJnehc2oLExKZ+ngW5hJfHI3l8N4IWv92ow
    bSvZsVaH+h8epCOLgiYQsiWBJ/dWl1ZQx+tmHfAtT9JFAbk/gbeOfZ8RboX2JvRv
    h7semDNEYxqG8zusn8JykzivV37DERixR8nbh1XQDsOF5l0AmIrdJB6dvGW88tR+
    ei2ij0QM
    =rl1+
    -----END PGP MESSAGE-----
Salt is not able to distinguish encrypted from non-encrypted strings at the moment.
You have to uncomment the entry gpg_keydir: and add /etc/salt/gpgkeys in the salt-master configuration of /etc/salt/master. In addition, you can find the part with decrypt_pillar:. In my case, I add – ‚kerberos:password‘: gpg there.
You need a restart of the service salt-master. Afterwards Salt knows, that the special pillar entry has to be decrypted with gpg. Following you can run the sls file on any salt client and Salt can use the password.
At the end you should remove the command with your password for the PGP Message creation in your bash history. Therefore, edit ~/.bash_history and remove the entry with echo. So nobody can figure out the secure encrypted password for the user.
The post Password Security with GPG in Salt on openSUSE Leap 15.0 first appeared on Sarah Julia Kriesch.
The crowbyte revival
I. Am. Back.
This is the crowbyte revival. Besides the brand new design there are lot more changes under the hood. If you are curious what, then ...
crowbyte is finally back
I know it has been a long time - a really very long long time - that my blog saw love and dedication from me. Sorry, my dear blog and sorry dear reader.
No promises about more content this time, which I might not be able to keep up to. So more time to focus on what has changed under the hood of crowbyte and about me...
Die crowbyte Wiederbelebung
Ich. Bin. Zurück.
Dies ist die crowbyte Wiederbelebung. Neben der brandneuen Webseite gibt einige Änderungen unter der Haube. Bist Du neugierig, dann solltest Du ...
crowbyte ist endlich zurück
Ich weiß, es ist eine lange her - wirklich sehr sehr lange - dass mein Blog Liebe und Hingabe erfahren hat. Es tut mir Leid, mein lieber Blog und es tut mir Leid, liebe Leser.
Dieses Mal keine Versprechungen über mehr Content, denen ich nicht vielleicht gerecht werde. Mehr Zeit sich also auf die...

Salient OS | Review from an openSUSE User

Road Trip from Germany to the Retreat in the Alps
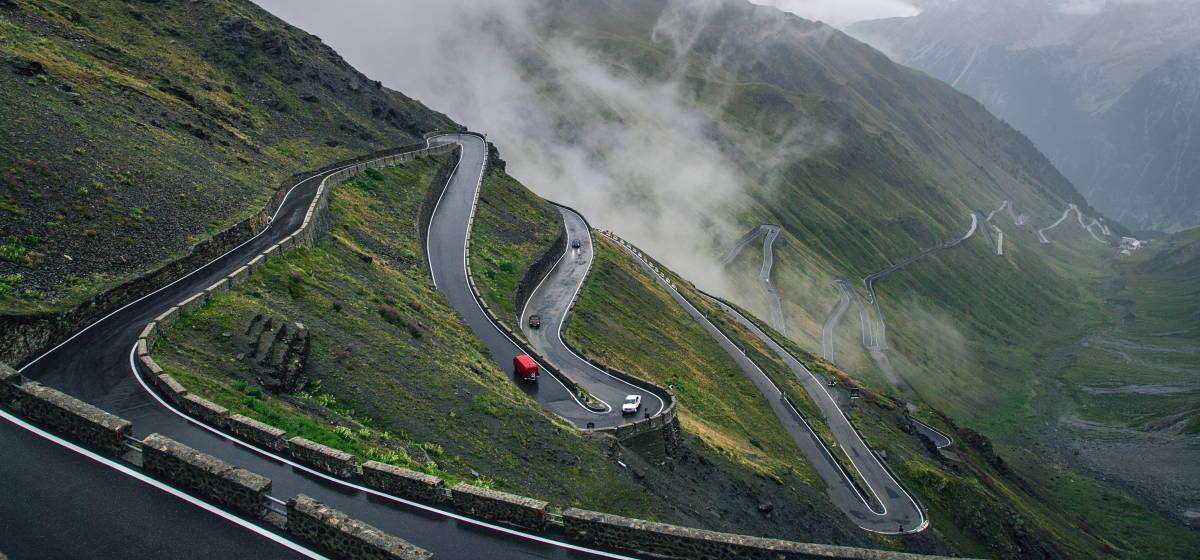
The black slope for all road trip novices. Photo by Raul Taciu.
If the mountain won’t come to the prophet, then the prophet must go to the mountain.1
If the mountain is very far away, the prophet is well advised to rather ride by horse, Uber or even take a plane. I was lucky to get the chance to use the car of the family. Unfortunately, this car was not in Brussels, but in North Rhine-Westphalia in Germany. Though, a car is much smaller and more mobile than a mountain, it was again me who had to go get the car.
I avoid cars whenever possible. I fly more often than I drive a car. So when I got to Germany for the hand-over of the car, we drive first together to the gas station, so I can verify that I can still manage to refill the tank, which I have not done for years.
The estimated total driving time to the Alps amounts to 8 hours. Considering that my longest drive was 4 hours from Berlin to the Baltic Sea, I decide to split the ride in two and stay halfway overnight. On my way to the Alps I make two stops in Germany for grocery shopping. Fritz-Kola, Bionade, different kinds of nuts, Klöße, Spätzle and few other specialities that are either very expensive in France or not available at all. In the end, little space is left in the car.
On the Road
I am on the Autobahn. I listen to the album A Night At The Opera from Queen. I listen to the album twice. When I reached again the last song God Save The Queen, still much Autobahn is ahead of me. I have to concentrate at every motorway junction. In between, at 120 km/h, time seems to halt. Nothing happens. FLASH. Yikes! Apparently, I did not slow down fast enough and got caught by a speed camera. This would be the first time in my life I get an administrative fine.
The next minutes I observe the real-time fuel consumption per 100 km. I heard once car engines would be designed to be most fuel-efficient at an engine-specific speed. Without the non-conservative force friction, I would only need fuel for the initial acceleration and to climb the mountains. In the plane, my consumption should be close to 0. Hence, the majority of the consumption is required to balance friction to keep the speed. During my studies, we learned that friction is a function of the speed and includes significant higher order contributions in . That means,
Consequently, the fuel consumption is optimal for a speed . :thinking: I keep on driving.
I listen to the German audio book Ich bin dann mal weg (english: I’m Off Then) on Spotify. Hape Kerkling reads his report from his pilgrim journey on the Camino de Santiago. I am also somehow on a trip to find rest. I wonder if I should also walk the Camino. Eventually, I arrive at my planned stop in a youth hostel in the south of Germany.
The youth hostel is quite busy. It accommodates 200 high school students from an international school in Germany, a seminar group of enthusiasts of frequency therapy led by their guru living in Canada and touring once every year in Europe, and a group of professional bicycle sport trainers. I get along best with the sports trainers and we start discussing social justice. With the question how a different salary of public servants in hospitals and schools can be justified, I go to bed.
On the Road Again
Next morning, I prepare myself for entering Switzerland. The use of their motorways requires a car vignette that can be bought at the border. I leave the hostel.
Proud of me, I refill the car at the gas station all alone. Then, I pass through the city to get on the motorway to Switzerland. FLASH. :unamused: Most likely, I got again trapped by a speed camera. The forest of street signs 30 km/h in the evening changed to ordinary 30 km/h signs while the street with 3 lanes per direction resembles a motor road. I feel cheated.
Without any further issues, I reach the border between Germany and Switzerland and buy a car vignette. The sales person is very friendly and attaches the new vignette next to the collection of old vignettes with the oldest dating back to 2012. These vignettes give proof of my father’s travels—like backpack travellers would put stickers of their discovered countries on their backpack.
My itinerary to the French Alps brings me to few Swiss cities I do not know yet. I decide to leave the motorway and have a walk downtown in Basel. Not 5 minutes later, the police knocks on my window while I wait at an intersection. We greet each other friendly. Then, they ask me to park close by for an inspection. This is the first time in my life that I am subject to police scrutiny as a car driver. They let me know that expired vignettes must be removed in Switzerland. The penalty is 265€. Fortunately, the police officers are in a good mood and propose that I remove the vignettes as soon as possible and do not pay the penalty. I am easily convinced of this plan and accept without further ado. Then, I discover in Basel its difficulties to find a parking spot in the city centre. Eventually, I can have a sort walk. All in all, I do not like Basel so much.
I continue my journey to the French Alps and leave again the highway to the city centre of the Swiss de facto capital Bern. Given my experience in Basel, I decide to give up finding a free parking spot and take the central parking house right next to the old town. The sun shines. Bern was founded in the Middle Age and the centre still reflects this charm.

People of Bern enjoying a warm Sunday afternoon in early March.
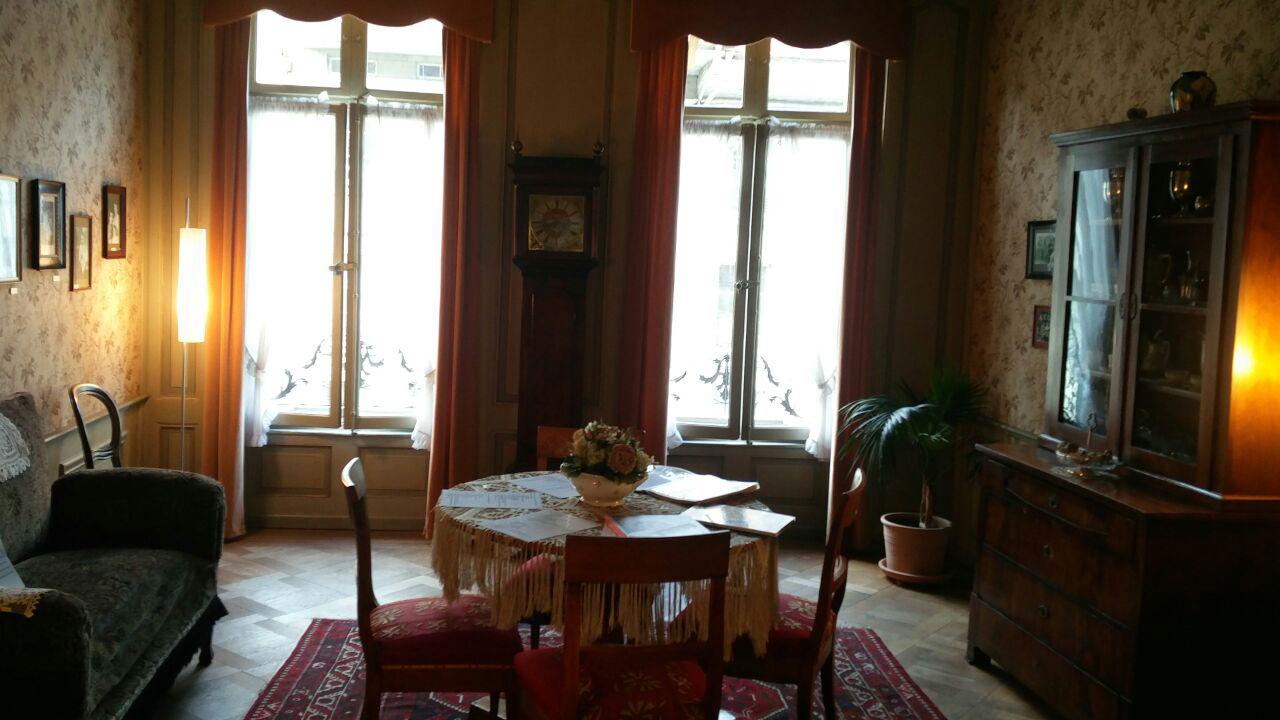
The living room of Einstein in Bern.
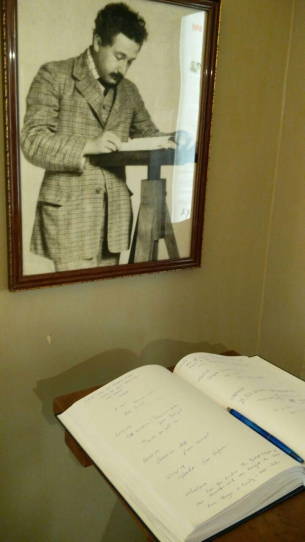
The guest book of the Einstein Museum Bern.
It is full of personal data.
While strawling to the old city, I discover an Einstein museum installed in his former flat. In the museum I learn that Einstein’ first and only daughter has been lost. I wonder if this daughter is still alive and knows her famous parents. On the way out, I notice the guest book of the museum, in which people—many apparently greedy for significance after the recent impressions from Einstein’s live–let other people know of their visit. For many, this is just a guest book. For me, it is a filing system containing personal data subject to data protection laws. As I need to arrive in the Alps before sunset, I decide to not inform the only present staff member of this recent discovery and just leave.
Eventually, I leave Bern and head towards Martigny and then Chamonix. In between, the motorway becomes a thin black slope that winds upwards the mountains in sharp curves. The temperature drops under the freezing point. Fortunately, the road is dry and clean. I continue with caution—much to the regret of those presumably local drivers that queue with little distance behind me. I can only relax again once I found enough space on the side to let them pass.
On the last kilometres before my destination, I pick up a hitch-hiker finishing the service as snow rescue patrol. I get some tips on the best skiing spots before our paths divide again. A quarter hour later, I arrive in my valley. I consider twice next time if I should not rather take the train.
-
According to Wiktionary, the prophet is in the Turkish proverb retold by Francis Bacon actually Muhammad. The form I know has been generalised to all prophets. They have a common problem here. Maybe they should have asked Atlas, who was used to carry heavy stuff. :thinking: ↩︎
Weblate 3.5
Weblate 3.5 has been released today. It includes improvements in the translation memory, addons or alerting.
Full list of changes:
- Improved performance of built in translation memory.
- Added interface to manage global translation memory.
- Improved alerting on bad component state.
- Added user interface to manage whiteboard messages.
- Addon commit message now can be configured.
- Reduce number of commits when updating upstream repository.
- Fixed possible metadata loss when moving component between projects.
- Improved navigation in the zen mode.
- Added several new quality checks (Markdown related and URL).
- Added support for app store metadata files.
- Added support for toggling GitHub or Gerrit integration.
- Added check for Kashida letters.
- Added option to squash commits based on authors.
- Improved support for xlsx file format.
- Compatibility with tesseract 4.0.
- Billing addon now removes projects for unpaid billings after 45 days.
If you are upgrading from older version, please follow our upgrading instructions.
You can find more information about Weblate on https://weblate.org, the code is hosted on Github. If you are curious how it looks, you can try it out on demo server. Weblate is also being used on https://hosted.weblate.org/ as official translating service for phpMyAdmin, OsmAnd, Turris, FreedomBox, Weblate itself and many other projects.
Should you be looking for hosting of translations for your project, I'm happy to host them for you or help with setting it up on your infrastructure.
Further development of Weblate would not be possible without people providing donations, thanks to everybody who have helped so far! The roadmap for next release is just being prepared, you can influence this by expressing support for individual issues either by comments or by providing bounty for them.
pfSense Box Setup for Home or Small Office
KIWI repository SSL redirect pitfall
[ DEBUG ]: 09:52:15 | system: Retrieving: dracut-kiwi-lib-9.17.23-lp150.1.1.x86_64.rpm [.error] [ DEBUG ]: 09:52:15 | system: Abort, retry, ignore? [a/r/i/...? shows all options] (a): aSSL error for an http:// URL? Digging for the zypper logs in the chroot found, that this request got redirected to https://provo-mirror.opensuse.org/repositories/... today, which failed due to missing SSL certificates.
[ INFO ]: Processing: [########################################] 100%
[ ERROR ]: 09:52:15 | KiwiInstallPhaseFailed: System package installation failed: Download (curl) error for 'http://download.opensuse.org/repositories/Virtualization:/Appliances:/Builder/openSUSE_Leap_15.0/x86_64/dracut-kiwi-lib-9.17.23-lp150.1.1.x86_64.rpm':
Error code: Curl error 60
Error message: SSL certificate problem: unable to get local issuer certificate
After I had debugged the issue, the solution was quite simple: in the <packages type="bootstrap"> section, just replace ca-certificates with ca-certificates-mozilla and everything works fine again.
Of course, jut building the image in OBS would also have solved this issue, but for debugging and developing, a "native" kiwi build was really necessary today.
Xonotic, el juego adictivo de shooting en primera persona que puedes instalar en openSUSE